The discussion of the Alien series of films and the props used in them is the aim, but if it's got Big Bugs and Big Guns, then they are welcome too!


Post new topic Reply to topic  [ 340 posts ]  Go to page Previous  1 ... 9, 10, 11, 12, 13, 14  Next
Author Message
 Post subject:
PostPosted: Tue May 14, 2013 6:39 pm 
MODEL 120-A2
User avatar

Service Number: A04/TQ0.0.72178E5
Country: United States
The final paint job (starting after a quick sand of the original mess of camoflague I did) took me a grand total of 3 hours. Including drawing and cutting the stencils, letting the paint dry, etc. I will see if I keep the pics of how I make the stencils, but I found an INCREDIBLY easy way to make the positive stencils. The negative stencils are made in almost the same way, but take a little more effort. If I don't have the pics, I have to make some more stencils tonight so I will do a step by step.

Charlie

_________________
"There is a clause in the contract which specifically states any systematized transmission indicating a possible intelligent origin must be investigated. On penalty of total forfeiture of shares. No money."


Image


Top
 Profile  
Reply with quote  
 Post subject:
PostPosted: Tue May 14, 2013 9:37 pm 
MODEL 120-A2
User avatar

Service Number: A04/TQ0.0.72178E5
Country: United States
I've started camo painting a small box; I'll have pics of the whole process of creating and stenciling, etc. For now though....I got a little something in the mail from Matsu:

Image

Image

Oh yeah!!

Charlie

_________________
"There is a clause in the contract which specifically states any systematized transmission indicating a possible intelligent origin must be investigated. On penalty of total forfeiture of shares. No money."


Image


Top
 Profile  
Reply with quote  
 Post subject:
PostPosted: Tue May 14, 2013 10:14 pm 
MODEL 120-A2
User avatar

Service Number: A04/TQ0.0.72178E5
Country: United States
Ok, so you want to paint camo. Here's my tutorial on how I did it. (Please note, the paintjob itself was a quick job. I didn't prep the item very well, I didn't wait nearly long enough for the paint layers to dry, and I didn't use enough stencils on the different layers. For a finished product, it's not so great. For an idea of how to actually do it, it works great).

First, gather your materials:

Image

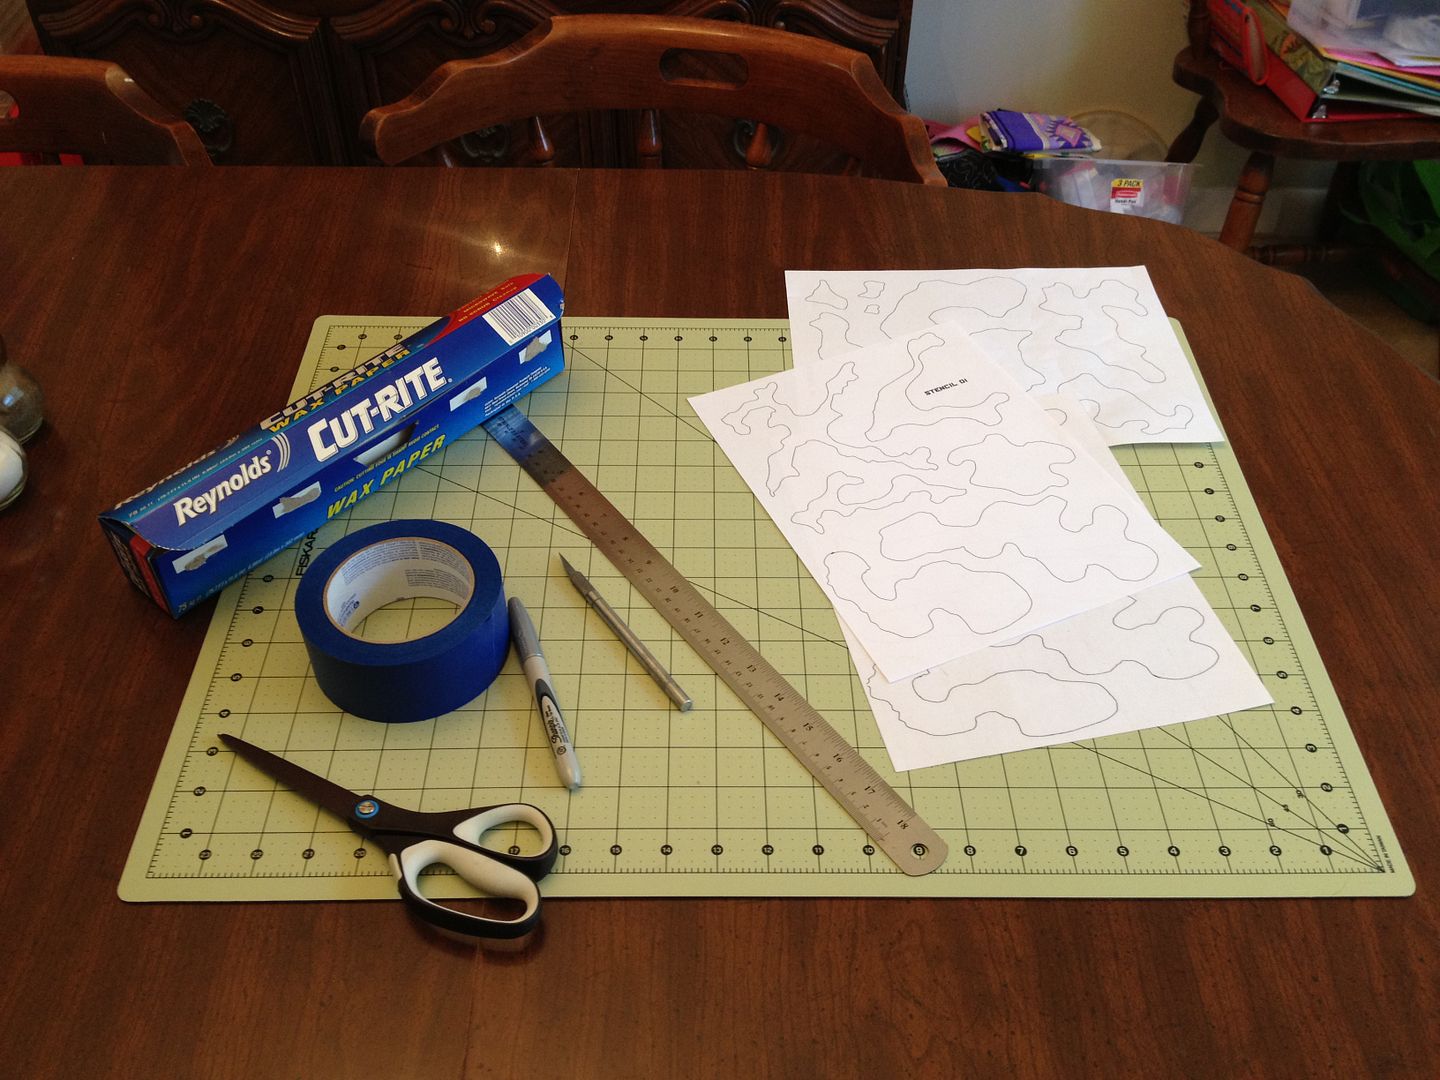
Reference stencils/patterns, ruler, Xacto knife, scissors,self-healing cutting board, wax paper, painter's tape, silver sharpie. Now, the Xacto, cutting board, and ruler aren't necessary for positive stencils. For negative stencils, the knife and the board are necessities. Rulers are just always handy. :)

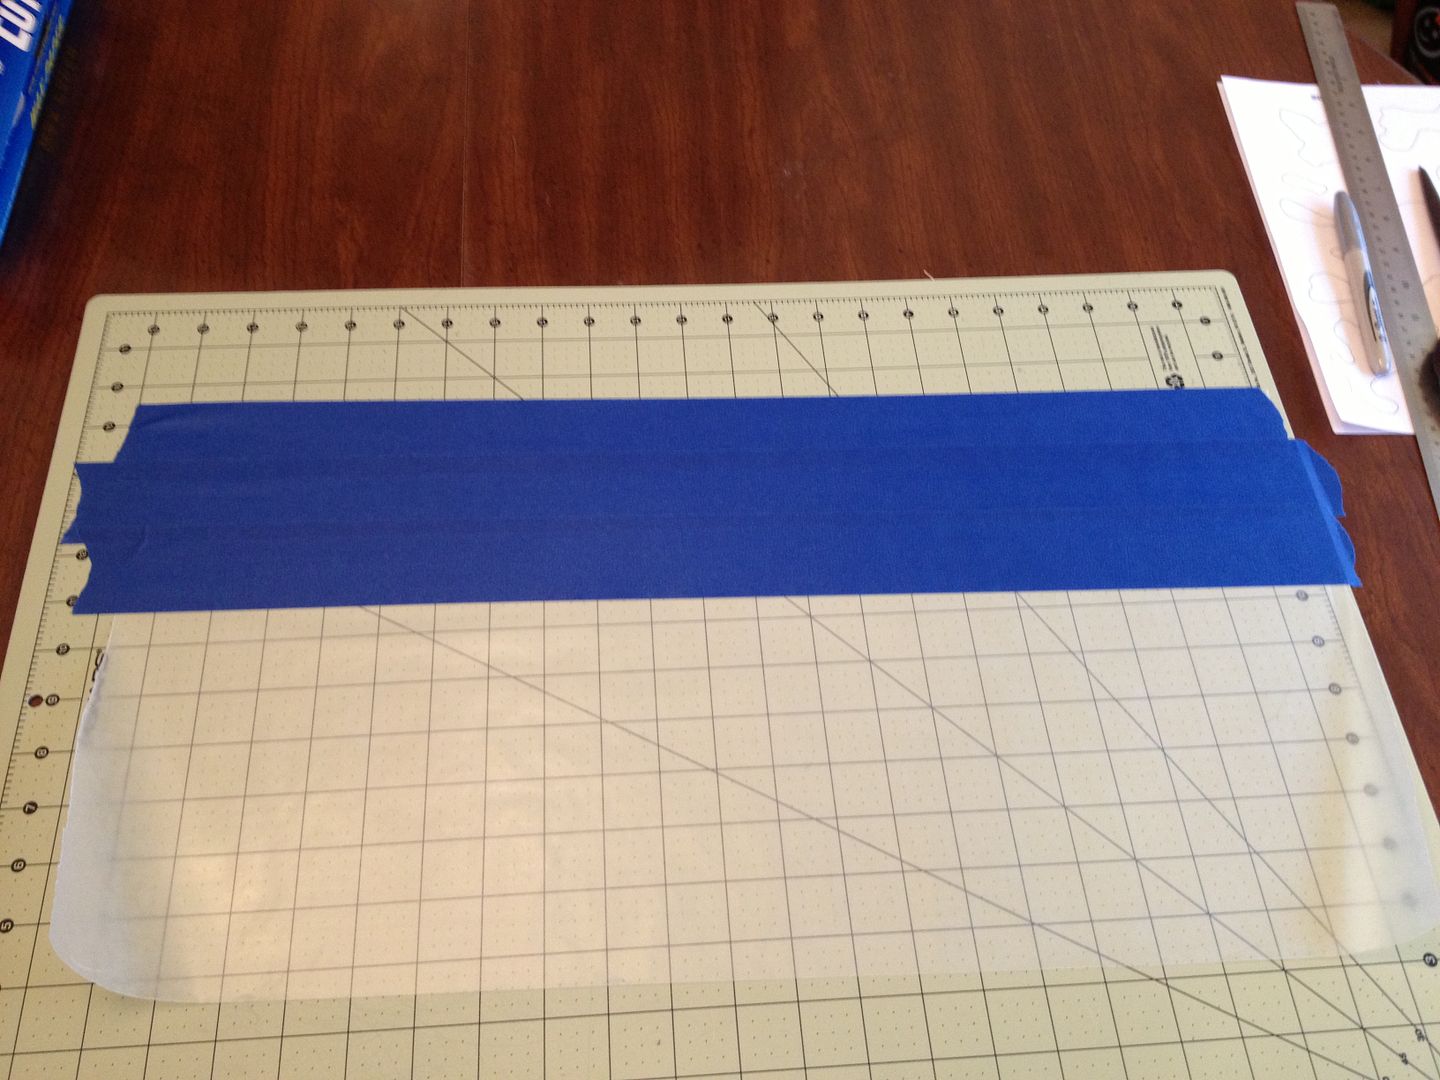
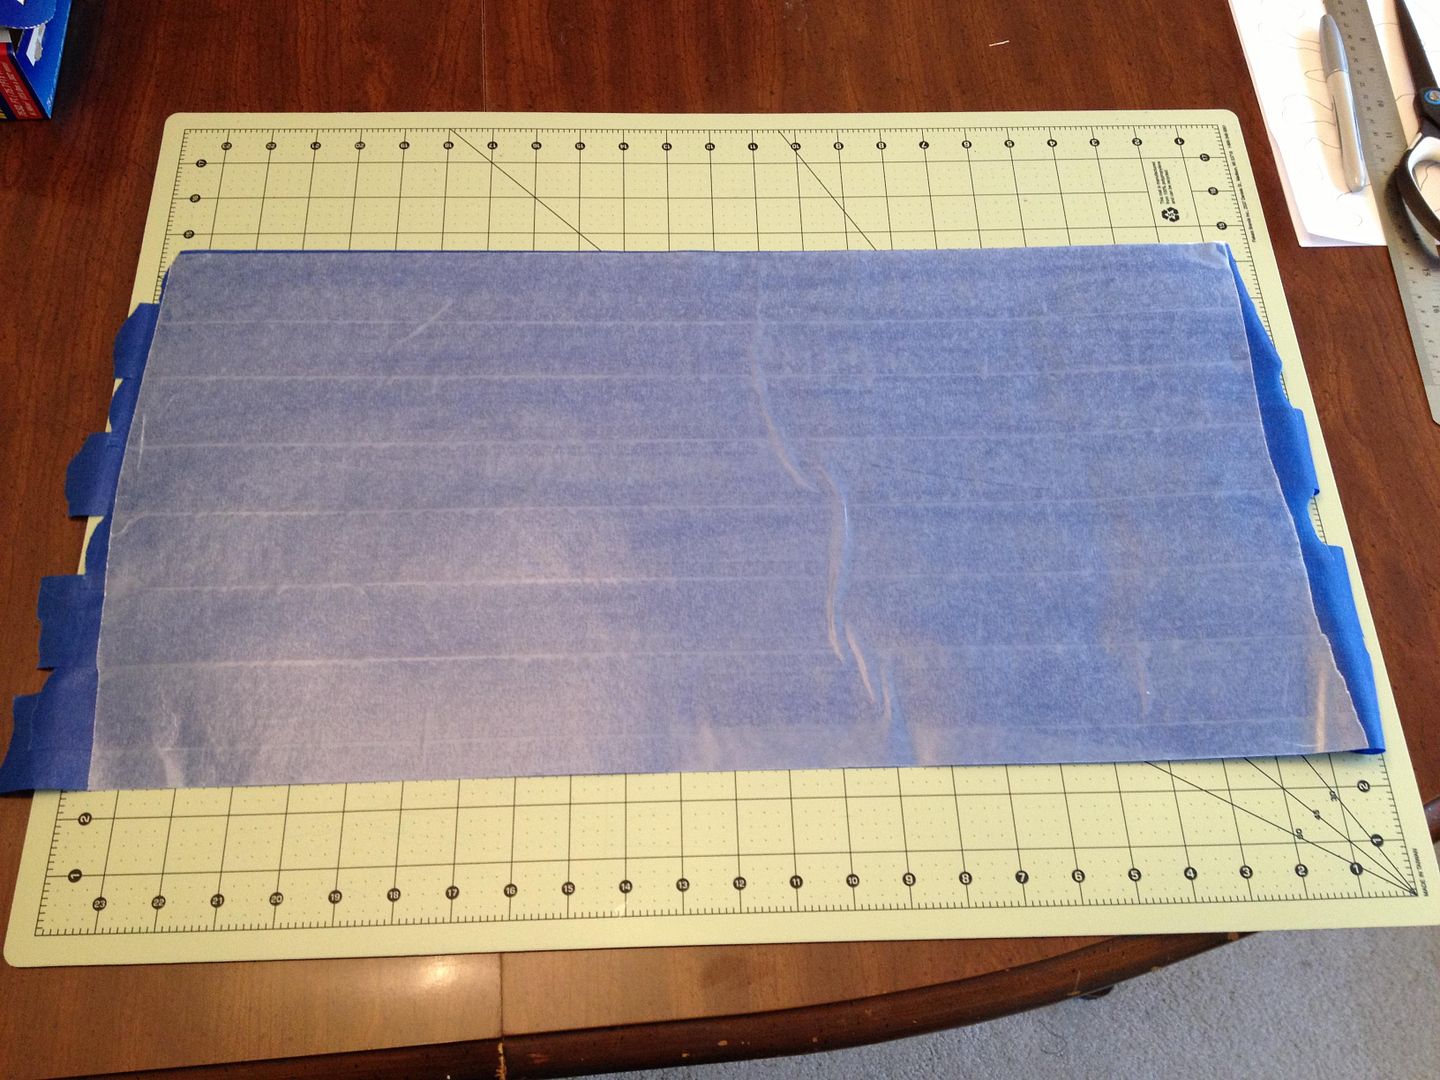
Measure out a length of wax paper.

Image

Using wax paper is trick to double your stencils, and makes it handy to store the stencils once they are shaped.

Start adding stripes of OVERLAPPING painter's tape to the wax paper. The overlap needs to be at least 1/4".

Image

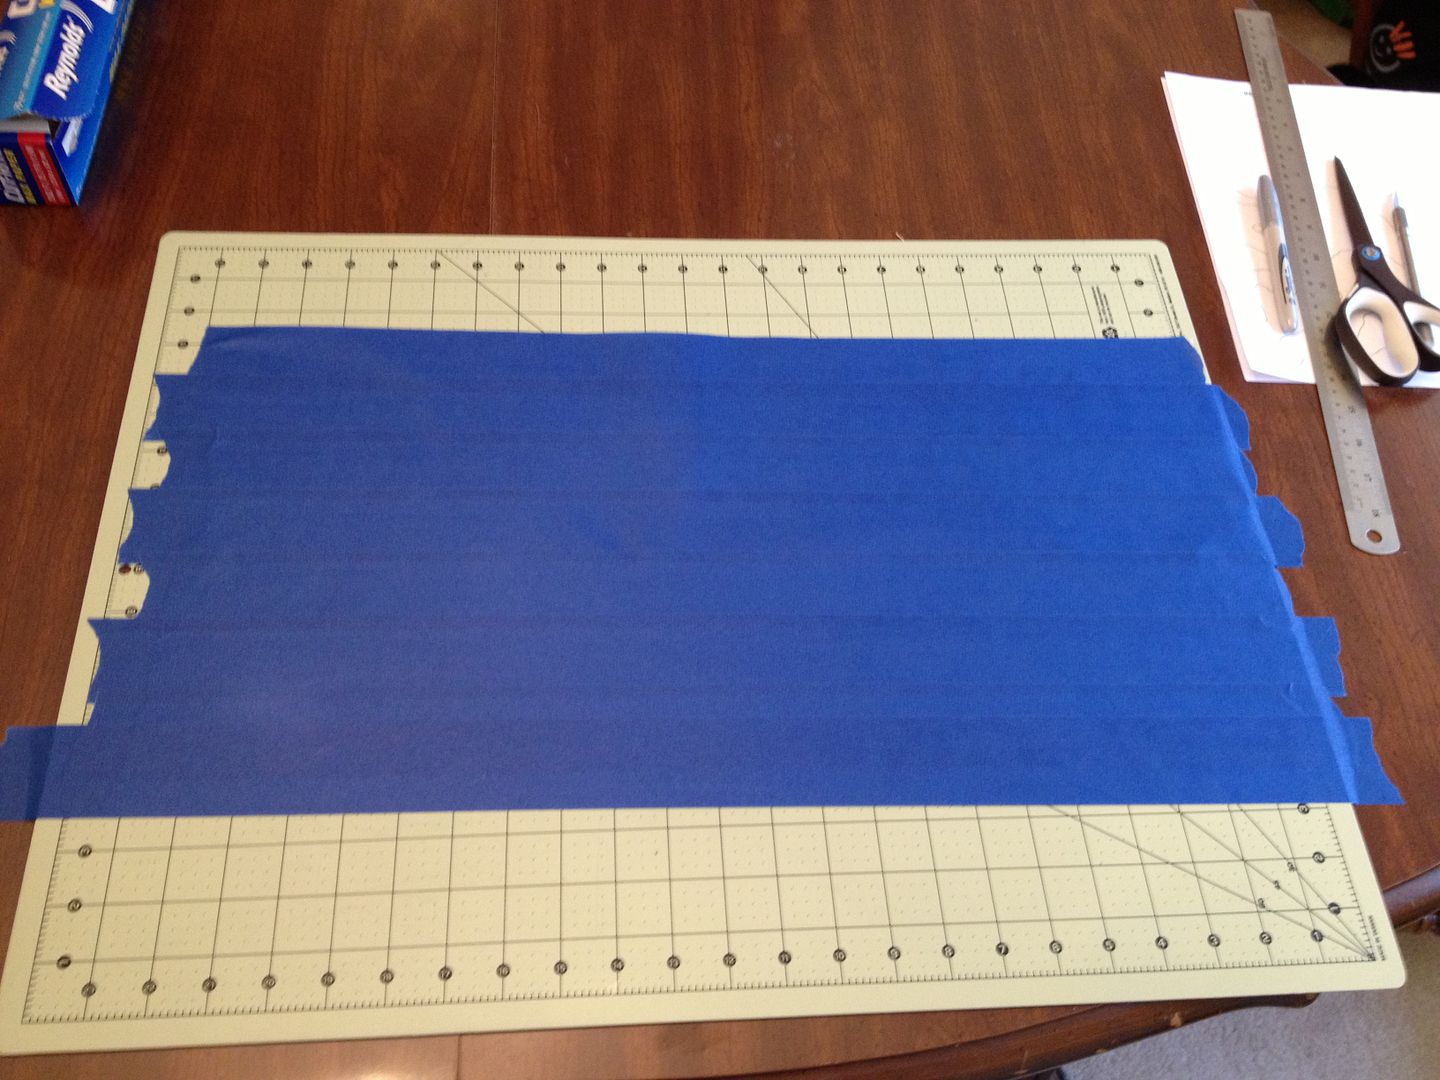
Cover the entire bit of wax paper with overlapping layers of painter's tape.

Image

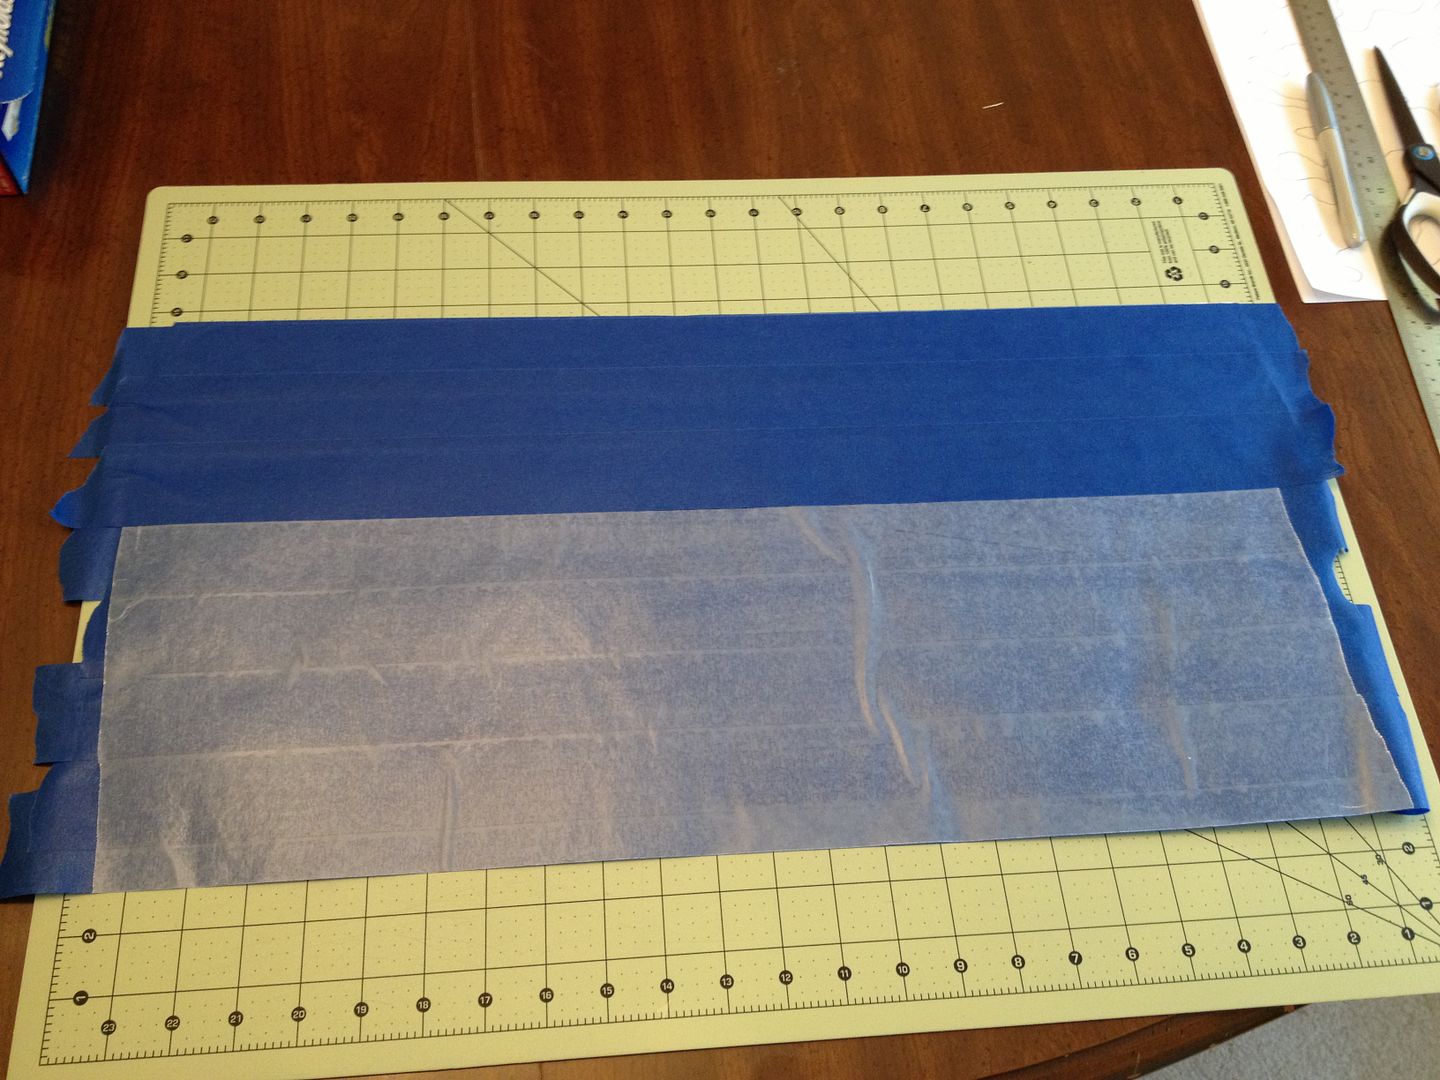
THIS is the clever bit. Are you ready for the clever bit? (Kudos to whoever knows where that quote is from).

Flip it over.

Image

Overlap layers of painter's tape on this side as well.

Image

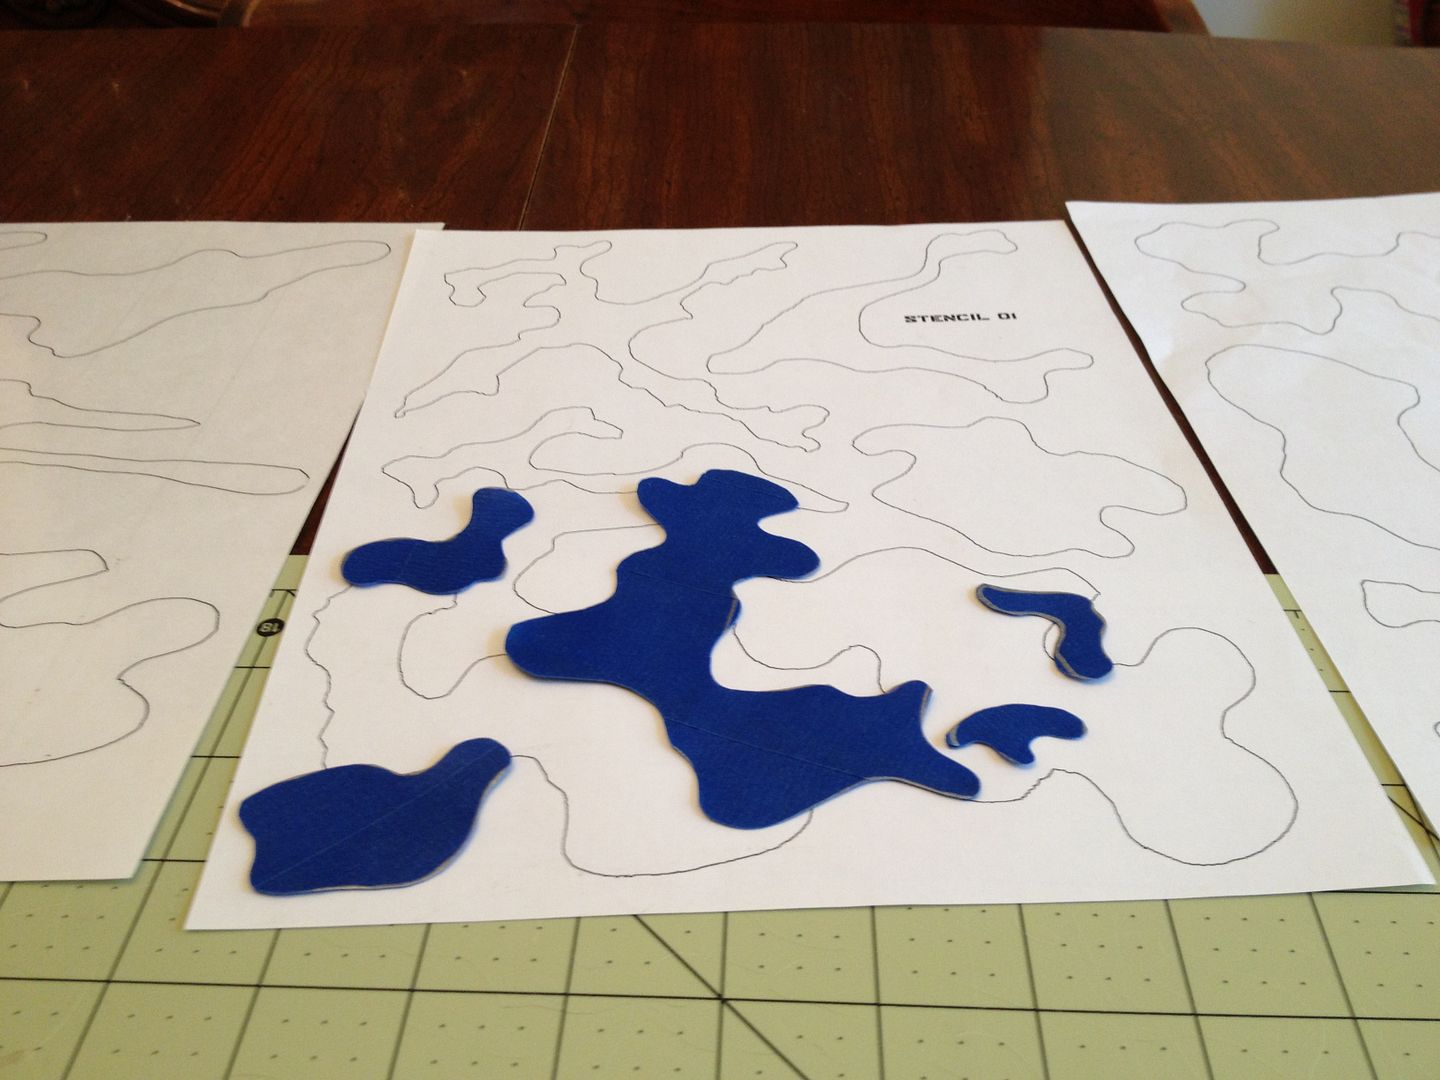
Once it full covered, trim the edges, and using the references as a guide, starting drawing shapes on the tape. Now, I use a silver sharpie cause it stays on well and easy to see. You can use whatever marking devices you want.

Image

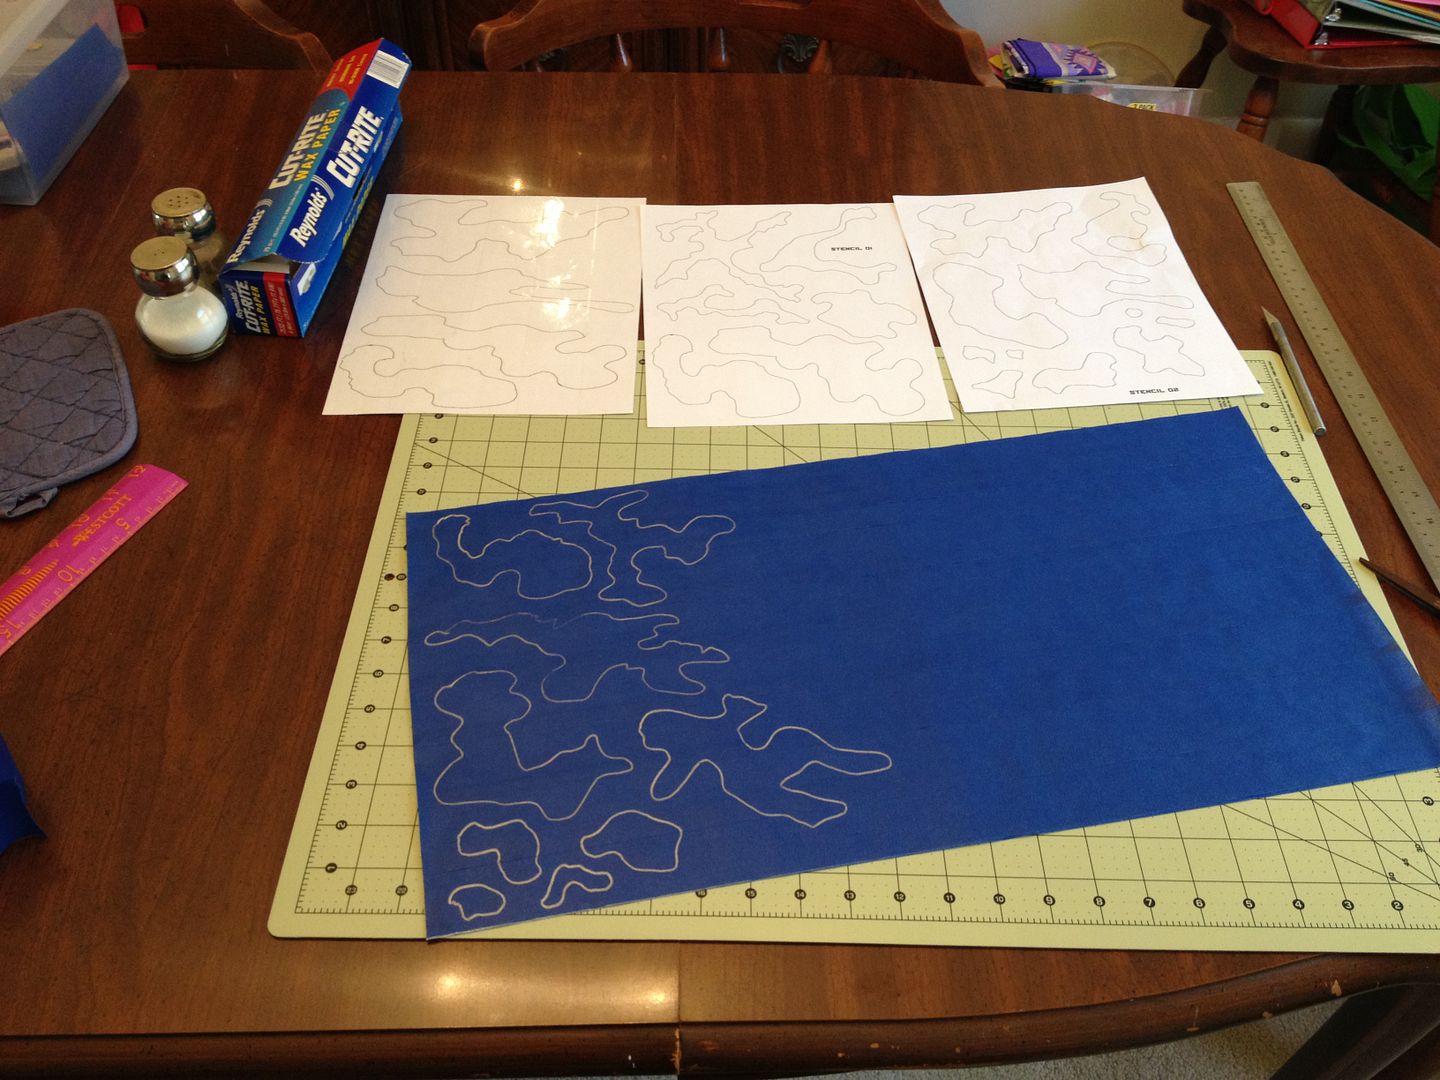
Cover the whole thing with shapes. The size of the shapes will depend on what type of camo pattern you are shooting for, and how large the item is.

Image

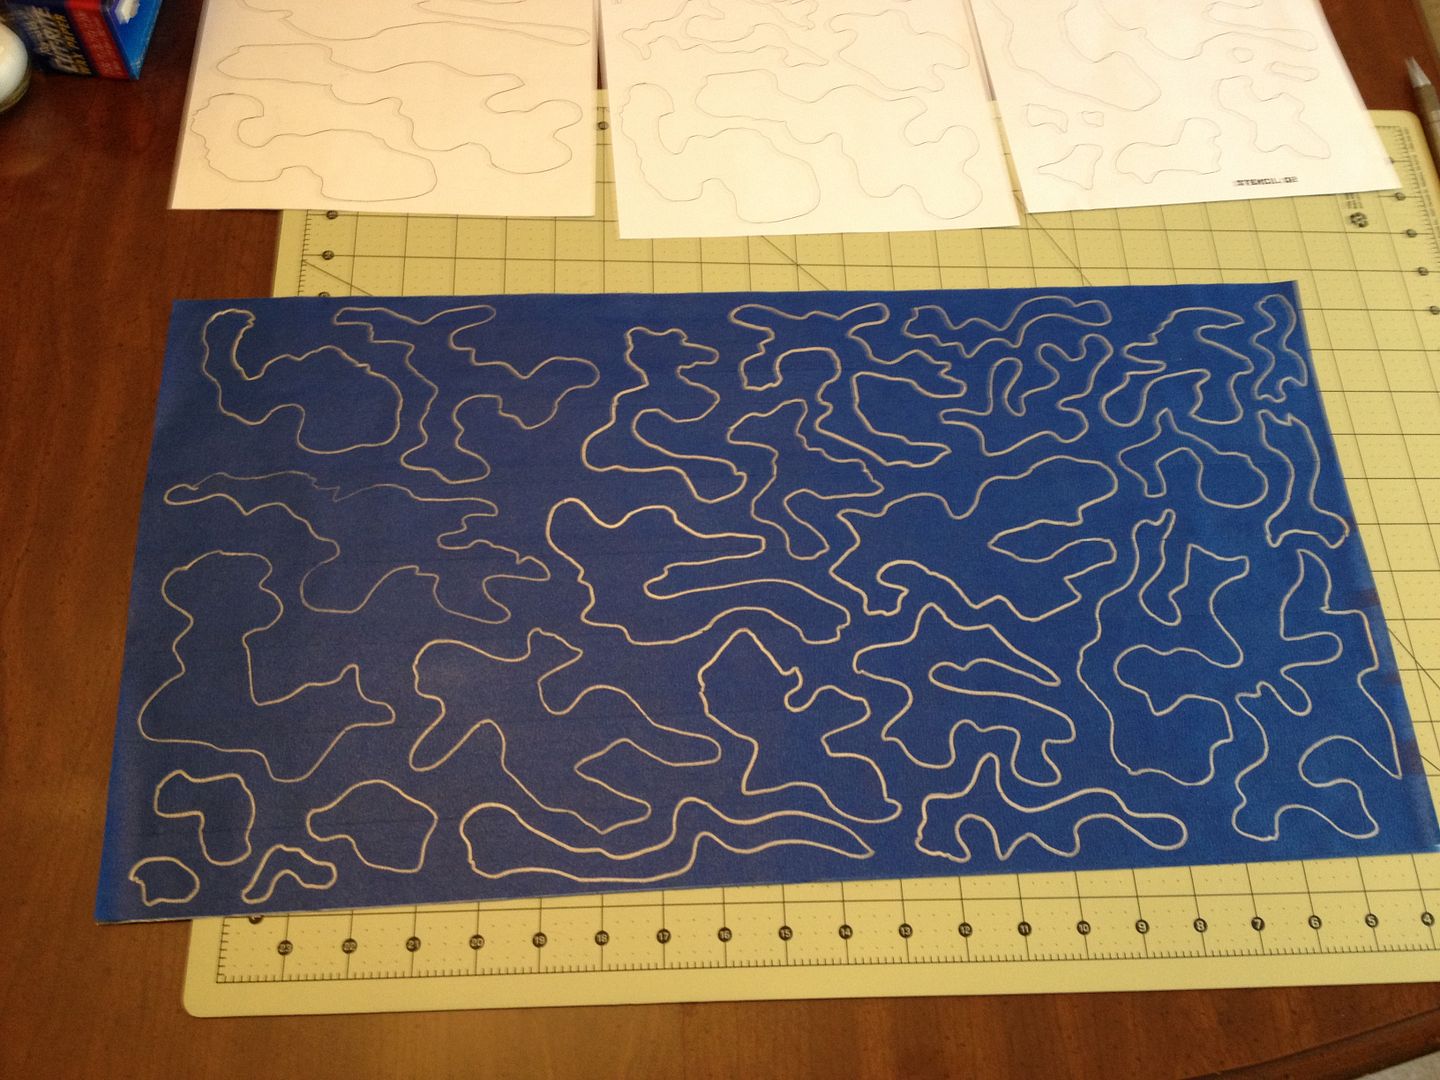
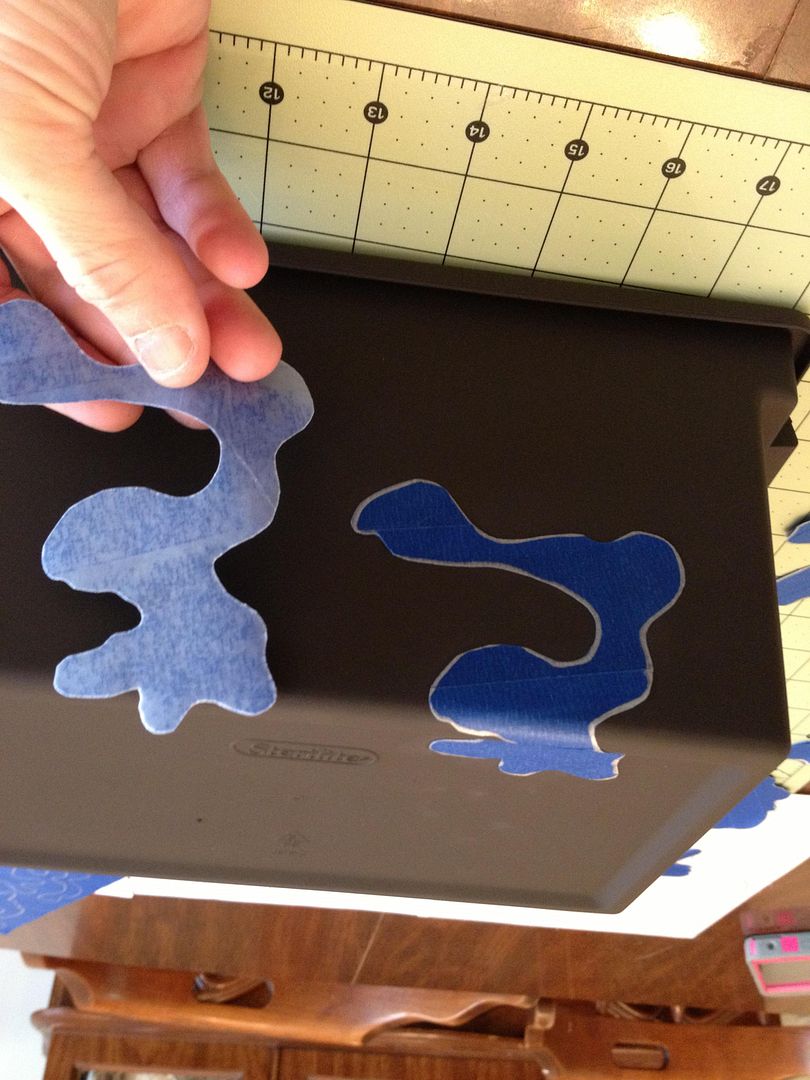
Grab your scissors and start cutting out shapes. SAVE THE EDGES. The little bit of edge left can be used if you need some small shapes, spots, etc.

Image

The stencils you will now have are double sided and mirrored, obviously. The wax paper will allow you to peel them off like stickers, and use them on whatever you want to stencil.

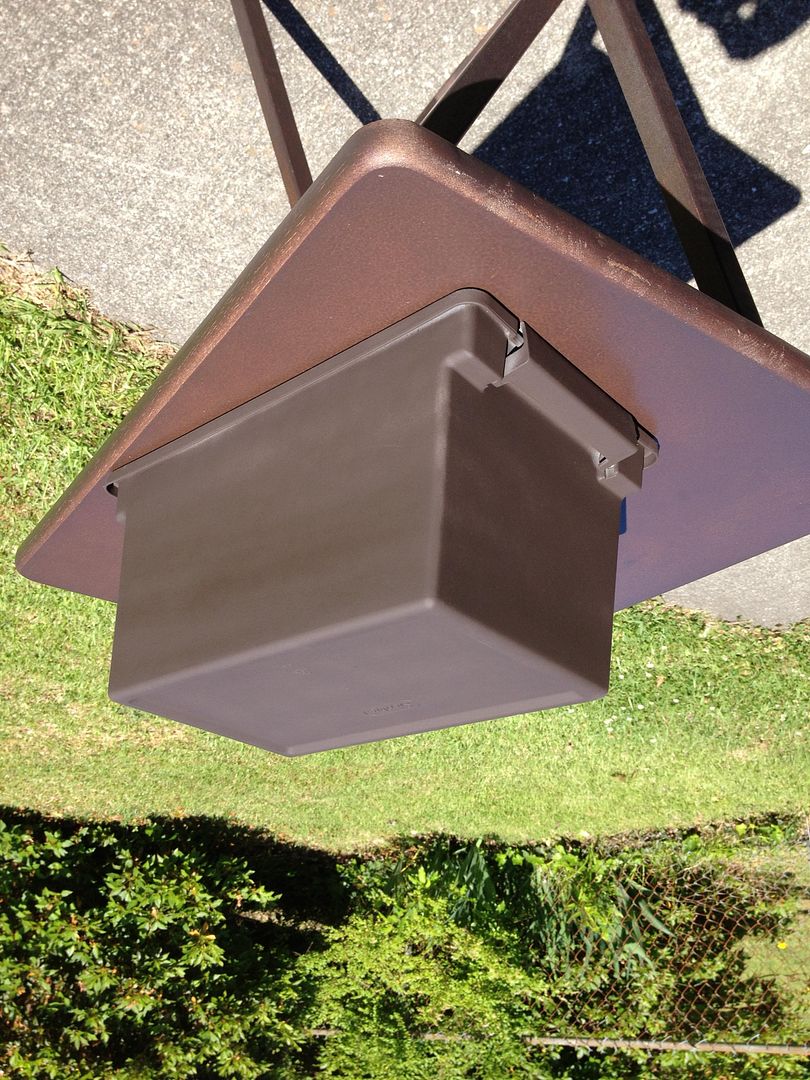
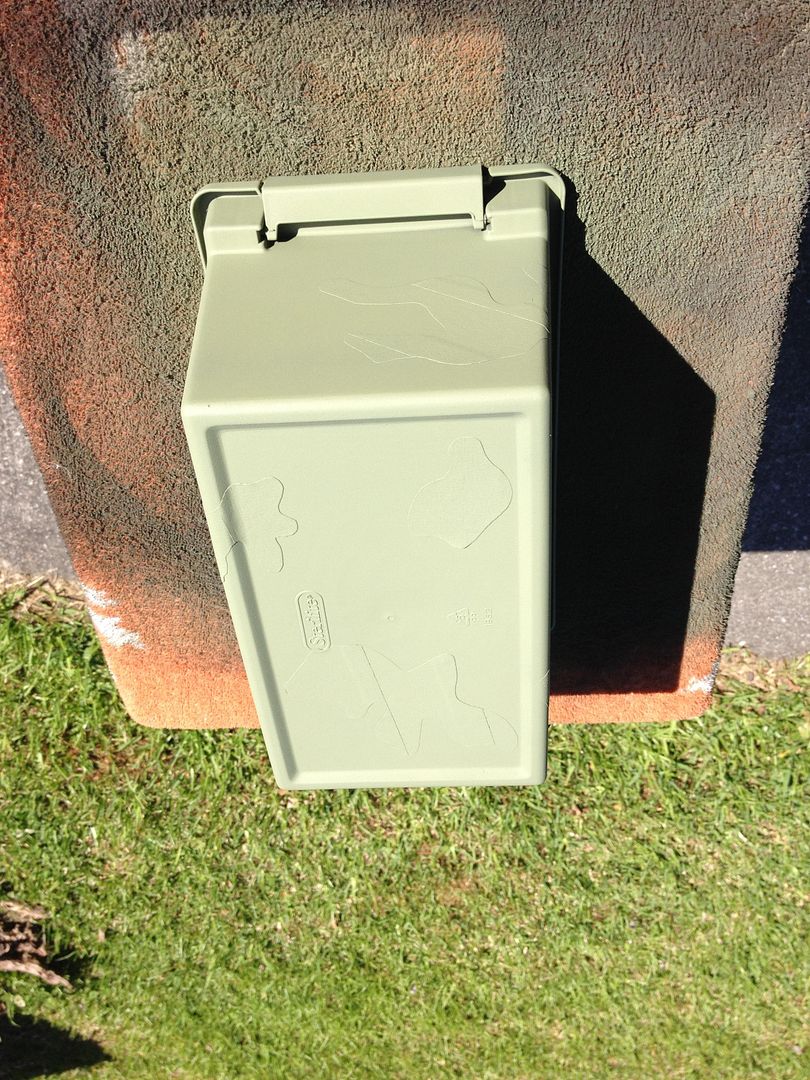
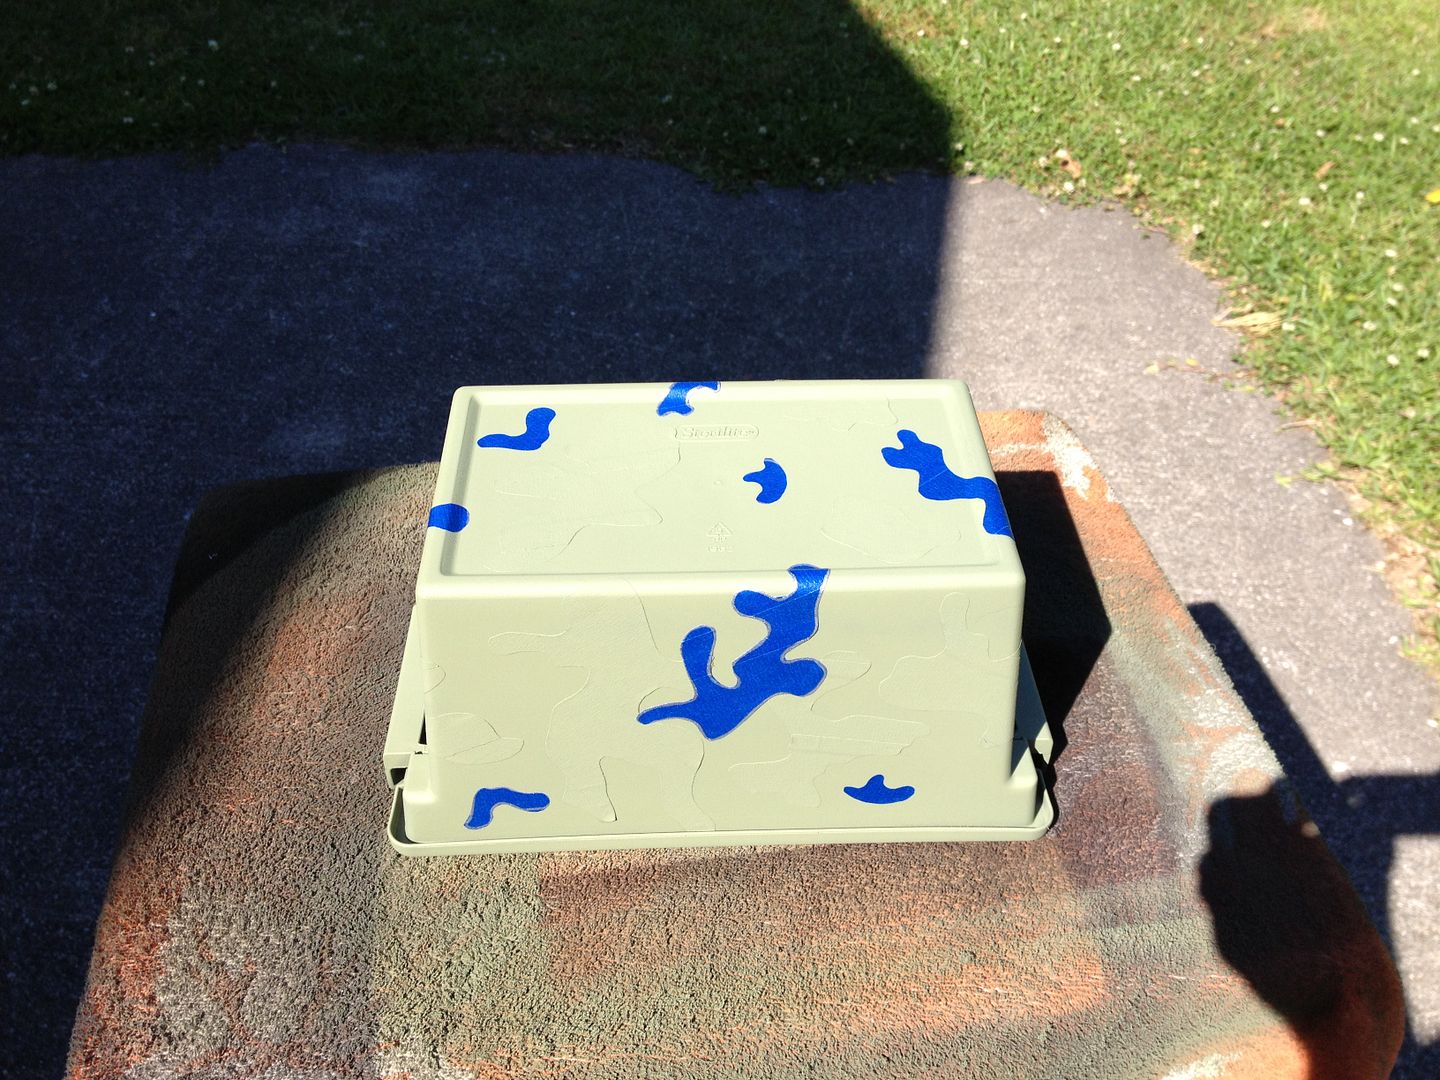
Take your object to be camofied (I don't think that is a real word) and put your base colour on.

Image

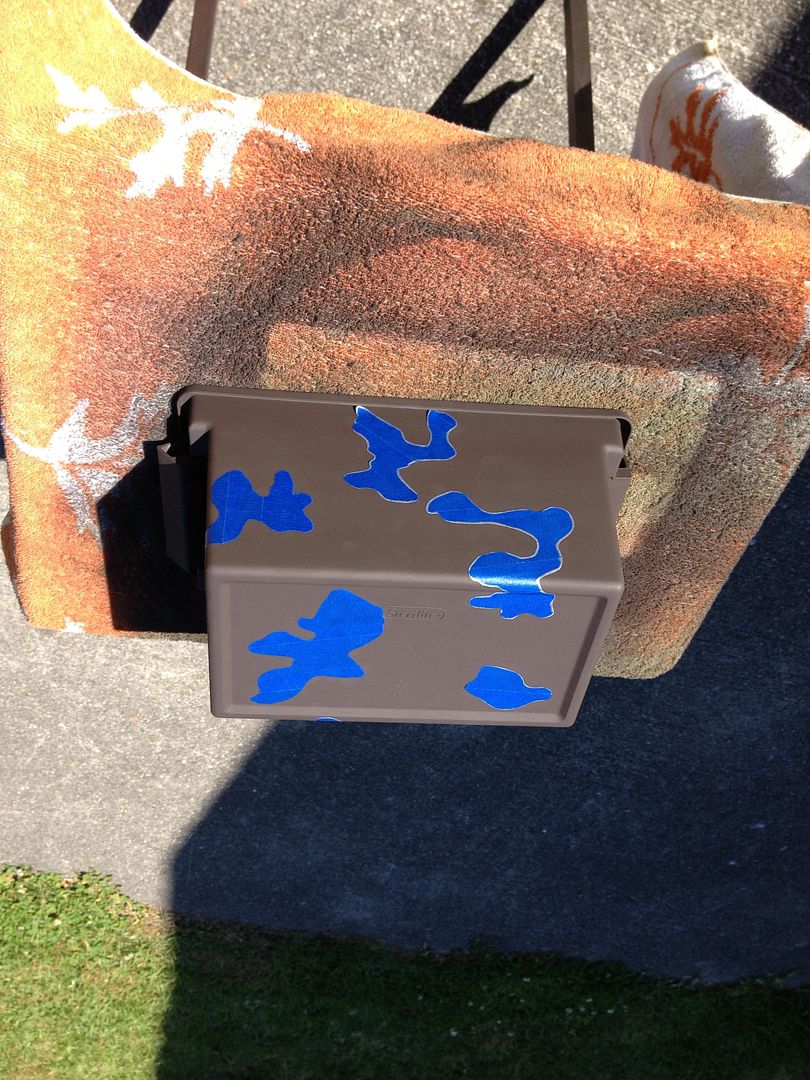
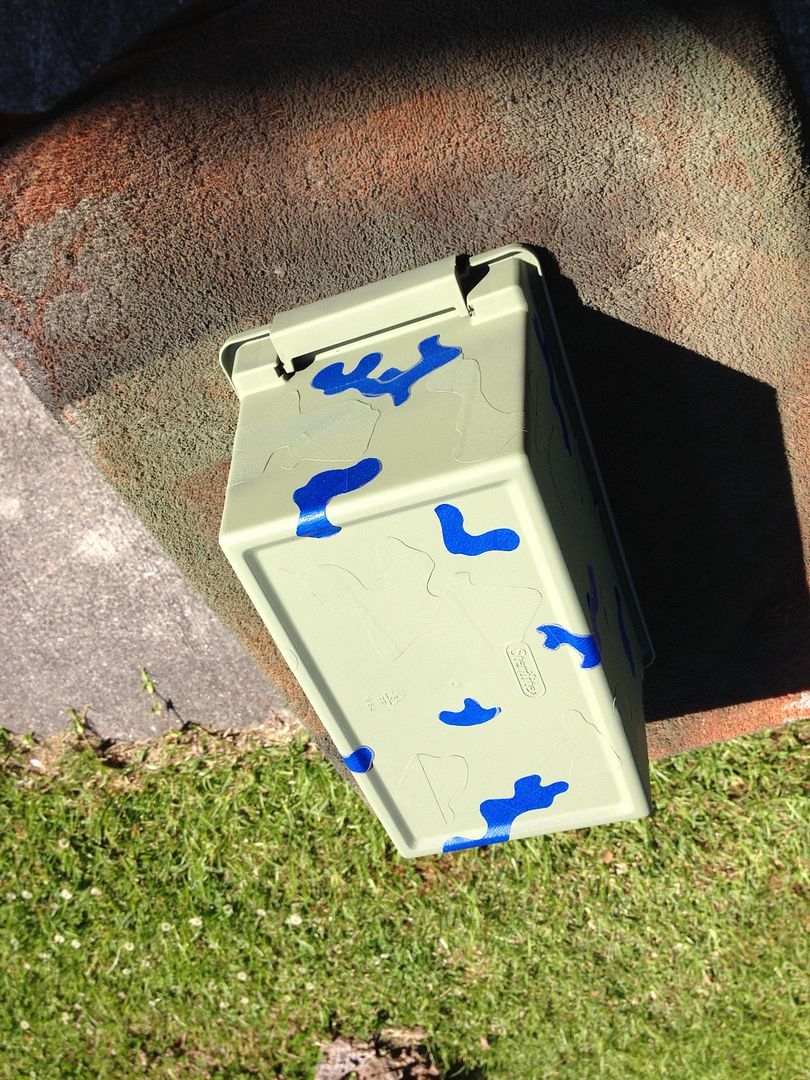
Add stencils. You can rotate or cut the stencils as you need. Even though you have 2 of everyone, by alternating its position and layer, you won't be able to tell it's the same shape.

Image

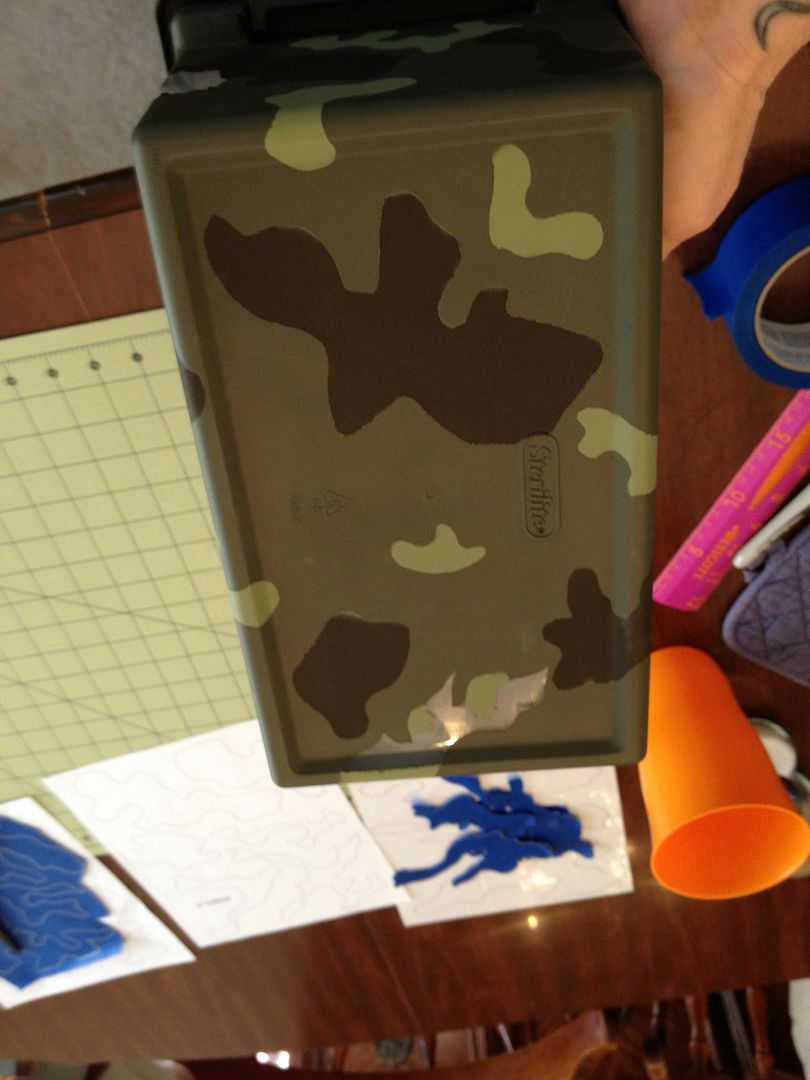
How many stencils and how big they are depends on the look you want. I was doing this more as a test/example, so I wasn't too picky. I made the dark brown layer fairly prominent.

Image

Image

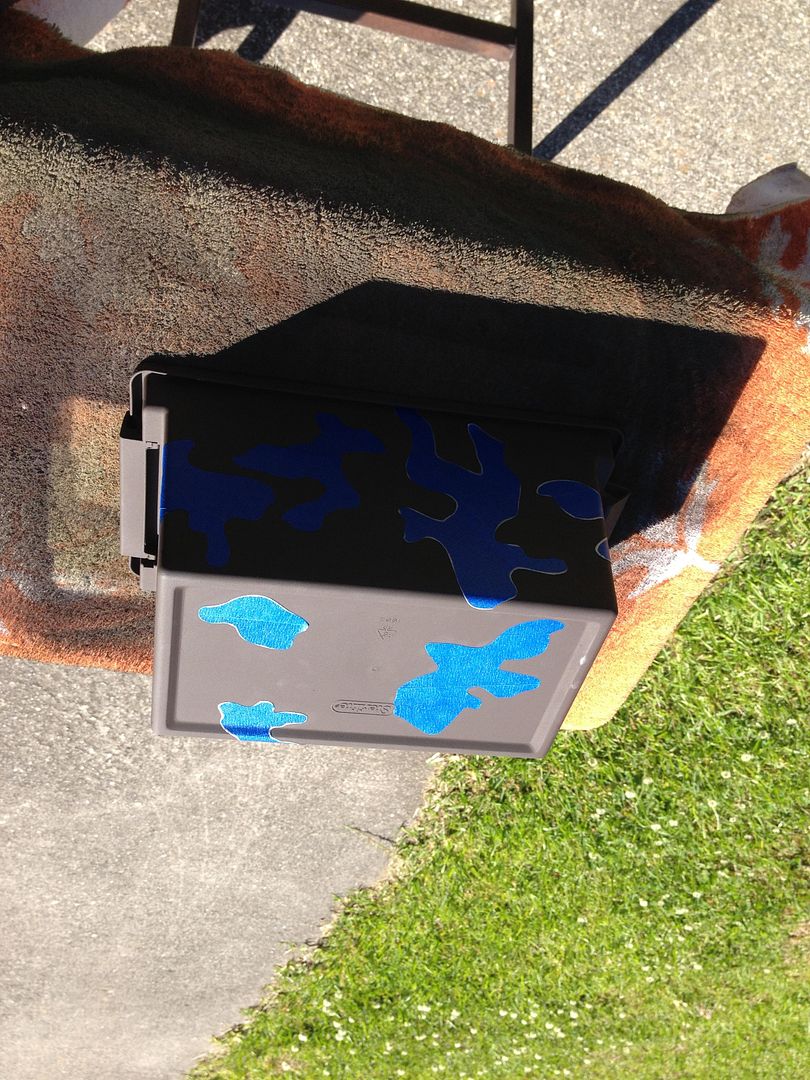
Add your next layer of colour.

Image

Image

Add more stencils. Again, how many and how large depends on the effect you want. I decided to make the light green more spotty and seem more like highlights. Don't be afraid to overlap the stencils either.

Image

Image

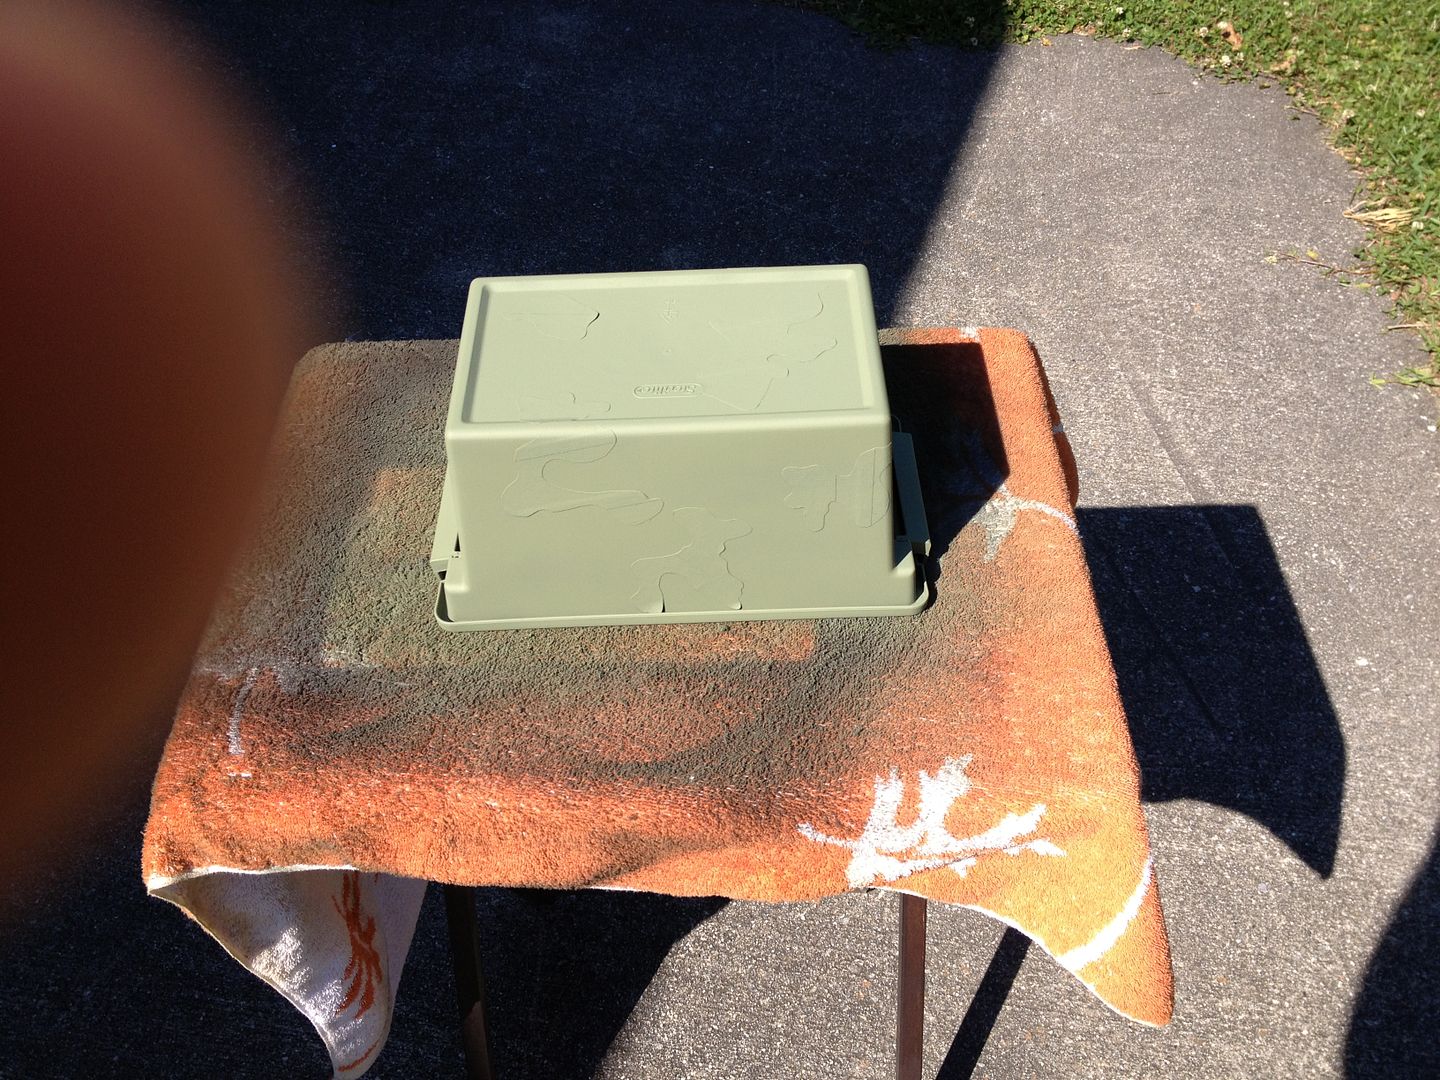
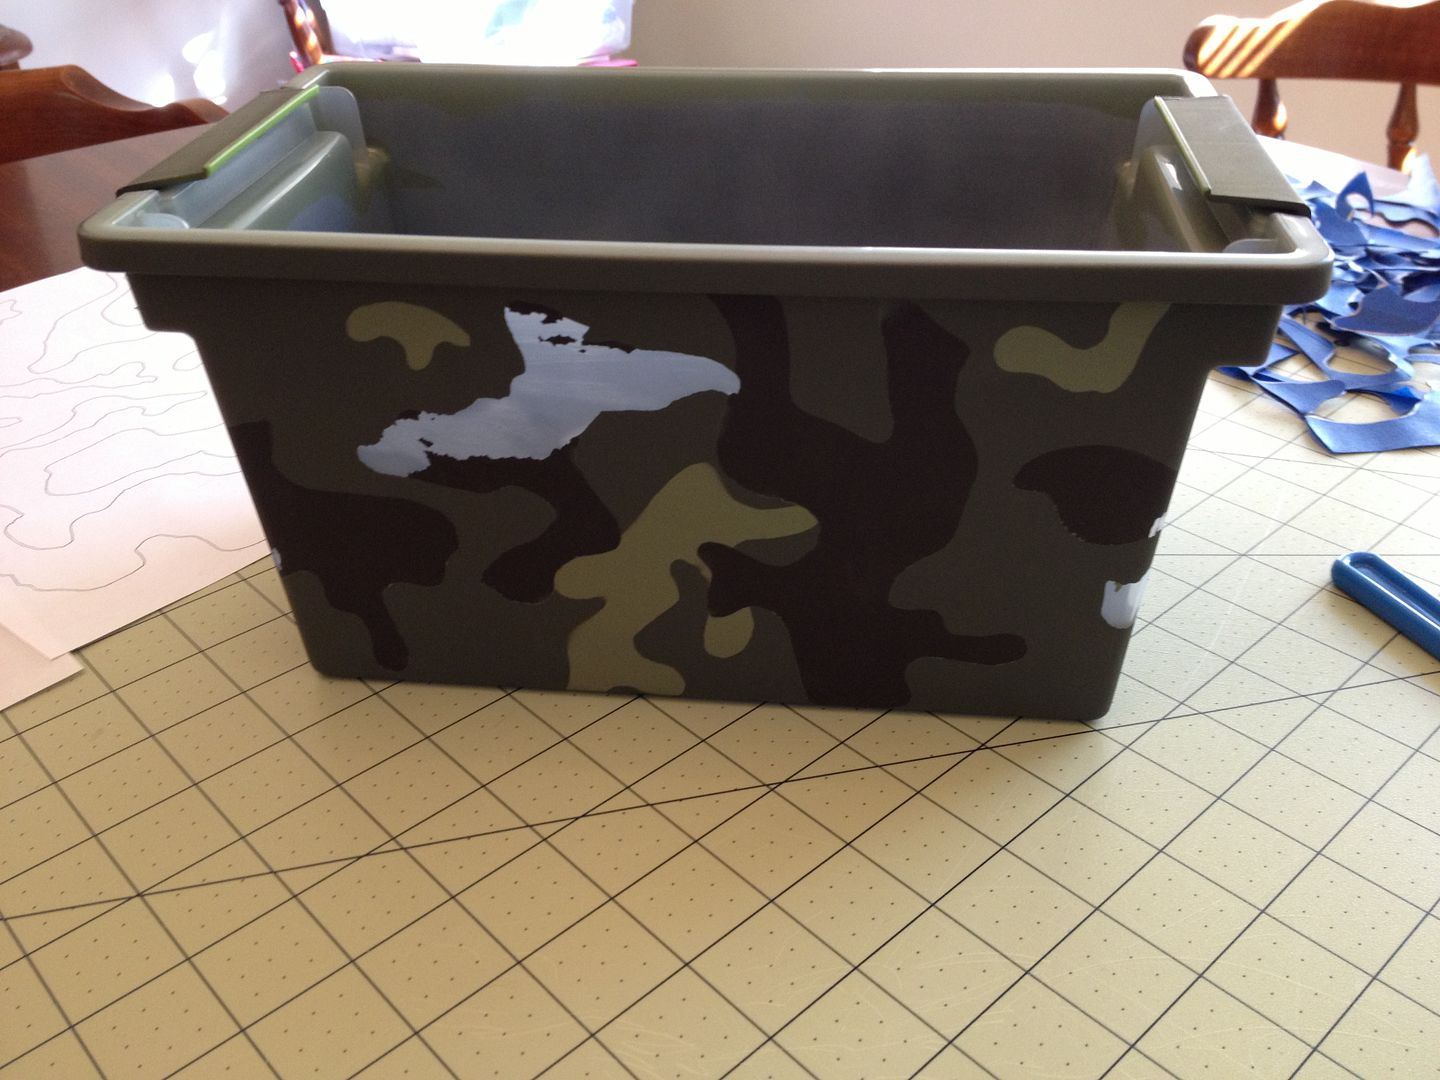
The next layer was dark green. I forgot to grab a picture, but it's not much to see. Once that is dry, I peeled all of the stencils off. I really should have had a fourth colour layer. It's pretty plain camo and there are not enough shapes, but you get the idea for the tutorial.

Image

Image

Image

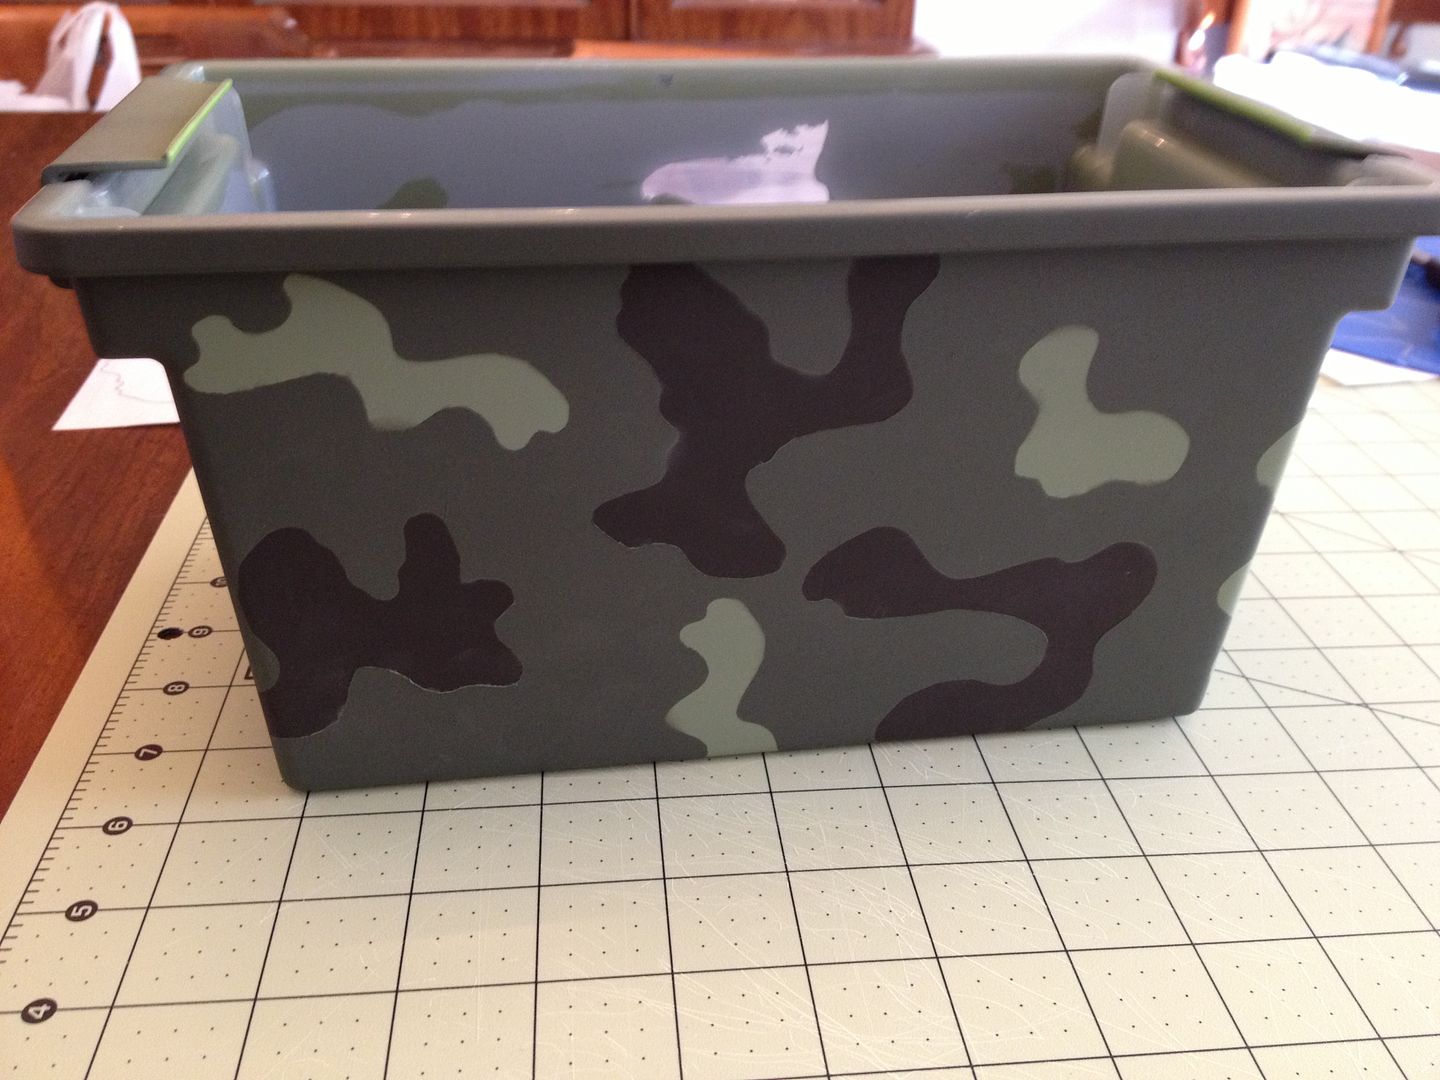
You can see how the tape pulled off some of the paint. It's because I didn't do a great job of sanding the box (and that sterlite plastic doesn't hold paint very either). As I said, for the purposes of a tutorial, there you go.

Charlie

_________________
"There is a clause in the contract which specifically states any systematized transmission indicating a possible intelligent origin must be investigated. On penalty of total forfeiture of shares. No money."


Image


Top
 Profile  
Reply with quote  
 Post subject:
PostPosted: Mon May 20, 2013 1:04 am 
BOHICA
User avatar

Location: Edinburgh, Scotland
Service Number: A05/TQ2.0.82134E1
Country: United Kingdom
seriously, you guys are so frakkin' talented.

_________________
" I'm anispeptic, frasmotic, even compunctuous to have caused you such pericombobulation."

Private
UKCM
42 rgmt, 1st Bttln,
Hadrian's Wall.


Top
 Profile  
Reply with quote  
 Post subject:
PostPosted: Mon May 20, 2013 2:49 am 
MODEL 120-A2
User avatar

Service Number: A04/TQ0.0.72178E5
Country: United States
LOL, thank you. Sometimes I think it is less talent and more sheer stubborn determination. :) Although I did manage to get one more item knocked out; since my shop is pretty much packed up and defunct, I can't work on any props. But that doesn't stop me from playing around on the computer. I finished up the artwork for the back of my armor. It's based off a Bawidamann picture of WWII style pinup.

Image

For those wondering, Carmen is my wife's name. :) Took me a while to work it up in photoshop but it came out rather well I think. I am going to try painting it (hand brushing, icky) on a few bits of styrene just as a test. I know I will lose some detail in the transition over. Most likely, I will end up taking it to an airbrush shop and getting it professionally put on, but I want to give that old college try before I do that.

Charlie

_________________
"There is a clause in the contract which specifically states any systematized transmission indicating a possible intelligent origin must be investigated. On penalty of total forfeiture of shares. No money."


Image


Top
 Profile  
Reply with quote  
 Post subject:
PostPosted: Mon Jul 08, 2013 1:51 pm 
MODEL 120-A2
User avatar

Service Number: A04/TQ0.0.72178E5
Country: United States
Just a quick update: no, I'm not dead. LOL. We finally got moved up to Connecticut. I don't have a shop, exactly, but I do have a basement where I can do some work. Talking with Spat, the armor won't be ready til October or November, but the resin items may get here sooner. I managed to get a few of the four barrel belt tools, so I will be working on those. The clips are proving...problematical.

Charlie

_________________
"There is a clause in the contract which specifically states any systematized transmission indicating a possible intelligent origin must be investigated. On penalty of total forfeiture of shares. No money."


Image


Top
 Profile  
Reply with quote  
 Post subject:
PostPosted: Mon Jul 08, 2013 2:13 pm 
Prop Churner Outer
User avatar

Location: Bath, Maine
Service Number: A03/TQ1.0.12143G1
Country: United States
Really glad you're not dead!

_________________
:delta: My entry-level prop and costume tutorials: viewtopic.php?f=3&t=12751 :delta:


Top
 Profile  
Reply with quote  
 Post subject:
PostPosted: Mon Jul 08, 2013 5:27 pm 
Glad the move went well Charlie!


Top
  
Reply with quote  
 Post subject:
PostPosted: Sun Sep 08, 2013 7:45 pm 
MODEL 120-A2
User avatar

Service Number: A04/TQ0.0.72178E5
Country: United States
Well my progress has been slow, but not stopped. I haven't done a lot of work since I don't have the bulk items yet (Spat says prob Oct or Nov). Noble's items should be arriving soon (yay!) but in the mean time I decided to do the rework on the shoulder lamp.

Now, I have a Matsu lamp. The quality is AWESOME. Well built, looks great. The only problem (if you want to call it that) is that the lamp was a bit dim for my tastes. So I decided to kill two birds with one stone. I replaced the lamp incandescent bulb with a 139 lumen LED. I don't have a super ton of pictures, because I got so caught up in doing it I forgot to document it.

I started with the Matsu lamp and broke it down to parade rest. Then I took a MagLite XL50 flashlight (you can get them at Target) as the guts for the new lamp assembly.

Image

Coincidently, looks like it's going to make a good base for a locator as well. :)

I took the end caps off, and the battery pack. After searching online, I took a 1/2" socket, placed over the LED internal housing and hit it with a hammer. LED module popped right out.

Image

Image

There is a small bend connection for the positive on the LED. The rest of the housing is the ground. I soldered wire to the bend connection and then looped a second along the outside edge and soldered that down. Once that was done, I soldered the lines into the tabs that were part of the original electronics. (I would have used connector tabs, but I didn't have any of the right size and didn't want to risk damaging the shorter wires on the inside).

Image

I hot glued the LED module to the back of the original lamp housing.

Image

Once that was done, I took out the original D cell battery pack. I just used a simple 3 AAA holder from radioshack. I thought about using the original battery pack, but it had a lot of compression connections (have to hold it in place to make the ciricuit) and in the end it was just a lot easier and cheaper to use a new pack. Soldered those connections to the original wiring for the exterior switch. Put it all back together and it's good to go.

Externally, it's hard to even tell I did anything.

Image

However, once the light is on, BOOM. A comparison to the original bulb and the new one.

Image

Image

This pic was taken in a room with the windows open, full daylight. You can still see the light pattern

Image

I'm happy with the light now. It might make pics a little more difficult, but it will actually light up a dark room. Plus the AAA run for about 8 hours continuous with little to no heat.

Charlie

_________________
"There is a clause in the contract which specifically states any systematized transmission indicating a possible intelligent origin must be investigated. On penalty of total forfeiture of shares. No money."


Image


Top
 Profile  
Reply with quote  
 Post subject:
PostPosted: Sun Sep 08, 2013 8:16 pm 
Proceed on a 2-1-6...
User avatar

Location: Sunny Sussex
Service Number: A02/TQ2.0.52141E1
Country: United Kingdom
Now that light looks awesome! Well done!

_________________
A02/TQ2.0.52141E1

"Errr... Roger that's a 2-1-6..."


Top
 Profile  
Reply with quote  
 Post subject:
PostPosted: Sun Sep 08, 2013 10:52 pm 
User avatar

Location: long island , NY
Country: United States
very bright :)

_________________
Cpl Matthew Rendar. M56 smart gun operator. 2nd bat 7th colonial marines "Rendars Raiders "
Image


Top
 Profile  
Reply with quote  
 Post subject:
PostPosted: Wed Dec 18, 2013 2:37 am 
MODEL 120-A2
User avatar

Service Number: A04/TQ0.0.72178E5
Country: United States
Well, this is NOT related to my CM build (pretty much on hold waiting for armor), but in the meantime I decided to do a little something extra to my jacket. This is my first winter in Connecticut (and snow is a new thing!) so I had to get something new. Since my coworkers don't think I'm geeky enough, I personalized one of my jackets.

Image

Image

Image

The WY-161 and CPWL patches are from patchesnpins. The nametape is one of the extra I had, and the stencil is homemade using a 8.5x11" clear label (remember those from my Pelican case build?) and yellow gloss spraypaint. It's not based on anything screen accurate, but just something I felt would be inkeeping with the universe (possibly back when Fury 161 was an actual working mining facility).

Charlie

_________________
"There is a clause in the contract which specifically states any systematized transmission indicating a possible intelligent origin must be investigated. On penalty of total forfeiture of shares. No money."


Image


Top
 Profile  
Reply with quote  
 Post subject:
PostPosted: Wed Dec 18, 2013 1:52 pm 
Prop Churner Outer
User avatar

Location: Bath, Maine
Service Number: A03/TQ1.0.12143G1
Country: United States
That is fantastic! I love the extrapolation from the source material too. That's one area (the mining history of Fury) that the novelization really helped flesh out. I might need to track those Foster novels down again...

_________________
:delta: My entry-level prop and costume tutorials: viewtopic.php?f=3&t=12751 :delta:


Top
 Profile  
Reply with quote  
 Post subject:
PostPosted: Wed Dec 18, 2013 3:44 pm 
MODEL 120-A2
User avatar

Service Number: A04/TQ0.0.72178E5
Country: United States
I have novels for Alien (the dreaming part was cool) and Alien 3, but I have never been able to find Aliens.

_________________
"There is a clause in the contract which specifically states any systematized transmission indicating a possible intelligent origin must be investigated. On penalty of total forfeiture of shares. No money."


Image


Top
 Profile  
Reply with quote  
 Post subject: Re: Charlie's Colonial Marine Build
PostPosted: Wed Dec 18, 2013 4:19 pm 
Synthetic Humanoid
User avatar

Location: Killing Bugs!
Country: United States
SGT KITTEN wrote:
I have novels for Alien (the dreaming part was cool) and Alien 3, but I have never been able to find Aliens.


Try this (I just ordered one): http://www.amazon.com/Complete-Alien-Omnibus-Aliens/dp/0751506672/ref=sr_1_12?s=books&ie=UTF8&qid=1387379889&sr=1-12&keywords=aliens+omnibus

_________________
When in doubt-fry the place from orbit! :)


Top
 Profile  
Reply with quote  
 Post subject:
PostPosted: Wed Dec 18, 2013 5:58 pm 
Prop Churner Outer
User avatar

Location: Bath, Maine
Service Number: A03/TQ1.0.12143G1
Country: United States
Nice find John! I just ordered one too!

_________________
:delta: My entry-level prop and costume tutorials: viewtopic.php?f=3&t=12751 :delta:


Top
 Profile  
Reply with quote  
 Post subject: Re: Charlie's Colonial Marine Build
PostPosted: Sat May 03, 2014 8:58 am 
MODEL 120-A2
User avatar

Service Number: A04/TQ0.0.72178E5
Country: United States
Well, I finally managed to complete my Personal Locator after sitting on the project for while. For those that remember (or look at the previous posts) I ripped apart a Maglite XL150 to replace the stock lamp in my Matsu shoulder lamp. Well, I took the left over shell and made a personal locator. It's not 100% screen accurate by any means, but I think it works fairly well.

Image

I inverted the light to start. I painted the top section Dark Forest Green and the bottom section matte black. For the the button, I just drilled a small hole and used a large screw (you can still faintly see the phillips head outline; I filled it with bondo but there is a faint trace left). To replace the push button inside, I had originally intended to just reuse the original cap. However, somewhere along the line that got lost. So, I used a spare thimble (yes, a sewing thimble) and jammed into the top from the inside with a bit of added superglue.

Image

Gives it an interesting look, I think.

To make the screen, I just photoshopped a label. I printed it on a standard white sticky back paper, and then used a clear shipping label cover (much like I did for the stickers for my PR and case).

Image

I'm pretty proud of the label. I think it came out very well. You can see the simulated red screen background as and the faint outline of the 7-segment displays. It would have been better if it actually lit up, but this is a just a cheap-o build, so I didn't want to spend any actual money making it. :)

If anyone would like the original graphic I did for the screen, here it is:

Image

I downsized it to 7/8" for printing and it fit perfectly on my locator.

Charlie

_________________
"There is a clause in the contract which specifically states any systematized transmission indicating a possible intelligent origin must be investigated. On penalty of total forfeiture of shares. No money."


Image


Top
 Profile  
Reply with quote  
 Post subject:
PostPosted: Fri May 16, 2014 1:25 pm 
MODEL 120-A2
User avatar

Service Number: A04/TQ0.0.72178E5
Country: United States
More crazy work, cause...well I guess I'm just a little crazy.

To add a little more customization, I've made up a pack of smokes to carry in the helmet band.

Image

The "cigarettes" inside are a wooden dowel, painted satin white, and the cut to size. The ends were sanded and then given a light coat of tan paint to simulate tobacco. I think they do a good job, especially from a distance.

Image

I've also completed my "trifecta."

Image

They all have the "Charlie Mod" for the ammo counter to count down on the trigger pull. The center is my "hero" rifle, previously described. The left is painted to match the ones used in Alien 3 (which I still like that movie, even if it's the worst of the bunch). The right is another dark forest green paintjob. The two new ones do have a metal grenade in the pipe, but I left off adding triggers (as I don't have any triggers handy to add anyway). They also only have minimal weathering, mainly where the pump rides along the SPAS cage. I have put my standard info plate on the green (with a unique serial), but I made a new one for the black rifle.

Image

Image

Now I am working on a place to store them.

Image

Image

It's going to a two part display; one for the PRs and then one for the smaller props (identical cabinets mounted side by side). The racks holding them in place are foam with magnetic backing, as I haven't decided if I want to mount them as they (so you can get a lot of detail from the one) or put the carry handles to the rear (which is more realistic but hides much more). I'm going to add some standard stickers and storage instructions to the inside, as well as put in some small lights in the top of the cabinet to brighten it up a bit.

Charlie

_________________
"There is a clause in the contract which specifically states any systematized transmission indicating a possible intelligent origin must be investigated. On penalty of total forfeiture of shares. No money."


Image


Top
 Profile  
Reply with quote  
 Post subject:
PostPosted: Fri May 16, 2014 6:27 pm 
Prop Churner Outer
User avatar

Location: Bath, Maine
Service Number: A03/TQ1.0.12143G1
Country: United States
Excellent stuff!
I've considered "updating" the Balaji cigarette pack to a more helmet-friendly size (like your Lucky Strikes). The originals are a much larger British style that just looks too big on a helmet. Sadly the only pack we see in Aliens is in Ripley's apartment and I swear they just wrapped a pack in brown tape; there doesn't seem to be any logo on it at all. A missed opportunity!

_________________
:delta: My entry-level prop and costume tutorials: viewtopic.php?f=3&t=12751 :delta:


Top
 Profile  
Reply with quote  
 Post subject: Re: Charlie's Colonial Marine Build
PostPosted: Fri May 16, 2014 7:05 pm 
reload
User avatar

Location: Hamburg
Service Number: A03/TQ3.0.12136E1
Country: Germany
Nice collection and a good way to store your rifles.

_________________
Sgt. Frank Peters 'reload' Smartgun Operator
A03/TQ3.0.12136E1 "It will be no picknick!"
AL Colonial Admin. - Sergeant at Arms (SgtA) -- 2020-2022
GERCM - Executive Officer (XO)
UKCM Foreign Legion: The Deviant Dragoons


Top
 Profile  
Reply with quote  
 Post subject: Re:
PostPosted: Fri May 16, 2014 10:49 pm 
MODEL 120-A2
User avatar

Service Number: A04/TQ0.0.72178E5
Country: United States
retrogarde wrote:
Excellent stuff!
I've considered "updating" the Balaji cigarette pack to a more helmet-friendly size (like your Lucky Strikes). The originals are a much larger British style that just looks too big on a helmet. Sadly the only pack we see in Aliens is in Ripley's apartment and I swear they just wrapped a pack in brown tape; there doesn't seem to be any logo on it at all. A missed opportunity!


I used a Lucky Strikes pack because they are unfiltered, so the pack is shorter, and they come in a soft pack which I thought would look better. I could have sworn there is a scene that shows the pack cigarettes they used were in Aliens were Marlboros. But I may be imagining it. New excuse to watch the movie!!

Charlie

_________________
"There is a clause in the contract which specifically states any systematized transmission indicating a possible intelligent origin must be investigated. On penalty of total forfeiture of shares. No money."


Image


Top
 Profile  
Reply with quote  
 Post subject:
PostPosted: Sun May 18, 2014 12:03 pm 
MODEL 120-A2
User avatar

Service Number: A04/TQ0.0.72178E5
Country: United States
Almost done with the weapons case. A few more details to go, but its coming along nicely.

Image

I've added a bunch of stickers, a holder for my DB pulse rifle manual, and LIGHTS!

The lights are set of extremely thin, self adhesive LEDs I got from Lowes. They are stringable (up to 4). I used two 18" runs on the sides, and 12" run at the top. They fit inside the lips of the interior of the cabinet.

Image

They plug into the wall via a 6' extension cord. It's currently run through the bottom of the cabinet to hide all the wiring. I have additional options if I need to change it when the cabinet is finally completed.

Closeup of the "storage instructions"

Image

The right inside seemed pretty boring, so I printed out a bunch of logos and just stuck em on.

Image

To give you an idea of how it looks with the lights in the room off:

Image

Still a bit more to add; I want a USS ALBATROSS sticker for it, but I am redoing the artwork. (the original artwork I did is a little too much "me", and not enough "Colonial Marines"). I also want to rig up some kind of clear door for front. I have ideas but I'm not sure what I will end up going with right now.

Charlie

_________________
"There is a clause in the contract which specifically states any systematized transmission indicating a possible intelligent origin must be investigated. On penalty of total forfeiture of shares. No money."


Image


Top
 Profile  
Reply with quote  
 Post subject:
PostPosted: Sun May 18, 2014 1:35 pm 
Prop Churner Outer
User avatar

Location: Bath, Maine
Service Number: A03/TQ1.0.12143G1
Country: United States
Awesome signage and I love seeing the DB manual in there, it really sells it!

_________________
:delta: My entry-level prop and costume tutorials: viewtopic.php?f=3&t=12751 :delta:


Top
 Profile  
Reply with quote  
 Post subject: Re: Charlie's CM Build (Pic Heavy and Extremely Long-Winded)
PostPosted: Sun May 18, 2014 1:59 pm 
User avatar

Location: UK all the way
Country: United Kingdom
Oh man I'm really liking that storage box, loving the illumination and labels. Very cool indeed.


Top
 Profile  
Reply with quote  
 Post subject: Re: Charlie's CM Build (Pic Heavy and Extremely Long-Winded)
PostPosted: Sun May 18, 2014 4:08 pm 
USCM Ambassador
User avatar

Location: Northern California
Service Number: AO2/TQ1.0.1233E1
Country: United States
WOW!! You have done some Stunningly Awesome work Marine!!! Fantastic Job!!! :delta: :delta: :delta: :delta: :delta: :delta: :delta: :delta: :delta: :delta: :delta: :delta: :delta: :delta: :delta:

_________________
Image Image

USCM- The Colonial Marines- A Brotherhood of Bad Asses!


Top
 Profile  
Reply with quote  
Display posts from previous:  Sort by  
Post new topic Reply to topic  [ 340 posts ]  Go to page Previous  1 ... 9, 10, 11, 12, 13, 14  Next


You cannot post new topics in this forum
You cannot reply to topics in this forum
You cannot edit your posts in this forum
You cannot delete your posts in this forum
You cannot post attachments in this forum

Search for:
Jump to: