The discussion of the Alien series of films and the props used in them is the aim, but if it's got Big Bugs and Big Guns, then they are welcome too!


Post new topic Reply to topic  [ 76 posts ]  Go to page 1, 2, 3, 4  Next
Author Message
 Post subject: MAGNUS's U.A.C.M. build...and so it begins!
PostPosted: Sun Mar 03, 2013 2:34 am 
It's started. Bought some used, older Spat armour from Scott (Falken108). Came with breast and back plates, shoulders, neck piece, ab pad, and both legs. He also gave me one of his Gerber MK II casts...very well done. Thanks Scott! I'll be making my own leather sheath for it, as per the movie. The armour will be getting sanded, and re-painted to more of an SA look. I'll do my best to match up the paints. It also needs a bit of TLC...I'm going to mod the shoulders with the elastic strapping (it's an old set that doesn't have it), and needs a few other repairs.

So far I have some multi-cam BDU's...modern style. I'm not going to change them much since I'll probably end up getting the Polish dessie cam, if not some SA BDU's from Spat or Aaron (I think it's Aaron). I also have panama soled jungle boots, and that one CDN '82 pattern C9 pouch to use.

On order, I have a khaki coloured M1937 belt, as well as an LC-2 pistol belt. From SPAT, I have on order a Spulse MK III, a set of 4 M41a grenades, some back brackets for the armour, and some OD grenade straps I'll swap out for the current black ones. I've also ordered the name tape and UACM tape in the USCM font, and Dom is going to be doing another run of UACM patches which I'm in for. Oh and I ordered a PFC rank (green on gold).

Eventually I'll buy a helmet, possibly a motion tracker, definately a welder, and either a VP-70 or an airsoft Remmington 870 to mod into a sawed off.

So yeah...here are some pics of what I have so far. PLEASE comment...I could use all of your advice being new, and have been very appreciative of it so far.

Thanks!!!

See below for my armour pics and pulse rifle. Here are a few other threads covering some bits and pieces I've made.
Making Grenades using pvc pipe: http://forum.alienslegacy.com/viewtopic.php?f=3&t=12895


Temporarily using a stool and a 5 gallon water bucket for an armour stand lol
Image

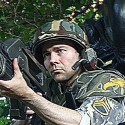
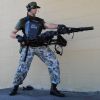
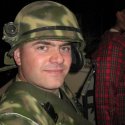
Trying so hard to look badass! (The airsoft M-16 is going to be my guinea pig for painting the Spulse, and the helmet was my uncle's from Viet Nam).
Image

At this point I realized trying to look badass was pointless...so I tried smiling.
Image

Then, like my 1812 kit which requires you to wear a neck stock, I noticed my f**k'n double chin! I HATE IT! So I started to goof around...and have a chat with my 1812 uniform/kit stand.
Image

And one last smile for the camera...
Image


Last edited by Magnus on Fri Apr 19, 2013 2:56 am, edited 1 time in total.

Top
  
Reply with quote  
 Post subject: Re: MAGNUS's U.A.C.M. build...and so it begins!
PostPosted: Sun Mar 03, 2013 3:06 am 
Duke Bronson
User avatar

Country: Canada
Totally weird to see Scott's armour in someone else's house... but, there you have it.


Top
 Profile  
Reply with quote  
 Post subject:
PostPosted: Sun Mar 03, 2013 4:19 am 
It'll be easier once it's painted. :)


Top
  
Reply with quote  
 Post subject: Re: MAGNUS's U.A.C.M. build...and so it begins!
PostPosted: Sun Mar 03, 2013 4:20 am 
Lifer
User avatar

Location: **Hamilton** Active Duty: USS Socorro
Country: Canada
Magnus wrote:
Image


At first glance I actually didn't realize you were wearing a Nam helmet- I thought it was an USCM M10! :lol: :delta:

Off to a great start!


Kevin

_________________
I told you I'd shoot, but you didn't believe me! WHY DIDN'T YOU BELIEVE ME!?!


Top
 Profile  
Reply with quote  
 Post subject:
PostPosted: Sun Mar 03, 2013 4:21 am 
Prop Churner Outer
User avatar

Location: Bath, Maine
Service Number: A03/TQ1.0.12143G1
Country: United States
So I keep forgetting to look at your Aliens stuff in the photos 'cause I'm so distracted by all the other cool things you've got. Damn dude!

_________________
:delta: My entry-level prop and costume tutorials: viewtopic.php?f=3&t=12751 :delta:


Top
 Profile  
Reply with quote  
 Post subject:
PostPosted: Sun Mar 03, 2013 4:21 am 
Call down the Thunder
User avatar

Location: Baldwin, MD
Service Number: A05/TQ0.0.12149E1
Country: United States
Looking good bro!

_________________
Jeffrey Hughes "Huggies"
Corporal, USCM
UD-4 "Cheyenne" Pilot
Dropship Argonne
Image


Top
 Profile  
Reply with quote  
 Post subject:
PostPosted: Sun Mar 03, 2013 4:30 am 
lol...thanks guys.

Yeah Retro...that is what happens when you reenact in 3 different time periods...!

Hey Kevin, I'm not far from you...I'm just in Smithville...!


Top
  
Reply with quote  
 Post subject: Re:
PostPosted: Sun Mar 03, 2013 8:29 am 
Combat Videographer
User avatar

Service Number: A03/TQ0.0.82153E1
Country: United States
retrogarde wrote:
So I keep forgetting to look at your Aliens stuff in the photos 'cause I'm so distracted by all the other cool things you've got. Damn dude!


I agree, got some really awesome things in those pictures of yours, as a sword collector, i can appreciate having steel on the walls!

_________________
Pt. Rob Sabol
USCM, Connecticut Colony
"The Few and the proud, all two of us"
A03/TQ0.0.82153E1


Top
 Profile  
Reply with quote  
 Post subject: Re: MAGNUS's U.A.C.M. build...and so it begins!
PostPosted: Mon Mar 11, 2013 7:46 pm 
I'm working my way through re-painting the armour...I hope to have the bulk of it painted by Tuesday evening or so.

After a light sanding, and a coat of primer, I did two coats of silver.
Image

Image

From there, I used Krylon ultra matte camo (OD) in a spray can. I was surprised at how well this stuff goes on.
Image

Image

Then using the Tamiya paints, I started to paint on the Dessert Yellow by hand. Two coats did it. I used the screen shots of the armour for reference.
Image

Image

Then onto the DK green...
Image

Image

Next will be dark brown, and finally the light grey. Then weathering, then clear coat.

And finally the modifications to the armour (strapping, back brackets etc).


Last edited by Magnus on Fri Mar 15, 2013 3:05 am, edited 1 time in total.

Top
  
Reply with quote  
 Post subject:
PostPosted: Mon Mar 11, 2013 8:31 pm 
Prop Churner Outer
User avatar

Location: Bath, Maine
Service Number: A03/TQ1.0.12143G1
Country: United States
Looking great!

_________________
:delta: My entry-level prop and costume tutorials: viewtopic.php?f=3&t=12751 :delta:


Top
 Profile  
Reply with quote  
 Post subject:
PostPosted: Mon Mar 11, 2013 9:02 pm 
Do you think I made the camo stripes too thick/big? I can always cut into them with the other colours to reduce their size...


Top
  
Reply with quote  
 Post subject: Re:
PostPosted: Mon Mar 11, 2013 9:10 pm 
MODEL 120-A2
User avatar

Service Number: A04/TQ0.0.72178E5
Country: United States
Magnus wrote:
Do you think I made the camo stripes too thick/big? I can always cut into them with the other colours to reduce their size...


It looks fine to me right now. Did you tape off all the webbing and buckles, or just paint over them? If you over painted, how does it look like the webbing is handling the paint?

Charlie

_________________
"There is a clause in the contract which specifically states any systematized transmission indicating a possible intelligent origin must be investigated. On penalty of total forfeiture of shares. No money."


Image


Top
 Profile  
Reply with quote  
 Post subject:
PostPosted: Mon Mar 11, 2013 11:51 pm 
I kind of did both Charlie...on the parts where the webbing was exposed and was painted, it seems to have bonded not too bad. I think since it will be limited in it's movement, it may just stick ok.


Top
  
Reply with quote  
 Post subject:
PostPosted: Tue Mar 12, 2013 12:58 am 
Dirty Bird
User avatar

Location: San Diego CA
Service Number: A07/TQ0.0.82154E1
Country: United States
lookin great. i did the same when i got my armor. but looking damn good.

_________________
SGT Chris Kraemer "BIRD"
S/N: A07/TQ0.0.82154G1 Sgt Kraemer

Image


Top
 Profile  
Reply with quote  
 Post subject:
PostPosted: Tue Mar 12, 2013 1:27 am 
MODEL 120-A2
User avatar

Service Number: A04/TQ0.0.72178E5
Country: United States
I'm guessing you painted the side clips and webbing on the chest and taped everything else?

_________________
"There is a clause in the contract which specifically states any systematized transmission indicating a possible intelligent origin must be investigated. On penalty of total forfeiture of shares. No money."


Image


Top
 Profile  
Reply with quote  
 Post subject:
PostPosted: Tue Mar 12, 2013 2:38 am 
User avatar

Location: long island , NY
Country: United States
Just did the same . Looks great mate !

_________________
Cpl Matthew Rendar. M56 smart gun operator. 2nd bat 7th colonial marines "Rendars Raiders "
Image


Top
 Profile  
Reply with quote  
 Post subject:
PostPosted: Tue Mar 12, 2013 2:58 am 
Yeah...it was hard to get the tape to stick to a small area of strapping, plus the wider webbing straps were bigger than my roll of tape. I think i was just being lazy. But I dont mind tbe idea of varied coloured strapping.

Thanks for the compliments everyone.


Top
  
Reply with quote  
 Post subject: Re: MAGNUS's U.A.C.M. build...and so it begins!
PostPosted: Tue Mar 12, 2013 11:39 pm 
I now have the Dk Brown painted, two coats on all parts. Just started the light grey. The light grey really brings it all together I noticed. Going to experiment with mixing water and black acryllic paint as a wash on the neck piece before I weather it. Then I may try sealing it in satin clear coat, though I am not sure if I'll do the clear coat or not. Probably won't.

Image

Image

Image


Top
  
Reply with quote  
 Post subject:
PostPosted: Wed Mar 13, 2013 12:17 am 
MODEL 120-A2
User avatar

Service Number: A04/TQ0.0.72178E5
Country: United States
The dark brown definitely makes a difference. Can't wait to see the grey. Keep up the good work!

Charlie

_________________
"There is a clause in the contract which specifically states any systematized transmission indicating a possible intelligent origin must be investigated. On penalty of total forfeiture of shares. No money."


Image


Top
 Profile  
Reply with quote  
 Post subject: Re: MAGNUS's U.A.C.M. build...and so it begins!
PostPosted: Thu Mar 14, 2013 3:28 am 
I have almost all of the light grey on...I'll post some pics of that (since I forgot) tommorow. I already started on weathering the pieces.

For a wash, I just went to the dollar store, bought a bottle of craft black acryllic paint, and added water to it. About 1 part paint to 2 parts water. Spread it on with a brush, then wiped the whole thing down with a sponge. Turned out well...muted the bright sand and grey, and darkened the rest of it. I'm happy with it. The leg on the left hasn't been washed yet.

Image

Image


Top
  
Reply with quote  
 Post subject:
PostPosted: Thu Mar 14, 2013 3:48 am 
BANNED USER
User avatar

Location: California, USA
Service Number: BANNED-USER-2024
Country: United States
Don't paint the M16! That would break my heart!

_________________
BANNED USER


Top
 Profile  
Reply with quote  
 Post subject:
PostPosted: Thu Mar 14, 2013 4:11 am 
Lol...i am only painting the "metal" parts silver then Nato black over that....then I will weather it. Needs to look real for my Nam impression. :)

Its just a cheap plastic airsoft rifle.


Top
  
Reply with quote  
 Post subject:
PostPosted: Thu Mar 14, 2013 4:52 am 
Dirty Bird
User avatar

Location: San Diego CA
Service Number: A07/TQ0.0.82154E1
Country: United States
armor is looking great. cant want to see the whole thing done with scratches and all.

_________________
SGT Chris Kraemer "BIRD"
S/N: A07/TQ0.0.82154G1 Sgt Kraemer

Image


Top
 Profile  
Reply with quote  
 Post subject:
PostPosted: Thu Mar 14, 2013 5:09 am 
MODEL 120-A2
User avatar

Service Number: A04/TQ0.0.72178E5
Country: United States
Two tips on weathering that have served me well: get a spray bottle with water. Mist the armor so it has droplets on it. Hit it with a black spray and tan spray paint. Give it a few seconds and then wipe off. It wil give you a spotty, dirty look. Alternately, use a sponge to apply the ink wash. Don't know if its something you would be interested in trying but that's how I weathered the mando.

Charlie

_________________
"There is a clause in the contract which specifically states any systematized transmission indicating a possible intelligent origin must be investigated. On penalty of total forfeiture of shares. No money."


Image


Top
 Profile  
Reply with quote  
 Post subject:
PostPosted: Thu Mar 14, 2013 2:03 pm 
Yeah, I used a sponge with mine Charlie, but with a "wiping" motion. Is that what you did, or did you daub it?


Top
  
Reply with quote  
Display posts from previous:  Sort by  
Post new topic Reply to topic  [ 76 posts ]  Go to page 1, 2, 3, 4  Next


You cannot post new topics in this forum
You cannot reply to topics in this forum
You cannot edit your posts in this forum
You cannot delete your posts in this forum
You cannot post attachments in this forum

Search for:
Jump to: