The discussion of the Alien series of films and the props used in them is the aim, but if it's got Big Bugs and Big Guns, then they are welcome too!


Post new topic Reply to topic  [ 76 posts ]  Go to page Previous  1, 2, 3, 4  Next
Author Message
 Post subject:
PostPosted: Sun Aug 18, 2013 6:37 pm 
This is a cool thread.


Top
  
Reply with quote  
 Post subject:
PostPosted: Sun Aug 18, 2013 8:36 pm 
Perfect Organism
User avatar

Location: Hampshire
Service Number: A96/TQ1.8.34962E2
Country: United Kingdom
Tail pictures as promised.

Battery pushes fully into the tail. The inside of the tail is pretty much gutted to fit the snail-fan inside. The tube carries the air up the back of the inside of the suit, and pumps air into the neck/head. If you look at the second picture, you should be able to see the switch which is quite easy for an Alien hand to switch on/off.

IMG_1632.JPG
IMG_1632.JPG [ 131.19 KiB | Viewed 5271 times ]

IMG_1631.JPG
IMG_1631.JPG [ 157.06 KiB | Viewed 5271 times ]

Top
 Profile  
Reply with quote  
 Post subject:
PostPosted: Sun Aug 18, 2013 8:54 pm 
Pint of AB negative please
User avatar

Location: HOUNSLOW, west london
Service Number: A09/TQ2.0.12136E1
Country: United Kingdom
Just dont sniff the tail whilst glueing

_________________
SSgt Kris "Bloodsucker" Kobus, VAS.
A09/TQ2.0.12136E1


Top
 Profile  
Reply with quote  
 Post subject: Re: Prophets Xeno Build
PostPosted: Mon Aug 19, 2013 9:46 am 
User avatar

Location: South-West UK
Country: United Kingdom
Good idea, i like that. However as im still planning on having a semi-rigid tail i won't have the space in mine to do it. My idea for the tail now is to use plumbing tube instead of metal bar. I'll get some 1" tubing and heat it so i can bend it. The advtantage of using the pastic tubing is that it'll be lighter and it'll also have a lot more flex in it so it'll 'move about'. The plan is to leave a long tang of the plastic tube protruding from the end of the tail. This will again will be heated, bent up and then squashed flat. This will then attach to the back brace. On the front of the chest harness i'll be adding a chest-strap to stop the weight of the tail/back piece from dragging the chest up

That's the plan anyway :)

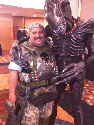
Got a fair bit done yesterday but didn't get many pictures. I've now fitted the neck inside the head. Man that was a BALL ACHE. I glued it inplace only to find the neck was at a bit of an angle and crumpled down the back of the neck. So i had to cut it back off and start again. I also lined it with some black linen cloth which allows you to see through but is very dark so you cannot see through it at all, even with a camera flash. The only thing i need to do now is add some foam on the inside to stop the fabric pressing against my eyes as it's a tad uncomforable.

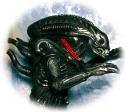
I also sprayed the teeth silver and hand-painted a small area around the mouth black. This is so when i come to mask-off the teeth to spray the head i can simply mask off the entire jaw area. I need to get a smaller brush today to go between the teeth -

Attachment:
DSC_0076.jpg
DSC_0076.jpg [ 70.79 KiB | Viewed 5244 times ]


I also sat down last night and trimmed up the tail. This takes a good few hours as you have to get in between each of the 'vertebrae' to cut away the flashing. And there's lots of them !

Attachment:
DSC_0080.jpg
DSC_0080.jpg [ 99.08 KiB | Viewed 5244 times ]


Top
 Profile  
Reply with quote  
 Post subject: Re: Prophets Xeno Build
PostPosted: Mon Aug 19, 2013 11:29 am 
User avatar

Location: UK all the way
Country: United Kingdom
Looking good.

Thinking about it if your using a PVC tube you could perforate it along it's length and draw fresh air down through it using a small fan at the base mounted on your back support.


Top
 Profile  
Reply with quote  
 Post subject:
PostPosted: Mon Aug 19, 2013 12:11 pm 
User avatar

Location: Sunny Cornwall
Country: United Kingdom
I've got a big reel of Blue Alkathene pipe here.

Feel free to come and whip a length off it.

_________________
You don't have to be pitilessly sadistic to work here.... But it helps.
http://www.chefs-creations.co.uk/shop/index.php/colonial-marine

http://www.kgbairsoft.com/wordpress


Top
 Profile  
Reply with quote  
 Post subject:
PostPosted: Mon Aug 19, 2013 12:28 pm 
User avatar

Location: South-West UK
Country: United Kingdom
What sort of diameter is it ?

The awkward part is this; The tail is obviously foam filled but it's already got a hollow core (yey !). However . . . On the larger section the core is about 1" diameter, but then in the smaller section it goes down to about 3/4". So i either need two sections of differing diameters that i can stick insider one another or somehow cut a section from a single piece to make it fit in the smaller tube (if that all makes sense).

In fact i'll probably pop it over for you to have a look at tomorrow (assuming you're about)


Top
 Profile  
Reply with quote  
 Post subject:
PostPosted: Mon Aug 19, 2013 8:05 pm 
User avatar

Location: Sunny Cornwall
Country: United Kingdom
Yeah, I'm about...

I've got two different diameters as it happens.

I use one length of it as a drain rod that goes underneath the driveway.
It's left over from when I put all the cabling in under path to the house. If you can use it, you can have as much as you need.

_________________
You don't have to be pitilessly sadistic to work here.... But it helps.
http://www.chefs-creations.co.uk/shop/index.php/colonial-marine

http://www.kgbairsoft.com/wordpress


Top
 Profile  
Reply with quote  
 Post subject: Re: Prophets Xeno Build
PostPosted: Tue Aug 20, 2013 8:24 pm 
User avatar

Location: South-West UK
Country: United Kingdom
Couple more bits done

Firstly i've done the feet. These are basically stretched over a pair of jazz boots i bought for a different costume. I've had to cut out the areas where the boot elastic is otherwise i can't get them on (the xeno feet are designed for size 8/9). Once they're painted etc you'll not notice -

Attachment:
2013-08-20 20.14.48.jpg
2013-08-20 20.14.48.jpg [ 160.4 KiB | Viewed 5173 times ]


Attachment:
2013-08-20 20.14.36.jpg
2013-08-20 20.14.36.jpg [ 163.37 KiB | Viewed 5173 times ]


I've also made headway with the tail. A trip to Chef's and a bit of experimenting with polythene piping and metal fuel line. A combination of both gives the tail a nice rigid shape -

Attachment:
2013-08-20 20.13.25.jpg
2013-08-20 20.13.25.jpg [ 222.63 KiB | Viewed 5173 times ]


Attachment:
2013-08-20 20.13.10.jpg
2013-08-20 20.13.10.jpg [ 183.7 KiB | Viewed 5173 times ]


Attachment:
2013-08-20 20.12.39.jpg
2013-08-20 20.12.39.jpg [ 189.32 KiB | Viewed 5173 times ]


Top
 Profile  
Reply with quote  
 Post subject:
PostPosted: Tue Aug 20, 2013 9:25 pm 
User avatar

Location: Cornwall
Country: United Kingdom
looks good . how you going to do the little mouth ?


Top
 Profile  
Reply with quote  
 Post subject:
PostPosted: Tue Aug 20, 2013 9:51 pm 
User avatar

Location: South-West UK
Country: United Kingdom
im not. doesnt come with one. in the future i'll probably get another head with a view to install animatronics.


Top
 Profile  
Reply with quote  
 Post subject:
PostPosted: Wed Aug 21, 2013 3:31 am 
Tail looks good...


Top
  
Reply with quote  
 Post subject: Re: Prophets Xeno Build
PostPosted: Thu Aug 22, 2013 11:37 am 
User avatar

Location: South-West UK
Country: United Kingdom
Got my plastidip paint through so i've done the head, tail and feet today

Attachment:
2013-08-22 10.56.24.jpg
2013-08-22 10.56.24.jpg [ 407.86 KiB | Viewed 5114 times ]


Attachment:
2013-08-22 11.04.52.jpg
2013-08-22 11.04.52.jpg [ 146.96 KiB | Viewed 5114 times ]


Top
 Profile  
Reply with quote  
 Post subject:
PostPosted: Thu Aug 22, 2013 12:22 pm 
Pint of AB negative please
User avatar

Location: HOUNSLOW, west london
Service Number: A09/TQ2.0.12136E1
Country: United Kingdom
Don't forget to add glitter Green and blue to the Varnish

_________________
SSgt Kris "Bloodsucker" Kobus, VAS.
A09/TQ2.0.12136E1


Top
 Profile  
Reply with quote  
 Post subject:
PostPosted: Thu Aug 22, 2013 12:40 pm 
Perfect Organism
User avatar

Location: Hampshire
Service Number: A96/TQ1.8.34962E2
Country: United Kingdom
Alien Selfie! :)


Top
 Profile  
Reply with quote  
 Post subject:
PostPosted: Thu Aug 22, 2013 7:42 pm 
User avatar

Location: long island , NY
Country: United States
Looking awesome!

_________________
Cpl Matthew Rendar. M56 smart gun operator. 2nd bat 7th colonial marines "Rendars Raiders "
Image


Top
 Profile  
Reply with quote  
 Post subject:
PostPosted: Thu Aug 22, 2013 7:56 pm 
So cool! I want to buy just a head and put it on my wall lol


Top
  
Reply with quote  
 Post subject:
PostPosted: Fri Aug 23, 2013 2:32 am 
Shithouse Mouse
User avatar

Location: Puyallup WA. USA
Service Number: A12/TQ1.0.22137E1
Country: United States
Love it.. Keep up the great work

_________________
Image
A12/TQ1.0.22137E1
PVT. Schmaus, Christopher J.
2nd Batt 6th Regt
USS Tahoma


Top
 Profile  
Reply with quote  
 Post subject: Re: Prophets Xeno Build
PostPosted: Tue Aug 27, 2013 11:22 am 
User avatar

Location: South-West UK
Country: United Kingdom
Not a great deal to report from the weekend. I planned to do a fair bit yesterday but instead spent the day nursing a crippling hangover :oops:

I did manage to get the back piece done on Saturday though. I used the 'dowels' method for attaching the horns to the back. You first need to peel the latex back from the edges a bit and trim some of the foam out first. Then cut a slit into the foam and glue a length of wooden dowel in. This gives it strengh and also allow a point to add screws into when you come to fit the harness. The horns were glued in place with contact adhesive then superglue around the edges. It's a surprising amount of work actually.

After it was fitted i then went around with the dremel grinding off the seams (which i should have done first).

Next job after painting will be to pick-up a harness and see how im going to attach the tail & chest section

DSC_0089.jpg
DSC_0089.jpg [ 42.64 KiB | Viewed 5040 times ]

Top
 Profile  
Reply with quote  
 Post subject: Re: Prophets Xeno Build
PostPosted: Tue Aug 27, 2013 11:41 am 
Unfit For Human Consumption
User avatar

Location: The City, London
Service Number: A08/TQ1.0.52150E1
Country: United Kingdom
Looks ace man. Amazed with how quickly it's coming together, it looks like a mammoth task! Keep the updates coming :-)

_________________
Si vis pacem, para bellum
SFC Steve "Fireball" Parsons - A08/TQ1.0.52150E1
69th Regt. 1st Batt. Homers Heroes

Image


Top
 Profile  
Reply with quote  
 Post subject: Re: Prophets Xeno Build
PostPosted: Tue Aug 27, 2013 1:37 pm 
Pint of AB negative please
User avatar

Location: HOUNSLOW, west london
Service Number: A09/TQ2.0.12136E1
Country: United Kingdom
Have you decided on a name or collar colour yet? :D

_________________
SSgt Kris "Bloodsucker" Kobus, VAS.
A09/TQ2.0.12136E1


Top
 Profile  
Reply with quote  
 Post subject:
PostPosted: Tue Aug 27, 2013 3:49 pm 
User avatar

Location: Sunny Cornwall
Country: United Kingdom
I think we should call him "fluffy"

_________________
You don't have to be pitilessly sadistic to work here.... But it helps.
http://www.chefs-creations.co.uk/shop/index.php/colonial-marine

http://www.kgbairsoft.com/wordpress


Top
 Profile  
Reply with quote  
 Post subject:
PostPosted: Tue Aug 27, 2013 5:24 pm 
Pint of AB negative please
User avatar

Location: HOUNSLOW, west london
Service Number: A09/TQ2.0.12136E1
Country: United Kingdom
Fluffy begins with an F has to be and A

_________________
SSgt Kris "Bloodsucker" Kobus, VAS.
A09/TQ2.0.12136E1


Top
 Profile  
Reply with quote  
 Post subject:
PostPosted: Tue Aug 27, 2013 5:32 pm 
Perfect Organism
User avatar

Location: Hampshire
Service Number: A96/TQ1.8.34962E2
Country: United Kingdom
Instead of "Fluffy", how's about "Alopecia"?


Top
 Profile  
Reply with quote  
 Post subject:
PostPosted: Thu Sep 26, 2013 3:54 pm 
User avatar

Location: South-West UK
Country: United Kingdom
Well after a two week holiday in Mexico i'm back and ready to crack on !

Today i attached the chest to the back plate -

Attachment:
DSC_0104.jpg
DSC_0104.jpg [ 444.53 KiB | Viewed 4971 times ]


Then shortened the wooden dowels from the horns to attach a section of 2mm ABS (left over from stormtrooper building). Note i've also use a short section of 40mm pipe and 'split' it over the plastic plate. This then allows me to attach the tang from the tail. I'll put another one at the bottom. This allows the tail to swing side-to-side slightly as you walk. The tail is rigid -

Attachment:
DSC_0107.jpg
DSC_0107.jpg [ 165.5 KiB | Viewed 4971 times ]


This then gives you a secure anchor point to attach the harness (necessary due to the weight of the tail/back piece) -

Attachment:
DSC_0109.jpg
DSC_0109.jpg [ 213.49 KiB | Viewed 4971 times ]


The belt of the harness will be worn around my chest instead of my waist. This means it can't ride up and allow the back to slip down. It also means the belt will be totally hidden under the chest section


Top
 Profile  
Reply with quote  
Display posts from previous:  Sort by  
Post new topic Reply to topic  [ 76 posts ]  Go to page Previous  1, 2, 3, 4  Next


You cannot post new topics in this forum
You cannot reply to topics in this forum
You cannot edit your posts in this forum
You cannot delete your posts in this forum
You cannot post attachments in this forum

Search for:
Jump to: