The discussion of the Alien series of films and the props used in them is the aim, but if it's got Big Bugs and Big Guns, then they are welcome too!


Post new topic Reply to topic  [ 340 posts ]  Go to page Previous  1 ... 5, 6, 7, 8, 9, 10, 11 ... 14  Next
Author Message
 Post subject:
PostPosted: Sat Apr 13, 2013 12:51 am 
Dirty Bird
User avatar

Location: San Diego CA
Service Number: A07/TQ0.0.82154E1
Country: United States
what case did you use as per model number of pelican. and very nice i need to get me one very soon.

_________________
SGT Chris Kraemer "BIRD"
S/N: A07/TQ0.0.82154G1 Sgt Kraemer

Image


Top
 Profile  
Reply with quote  
 Post subject:
PostPosted: Sat Apr 13, 2013 5:55 am 
MODEL 120-A2
User avatar

Service Number: A04/TQ0.0.72178E5
Country: United States
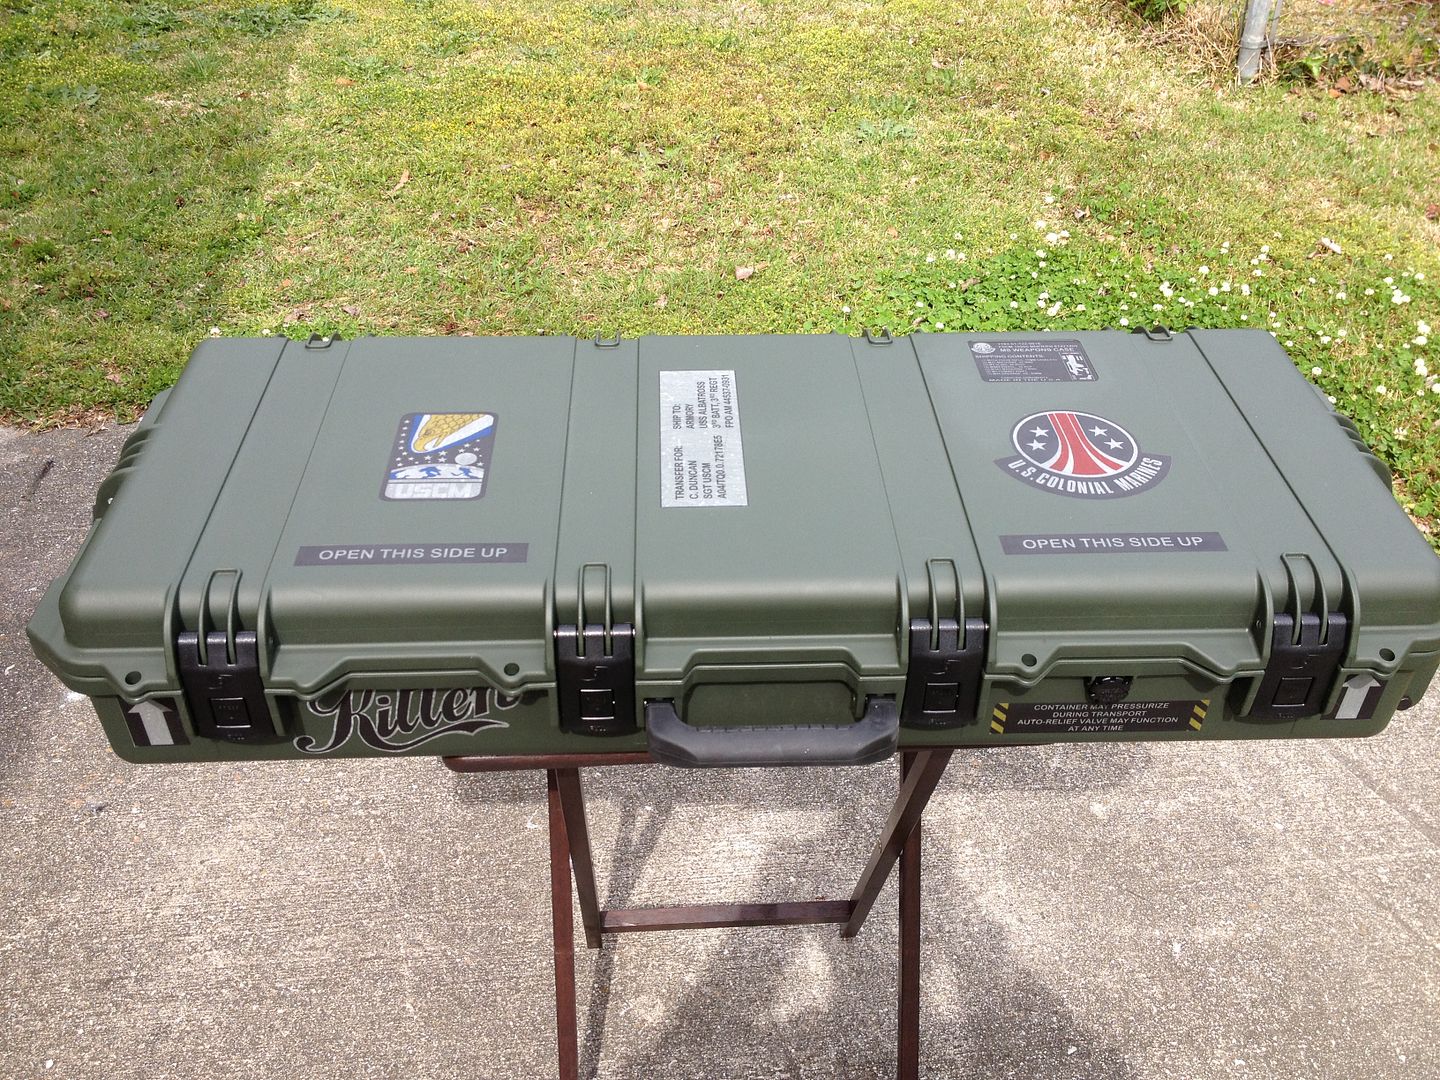
Cosmo it's an im3100 model.

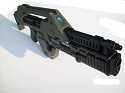
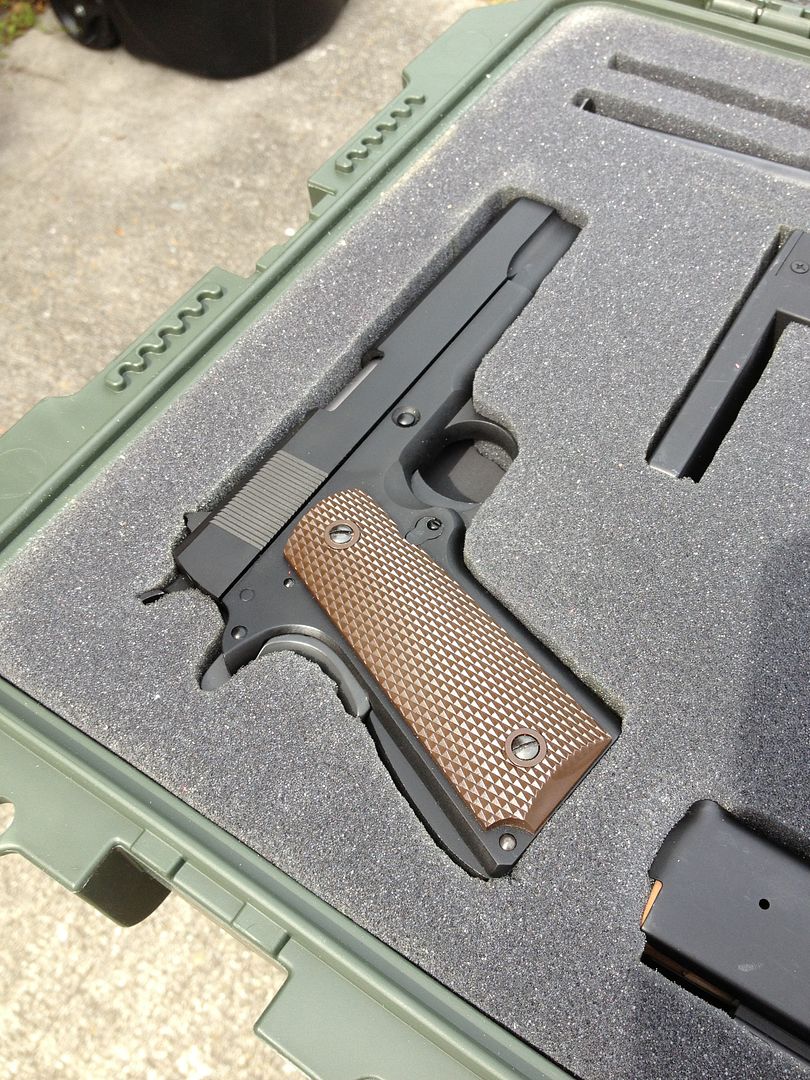
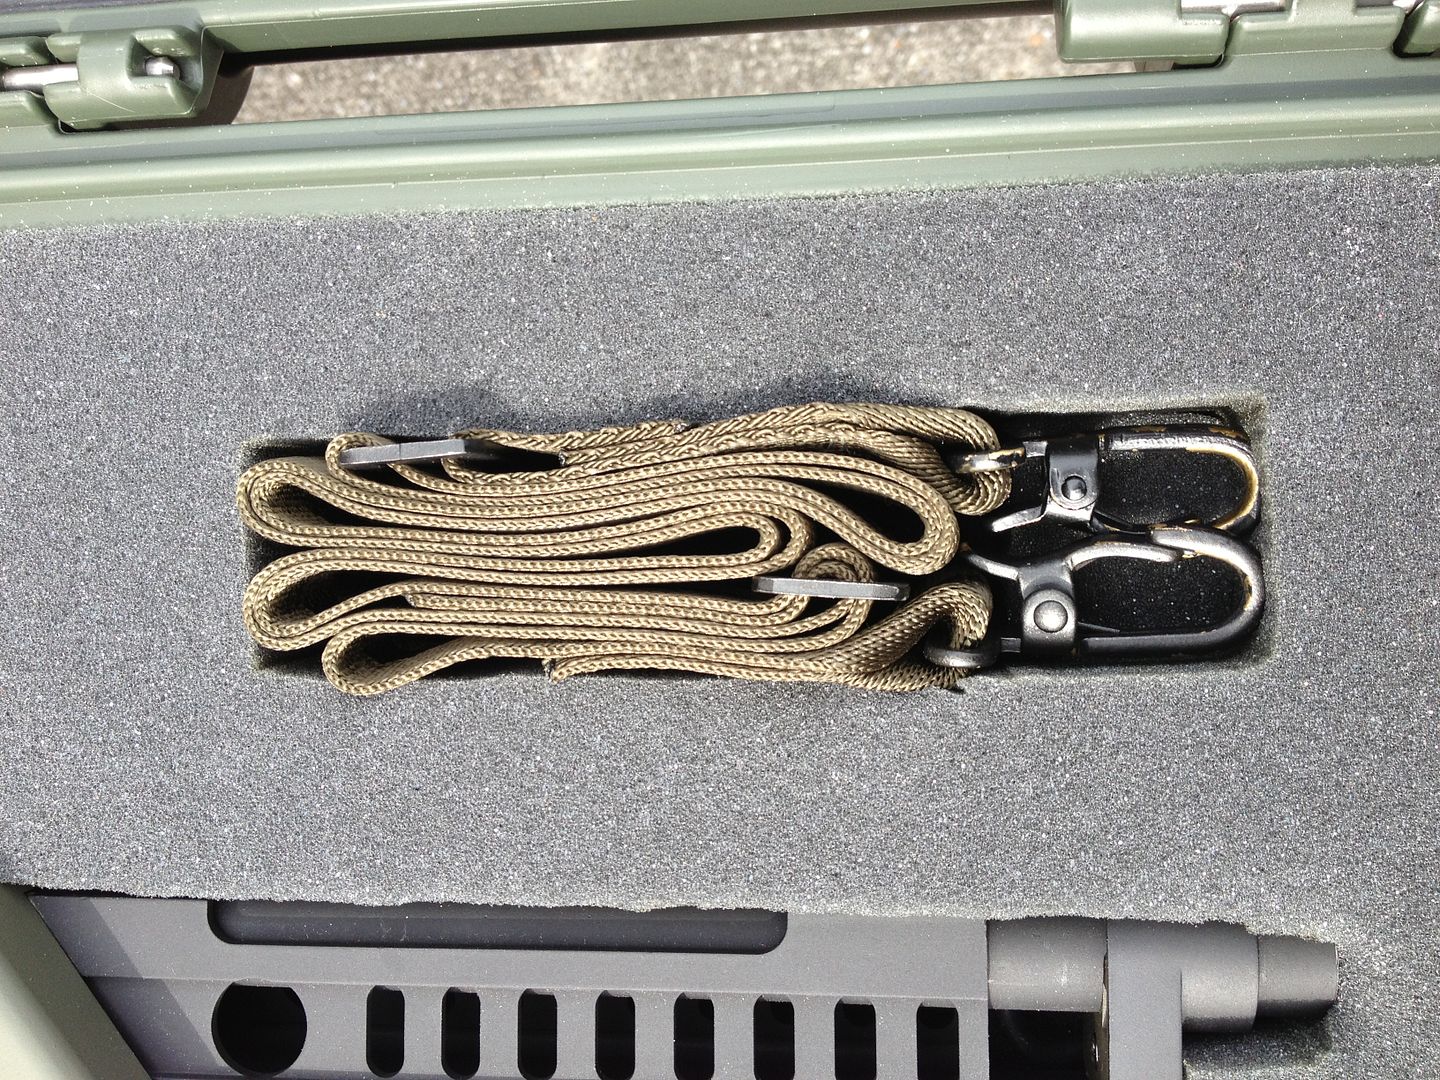
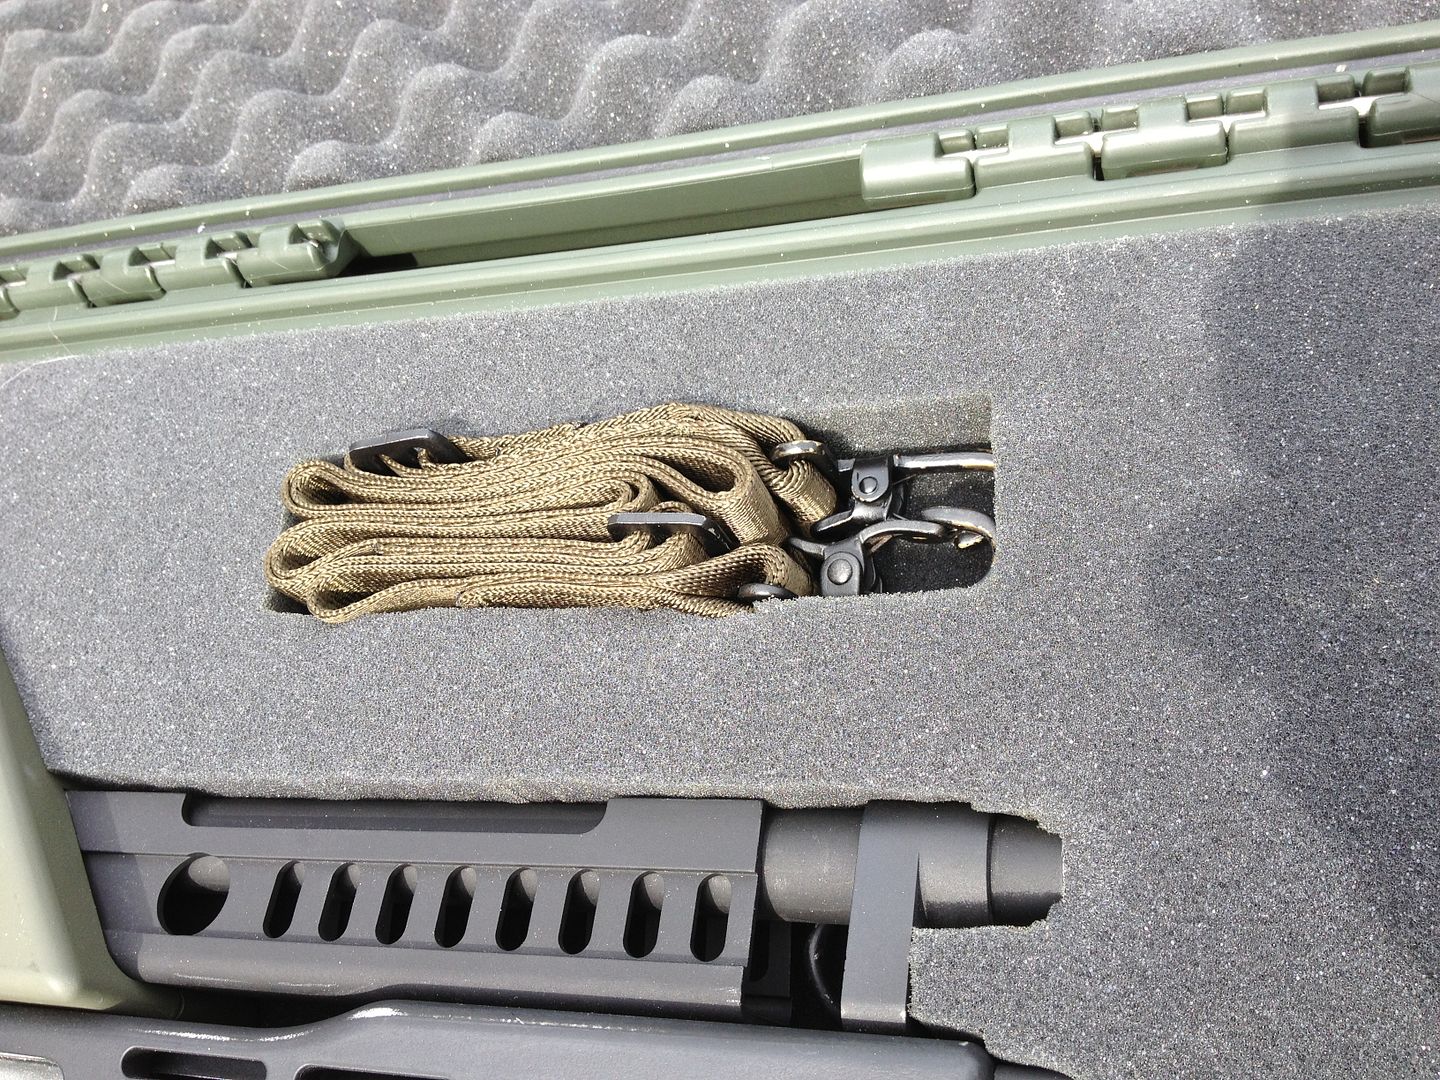
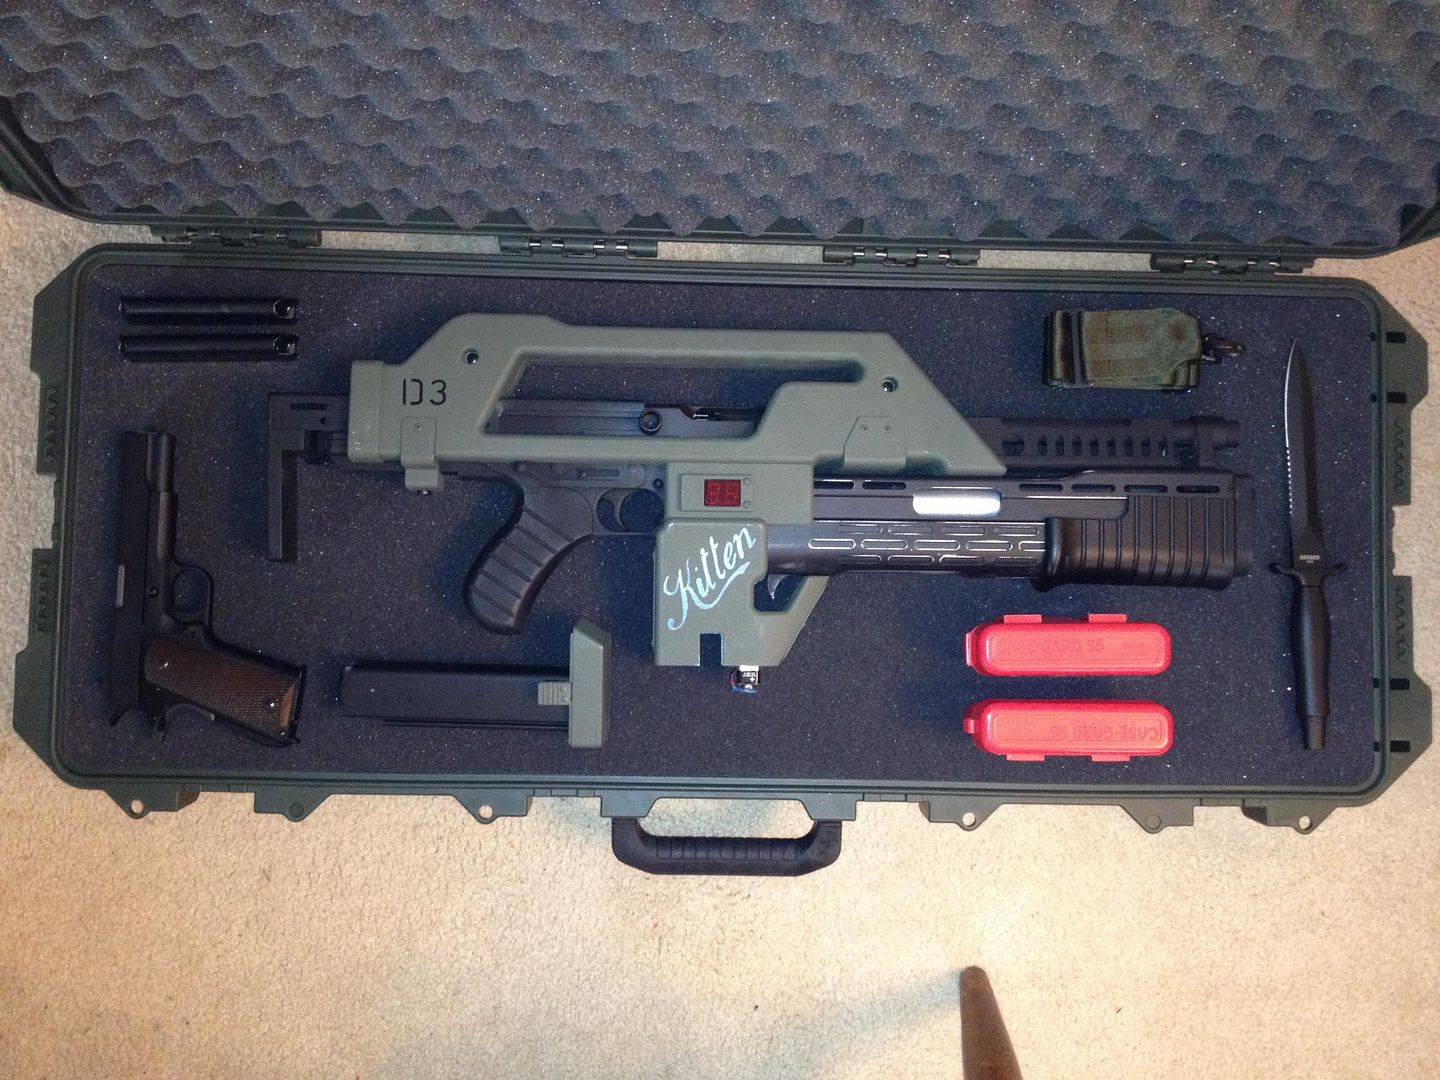
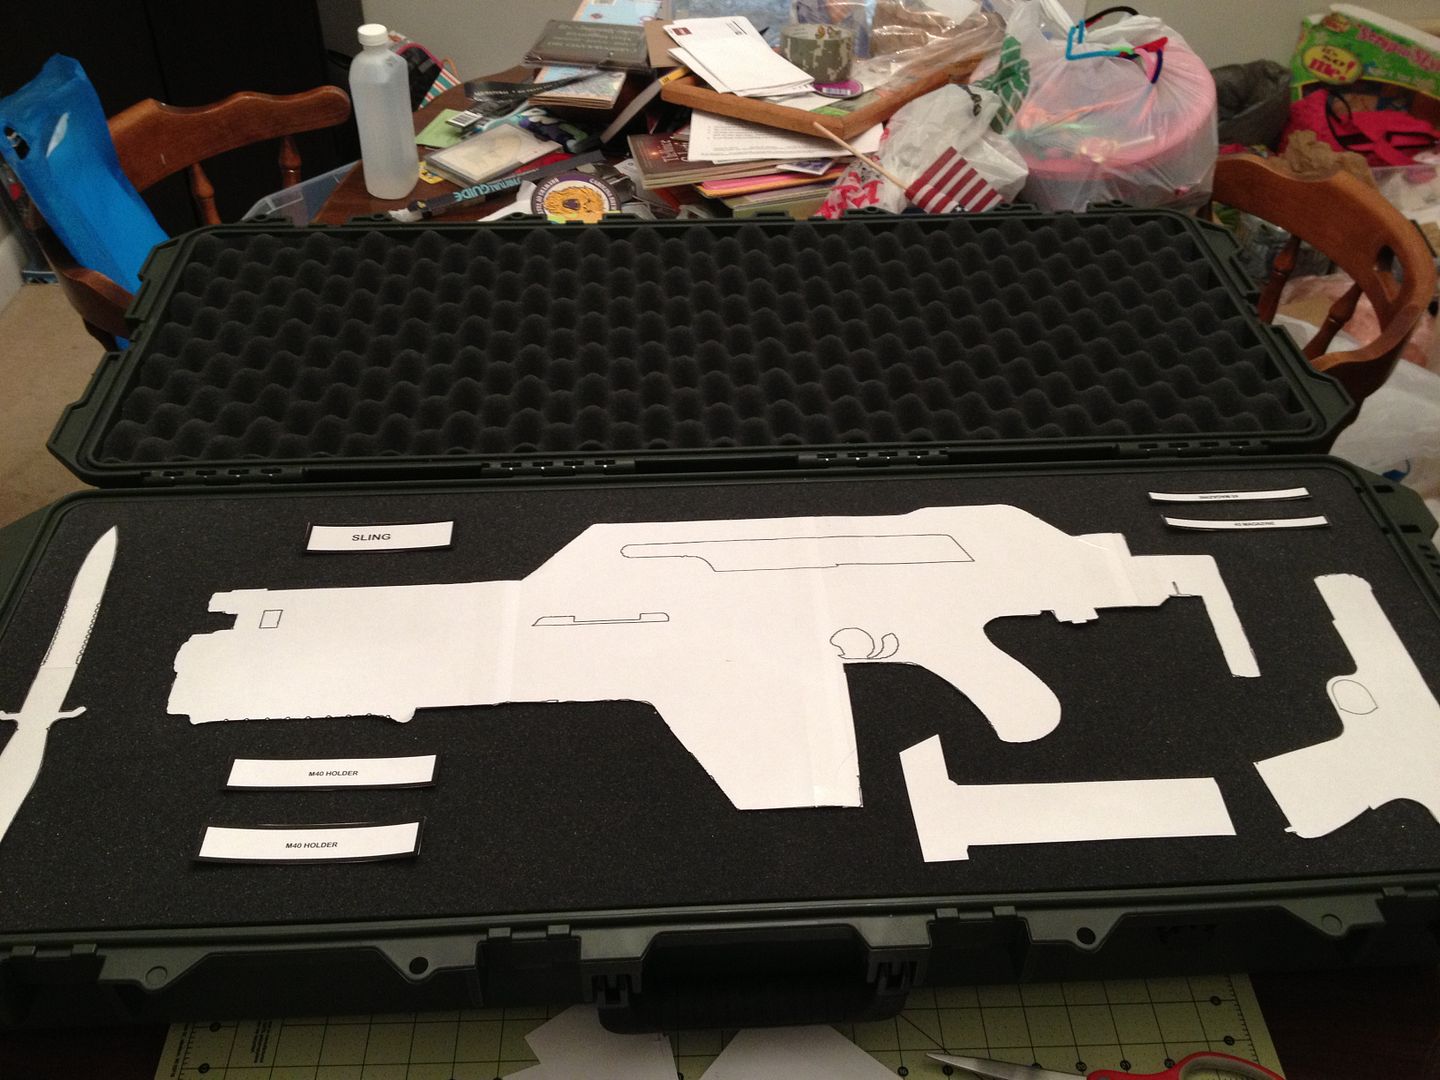
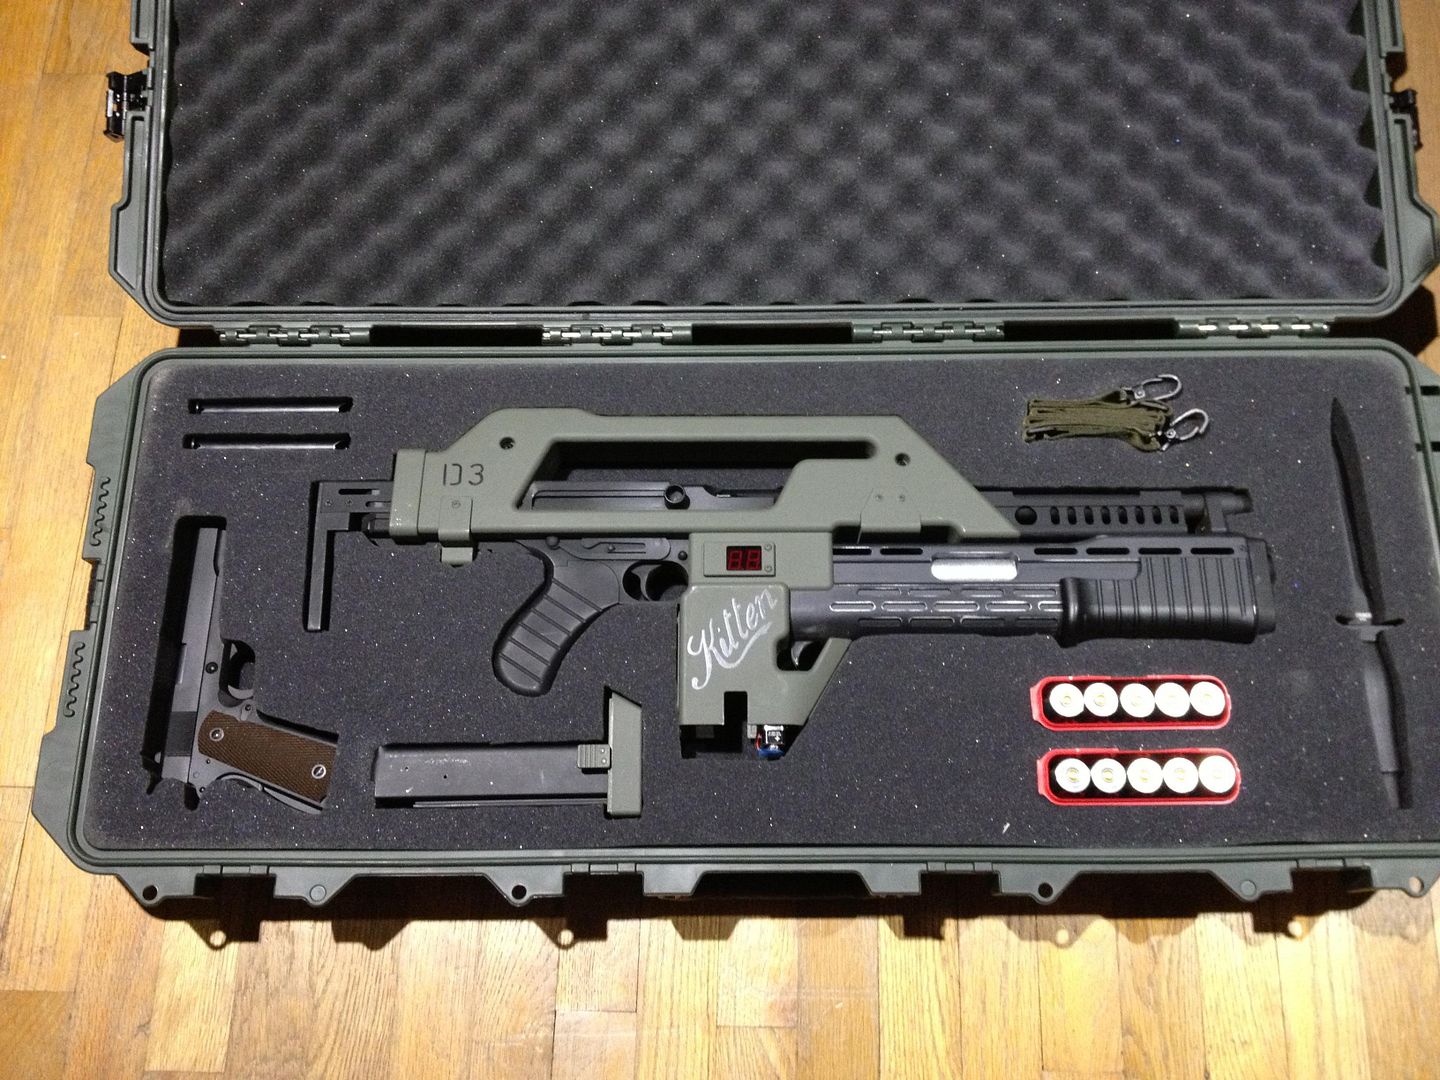
Here was my final test fit of the actual items before I started with the paper.

Image

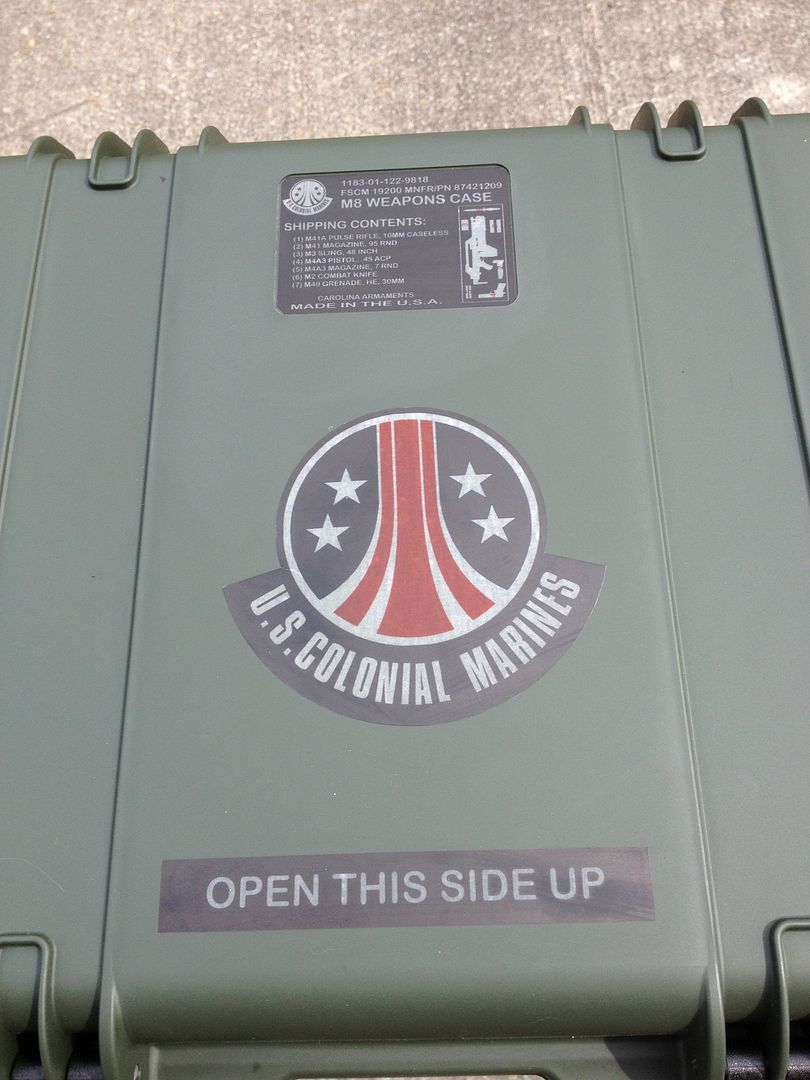
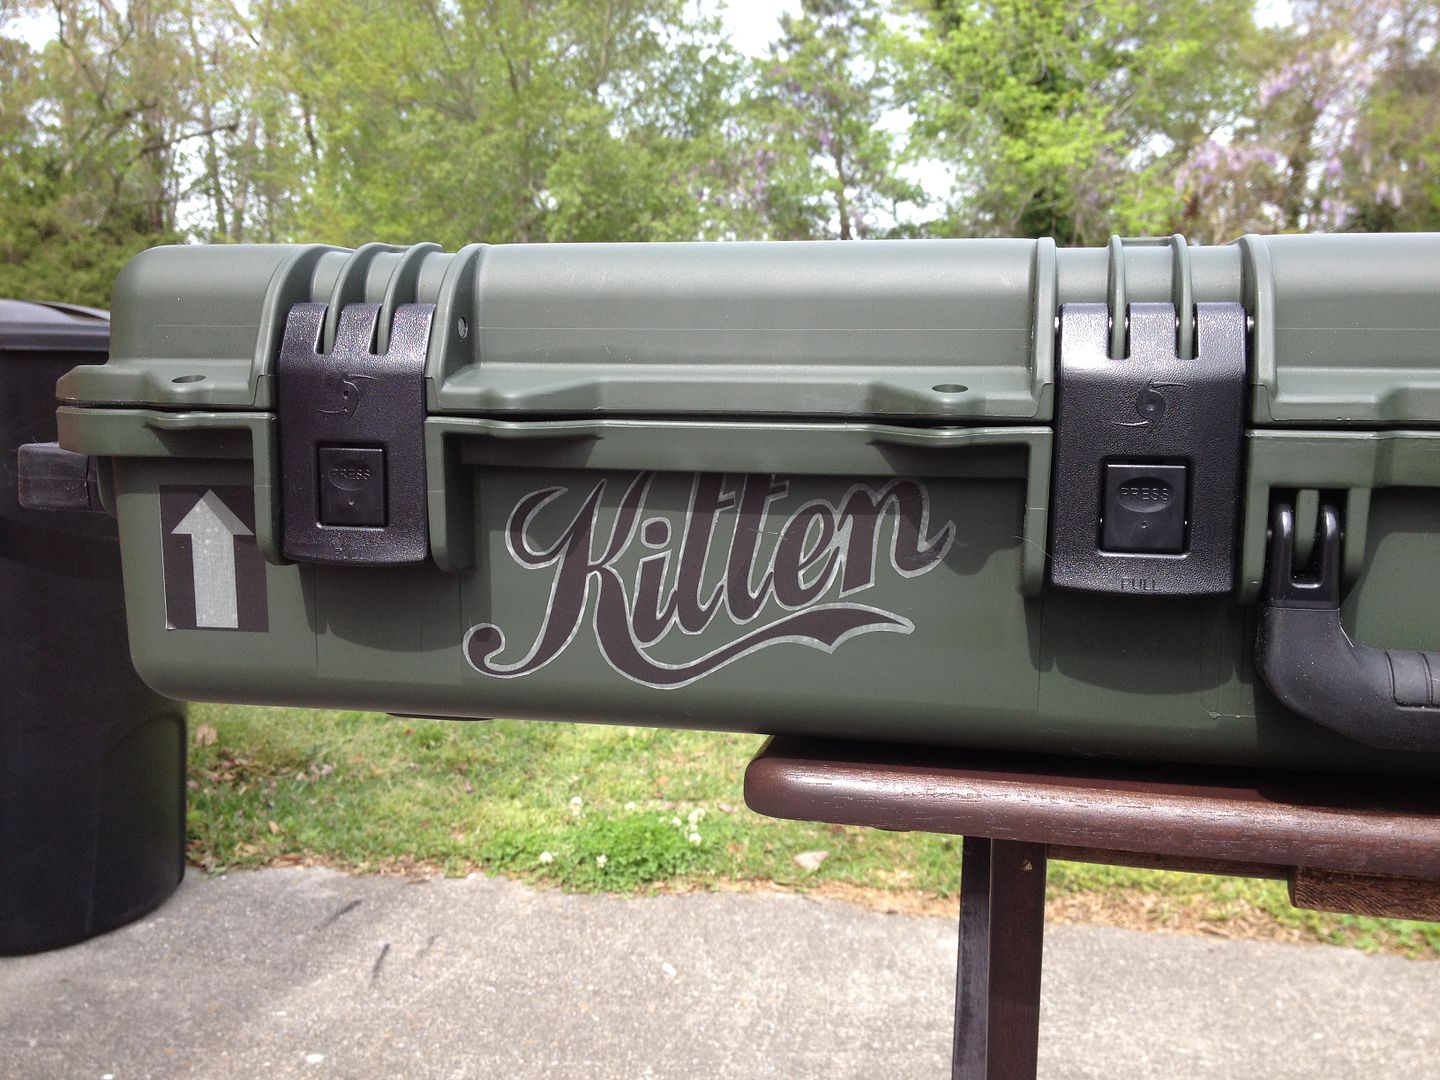
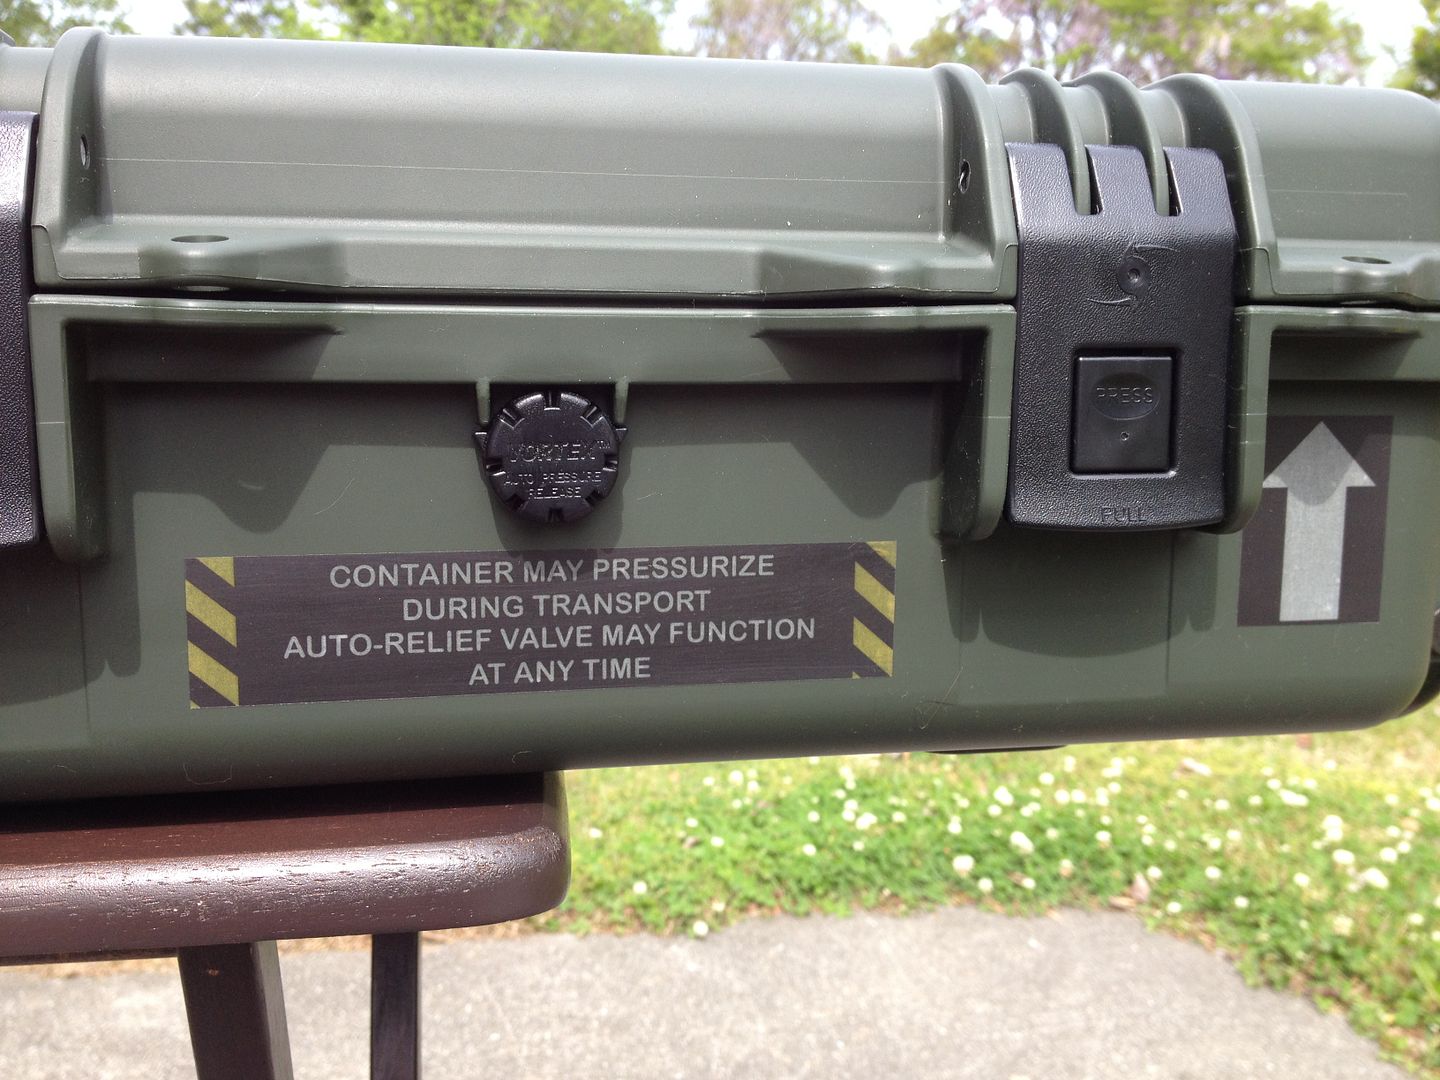
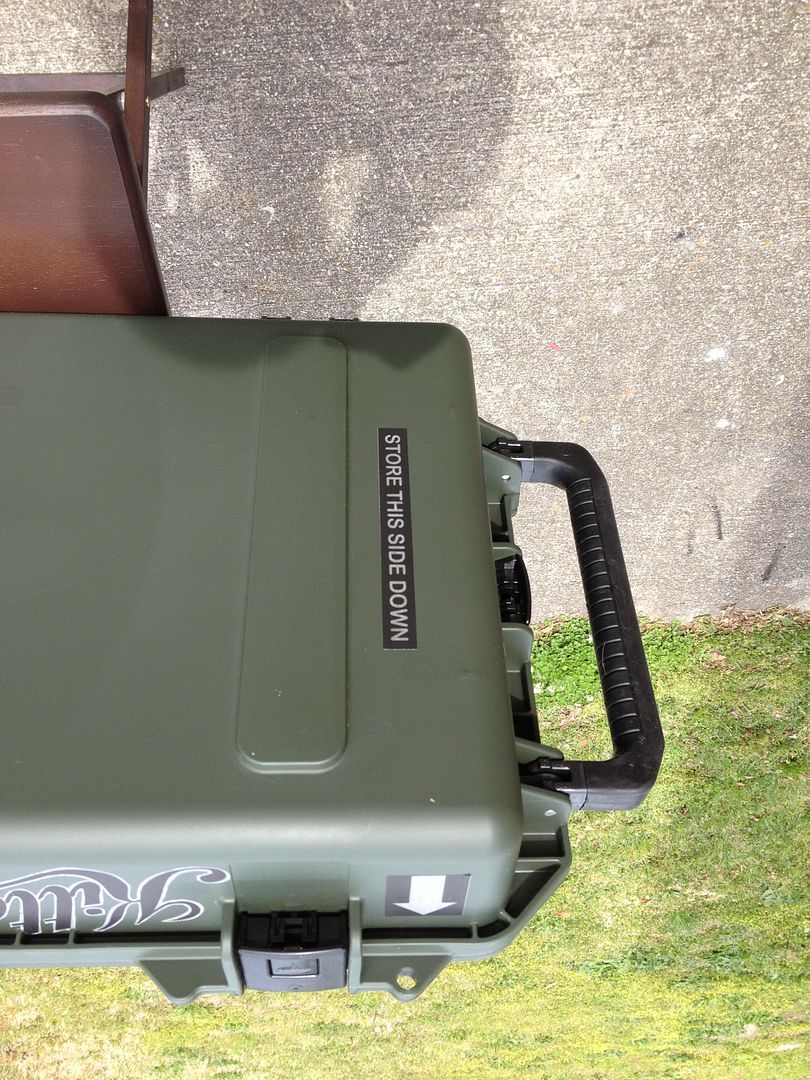
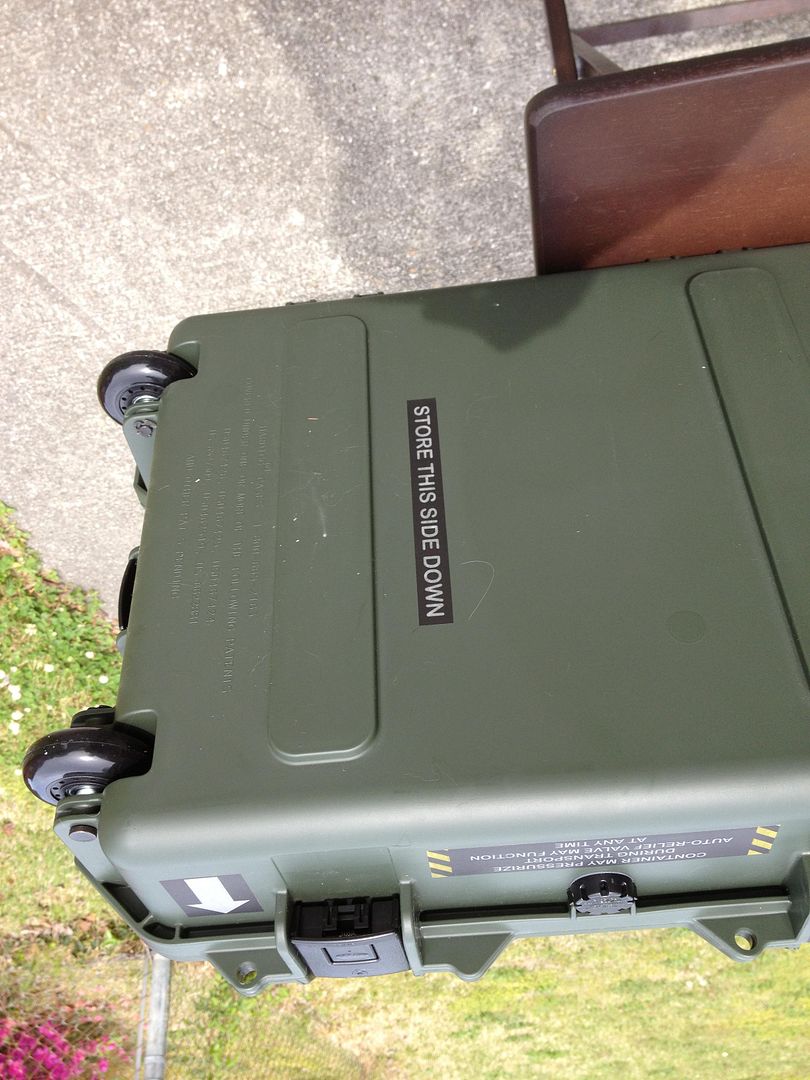
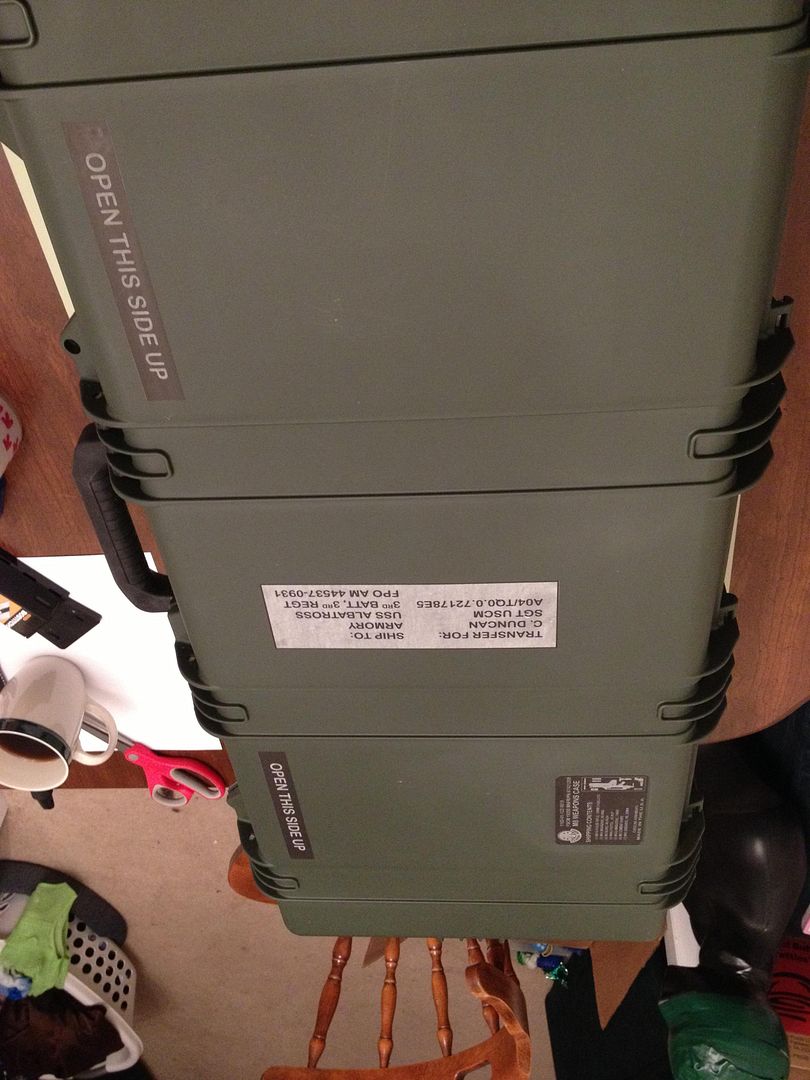
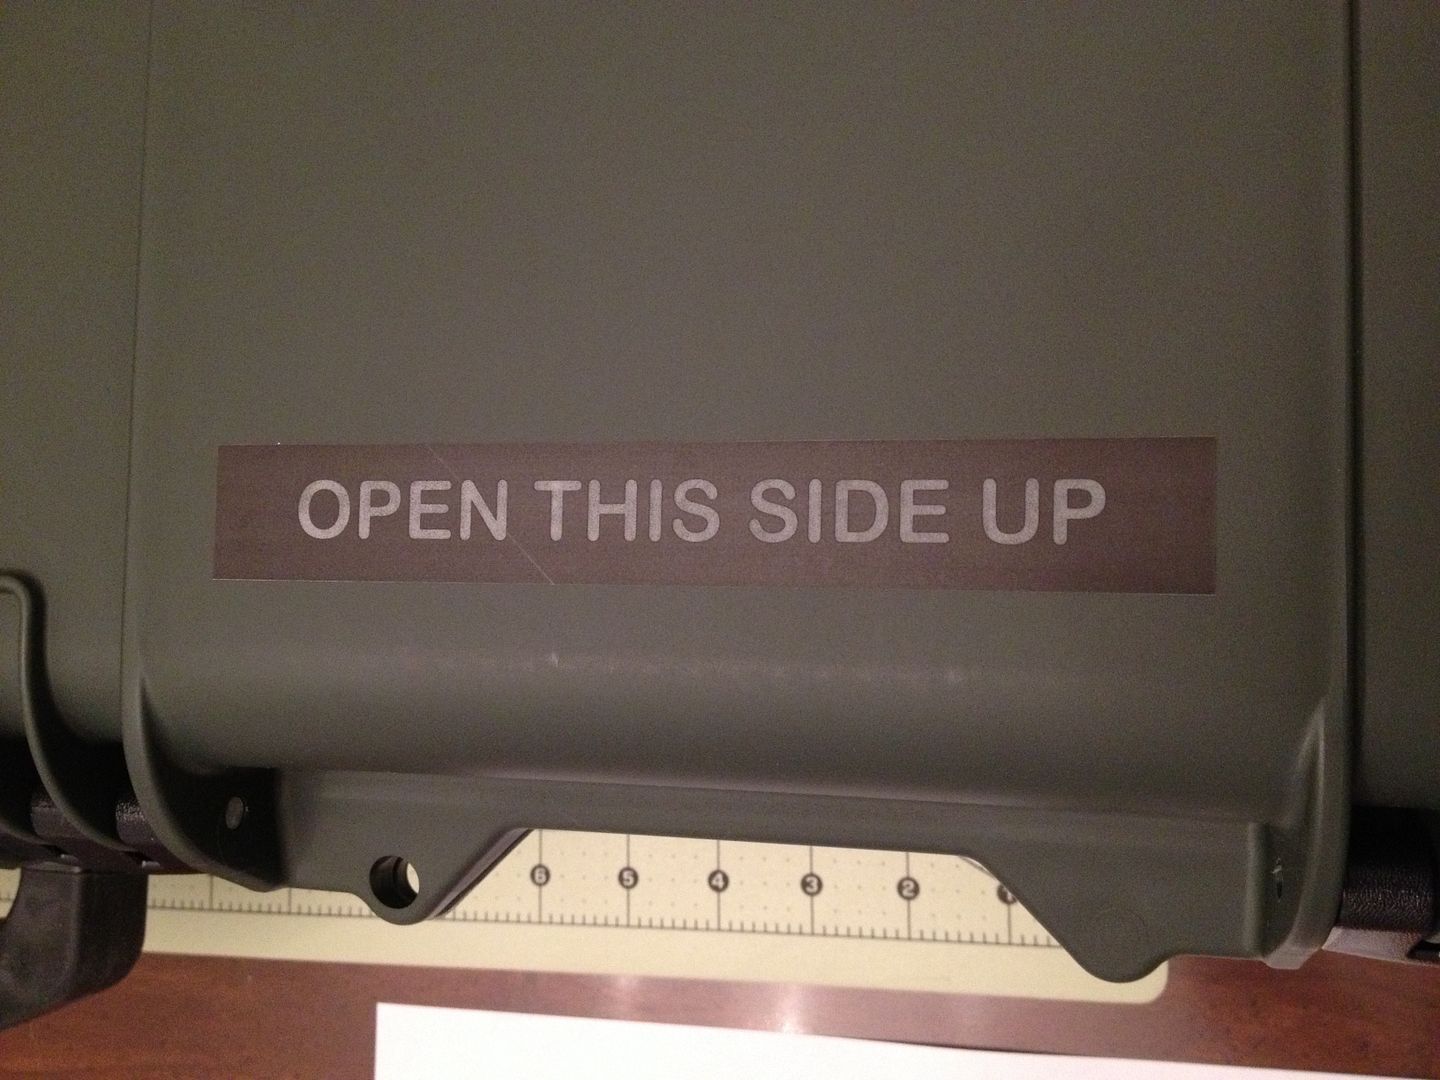
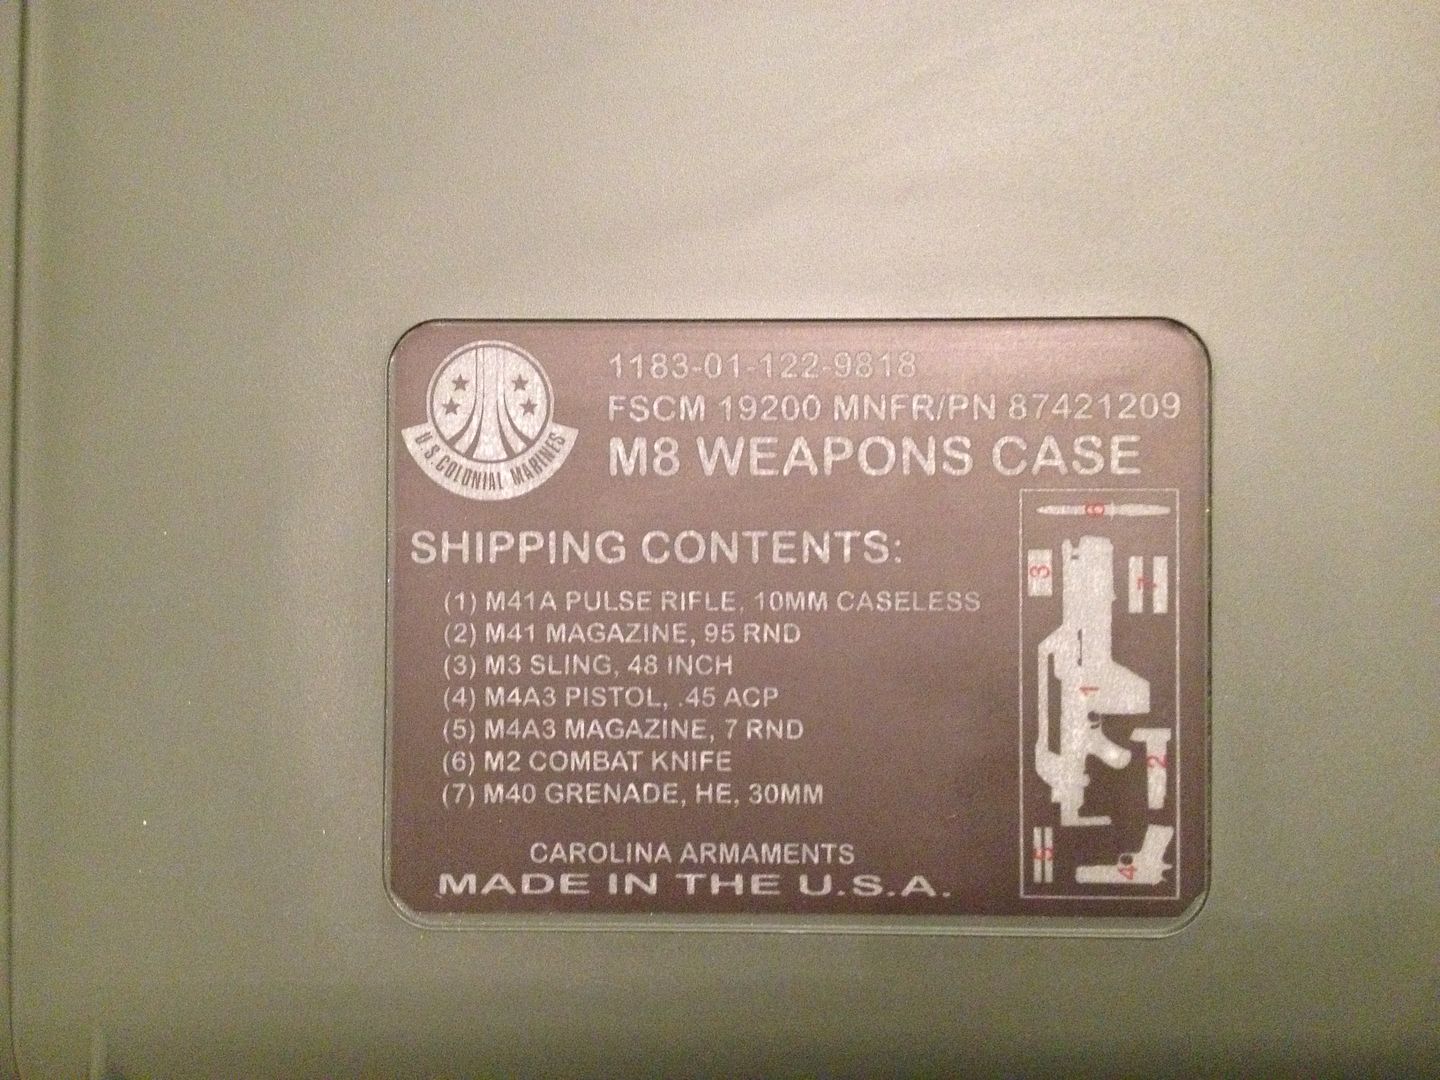
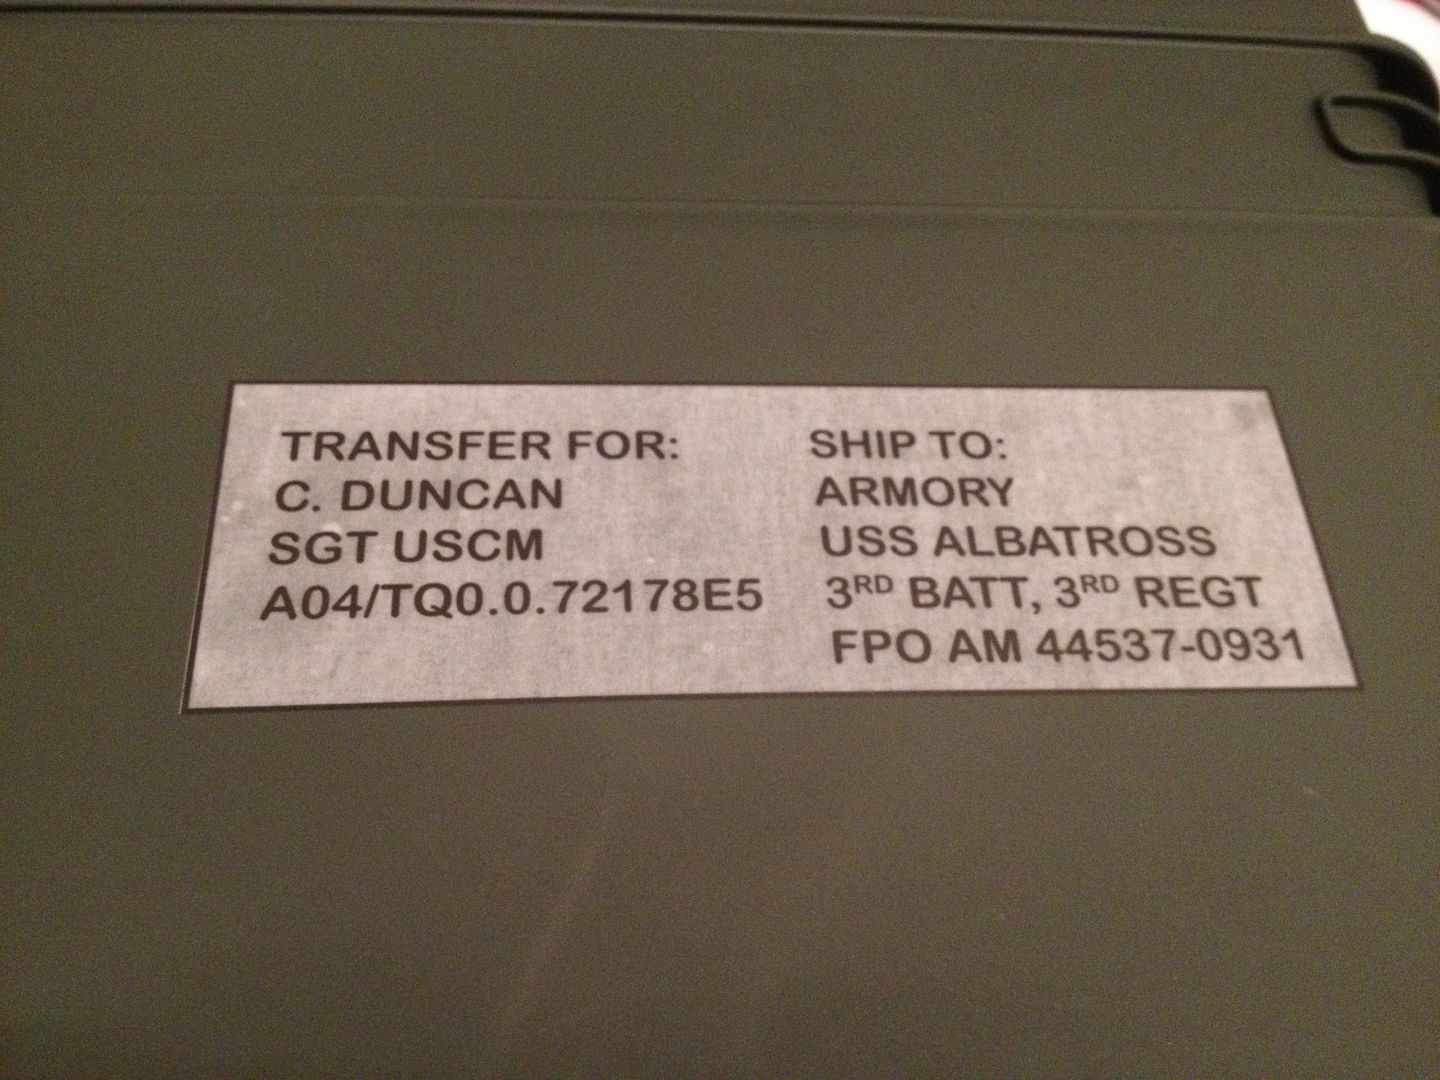
Next, I made a few stickers to put on the case. I originally wanted to use a yellow font, but the the clear isn't really clear, so it was very hard to see. I went back and remade them black and white like I did for the Armat label plates.

Image

Image

Image

Image

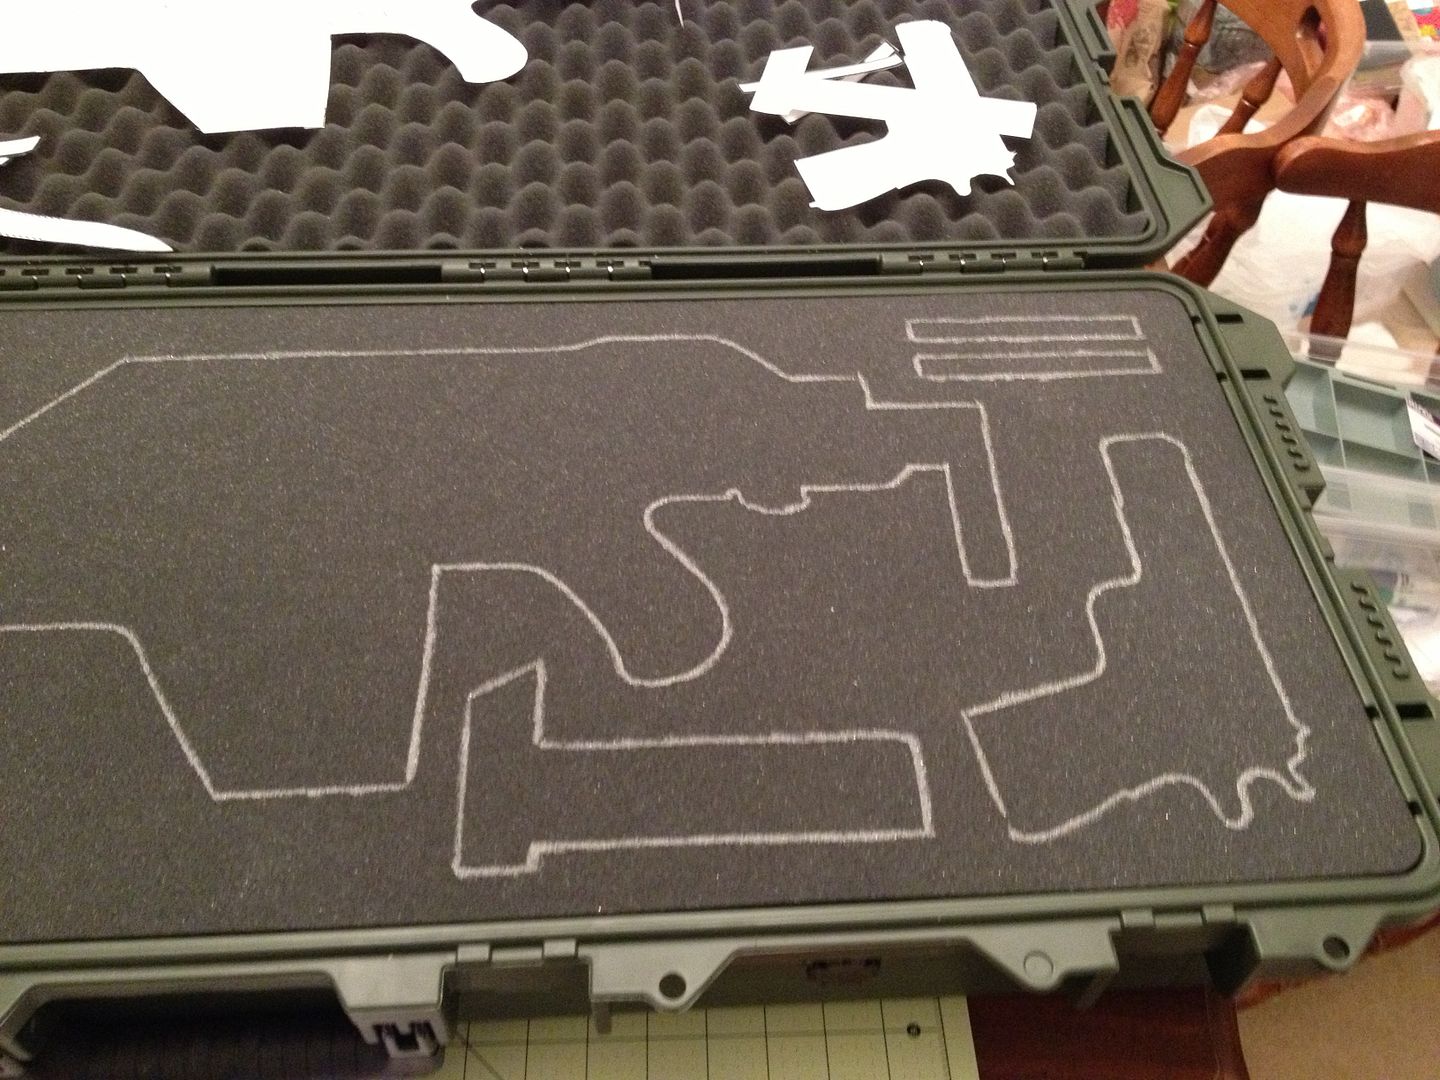
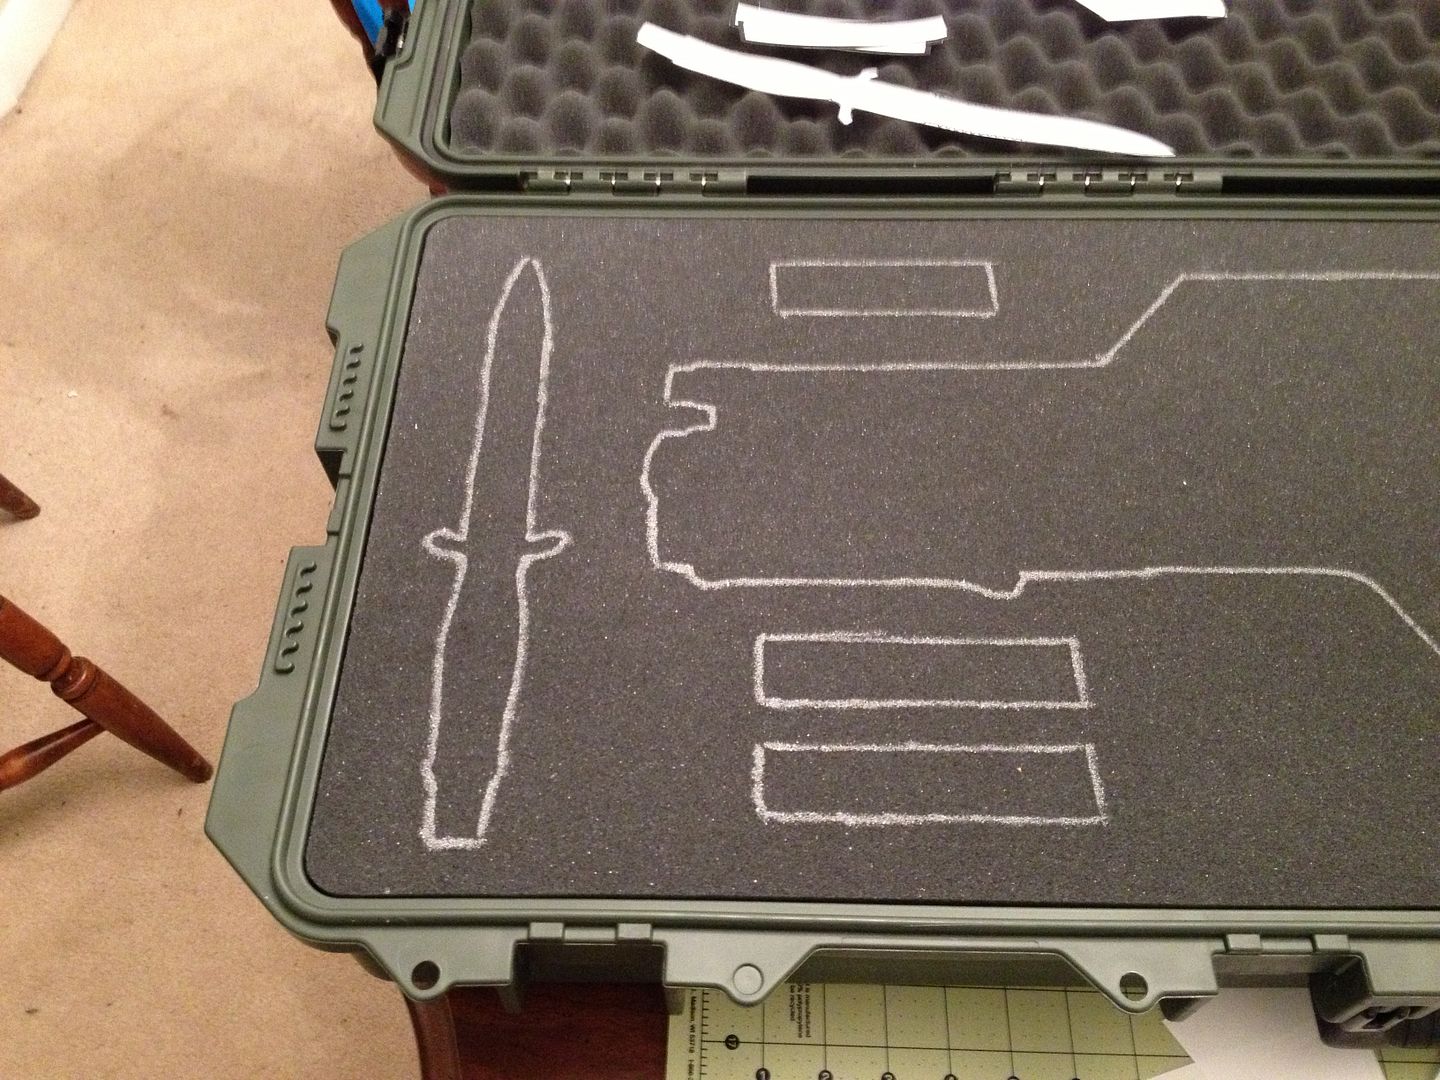
I actually think I did the stickers first just cause I was scared to start cutting the foam. lol. But it had to be done eventually. I opened the case up and put the templates down. Now, you will notice that I put them down backwards. My plan was to outline the templates with a silver sharpie. But, I didn't want to have the sharpie showing (you have to cut a little thinner than your measurements to make the foam hold the items tightly). So, I flipped the foam upside, verified it was the same on top and bottom, and then mirrored what I wanted it to look like. This way, when I cut through the foam, everything would face the direction I want but there would be no silver sharpie visible in the case.

Image

Image

Image

To do the cutouts, I used a Proxxon hot wire cutter like this:

[IMG]http://www.homedepot.com/catalog/productImages/300/1c/1c09e67c-b852-49c2-935a-edb17ac92298_300.jpg[IMG]

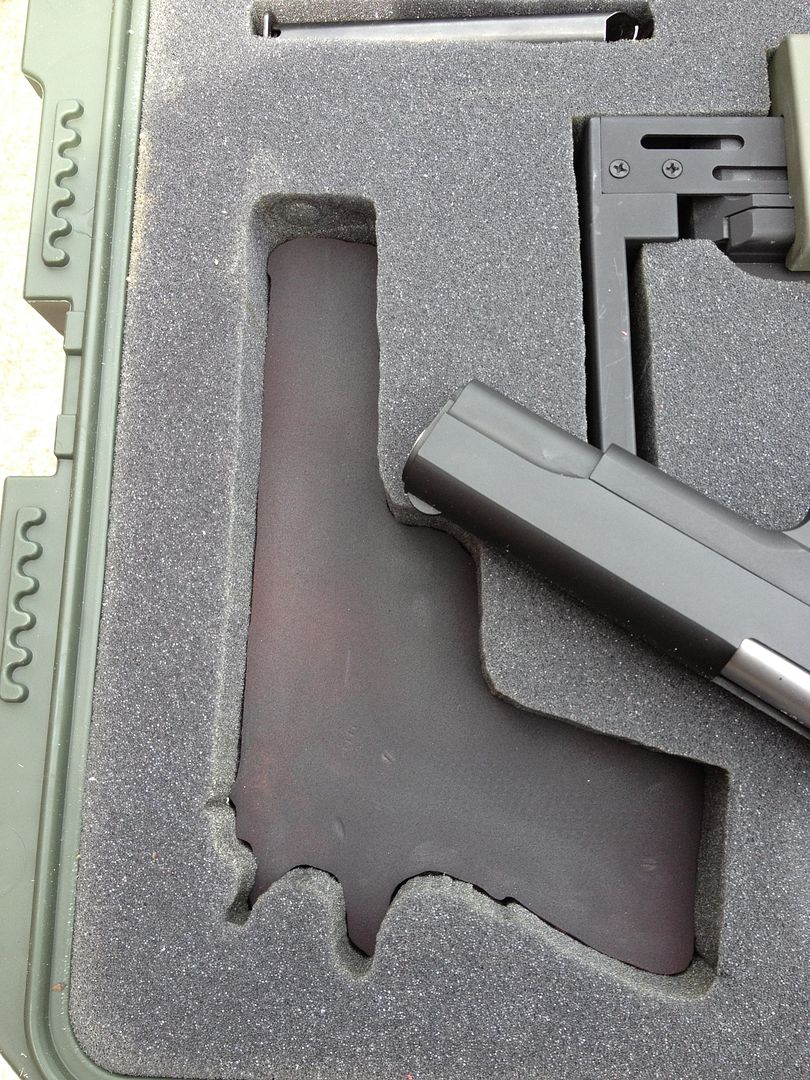
I used a razor knife to cut a small slit in the middle of the cutout, and then I would thread the wire through the slit. Reconnect to power terminal, hot it up, and boom foam cutting time. The only difficulty was that the foam pad was too big to actually use the guides on the table, so everything was freehand. It still came out ok but it doesn't look super sharp up close.

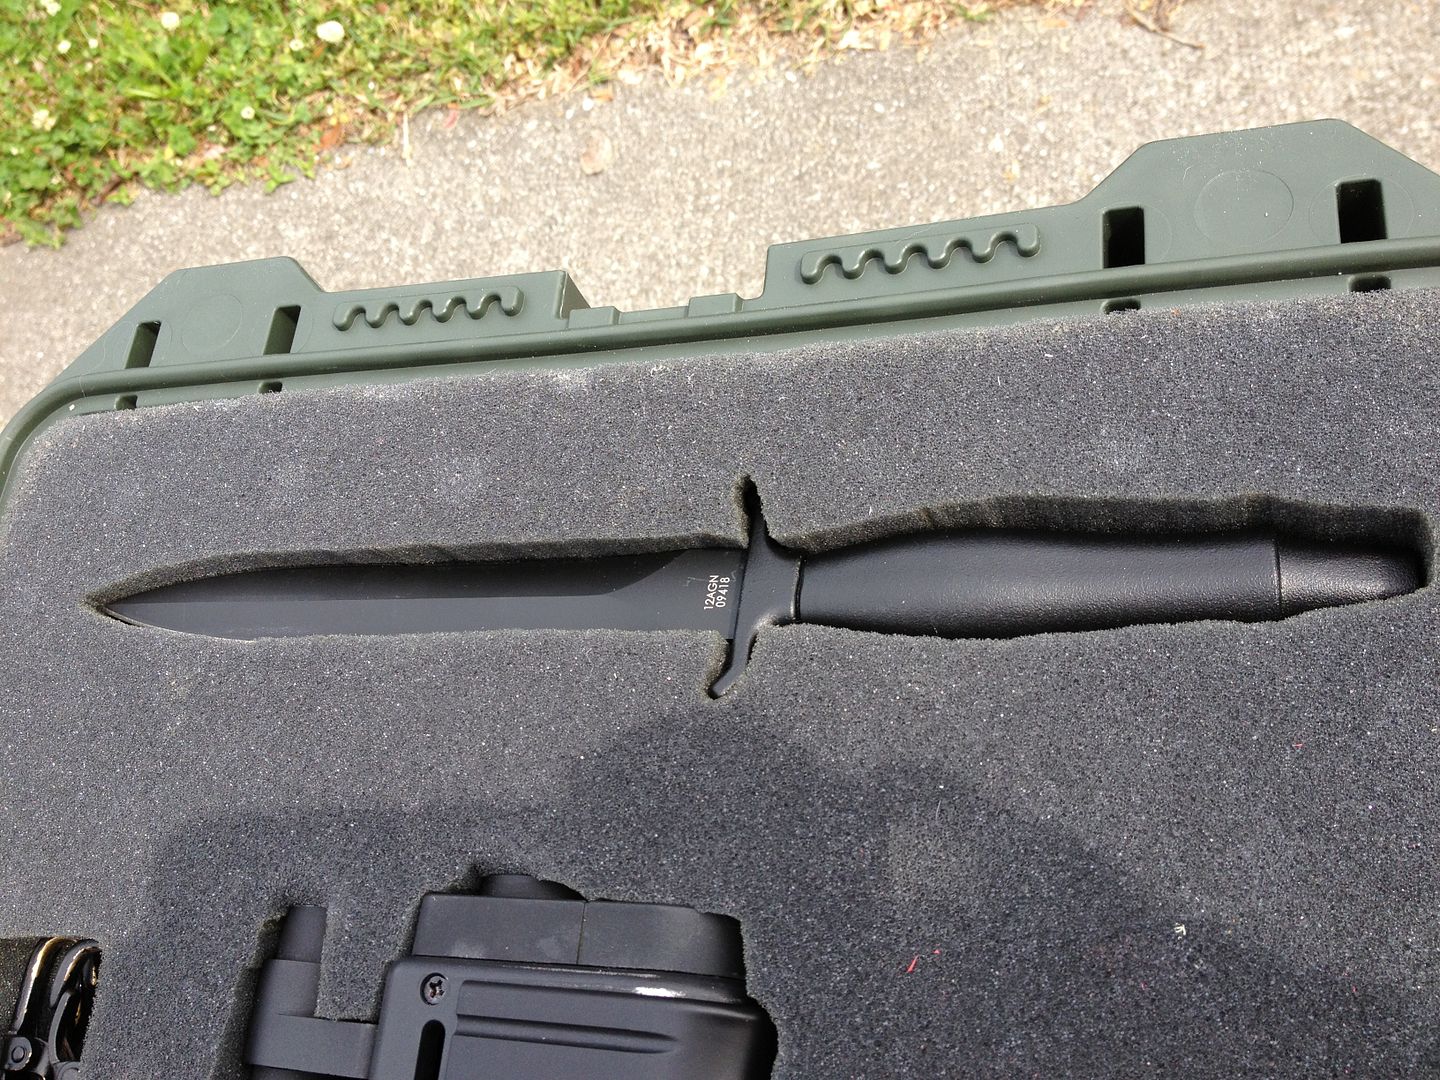
I cut the tops off of the shotgun shell holder and filed the edges a bit. I left them red, just cause it added a bit of colour and hey, it's explosives. I also had to cut some scraps in half and make an additional layer for the Gerber knife. The mid layer foam is 1.5" thick; the Gerber got lost in it.

Image

I've ordered an extra mag base from Evike. It should be here next week. I have another mag, so I will keep the Noble base plate one in the case for display purposes. I will go back to the original design for carrying in the PR unless Noble does another run of the mag inserts, in which case I get will get one.

I had my appointment with the CNC shop today as well. They were willing to do the work for me, so hopefully in about three weeks I'll have a nice shiny pile of machined aluminum grenades. :)

Charlie

_________________
"There is a clause in the contract which specifically states any systematized transmission indicating a possible intelligent origin must be investigated. On penalty of total forfeiture of shares. No money."


Image


Top
 Profile  
Reply with quote  
 Post subject:
PostPosted: Sat Apr 13, 2013 6:36 am 
Dirty Bird
User avatar

Location: San Diego CA
Service Number: A07/TQ0.0.82154E1
Country: United States
very nice and i will have to look at that model case thanks a lot.

_________________
SGT Chris Kraemer "BIRD"
S/N: A07/TQ0.0.82154G1 Sgt Kraemer

Image


Top
 Profile  
Reply with quote  
 Post subject:
PostPosted: Sat Apr 13, 2013 7:30 am 
User avatar

Location: Sunny Cornwall
Country: United Kingdom
Very swish.

_________________
You don't have to be pitilessly sadistic to work here.... But it helps.
http://www.chefs-creations.co.uk/shop/index.php/colonial-marine

http://www.kgbairsoft.com/wordpress


Top
 Profile  
Reply with quote  
 Post subject:
PostPosted: Sat Apr 13, 2013 8:38 am 
MODEL 120-A2
User avatar

Service Number: A04/TQ0.0.72178E5
Country: United States
I took some closeups of the cutouts.

Image

Image

Image

Image

Image

Image

Charlie

_________________
"There is a clause in the contract which specifically states any systematized transmission indicating a possible intelligent origin must be investigated. On penalty of total forfeiture of shares. No money."


Image


Top
 Profile  
Reply with quote  
 Post subject:
PostPosted: Sat Apr 13, 2013 9:04 am 
User avatar

Location: South-West UK
Country: United Kingdom
Great job


Top
 Profile  
Reply with quote  
 Post subject: Re:
PostPosted: Sun Apr 14, 2013 3:20 am 
MODEL 120-A2
User avatar

Service Number: A04/TQ0.0.72178E5
Country: United States
cosmo_kraemer wrote:
very nice and i will have to look at that model case thanks a lot.


Thank you all for the compliments. Cosmo, I went with that model because it was one of the smallest rifle cases they make. I think there is one smaller, but I wanted to have room for the rest of the kit. This way all I will have to worry about is one other case/bucket/tub for transporting the armor. It also a few other nice features; it has wheels so you can roll it and it is one of the few models where the handles fold down out of the way.

There are a few more changes to it I want to make. The pistol needs to have another layer of foam added; it sits too deep in the cutout. Ditto for the knife (although I already added one, it's not enough). The cutout for the sling needs to be bigger. I can see indentations where it isn't sitting properly. I will do that tonight. Additionally, I got some spray adhesive; I'm going to spray the back and then mount it securely in the case once I do the cutout for the sling. Right now it has a tendancy to come up when I remove an item. A bunch of people on some gun forums have used that method and it works well.

Charlie

_________________
"There is a clause in the contract which specifically states any systematized transmission indicating a possible intelligent origin must be investigated. On penalty of total forfeiture of shares. No money."


Image


Top
 Profile  
Reply with quote  
 Post subject:
PostPosted: Sun Apr 14, 2013 3:56 am 
Wow that is slick Charlie. The labels add a nice touch. Very professional.


Top
  
Reply with quote  
 Post subject: Re: Charlie's Colonial Marine Build
PostPosted: Sun Apr 14, 2013 1:01 pm 
User avatar

Location: Kentucky USA
Service Number: A03/TQ1.0.12132E1
Country: United States
Wow, that is fricken awesome!!!!!! I know those cases are not cheap, but I want one! It looks fantastic.

_________________
viewtopic.php?f=4&t=12784
viewtopic.php?f=4&t=12917


Top
 Profile  
Reply with quote  
 Post subject:
PostPosted: Sun Apr 14, 2013 9:14 pm 
MODEL 120-A2
User avatar

Service Number: A04/TQ0.0.72178E5
Country: United States
Ok well, I made some more mods to the case. I got bored. LOL. I know...I should stop now before I screw it up. I think I am done with it. I took it outside to get some photos in good daylight.

I added some more stickers to the outside. It seemed a little plain. I didn't want to go overboard. I wasn't sure if I wanted to graffiti it either. In the end, I added a minor personal touch. I also inverted the shipping contents sticker, so it is readable in the "normal open" position of the case.

Image

Image

Image

Image

Image

Image

I also redid some of the cutouts inside and sprayed it with contact adhesive. I added a layer of foam to the handgun area. It sits much better now.

Image

I didn't have a solid piece of foam big enough to make the full handgun. I ended up using several pieces to cut to fit. It worked, but didn't look pretty. I went back and used some thin craft foam, cut that to shape and then laid it in the area. It was originally red foam; a bit of black spray paint solved that.

Image

I enlarged the cutout for the sling. I also took a full thickness square of foam and cut that in half. I put that in the end where the clips go. It sits snug without moving around now.

Image

Image

I added a new layer of foam to the knife blade area only. I kept the handle area at 1/2 thickness as before. Knife sits flush now.

Image

That's the one area I think I cut too much. The knife isn't loose, but it's obviously not as tight as the other pieces are.

Image

Overall I really like the look. I had fun with this and I think I got an awesome display out of it.

Image

Once I get the mag insert from Noble and the mag base from Evike, I'm going to make up a second "functional" mag for the PR. I think this time I am going to try a different route for the bullets. I keep trying to make the caseless rounds look good but nothing seems to come out right. I think for this next iteration, I am going to use 9mm dummy rounds (it's close to 10mm) and then mount them in a two by three array. the 2x3 will fit in the thompson mag, and it will look more like it could actually hold 95 rounds.

Charlie

_________________
"There is a clause in the contract which specifically states any systematized transmission indicating a possible intelligent origin must be investigated. On penalty of total forfeiture of shares. No money."


Image


Top
 Profile  
Reply with quote  
 Post subject:
PostPosted: Sun Apr 14, 2013 9:33 pm 
Prop Churner Outer
User avatar

Location: Bath, Maine
Service Number: A03/TQ1.0.12143G1
Country: United States
Just bloody awesome. I love it!

_________________
:delta: My entry-level prop and costume tutorials: viewtopic.php?f=3&t=12751 :delta:


Top
 Profile  
Reply with quote  
 Post subject:
PostPosted: Sun Apr 14, 2013 11:57 pm 
Charlie, why not just use some 10mm rounds?


Top
  
Reply with quote  
 Post subject: Re:
PostPosted: Mon Apr 15, 2013 2:00 am 
MODEL 120-A2
User avatar

Service Number: A04/TQ0.0.72178E5
Country: United States
Magnus wrote:
Charlie, why not just use some 10mm rounds?


10mm was hard to find before the current ammo crisis. It's hard to find ANY pistol ammo right now, much less 10mm. I can't get any brass or slugs from the suppliers. I have a bunch of old 9mm. I don't shoot 9mm so it's not a big loss to me.

Charlie

_________________
"There is a clause in the contract which specifically states any systematized transmission indicating a possible intelligent origin must be investigated. On penalty of total forfeiture of shares. No money."


Image


Top
 Profile  
Reply with quote  
 Post subject:
PostPosted: Mon Apr 15, 2013 1:23 pm 
MODEL 120-A2
User avatar

Service Number: A04/TQ0.0.72178E5
Country: United States
Well, a word of warning to anyone using the clear labels and an inkjet printer....DO NOT GET THEM WET. Luckily, I discovered this on a different prop I was working on; some water splashed on the sticker and the ink ran right off. I am now terribly concerned about how to protect the sticker I put on the case. I am thinking of hitting the whole thing with a bit of clear coat. Of course, to prep the surface I would need to clean it. I would also need a day with good weather, and that's not happening anytime soon. I think the clearcoat would work out fine, but I am not sure the effect it would have on the case itself. Also, I am now concerned as to the Armat label I put on the PR. It probably won't get wet, but I would hate to have it ruined by a chance bit of rain. I don't want to clear coat the entire rifle; one I am not sure what effect the clear coat would have on the rest of the paintjob (esp the LED window, although I could tape that off) and two I want the gun to weather naturally as I tote it around. I think I might take a slightly larger bit of clear label and overcoat the Armat plate. Ugh. I hate having to make decisions like this, but at least I found out now rather than the case getting rained on. Suggestions are welcome.

Charlie

_________________
"There is a clause in the contract which specifically states any systematized transmission indicating a possible intelligent origin must be investigated. On penalty of total forfeiture of shares. No money."


Image


Top
 Profile  
Reply with quote  
 Post subject: Re:
PostPosted: Mon Apr 15, 2013 1:42 pm 
User avatar

Location: Royal Wolverhampton Upon Sh*te, England
Service Number: A11/TQ1.0.72144E1
Country: United Kingdom
SGT KITTEN wrote:
Well, a word of warning to anyone using the clear labels and an inkjet printer....DO NOT GET THEM WET. Luckily, I discovered this on a different prop I was working on; some water splashed on the sticker and the ink ran right off. I am now terribly concerned about how to protect the sticker I put on the case. I am thinking of hitting the whole thing with a bit of clear coat. Of course, to prep the surface I would need to clean it. I would also need a day with good weather, and that's not happening anytime soon. I think the clearcoat would work out fine, but I am not sure the effect it would have on the case itself. Also, I am now concerned as to the Armat label I put on the PR. It probably won't get wet, but I would hate to have it ruined by a chance bit of rain. I don't want to clear coat the entire rifle; one I am not sure what effect the clear coat would have on the rest of the paintjob (esp the LED window, although I could tape that off) and two I want the gun to weather naturally as I tote it around. I think I might take a slightly larger bit of clear label and overcoat the Armat plate. Ugh. I hate having to make decisions like this, but at least I found out now rather than the case getting rained on. Suggestions are welcome.

Charlie


It might be overly simple a suggestion but: whatever the stickers are made from- why not cut out an unprinted sheet of the same sticker then apply it over the top of the applied sticker?

You know it'll stick to the material and won't require you spraying or otherwise lacquering your hardwork.

Make it slightly larger to seal the edges against water ingress like a 'laminate' cover for ID cards- type of thing ;)

_________________
2nd Lt Jon "Jaylo" Lopez
A11/TQ1.0.72144E1
USCM Quality Assurance Division- Aerospace and Space Products- Earth
"Checklists Save Lives- No Service Stations at 30,000ft"


Top
 Profile  
Reply with quote  
 Post subject: Re: Charlie's Colonial Marine Build
PostPosted: Mon Apr 15, 2013 1:44 pm 
User avatar

Location: UK all the way
Country: United Kingdom
Really good job. :shock:

I know it's a pain in the neck but instead of the clear coat would it be possible to replace the stickers with some that won't run? Just it's going to be a major work up for you to cover the lot with clear coat and like you said you're looking at a day of good weather too. On the pulse I think the clear label over the Armat plate is the way to go (would that option be viable for the other labels too?)


Top
 Profile  
Reply with quote  
 Post subject:
PostPosted: Mon Apr 15, 2013 2:19 pm 
MODEL 120-A2
User avatar

Service Number: A04/TQ0.0.72178E5
Country: United States
Both excellent suggestions. Here's what I've found out: the labels really are CLEAR. They are just transparent due to whatever is used to hold the ink on them. So, when it gets wet, it gets clear, but it's still a plastic coating. I tried it on a test piece. Printed out the label, covered it with a blank piece, and then wiped it down. No issues. I then took a bigger step, cut out a piece, and applied that over the Armat plate and wiped it down. Now, it's not as good as before. There is a slight greying but it was fine. If I had printed a totally new sticker and covered it over, it might look better (which I am going to do) but for a test platform it showed me what I needed to know. So now....I am reprinting all of the stickers. *sigh* Will probably need new ink cartidges, but at least I have a spare black one here. I think I have enough paper to do it all. Once I reprint the stickers, I will double layer them and then wipe them down and hopefully all will be well. Everything is a learning experience. Unfortunately, I only have about 60% of the sticker designs saved. I made a bunch up on the fly and didn't save them. Curse my laziness! Oh well, they aren't terribly difficult to reproduce. The complicated ones (especially the shipping contents one) I do have saved.

Charlie

_________________
"There is a clause in the contract which specifically states any systematized transmission indicating a possible intelligent origin must be investigated. On penalty of total forfeiture of shares. No money."


Image


Top
 Profile  
Reply with quote  
 Post subject:
PostPosted: Mon Apr 15, 2013 4:09 pm 
Hey Charlie, if you take the stickers and have them printed at a place like Business Depot, the "ink" tbeir Xerox printers use is actually super heated plastic. Much more resistant to water than ink.


Top
  
Reply with quote  
 Post subject:
PostPosted: Mon Apr 15, 2013 10:10 pm 

Service Number: a02/tq2.0.12143e1
Country: Australia
That case looks bloody Great. Well done.


Top
 Profile  
Reply with quote  
 Post subject: Re:
PostPosted: Tue Apr 16, 2013 2:07 am 
MODEL 120-A2
User avatar

Service Number: A04/TQ0.0.72178E5
Country: United States
Magnus wrote:
Hey Charlie, if you take the stickers and have them printed at a place like Business Depot, the "ink" tbeir Xerox printers use is actually super heated plastic. Much more resistant to water than ink.


I may end up doing that. But right now I am stubborn and refuse to admit I can't do it at home :)

Charlie

_________________
"There is a clause in the contract which specifically states any systematized transmission indicating a possible intelligent origin must be investigated. On penalty of total forfeiture of shares. No money."


Image


Top
 Profile  
Reply with quote  
 Post subject:
PostPosted: Tue Apr 16, 2013 2:23 pm 
MODEL 120-A2
User avatar

Service Number: A04/TQ0.0.72178E5
Country: United States
Ok, I redid the stickers. I got about 60% on the case. I am too tired to do the rest but I will probably get them on tomorrow. I reprinted all the stickers, and then added a second layer of the label sheet on top of them. I cut them out again using a metal straight edge and an exacto and placed them on the case. They looked like this:

Image

As you can see, faded out pretty bad, but that is just the overlay.

Once they were in place, I took a dampened microfiber cloth and scrubbed them down good. Now it looks like:

Image

Image

Image

I also redid the label for my PR. The test case was ok, but I made this one slightly bigger and changed the details just a bit.

Image

Finally, I took my original "test" piece and mounted that inside the case. It's a piece of thin flexible white plastic (originally one of those cheap license plates) that I put the label one. Once I sized the label, I put spray adhesive on the back, placed it in the case, and let it dry with some wooden blocks on it for 24 hrs. (The blocks were just dead weight to make sure it was contacting the foam over the entire surface).

Image

Yeah, it's a close match to the exterior, but if I display it at home or a con with the lid open I wanted it to see be visible.

I'll get the rest of the sticker put on sometime this week and then I am done screwing with the case. Must find something new to work on.

Charlie

_________________
"There is a clause in the contract which specifically states any systematized transmission indicating a possible intelligent origin must be investigated. On penalty of total forfeiture of shares. No money."


Image


Top
 Profile  
Reply with quote  
 Post subject:
PostPosted: Tue Apr 16, 2013 8:44 pm 
Oh sure, change your PR sticker AFTER I put mine on! j/k lol

The stickers look good with the faded look Charlie.


Top
  
Reply with quote  
 Post subject: Re:
PostPosted: Tue Apr 16, 2013 9:37 pm 
MODEL 120-A2
User avatar

Service Number: A04/TQ0.0.72178E5
Country: United States
Magnus wrote:
Oh sure, change your PR sticker AFTER I put mine on! j/k lol

The stickers look good with the faded look Charlie.


LOL. I didn't even think of that Matt! I don't know if I like the word corp behind Armat or not. Minor detail but I am iffy on it. :) I definitely recommend putting another layer if you went the same route I did with printing. It doesn't add much to the thickness and it will definitely protect it from accidental wettings.

Charlie

_________________
"There is a clause in the contract which specifically states any systematized transmission indicating a possible intelligent origin must be investigated. On penalty of total forfeiture of shares. No money."


Image


Top
 Profile  
Reply with quote  
 Post subject:
PostPosted: Wed Apr 17, 2013 7:28 am 
MODEL 120-A2
User avatar

Service Number: A04/TQ0.0.72178E5
Country: United States
The new mag base from evike arrived today. Hopefully we have good weather on Friday and I wil get it painted to match my PR. Noble shipped the mag insert so I'm hoping it will arrive this week. Going to try to get the dummy rounds mounting figured out. I've already popped the pins an removed the internals on the magazine. Since I have a foam cutter I think I will fill the bulk of the mag with styrofoam to support the weight of the bullets.

Charlie

_________________
"There is a clause in the contract which specifically states any systematized transmission indicating a possible intelligent origin must be investigated. On penalty of total forfeiture of shares. No money."


Image


Top
 Profile  
Reply with quote  
 Post subject:
PostPosted: Sat Apr 20, 2013 10:07 am 
MODEL 120-A2
User avatar

Service Number: A04/TQ0.0.72178E5
Country: United States
I've redone the magazines. I started with a stripped out hi-cap, a bunch of dummy 9mm rounds, and block of styrofoam.

Image

The styrofoam was used to support the bullets, and also to fill the mag so I didn't have to have the thing fully loaded with fake rounds.

Basically, I pushed the foam all the way into the mag. Then I slowly lowered it while putting down layers of bullets. It's 2 bullets/1 bullet I put in. I used superglue to hold the rounds together (both gel and liquid).

Image

I kept adding layers until the back gap of the magazine was full.

Image

Then I added one final layer so I didn't have a random round magically staying on top. :)

Image

This left a bunch of excess styrofoam sticking out the bottom of the mag.

Image

I trimmed it down so there was just a slight bit sticking out the bottom. That way, when I inserted the mag into the mag base, it would put upward pressure on the bullets and make everything a bit more solid and stable.

Image

Image

Image

Image

Of course, when it was done, I found out it wouldn't seat properly. The bullet would contact the loading port inside the PR for the BBs. The magazine wouldn't latch unless I put a lot of pressure on it, and it was deforming the styrofoam. I decided this would be the display mag for the case.

I took my other mag and removed the "caseless" rounds I had made. Then, I took another block of styrofoam and added an angle to the top so the bullets wouldn't sit flat. I took myold hollowpoint rounds from the caseless build and made a few extra dummy rounds for those.

Image

Image

Image

Yay magazines are finished.

I also started work on a grenade box. I took one of the MTM 25 cases and I sanded the exterior with 220 and 600 grit sandpaper. I also took some extra styrofoam and case foam and made a thick pad for the interior. I hit with some more of the Dark Forest Green spray paint. We'll see how it looks tomorrow after it dries.

Image

Image

Charlie

_________________
"There is a clause in the contract which specifically states any systematized transmission indicating a possible intelligent origin must be investigated. On penalty of total forfeiture of shares. No money."


Image


Top
 Profile  
Reply with quote  
Display posts from previous:  Sort by  
Post new topic Reply to topic  [ 340 posts ]  Go to page Previous  1 ... 5, 6, 7, 8, 9, 10, 11 ... 14  Next


You cannot post new topics in this forum
You cannot reply to topics in this forum
You cannot edit your posts in this forum
You cannot delete your posts in this forum
You cannot post attachments in this forum

Search for:
Jump to: