Quote:
How did other people do this? any suggestions?
Thanks!
lewis
Hi Lewis,
I initially thought I would just print out the templates, use spray glue to stick them on the sides of the helmet and cut around them.
As you have already pointed out due to the curvature of the helmet it is not that simple.

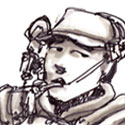
Below are a series of photos I took as I converted my helmet
Attachment:
 a helmet.jpg [ 103.15 KiB | Viewed 17790 times ]
I photocopied the greeblie templates and cut them out, by moving them around, and mostly judging by eye, I managed to trace a rough outline of the shape onto the helmet with first pencil then made clearer with a black marker pen.
Attachment:
 b helmet.jpg [ 60.79 KiB | Viewed 17790 times ]
Attachment:
 DSCF5352.JPG [ 64.29 KiB | Viewed 17790 times ]
Attachment:
 c helmet.jpg [ 56.44 KiB | Viewed 17790 times ]
Attachment:
 d helmet.jpg [ 64.71 KiB | Viewed 17790 times ]
I photocopied the greeblie base plate templates, spray glued them to 0.32 sheet alluminium (I used alluminium as I wanted a sturdy back plate) and then cut and filed them into the correct shapes.
Attachment:
 DSCF5388.JPG [ 60.22 KiB | Viewed 17790 times ]
Attachment:
 DSCF5389.JPG [ 68.47 KiB | Viewed 17790 times ]
Once I had a rough outline in black marker pen I drilled a series of holes to cut out the hole for the greeblie plate, at this time it is undersize.
Attachment:
 DSCF5369.JPG [ 48.69 KiB | Viewed 17790 times ]
The same process is done both sides.
Attachment:
 DSCF5356.JPG [ 51.65 KiB | Viewed 17790 times ]
Once removed I had roughly the right shape, but at this stage the greeblie base plate would not fit into the gap.
Attachment:
 DSCF5358.JPG [ 75.28 KiB | Viewed 17790 times ]
Using the template I had made from aluminium I could now more accurately sand and file the shape to the correct size, by placing my template on the inside I could judge how much material to remove.
Attachment:
 DSCF5390.JPG [ 60.62 KiB | Viewed 17790 times ]
The hole is now the right size
Attachment:
 DSCF5361.JPG [ 61.82 KiB | Viewed 17790 times ]
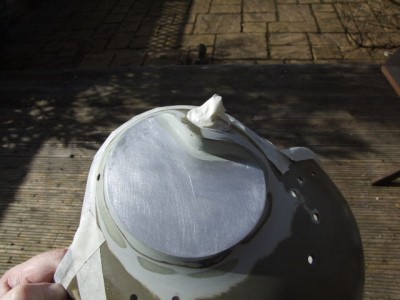
I glued the metal plate into position with a generous amount of epoxy resin. Once the glue was set I used body filler to fill all the gaps. Building up the curved wall on the kidney shaped side was the biggest pain. It is all then sanded back using the screen used helmet photos as guidance.
Attachment:
 DSCF5392.JPG [ 61.85 KiB | Viewed 17790 times ]
Attachment:
 DSCF5393.JPG [ 53.06 KiB | Viewed 17790 times ]
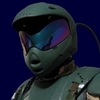
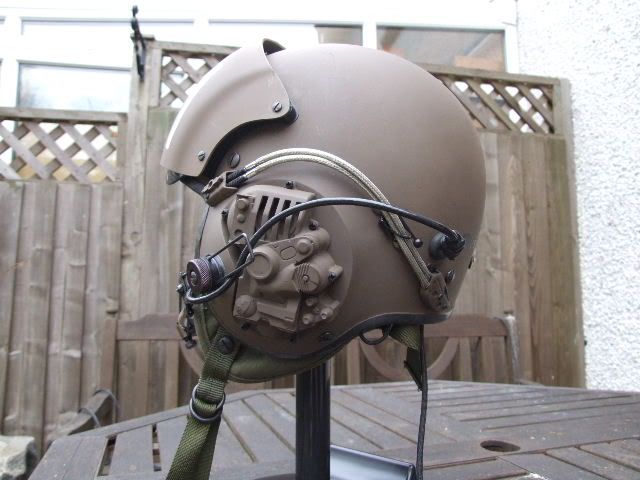
The greeblies themselves dictate most of the sanding and filing, I kept checking they fitted correctly and matched the SU photos, time consuming, but worth it. Once I was happy I glued the greeblies to the plate and hit it with a coat of primer.
Attachment:
 v helmet.jpg [ 80.08 KiB | Viewed 17790 times ]
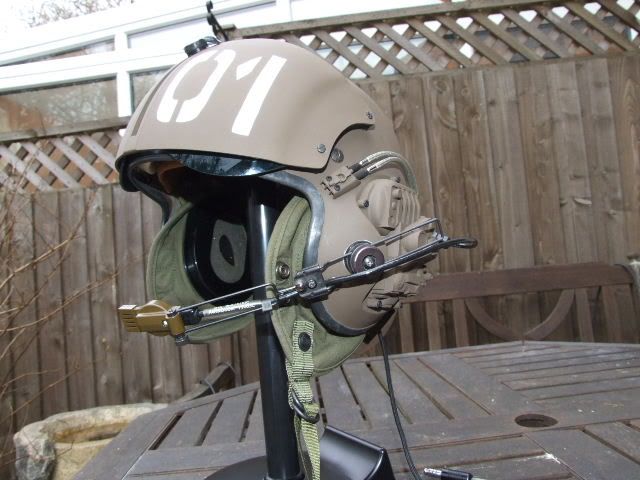
A coat of Brown Bess and she's ready to fly the friendly!
I hope this is of some use,
Cheers,
Andy