The Aliens Legacy
http://forum.alienslegacy.com/

Mini Colonial Marine Armor
http://forum.alienslegacy.com/viewtopic.php?f=3&t=19979
Page 1 of 1

Author:  Red_2 [ Sat Apr 29, 2023 7:47 pm ]
Post subject:  Mini Colonial Marine Armor

Hey peeps!

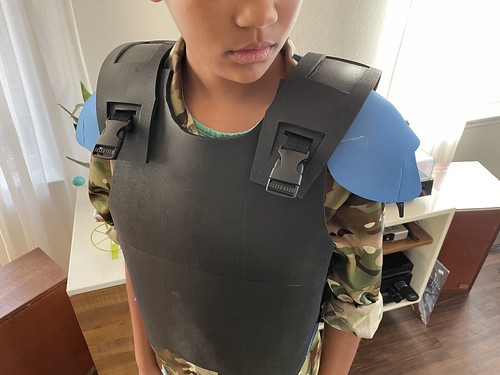
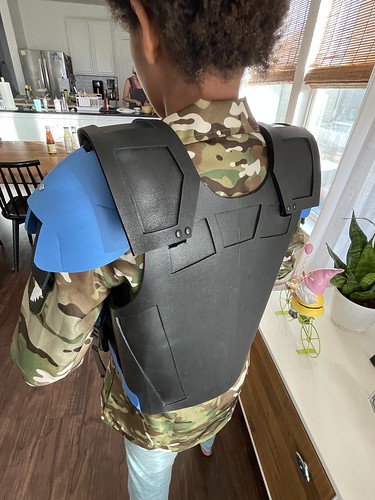
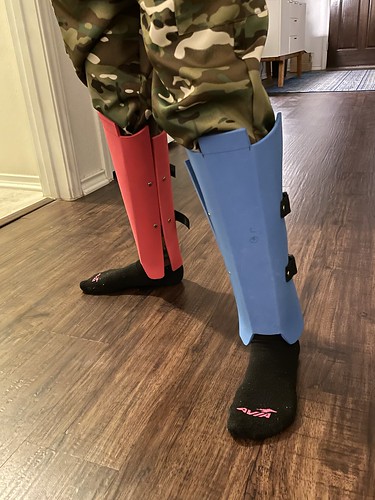
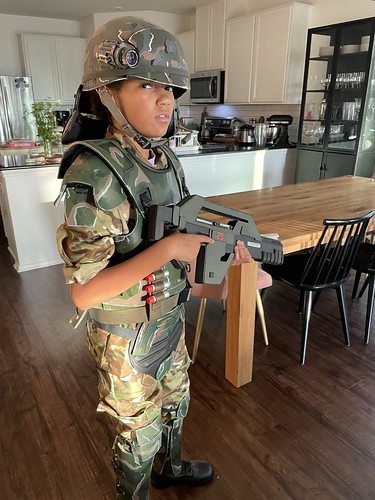
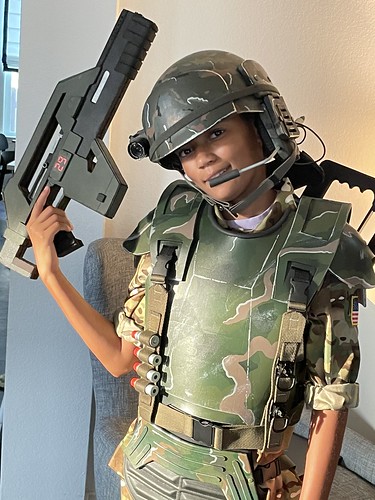
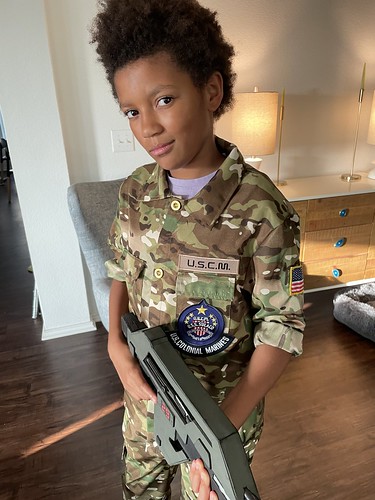
At the end of February, a buddy inspired me to try and finish off my daughter's armor. I built a lid and foam pulse rifle years ago. Friend's daughter is now rocking' the mini-xeno suit I built a few years back.

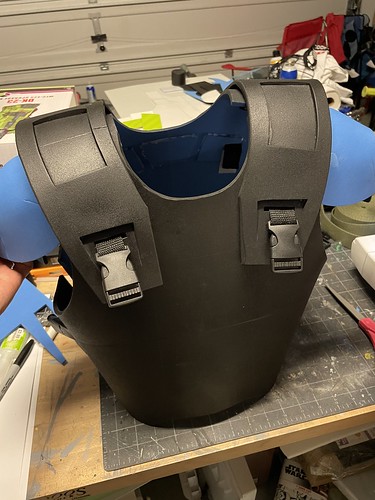
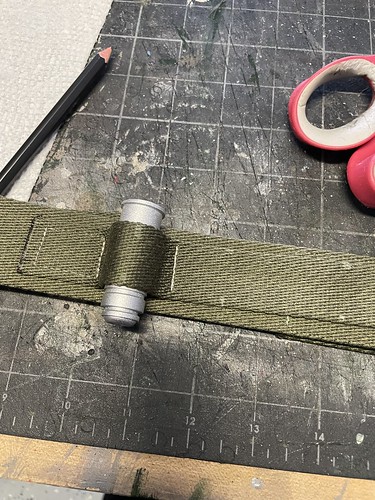
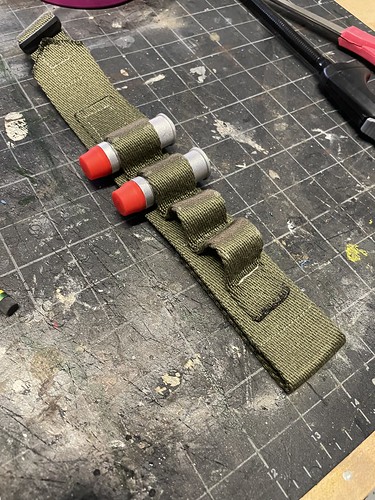
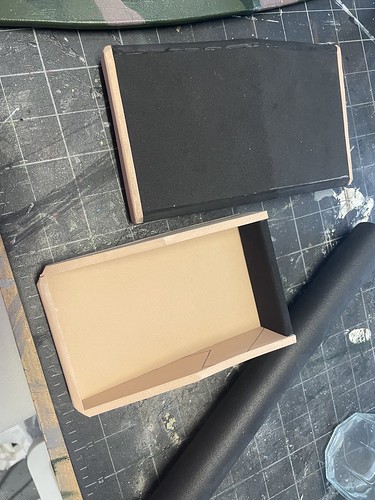
Anyhoo, here's the build process I went through. Similar materials as usual, EVA foam, webbing from Amazon/old hiking pack, and found items.
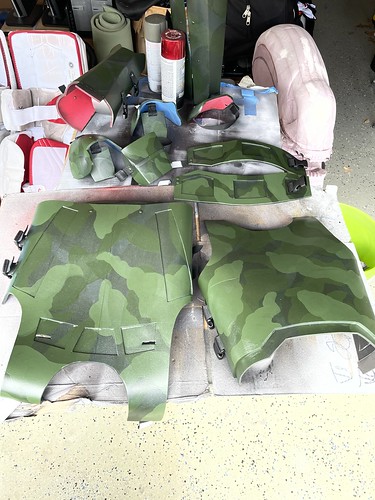
When I started, I thought I'd try a 2 week speed build but life wasn't having it. So I only used foam I had in the garage. There's seams where there shouldn't be ideally, but the camo paint job hides it pretty well.

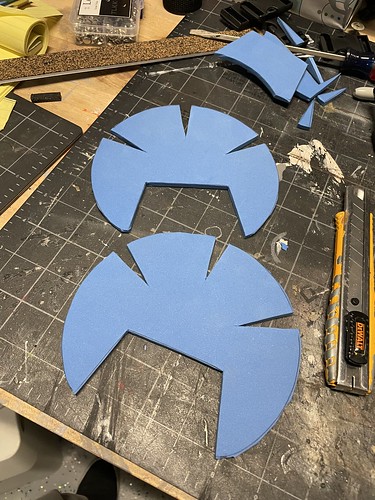
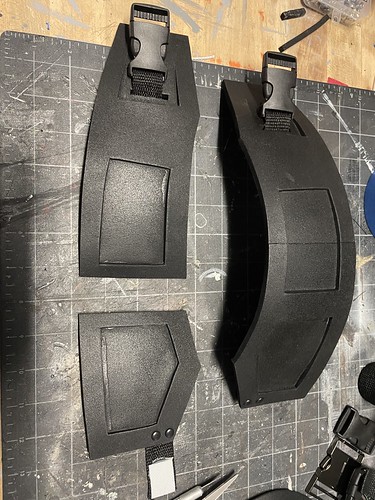
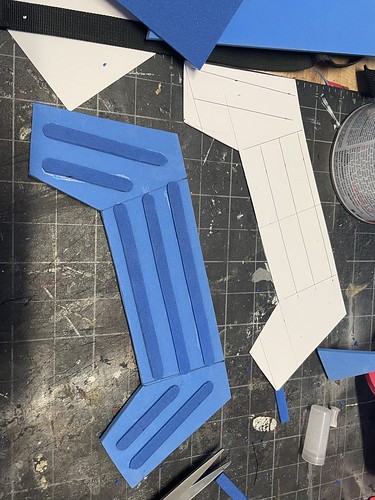
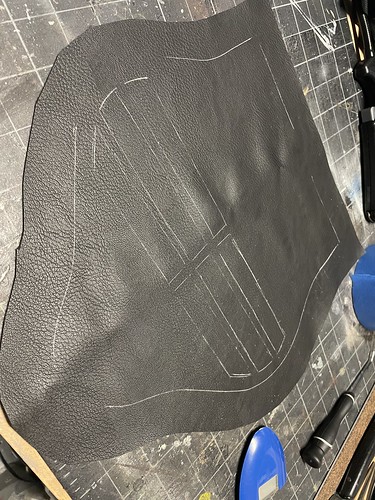
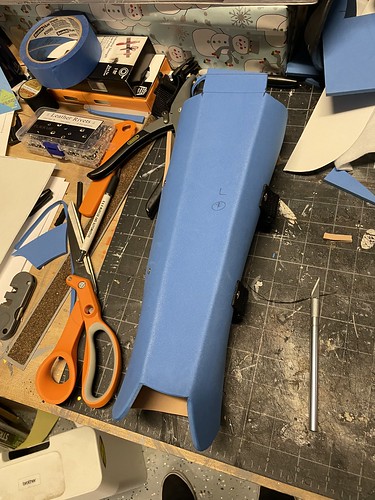
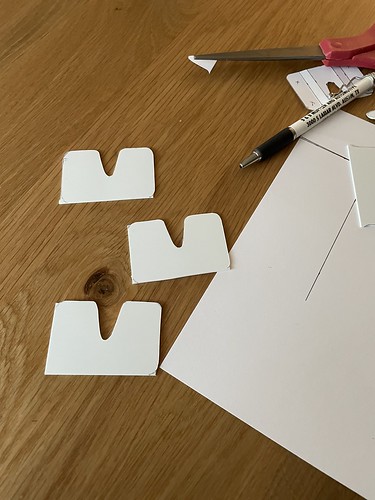
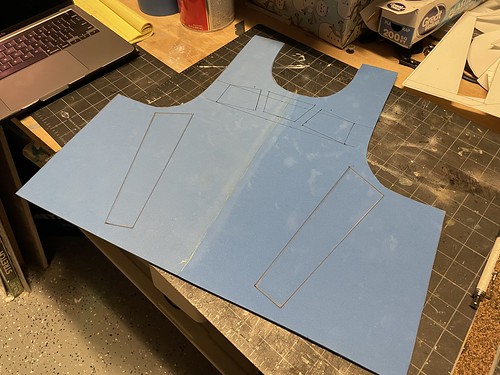
Started with sketches, then templates made with cardstock. From there I cut foam and test fit. If adjustments or redos are necessary then I just go back and remake pieces. That's pretty much my strategy. These were just hand drawn from reference pics, but again there are inaccuracies. Just tried t keep the spirit of the look.


Image

Image

Image

Image

Image

Image

Image

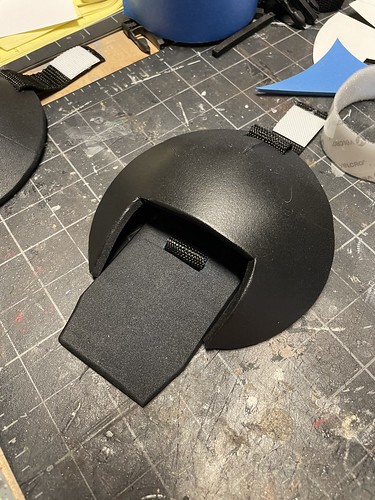
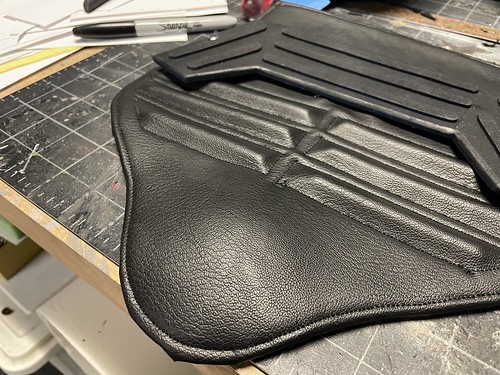
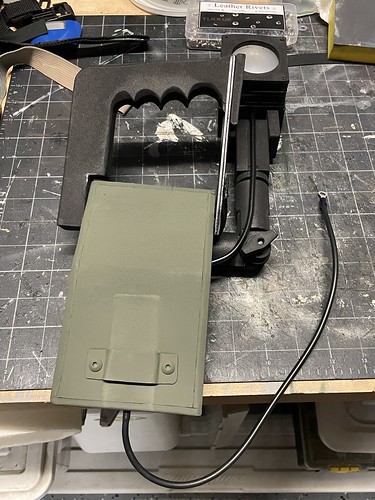
I remembered the depressions present on the rear plate but didn't realize there were also shapes on the shoulders also. They don't show up on reference pics very well and by the time I was painting I realized it. No biggie. With the kids' suits I try and get the gist of the costume and try to get a majority of the details right. But simplifying it also makes it a reasonable experience.

Author:  Red_2 [ Sat Apr 29, 2023 8:12 pm ]
Post subject: 

Contact cement (Dap), crazy glue, and hot glue are my main fastening methods. I also used leather snaps a bunch in place of the rivets. They are super easy, just snap together and can be removed with little effort. Worked great on this build.

The initial shoulder patterns I had to redo. Too round in shape and not enough coverage. Failing is ALWAYS a part of the process. You can see the updated version in the last pics.

Image

Image

Image

Image

Image


The initial pauldrons? They were too short so I had to shim them. Again, not a preferred approach, but I was in speed mode at this point.

Image

Image

Image

Image


All the indents/depressions I just cut out of the foam and reglued back in halfway. The ones on the flanks I just cut 3 out of 4 sides and then glued back in to create the ramp effect.

Image

Image

Author:  Red_2 [ Sat Apr 29, 2023 8:21 pm ]
Post subject: 

I got 1" and 1.5" green webbing for the straps and belt.

Image

Image

Image


The grenades were 3D printed resin. And rubber safety caps I found on McMaster-Carr. I had someone reprint me some more accurate ones and they should be here any day. Small detail but they were cheap enough to upgrade.

Image

Image

Author:  Red_2 [ Sat Apr 29, 2023 8:25 pm ]
Post subject: 

Image

Image

Image

Image

Image

Image

Image

Author:  Red_2 [ Sat Apr 29, 2023 8:32 pm ]
Post subject: 

Plastic wrap and duct tape method for shaping shins. I made them too small at first so had to redo.

Image

Image

Image

Image

Image

Image


Yes, the knee pads are a bit off. Mainly the middle indent being a raised line. But I can live with it. (Please forgive me. - David Gray)

Image

Author:  Red_2 [ Sat Apr 29, 2023 8:42 pm ]
Post subject: 

First layers of paint going down.

Image

Image

Image

(Yes, that's the 1:1 foam xeno head I never got around to finishing. A few friends advised me to stop and get to sculpting with clay. For some reason I've never tossed that foam head.)

Author:  Red_2 [ Sat Apr 29, 2023 8:53 pm ]
Post subject: 

Simple shoulder lamp design. I wasn't going to add this at first, but it really is noticeable without it. It's a little floppy but hey, it lights up. (I used a brake line bent to look like the wire to the lamp to give it some support.)

Image

Image

Image

Image

Image

Image

Image

Image

Image

Image

Image

Image

Image

Image

Author:  Red_2 [ Sat Apr 29, 2023 8:56 pm ]
Post subject: 

Hangers.

Image

Image

Author:  Red_2 [ Sat Apr 29, 2023 9:08 pm ]
Post subject: 

Done. Kids BDU's and Rothco Jr jungle boots bought off of Amazon, and some patches off of eBay and Etsy. I'll add a few more rivets in spots to fill out the smaller details. Maybe make a simple tracker out of foam. She's stoked for the next 'con to walk through.

Image

Image

Image

Image

Image

Image

Image

Image

Author:  smrtazzsmrtgnnr [ Sun Apr 30, 2023 3:23 am ]
Post subject: 

:like: :D :delta:

Author:  Willie Goldman [ Sun Apr 30, 2023 7:51 am ]
Post subject: 

Awesome job!

Image

Author:  SulacoBoy [ Sun Apr 30, 2023 9:13 am ]
Post subject: 

That’s amazing!

Author:  punkmarine [ Sun Apr 30, 2023 10:35 am ]
Post subject: 

Brilliant work, she looks great

Author:  577_ops [ Sun Apr 30, 2023 5:00 pm ]
Post subject:  Re: Mini Colonial Marine Armor

Thanks for sharing. Amazing work! God luck for your first Con!

Author:  TS826 [ Sun Apr 30, 2023 6:00 pm ]
Post subject:  Re: Mini Colonial Marine Armor

That is all awesome stuff.
The ab pad looks really sharp, and the balance on the Armor Camo is great.

How 'bout the helmet?
Is it foam, or maybe a toy M1 ?

Author:  bigbisont [ Mon May 01, 2023 2:50 pm ]
Post subject: 

Man you went all out! Extra mile for all the details. Very impressive

Author:  Red_2 [ Tue May 02, 2023 12:28 am ]
Post subject:  Re: Mini Colonial Marine Armor

Thanks, everyone!

TS826 wrote:
That is all awesome stuff.
The ab pad looks really sharp, and the balance on the Armor Camo is great.

How 'bout the helmet?
Is it foam, or maybe a toy M1 ?


The helmet is actually an M1 plastic liner. I made the blast shield our of air dry clay. The cam is a resin cast with real lens. The ear piece is foam made from scratch and a replacement headphone pad. Mic is found items. Chapstick, brake line, and a nerf dart. The lobster plates are bowls with EVA foam padding and detail.

Author:  EvanDallas [ Mon May 15, 2023 8:54 pm ]
Post subject: 

I recognize this workbench

Author:  Red_2 [ Mon May 22, 2023 1:34 am ]
Post subject:  Re:

EvanDallas wrote:
I recognize this workbench


Strangely, I'm also familiar with an Evan in Dallas.

Hmmmm ....

Author:  Red_2 [ Mon May 22, 2023 1:36 am ]
Post subject: 

Last pic to share! Courtesy of a friendly FB board member:

Image

Author:  retrogarde [ Mon May 22, 2023 2:13 am ]
Post subject: 

Have you shared this wirh Ricco Ross?

Great work!

Author:  Red_2 [ Tue May 23, 2023 1:59 am ]
Post subject:  Re:

retrogarde wrote:
Have you shared this wirh Ricco Ross?

Great work!


I haven't but a good buddy sent him a shot of her when I finished the helmet and rifle several years back.

Page 1 of 1 All times are UTC [ DST ]
Powered by phpBB © 2000, 2002, 2005, 2007 phpBB Group
http://www.phpbb.com/