The discussion of the Alien series of films and the props used in them is the aim, but if it's got Big Bugs and Big Guns, then they are welcome too!


Post new topic Reply to topic  [ 19 posts ] 
Author Message
 Post subject: PFC Marine build - One step at a time (Image heavy)
PostPosted: Wed Apr 15, 2015 10:34 am 
User avatar

Location: Ruhr Sector Protectorate
Country: Germany
Hi there troops,
roughly a year and a half ago we, PFC ObiHahn and myself, came together and decided to start our Aliens Colonial Marines project. Obi had already made some research based on the Blu Ray and facts on the net, was active on this board and....he had his incredible cool Pulse Rifle that was more than enough to convince me, to do something outside my other, mostly Star Wars related costuming projects. And so it began...

At first we only wanted to get "the look" as close to the movie as possible and do not care about original parts that much, would be cool to have but not needed. But oh well soon one found a Kango, another the Seiko Pulsemeter, then other small parts all over the internet and bazaars and in the end...except the armor and Pulse Rifle itself, we got nearly all original parts together and I spent way more money, then I originally planed :shock: . But guess what, it was well worth it and I enjoyed the hunt. ^^

But enough with the introduction...let's start with some pics for the Tracker, shall we?!


Last edited by loki on Wed Apr 15, 2015 10:50 am, edited 1 time in total.

Top
 Profile  
Reply with quote  
 Post subject: Re: PFC Marine build - One step at a time (Image heavy)
PostPosted: Wed Apr 15, 2015 10:43 am 
User avatar

Location: Ruhr Sector Protectorate
Country: Germany
The Tracker:

Ah well, one of my most beloved props, besides the Pulse Rifle! I loved it in the movie and games and finally, I build one myself! :D

The Parts

Kango 426 Hammer Drill (and I even got one more, the much closer version with the correct hammer/drill switcher, witch I obviously used for my tracker build. The one I have is "not" from Kango but another brand, pre-dating the Kango but it is the correct model and an 1:1 version of the 327. I still have one left, just PM me for Information about the brand name or if you want to buy it.)

Image

The Casio Calculator (too bad I was not fast enough for the correct version at ebay, the SL-85, shame)

Image

The Hama Dia Viewer (very easy to get by in Germany)

Image

The Matchbox Trafomat (not as easy to get)

Image

The distance meter (From a Photoshop here in my city, that was pure luck)

Image

The Hama self primer + cable (not on the pic) (yay for more German parts!)

Image

The Vivitar Photoflash

Image

The Jobo Minilux

Image

And the Self Primer as well as the casing

Image
Image

So the only original part missing for the Tracker is in fact the pump widget. I used a resin replica from nickatrons MT Kit. Since initially, I did not plan on getting all that stuff as original parts, I already ordered a full resin kit from him and ended up only using the pump and the Motion Tracker sticker for the Dia Viewer...oh well. ^^

The Nickatron Tracker Kit (If you want a great prop, without functional buttons and just for decoration, or to accompany your costume, I can recommend this kit. Mine is already sold, sorry guys)

Image

(Yeah...i placed the Hama trigger the wrong way around for the picture...meh)

And finally some pictures of the current status (To do: still need 2 screws in the Jobo Light, the cable from the front to the side of the grip as well as the shoulderstrap hangers on the grip)

Image

Image


Image

Image

Image

Image

Next up...the Pulse Rifle


Top
 Profile  
Reply with quote  
 Post subject:
PostPosted: Wed Apr 15, 2015 11:44 am 
AKKURAZI
User avatar

Location: Bochum, Ruhr area
Country: Germany
There he is - welcome to the boards here, Loki. You have come to the right place!


Top
 Profile  
Reply with quote  
 Post subject: Re: PFC Marine build - One step at a time (Image heavy)
PostPosted: Wed Apr 15, 2015 12:34 pm 
THAT guy
User avatar

Location: Virginia
Service Number: A03/TQ2.0.02146E1
Country: United States
Very nice and herzliche willkommen. I am pretty jealous of all the real parts trackers out there.


Top
 Profile  
Reply with quote  
 Post subject: Re:
PostPosted: Wed Apr 15, 2015 12:55 pm 
User avatar

Location: Ruhr Sector Protectorate
Country: Germany
ObiHahn wrote:
There he is - welcome to the boards here, Loki. You have come to the right place!


Thanks mate, because of you I am constantly broke...broke I tell you! :wink:

bigbisont wrote:
Very nice and herzliche willkommen. I am pretty jealous of all the real parts trackers out there.


Thank you too. I guess I/we were very lucky, to get those parts to be honest. But also the fact, that the movie prop builders used so many german parts, made the search a lot easier for us.

The Pulse Rifle

Well at first, a bit naive, I got myself a Snow Wolf Air-soft Pulse Rifle and wanted to mod it to be in line with the original Pulse.

Image

But I soon realized, despite the fact that for a air-soft, it was a pretty cool deal, it was not worth my time. The shroud was by far not right, and it would be much work to break some parts and remodel them back to look right. The screws where wrong (okay minor thing), the Thompson grip was not the right form an even the shoulder stock was incorrectly made out of two parts. There where other flaws like, the pump gun housing being one plastic casing, rather than a shroud and individual parts, and there was always a dummy shell in there...meh. So I sold it again and looked out for another alternative.

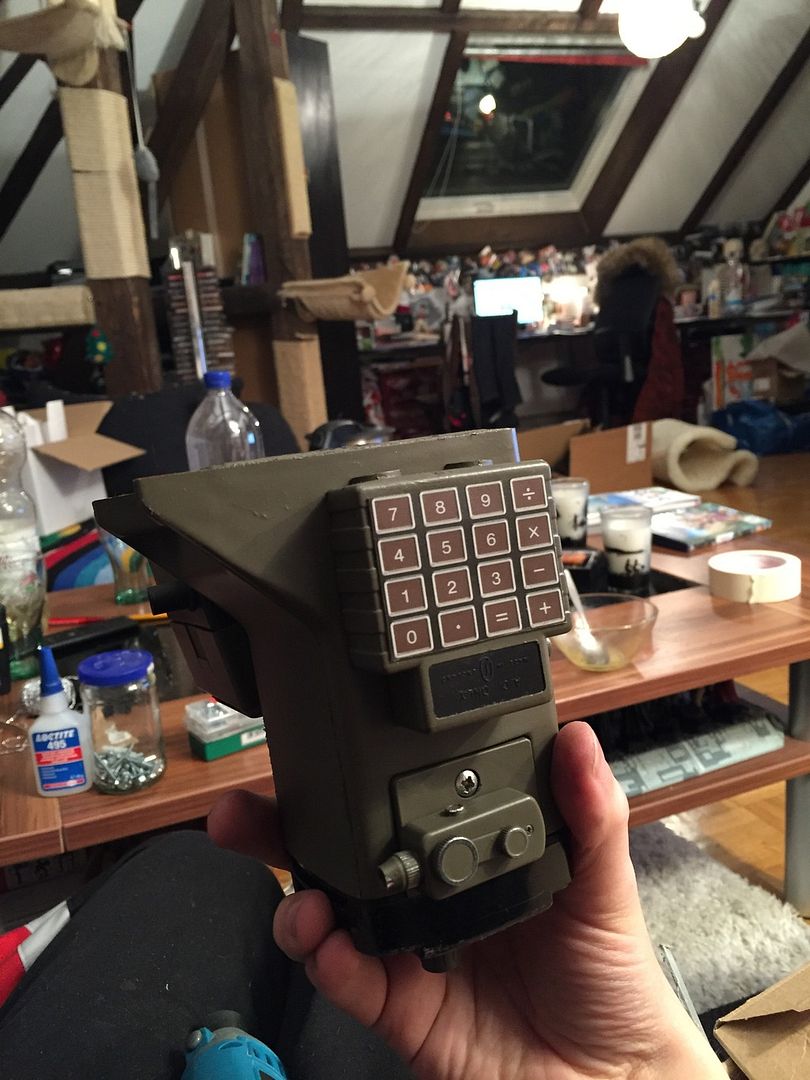
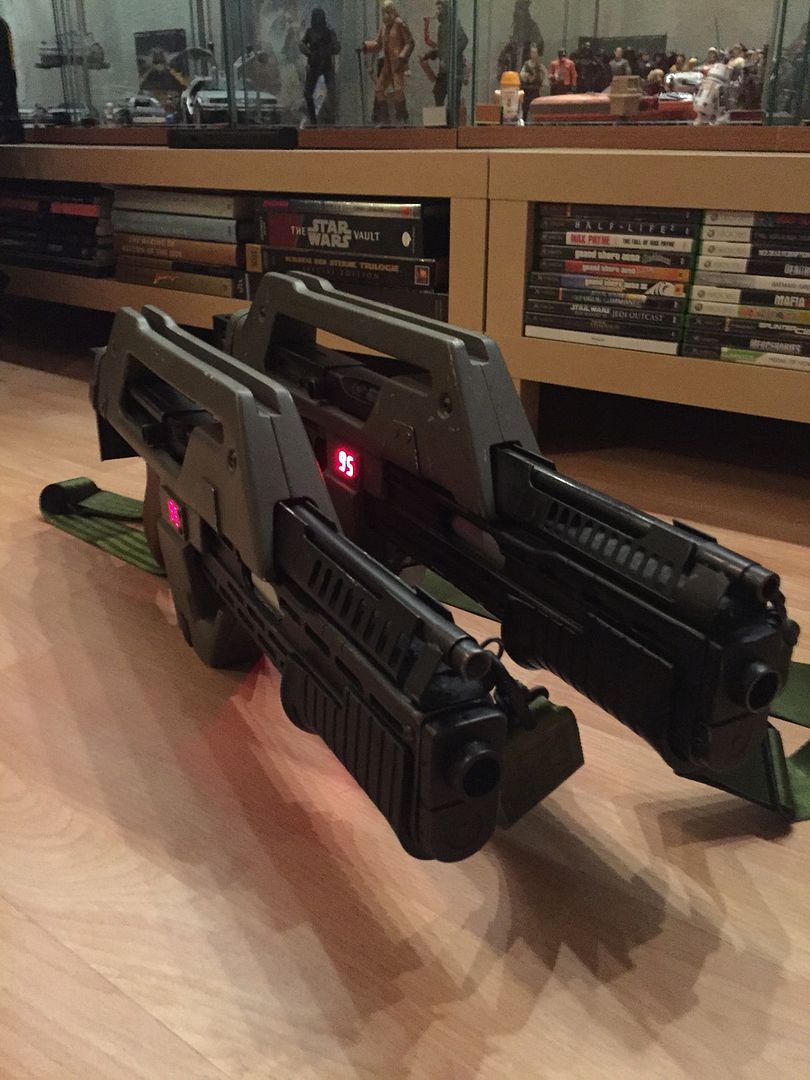
I knew about Matsuos Kits and also from SD Designs and that they still made some parts for the rifle, but I also found a guy on the net, building a whole Pulse (with the parts from Matsu and SD etc.) And I decided to get one of those babies! After several month (it was over a year to be honest) and after many PMs, and nerve-wrecking conversations, the gun finally arrived and I could take a first look. It was not exactly like on the pictures, but then again, neither are the burgers from MC D or the B King. Don't get me wrong...after a year, I was glad to finally have it and all worked as promised, pump-gun, counter and some other moving parts, and it looked already very good.

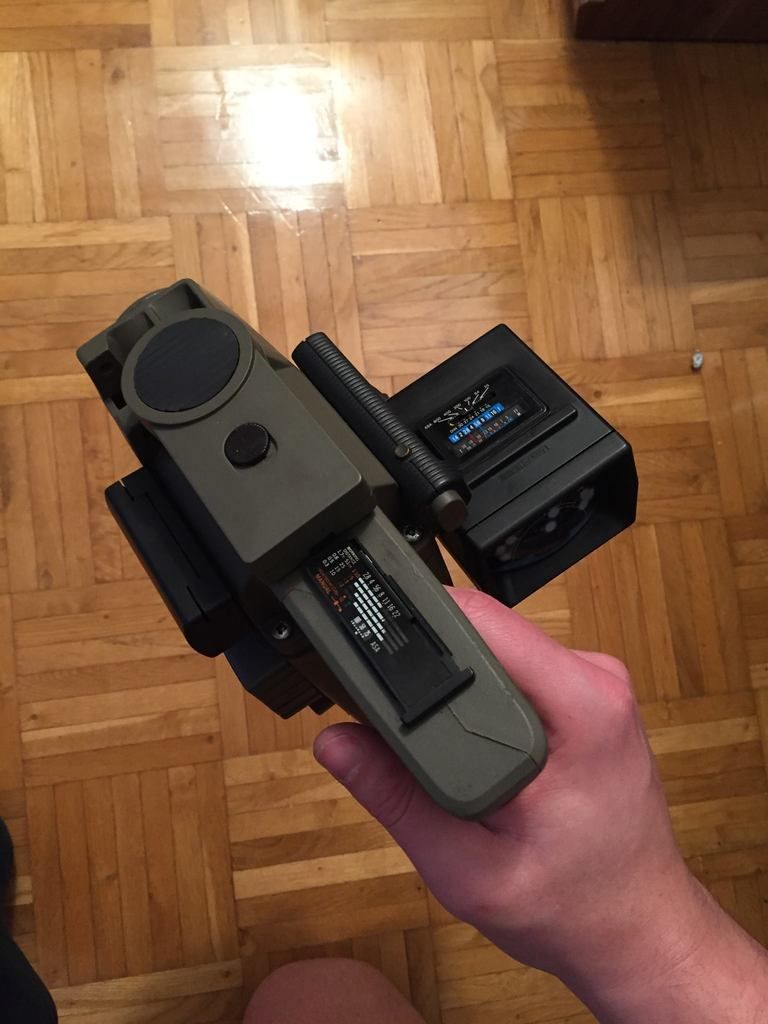
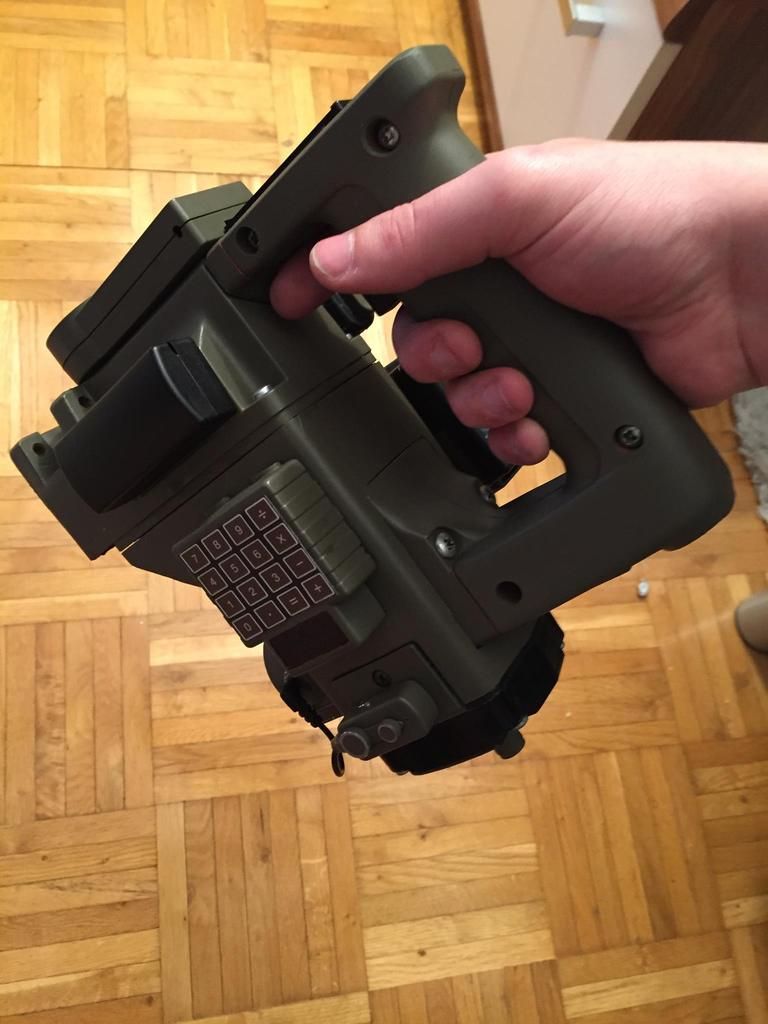
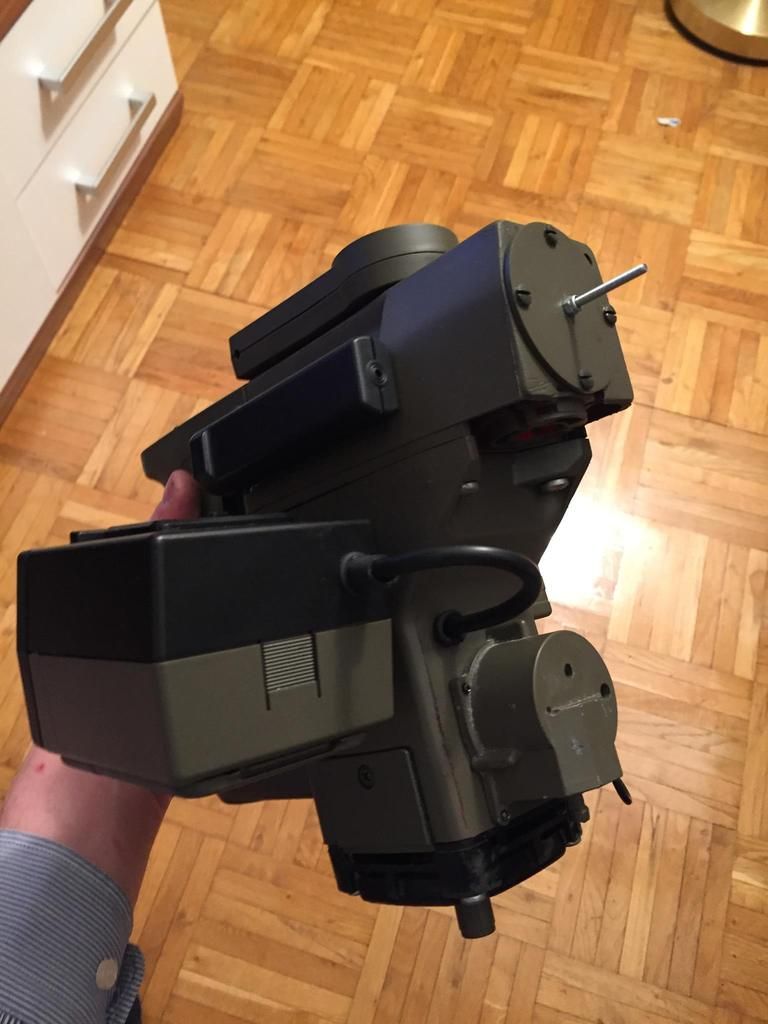
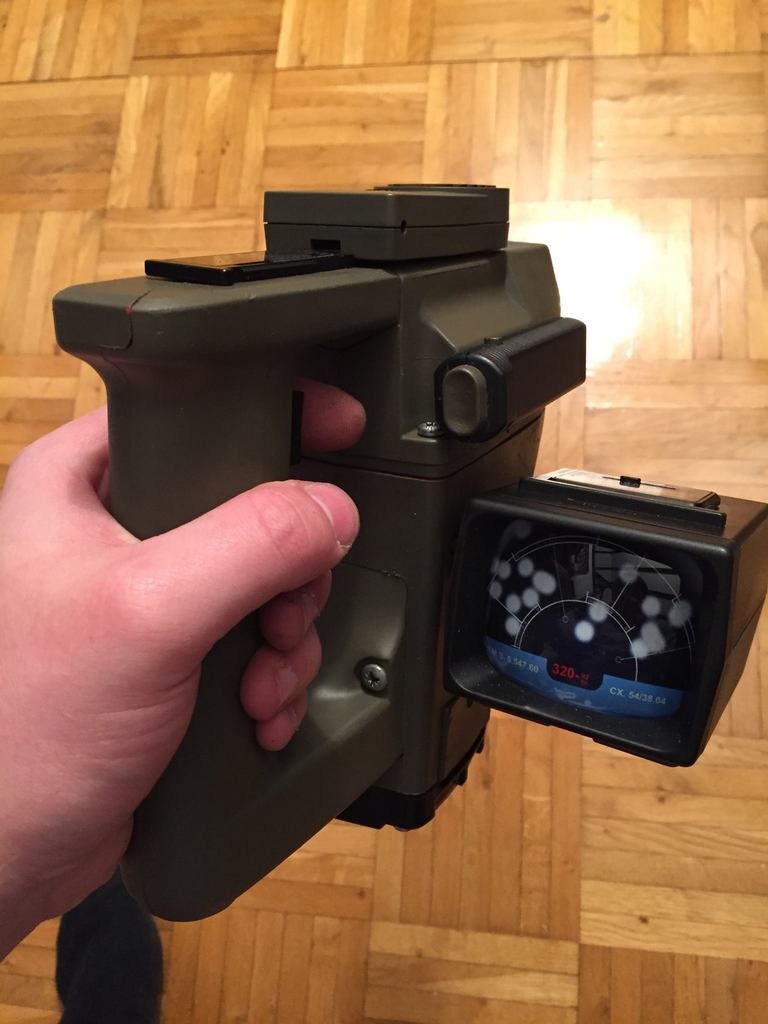
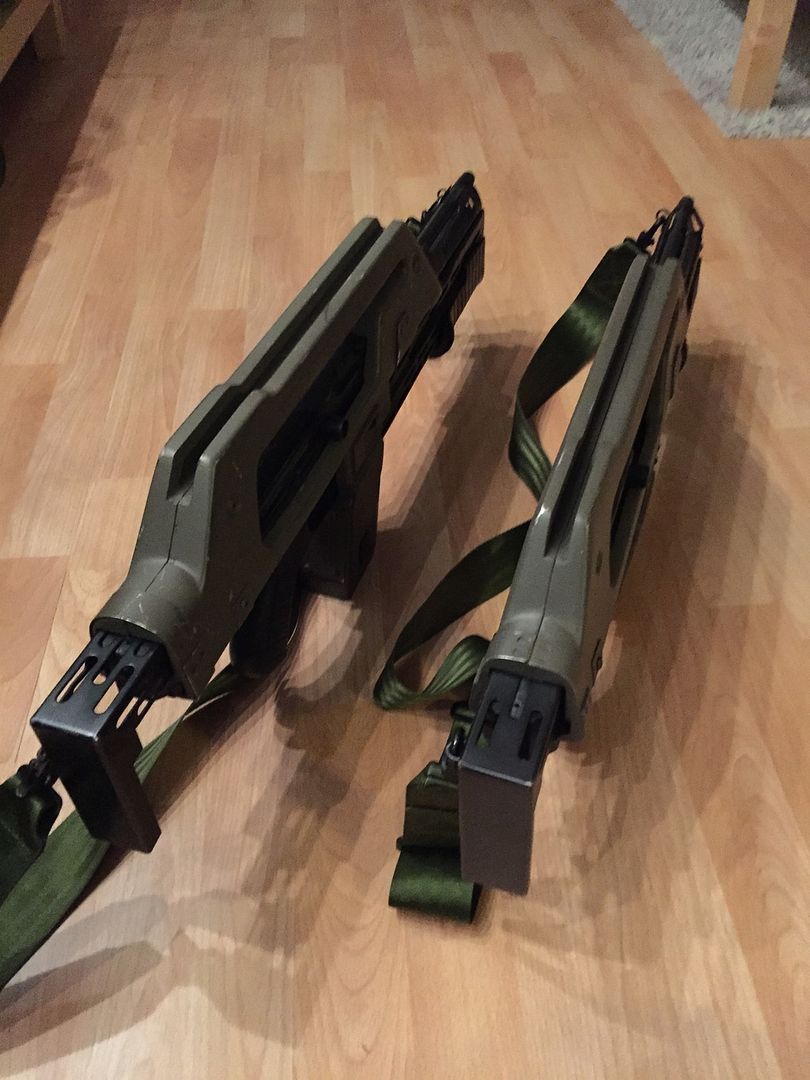
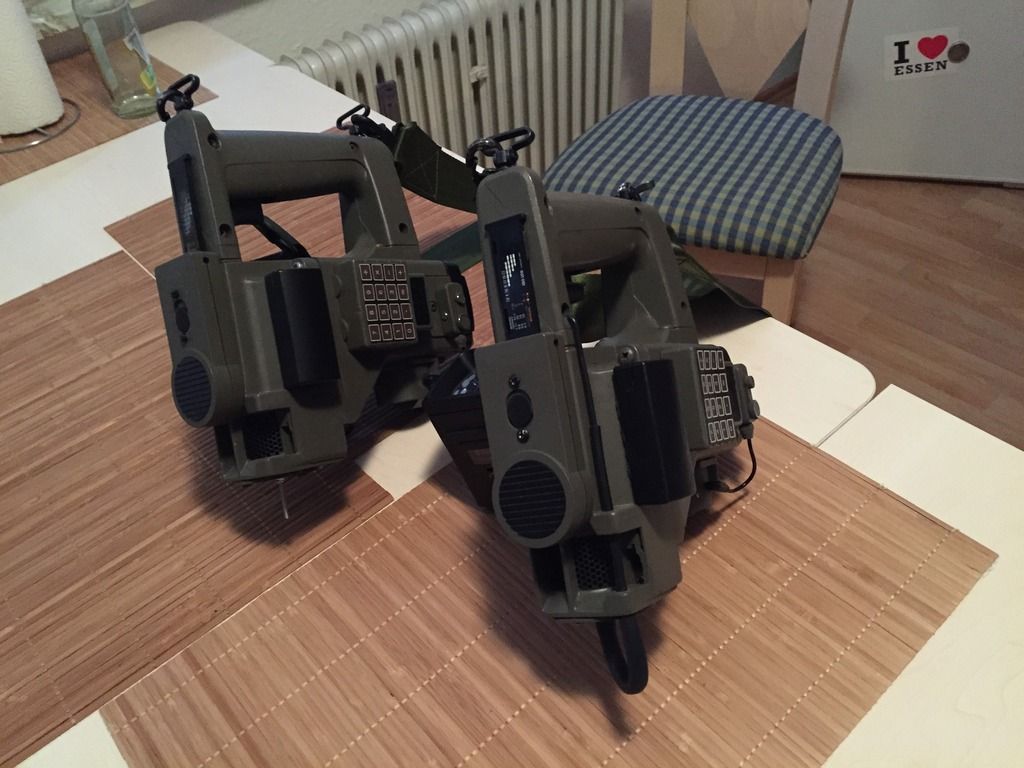
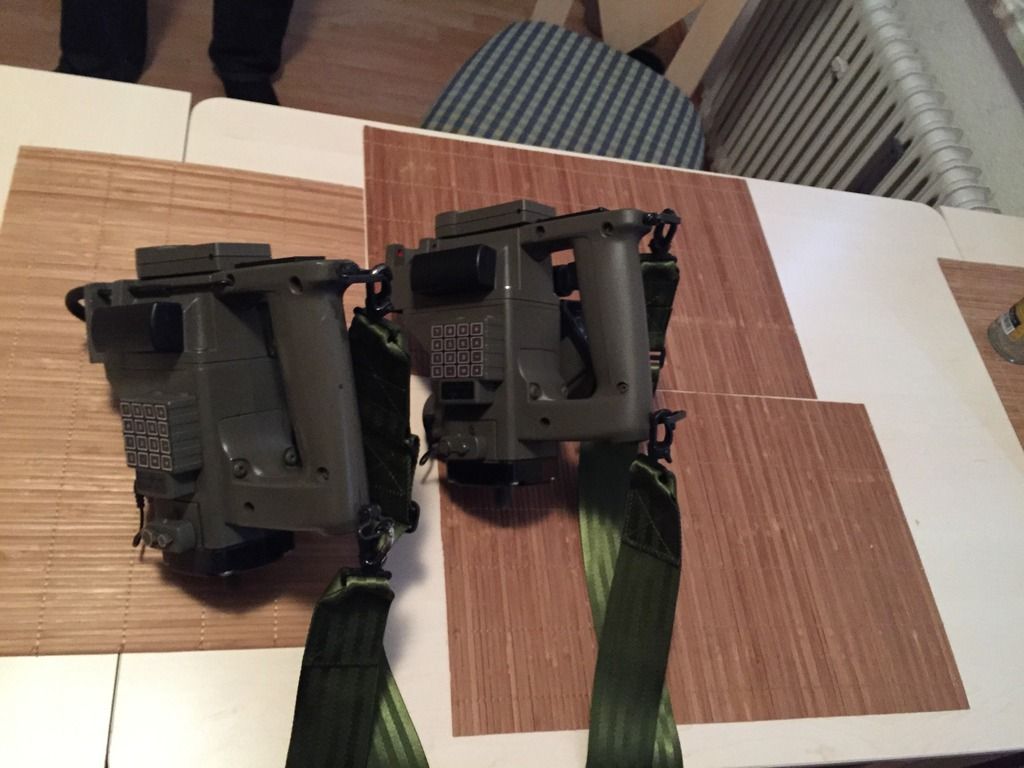
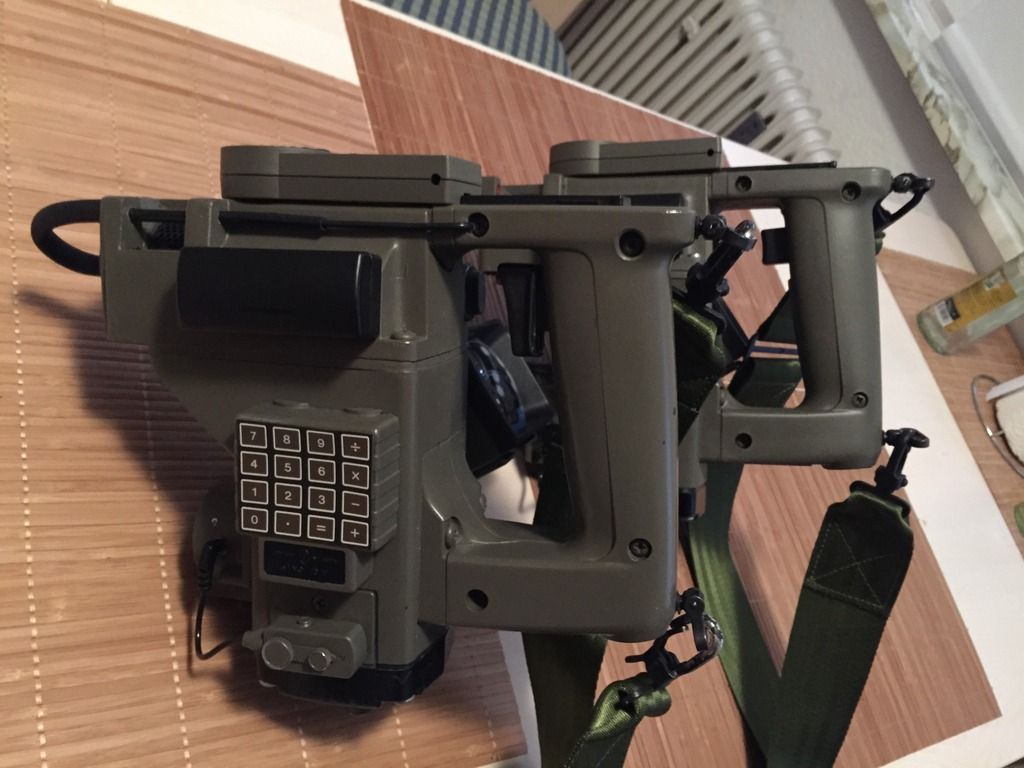
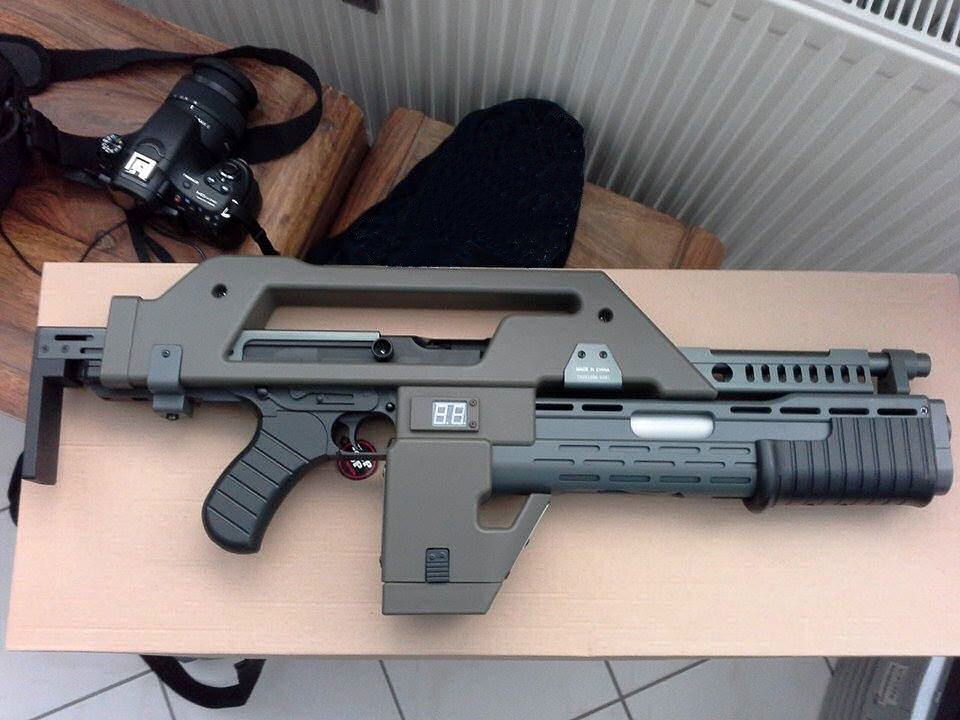
First pictures of the PR out of the box

Image

Image

Image

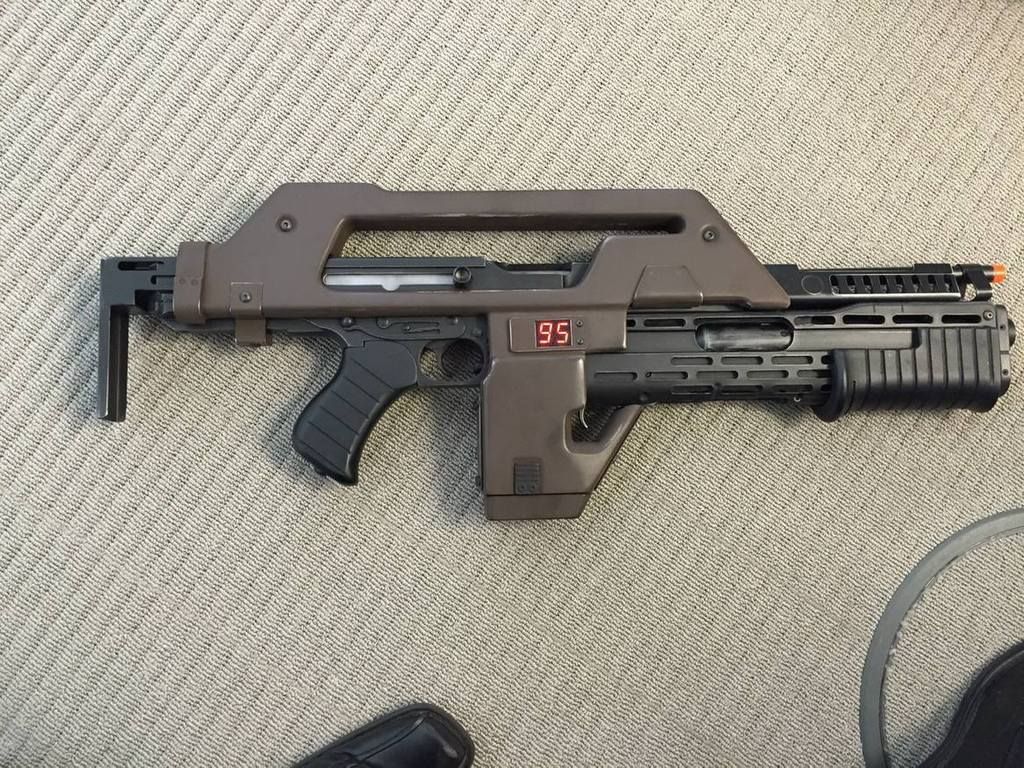
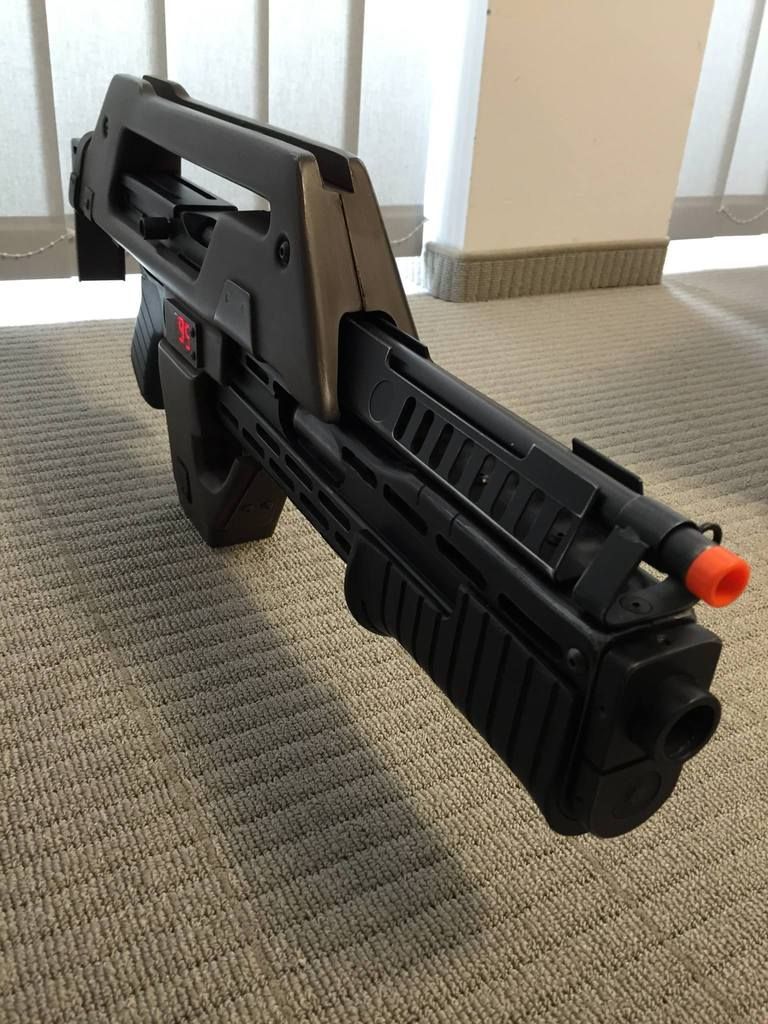
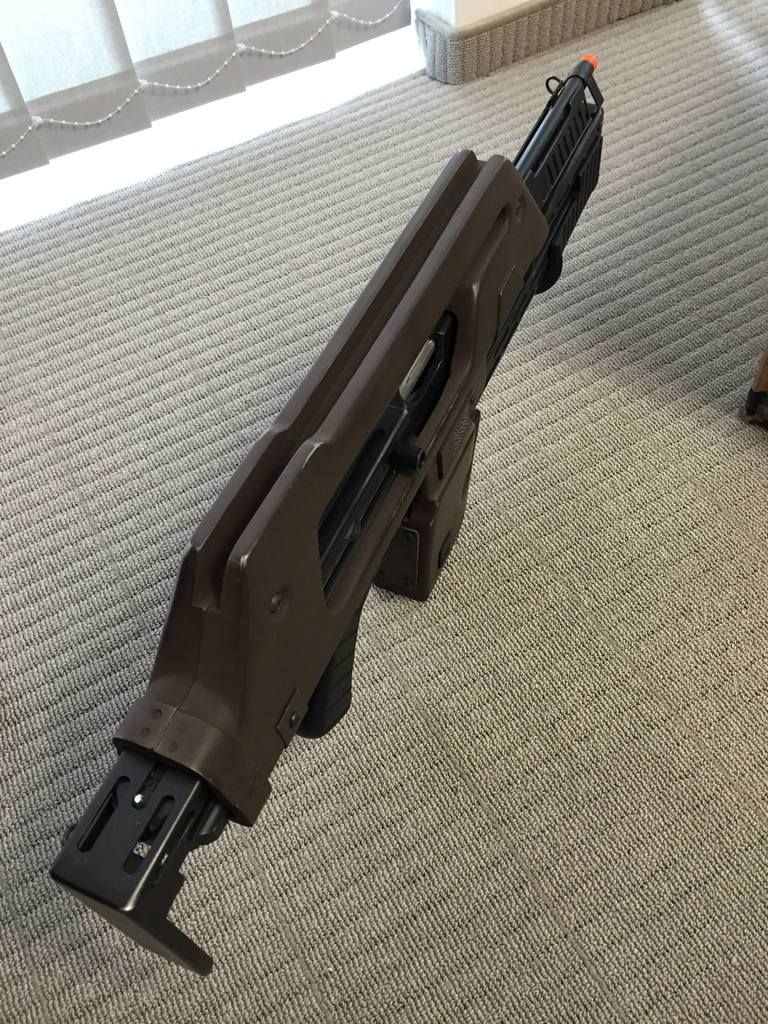
The Thompson main body as well as *most* of the parts, except the shoulder stock, the screws and the barrel shrouds are resin casts. I soon made a list with improvements, I would like to do and I also wanted to replace the resin Tommy Gun with a metal version.

List of Improvements:

Replacing the Thompson resin parts with metal version (probably an Air-Soft Thompson M4A1)
Repainting the shrouds. First with a aluminium base and then the brown bess as well as a better, more realistic weathering.
Replacing the Grip (The one with the gun is a full resin cast and a Air-Soft Thompson has the motor in the grip, so I either need to hole the one I have out or replace it with a hollow one)
Getting rid of the resin magazine (Seriously...this one has to be made of metal! I want to slam it into the gun)
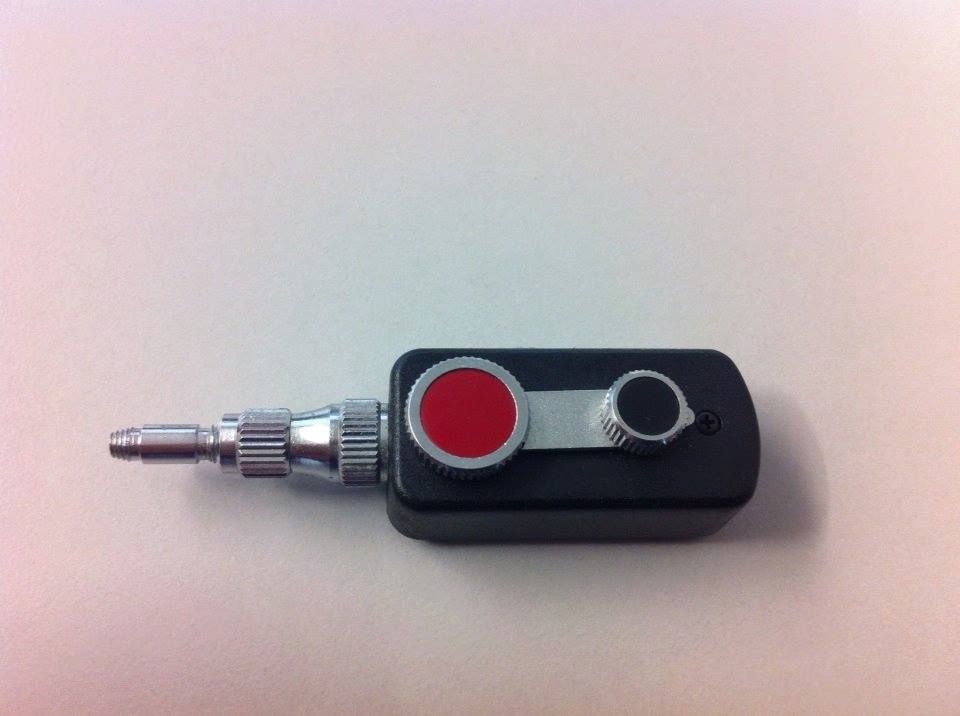
Replacing the front of the pump-gun part. It is also made of resin and SD makes some really great looking covers out of aluminium.
Replacing the screws from the LED Display from allen to phillips screws.
Minor details.

So I again searched the web for some fitting Thompson Air-Soft replicas. The Tokyo Marui was a bit to expensive and so, after checking some reviews, I decided to buy a King Arms Thompson Submachine Gun.

Image

Image

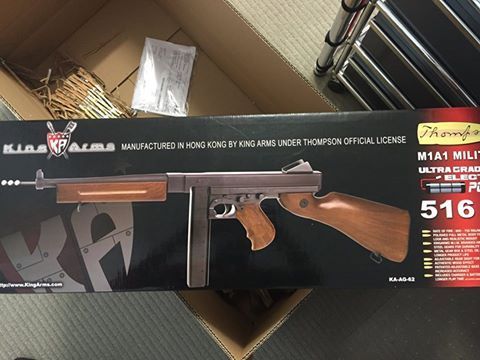
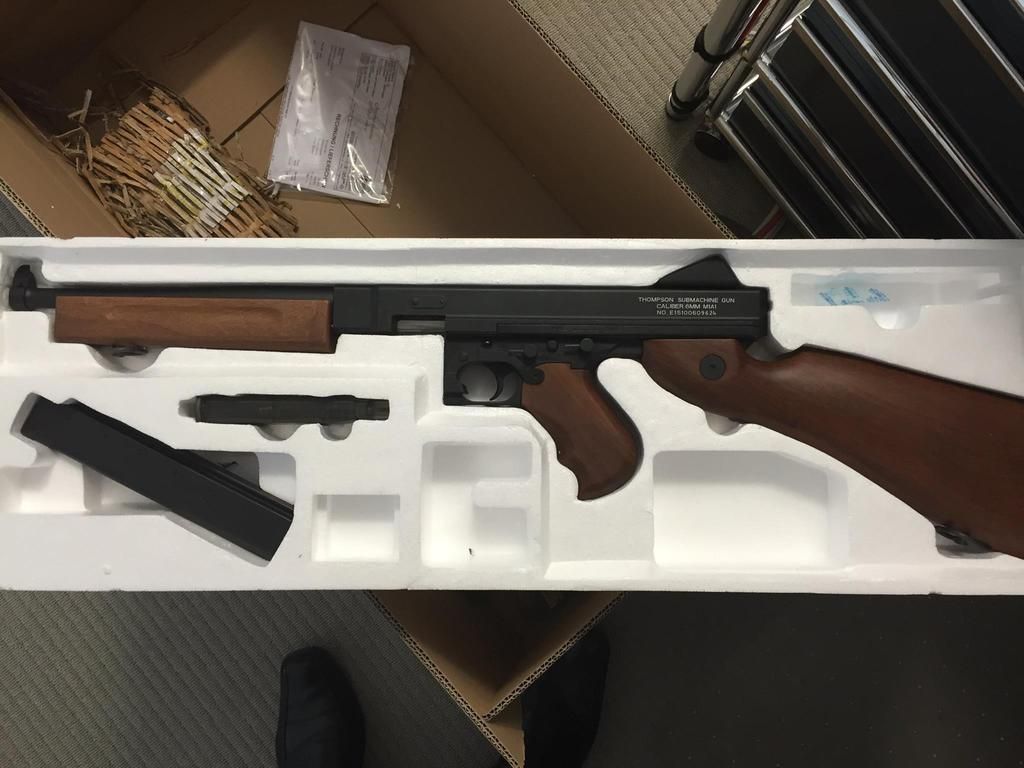
This one was a great buy. Pretty cheap, but very good manufactured and well made gun. The Body is made out of aluminium and is very detailed! I also tested a few rounds on the field before I deconstructed the gun and it was a blast! :twisted:

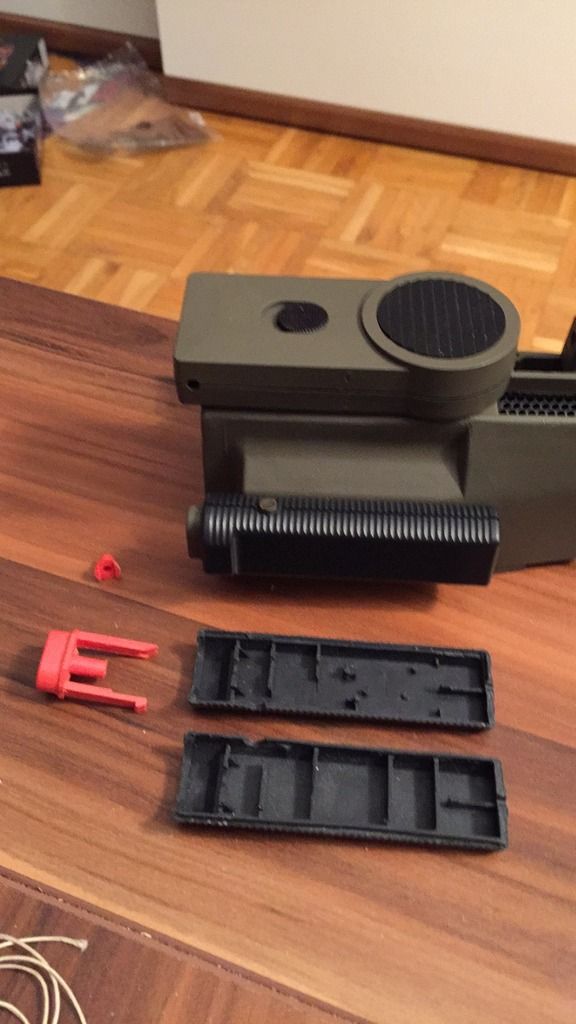
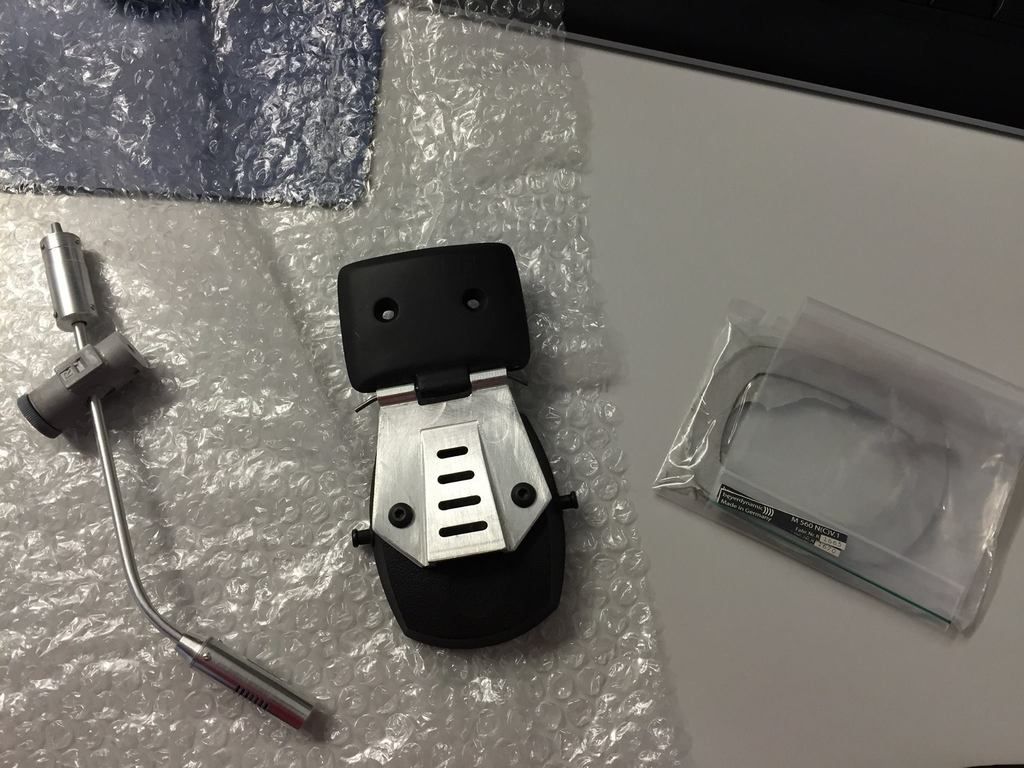
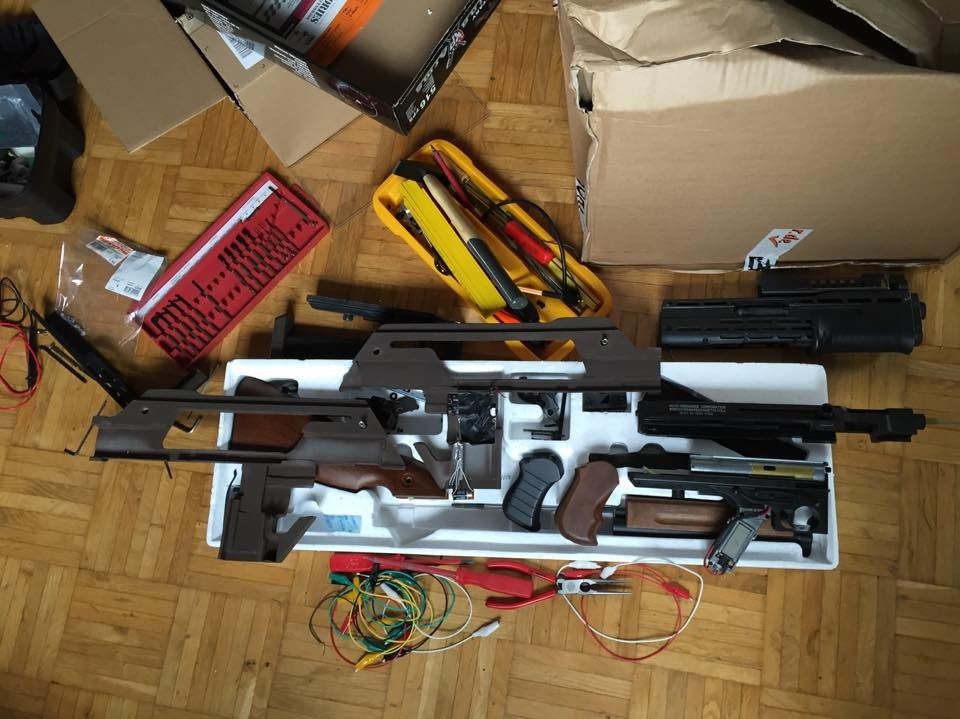
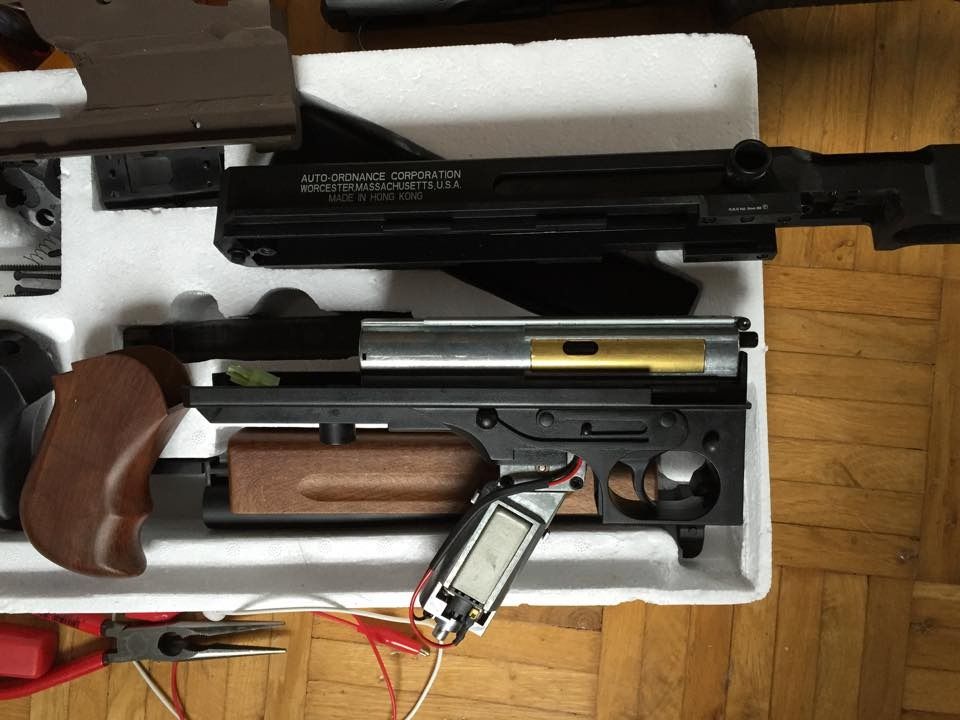
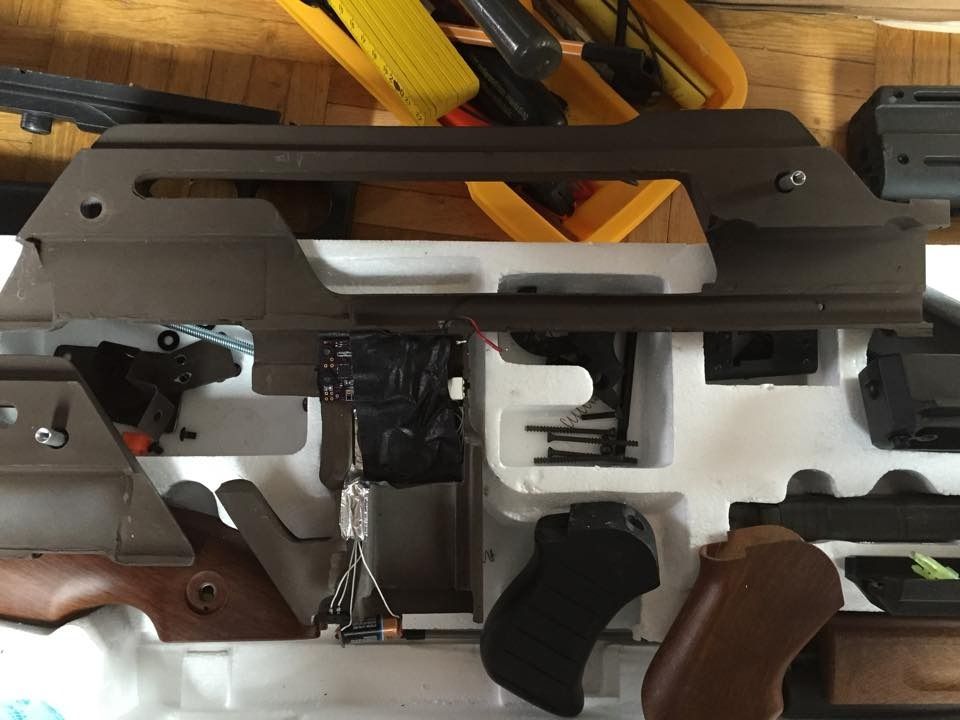
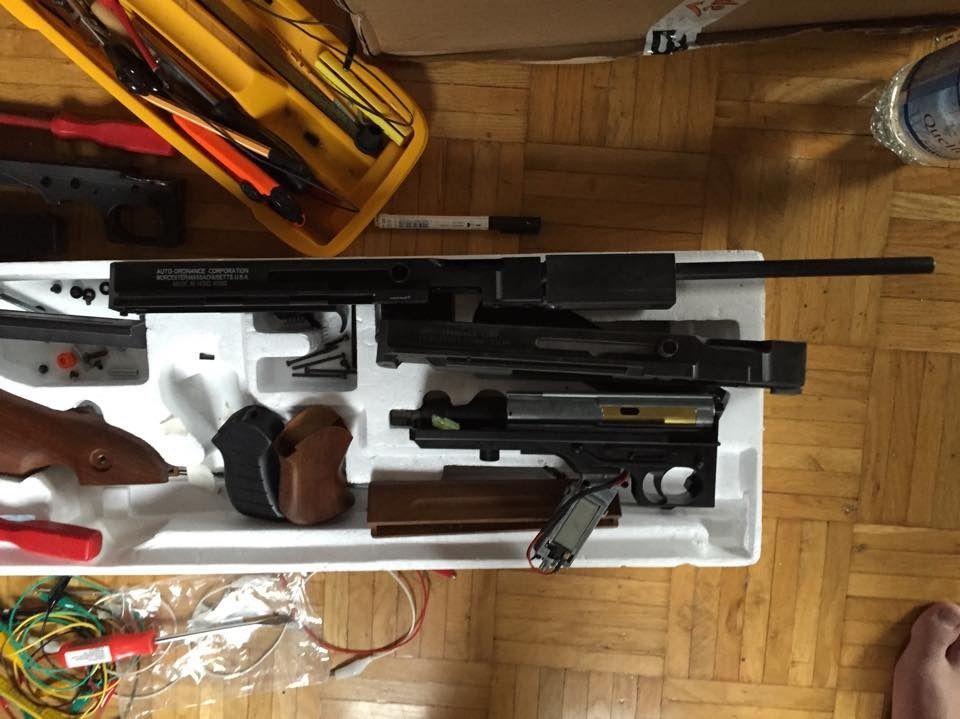
Well but then the real work begun! I started with deconstructing the Pulse and cannibalizing all the parts I wanted to use again. Some messy pics ahead (I always work like that sorry :roll: ):

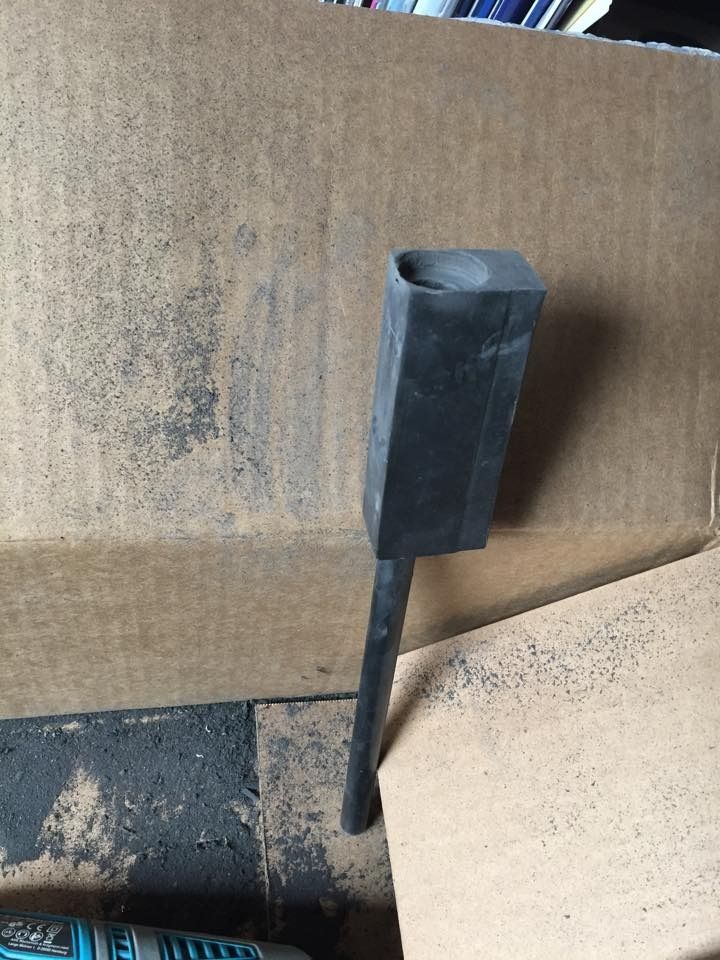
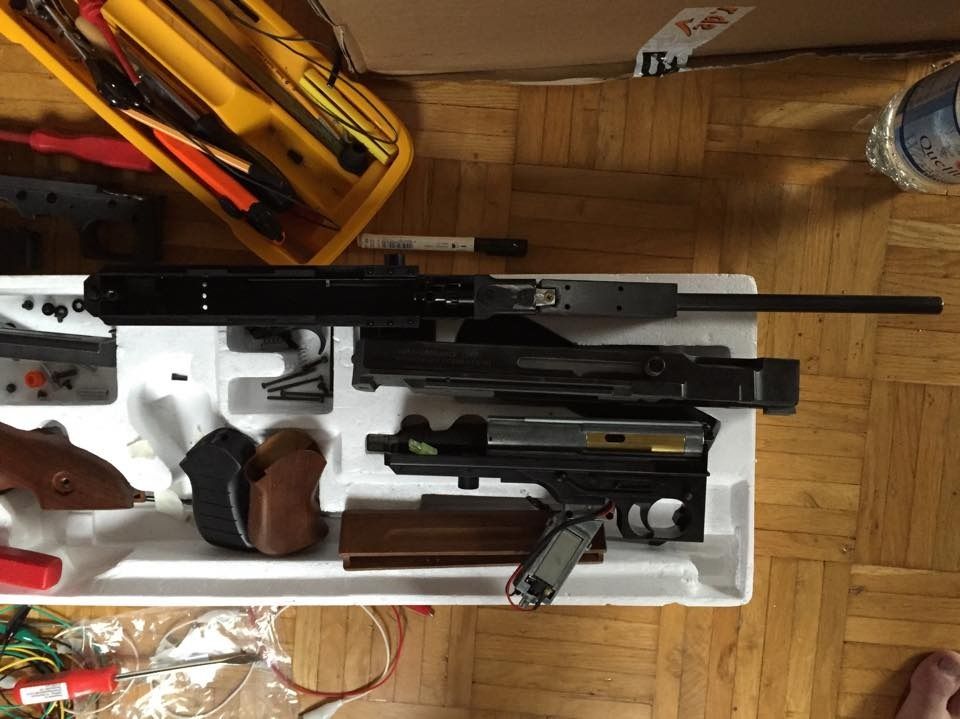
Sawed of resin part with the aluminium barrel. Made ready to fit over the air-soft barrel
Image

Disassembled Pulse and Air-Soft parts all over the place!
Image

Air-Soft front, with the brass barrel
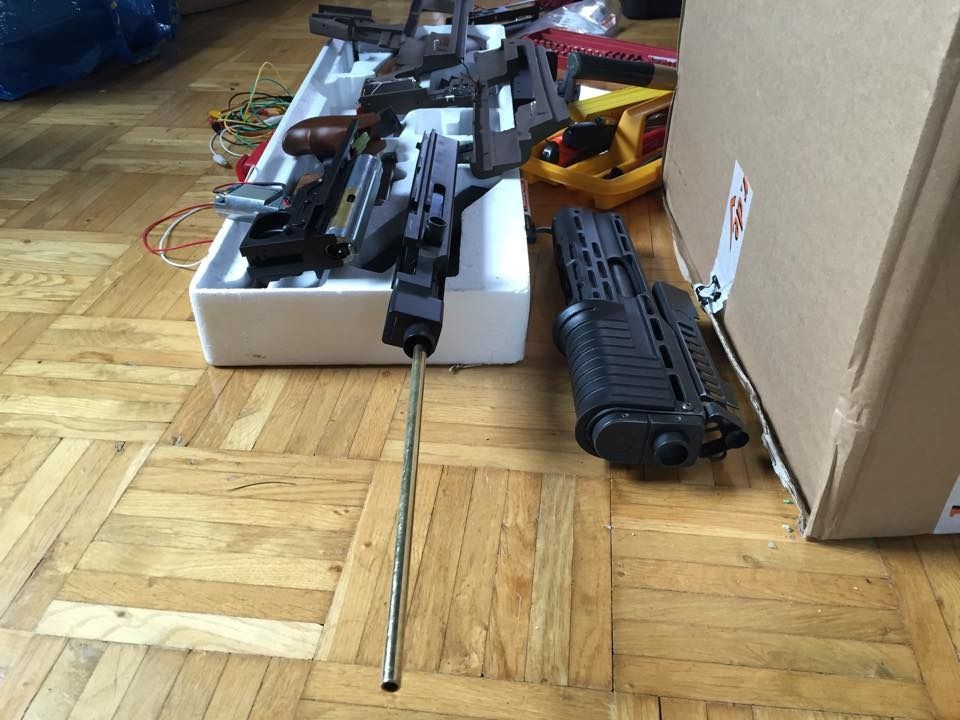
Image

Just a closer look
Image
Image

The fitted sawed off barrel (and part of my foot)
Image
Image

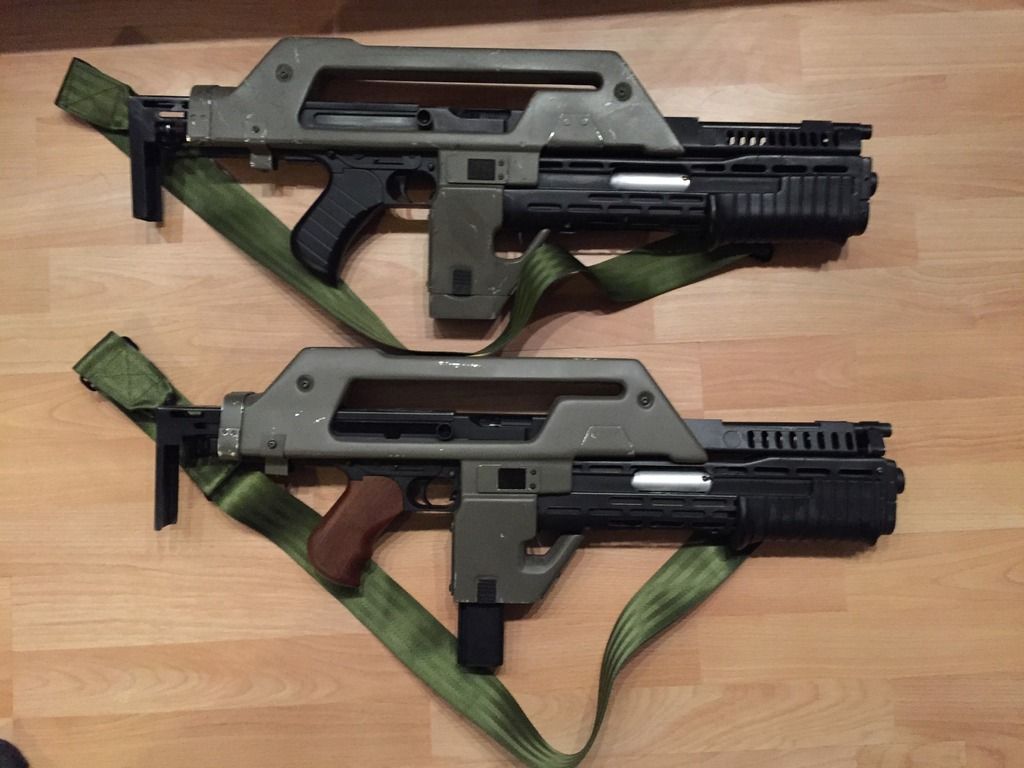
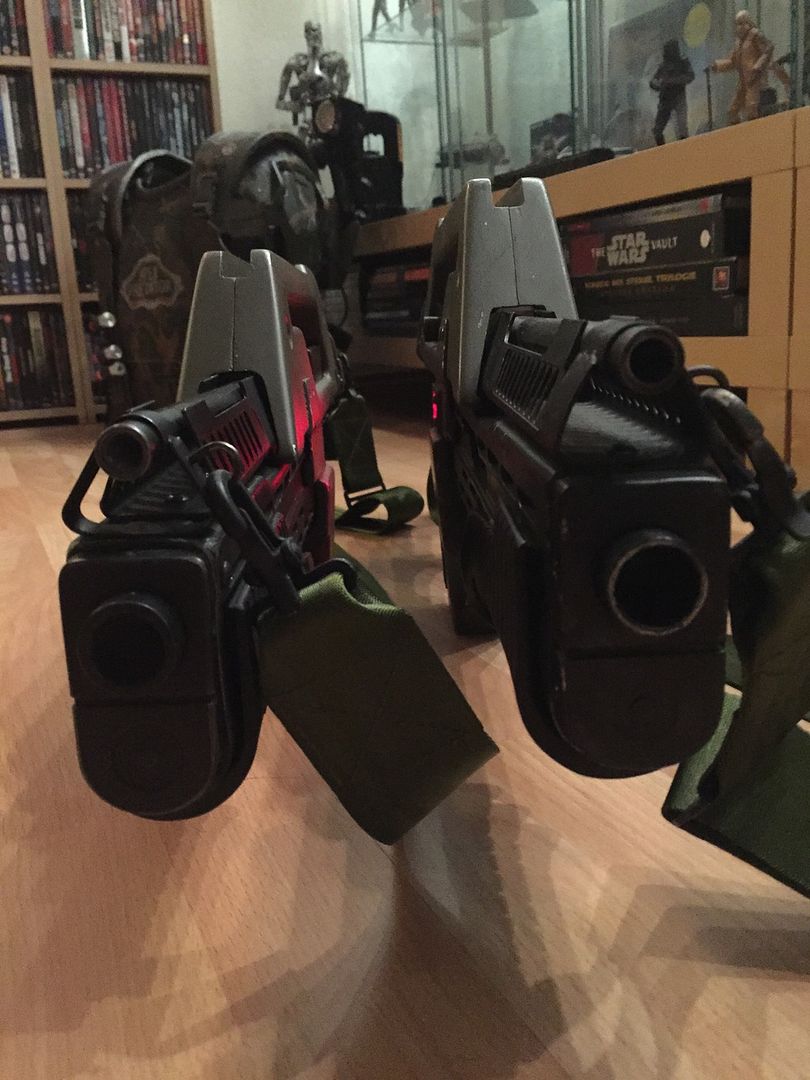
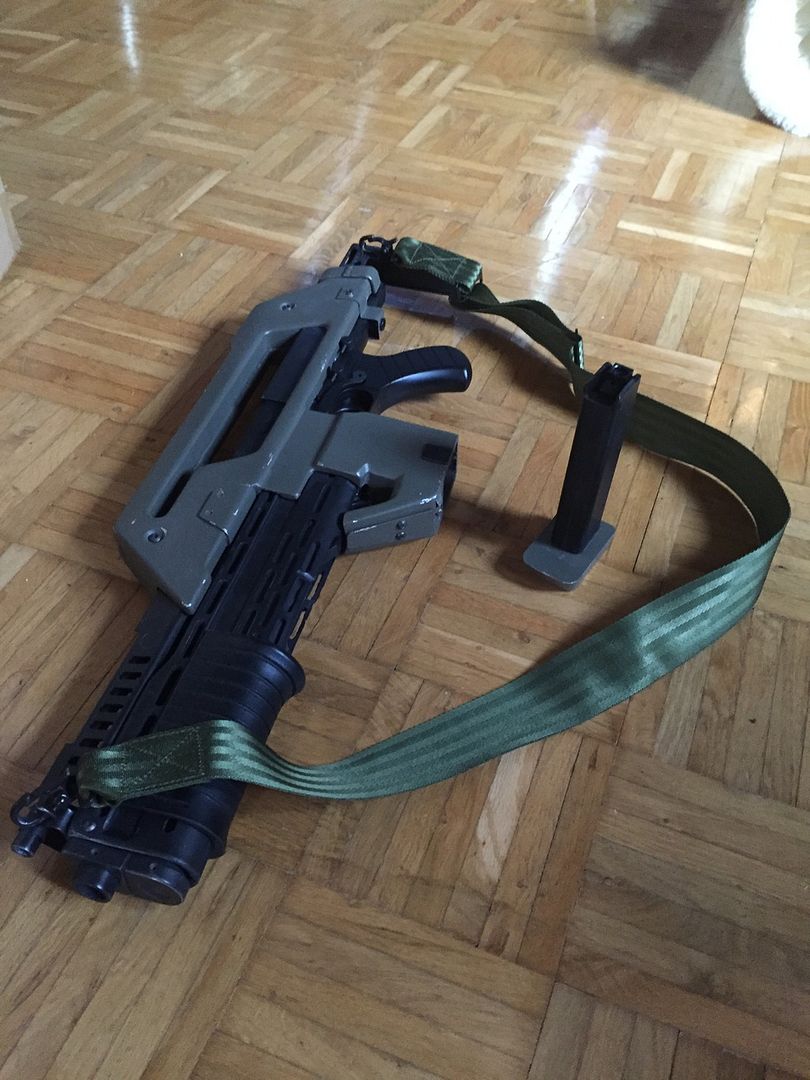
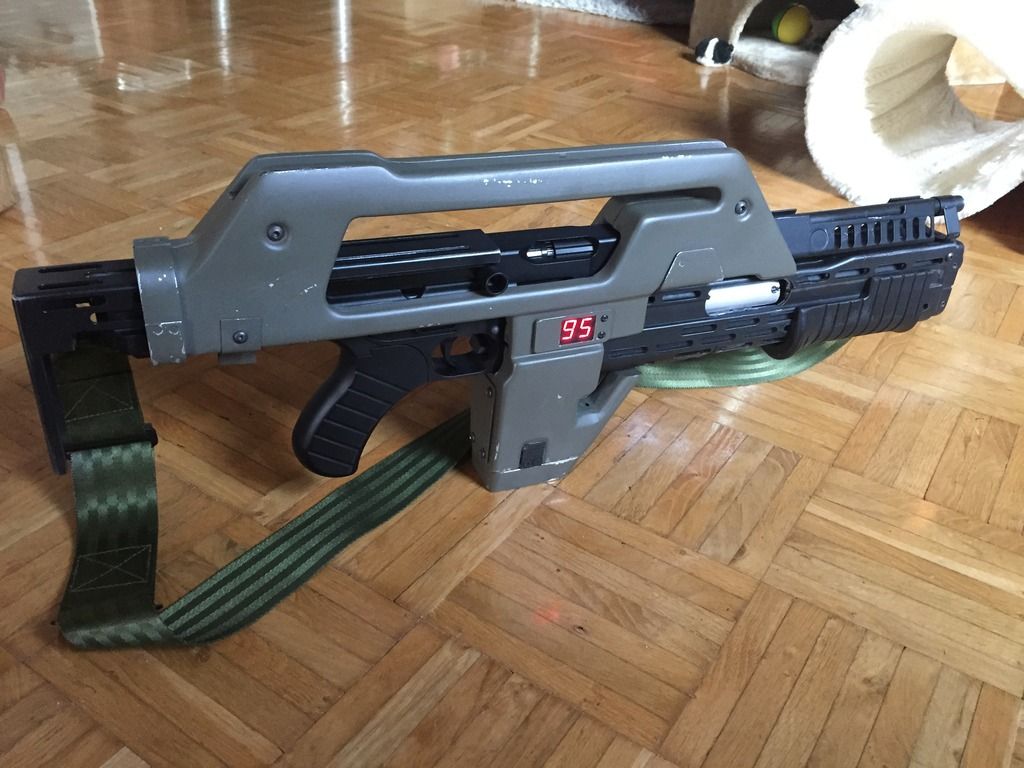
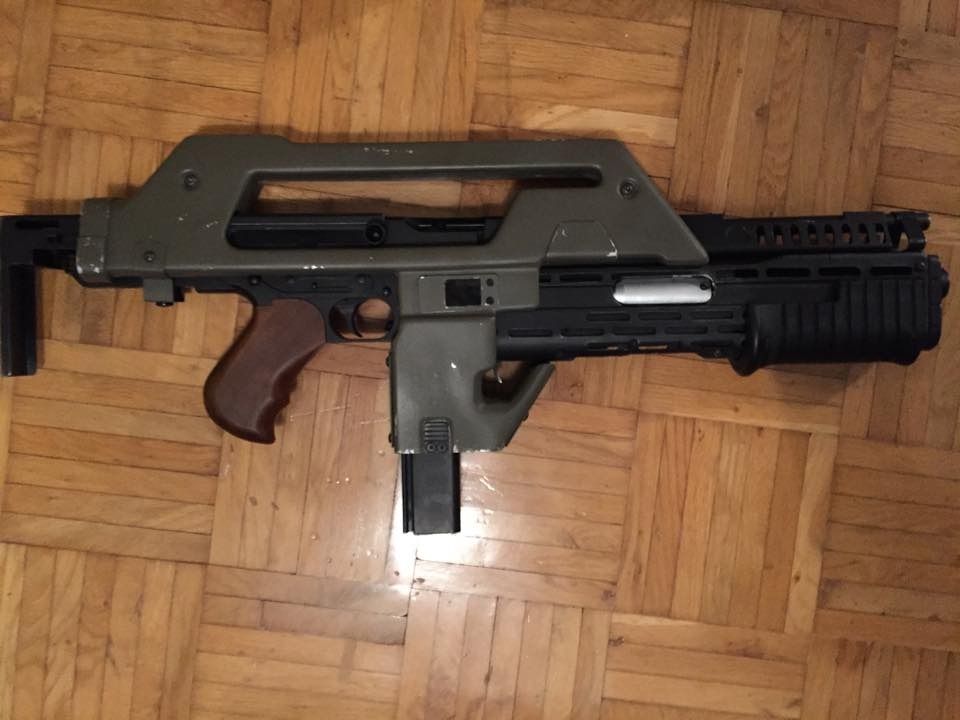
And...after some magic with the shrouds and some soldering the trigger with the counter, the current state:

(The mag will of course be shortened, as soon as my aluminium base-plate arrives)
Image
Image
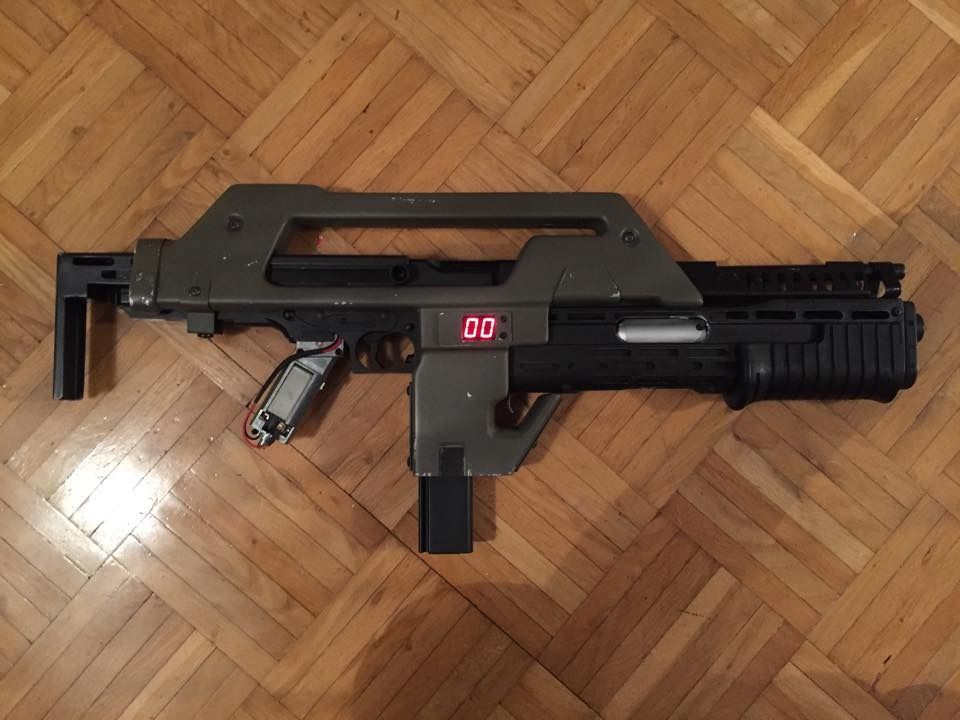
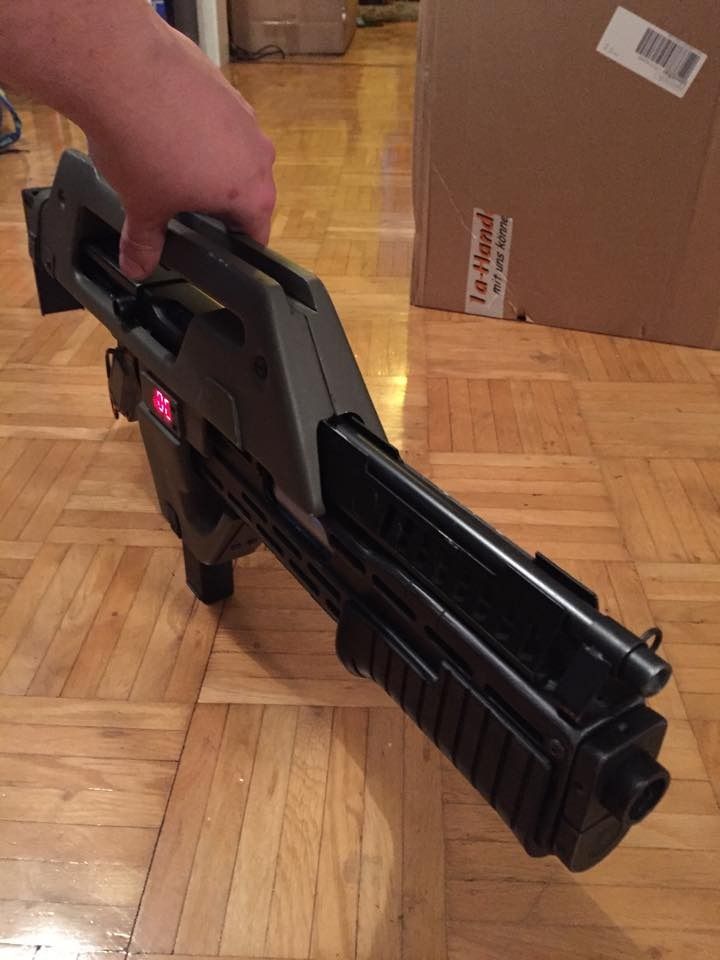
The Grip is only a placeholder, till my replacement arrives.
Image

That's it for now. :delta:


Top
 Profile  
Reply with quote  
 Post subject: Re: PFC Marine build - One step at a time (Image heavy)
PostPosted: Wed Apr 15, 2015 6:33 pm 
reload
User avatar

Location: Hamburg
Service Number: A03/TQ3.0.12136E1
Country: Germany
Welcome to the board Loki! Your builds look great!
I see Denis has done a great job in recruiting you.

@bigbisont: Don’t be jealous. You’re PR builds are motivation others to join or spending money on build a 2nd, 3rd ... (hero) build. 8)

_________________
Sgt. Frank Peters 'reload' Smartgun Operator
A03/TQ3.0.12136E1 "It will be no picknick!"
AL Colonial Admin. - Sergeant at Arms (SgtA) -- 2020-2022
GERCM - Executive Officer (XO)
UKCM Foreign Legion: The Deviant Dragoons


Top
 Profile  
Reply with quote  
 Post subject:
PostPosted: Mon Apr 20, 2015 10:38 am 
User avatar

Location: Ruhr Sector Protectorate
Country: Germany
Some more gear for the Marine

The Seiko Pulsemeter. Since we initially thought, we may not find the original (for a resonable price) we ordered perfect replicas from stapleton13 (thank you punkmarine, you know why ;-) ). (Highly recommended)

Image

And then, well the real one showed up and after some haggling, got into my possesion. The best part is, it was still bundled wirh the cables I need for my Hudson hacking pouch!

Image

From noble, this great grenade belt and pouches! Great work! I can hardly wait to put all the parts together at last...

Image

The next part is the belt tool (or as I would rather see it, additional nades)

Image

I'm still unsure about unpacking this one but then again, I bought it for my armor and not to gather dust on a shelf...

The next one was not a bargain...I found it on a fleemarket page in Canada...and shipping from there to Germany was rather costly...but I so wanted this item!

Image

For the helmet, I also still needed the Itex Defender and the metal hinge as well as the helmet adapter plate. I found a great source for that and will soon start on adding it to my M1 helmet. (The Itex, as well as this mic in this picture are in fact replicas. I could not find a real itex...for now :P )

Image

A fitting set of dogtags! Cheers corsasri

Image

The armor itself is currently with Obihahn, who was kind enough to help me with the painting of it. I did not want to ruin this great part of the costume with my meager skills. ^^


Last edited by loki on Mon Apr 20, 2015 4:53 pm, edited 2 times in total.

Top
 Profile  
Reply with quote  
 Post subject: Re: PFC Marine build - One step at a time (Image heavy)
PostPosted: Mon Apr 20, 2015 12:27 pm 
reload
User avatar

Location: Hamburg
Service Number: A03/TQ3.0.12136E1
Country: Germany
Great progress!
Now get on the ready line Marine: http://forum.alienslegacy.com/viewtopic.php?f=33&t=15089

_________________
Sgt. Frank Peters 'reload' Smartgun Operator
A03/TQ3.0.12136E1 "It will be no picknick!"
AL Colonial Admin. - Sergeant at Arms (SgtA) -- 2020-2022
GERCM - Executive Officer (XO)
UKCM Foreign Legion: The Deviant Dragoons


Top
 Profile  
Reply with quote  
 Post subject: Re: PFC Marine build - One step at a time (Image heavy)
PostPosted: Mon Apr 20, 2015 4:42 pm 
User avatar

Location: Ruhr Sector Protectorate
Country: Germany
I thought I did already 577_ops :-P

Some comparisson with Obihahns Gear:

Pulse Rifle
Obis Version is the 10 hole Ripley Hero, mine is the 8 hole version still missing the Mag base (therefore it is lower on some pics) and the rifle grip.

Image

Image

Image

Image

Even thought, both shrouds are from the same propmaker, they vary slightly in size. Dennis version has a slightly smaller mag casing, as well as a smaller part on the back of the shroud. They both already look awesome together! :-D

The Tracker(s) are even closer in comparisson, but considering we both used the same original parts, that was to be expected.

Image

Image

Image


Top
 Profile  
Reply with quote  
 Post subject: Re: PFC Marine build - One step at a time (Image heavy)
PostPosted: Mon Apr 20, 2015 7:05 pm 
reload
User avatar

Location: Hamburg
Service Number: A03/TQ3.0.12136E1
Country: Germany
Nice comparision!
I feel already guilty that I couldn’t bring Spulsy or a HCG PR with me.
On Sunday we can check @RPC with Andrea’s PR modifications.

_________________
Sgt. Frank Peters 'reload' Smartgun Operator
A03/TQ3.0.12136E1 "It will be no picknick!"
AL Colonial Admin. - Sergeant at Arms (SgtA) -- 2020-2022
GERCM - Executive Officer (XO)
UKCM Foreign Legion: The Deviant Dragoons


Top
 Profile  
Reply with quote  
 Post subject:
PostPosted: Mon Apr 20, 2015 7:28 pm 
AKKURAZI
User avatar

Location: Bochum, Ruhr area
Country: Germany
That was a fun day doing the comparison. Pictures look good. Now finish that tracker and the PR! ;)


Top
 Profile  
Reply with quote  
 Post subject: Re:
PostPosted: Mon Apr 20, 2015 8:36 pm 
User avatar

Location: Ruhr Sector Protectorate
Country: Germany
ObiHahn wrote:
That was a fun day doing the comparison. Pictures look good. Now finish that tracker and the PR! ;)


ASAP mate and it was a blast. The "Speckmade" was awesome! Oh, and you don't forget 'bout my paintjob! :mrgreen:


Top
 Profile  
Reply with quote  
 Post subject:
PostPosted: Fri May 01, 2015 10:02 am 

Location: Herten, Ruhr area
Country: Germany
Absolutely great Loki, I am looking forward to our first Troop, which is really great.


Top
 Profile  
Reply with quote  
 Post subject: Re: PFC Marine build - One step at a time (Image heavy)
PostPosted: Thu Jul 16, 2015 7:34 pm 
User avatar

Location: Ruhr Sector Protectorate
Country: Germany
Thank you Desert, me too! :D

Damnation, has it alteady been that long?! Had no time to make things happen in the last couple of month, getting our wedding ready and my work take up much more time now, but at least some minor update. I got the aluminium parts from SD and was able to finish up the Rifle.

Image

Image

The rest is still in limbo, but I do hope to get all set and done around this time next year! Cheers mates!


Top
 Profile  
Reply with quote  
 Post subject:
PostPosted: Thu Jul 16, 2015 9:04 pm 
AKKURAZI
User avatar

Location: Bochum, Ruhr area
Country: Germany
Yay! Progress! There is also progress on the "painting front"...some at least.

Rifle party coming soon, right? :P


Top
 Profile  
Reply with quote  
 Post subject:
PostPosted: Fri Jul 17, 2015 1:58 am 
NZCM "Bug Stompers"
User avatar

Location: West Coast, NZ
Service Number: A06/TQ1.0.12144E1
Country: New Zealand
Pulse rifles and trackers look awesome guys!!!!

You guys in Germany are so lucky to have easy access to original parts. So jealous. :(

Carry on sir.


Top
 Profile  
Reply with quote  
 Post subject: Re:
PostPosted: Fri Jul 24, 2015 8:56 am 
User avatar

Location: Ruhr Sector Protectorate
Country: Germany
ObiHahn wrote:
Yay! Progress! There is also progress on the "painting front"...some at least.

Rifle party coming soon, right? :P


At (long) last! And yes, Rifle-show-of-food-massacre needs a revival soon! :mrgreen:


prev wrote:
Pulse rifles and trackers look awesome guys!!!!

You guys in Germany are so lucky to have easy access to original parts. So jealous. :(

Carry on sir.


Thank you prev, but you don't need to be jealous! While some parts originated from Germany and could be obtained here in the EU, I for myself had to stretch out very far for some other parts. The Beyerdynamic headset for example, at first found someone in the UK and in Germany but they did not want to part with it and I had mine shipped from Canada (with a seaplane form a remote spot, somewhere in the farthest corner of the Youkon territory to Toronto and then via cargoplane to Germany. Do not ask about the costs... :shock: )
Also, our team got some very cool parts for the helmet from your neighbors in Australia! :wink:


Top
 Profile  
Reply with quote  
 Post subject:
PostPosted: Mon Jan 13, 2020 11:03 pm 
GarageGeek
User avatar

Country: United States
This would be a great thread to revive and re upload the pictures


Top
 Profile  
Reply with quote  
 Post subject: Re: PFC Marine build - One step at a time (Image heavy)
PostPosted: Thu May 14, 2020 2:34 am 

Country: United States
Agree. How is this build coming?


Top
 Profile  
Reply with quote  
Display posts from previous:  Sort by  
Post new topic Reply to topic  [ 19 posts ] 


You cannot post new topics in this forum
You cannot reply to topics in this forum
You cannot edit your posts in this forum
You cannot delete your posts in this forum
You cannot post attachments in this forum

Search for:
Jump to: