The discussion of the Alien series of films and the props used in them is the aim, but if it's got Big Bugs and Big Guns, then they are welcome too!


Post new topic Reply to topic  [ 339 posts ]  Go to page Previous  1 ... 10, 11, 12, 13, 14  Next
Author Message
 Post subject:
PostPosted: Tue Nov 16, 2021 12:04 am 
I figured out how to add images again. :)

Epsilon also sent me this guy (below).

Attachment:
APC_21111402.jpg
APC_21111402.jpg [ 185.9 KiB | Viewed 6381 times ]


With a lick of paint on the uniform this guy is a perfect Lt. Gorman! He looks very much at home in his command chair. :)

Another friend, a local mate who came to visit yesterday, brought me this string of cool-white micro LEDs, perfect for interior cabin lighting.

Attachment:
APC_21111403.jpg
APC_21111403.jpg [ 264.13 KiB | Viewed 6381 times ]


There are a ton of LEDs here - more than enough!

Attachment:
APC_21111404.jpg
APC_21111404.jpg [ 262.98 KiB | Viewed 6381 times ]


They light up really well - not too bright and they'll look the part when incorporated into the APC.

Attachment:
APC_21111405.jpg
APC_21111405.jpg [ 267.21 KiB | Viewed 6381 times ]


Here's a look at the size of the individual LEDs against a scalpel blade. It looks like there's a little blob of hot glue type stuff on each one, which makes them look like 'emergency' lights. I'll just have to scrape or burn off the lacquer coating on the wire when I solder them together.

I feel blessed to receive such kindness from forum buddies and local friends alike and I'm really looking forward to getting back to it.


Top
 Profile  
Reply with quote  
 Post subject:
PostPosted: Tue Nov 16, 2021 9:11 pm 
User avatar

Country: Netherlands
Good to see the new recruits arrived in one piece, wel mostly ;-) Thanks for sharing all these build updates over the years!


Top
 Profile  
Reply with quote  
 Post subject: Re: 1:18 scale M557 APC scratch-build
PostPosted: Mon Nov 29, 2021 6:56 pm 
Thanks Epsilon - you'll see that Gorman has gotten a little attention today. :)

So, I got a couple of hours in on the APC. :)

Attachment:
APC_21112901.jpg
APC_21112901.jpg [ 120.11 KiB | Viewed 6283 times ]


Yes, the colour of the rear lights has been bugging me for a while. I made mine red, thinking logically and not even checking any reference.

Attachment:
APC_21112902.jpg
APC_21112902.jpg [ 271.23 KiB | Viewed 6283 times ]


Of course they're blue in the movie, so my red LEDs got dug out and replaced with blue. I needed to shave them down on the dremel to get rid of the 'dome' top.

Attachment:
APC_21112903.jpg
APC_21112903.jpg [ 199.53 KiB | Viewed 6283 times ]


Next step was light blocking with thick black acrylic. (I'm sure I've been here before). :)

Attachment:
APC_21112904.jpg
APC_21112904.jpg [ 181.09 KiB | Viewed 6283 times ]


There we are. It looks a little weird on camera but looks fine in real life.

Attachment:
APC_21112905.jpg
APC_21112905.jpg [ 137.5 KiB | Viewed 6283 times ]


Gorman got a couple of khaki base coats too.

Attachment:
APC_21112906.jpg
APC_21112906.jpg [ 177.23 KiB | Viewed 6283 times ]


Last up for today, I tackled the searchlight brush guard. Brass rod was bent up, glued into pre-drilled holes and given a lick of paint.

Attachment:
APC_21112907.jpg
APC_21112907.jpg [ 114.77 KiB | Viewed 6283 times ]


Attachment:
APC_21112908.jpg
APC_21112908.jpg [ 111.74 KiB | Viewed 6283 times ]


There we go. The exterior of the APC is all different shades of Olive Drab at the moment. I can't get a regular paint to match what's in the rattle can. It'll get a final overspray from that but I only have one can left, so that'll be one of the last jobs.


Top
 Profile  
Reply with quote  
 Post subject: Re: 1:18 scale M557 APC scratch-build
PostPosted: Sat May 21, 2022 5:12 pm 
I'm back on this, hoping to get a second video together showcasing the lighting of the APC but first I have to get the wiring to a decent state. ;)

I was wondering if I have enough crew to fully man the APC and it looks like I do, 8 in the back, 2 on the rear pair (Ripley and Burke seats), Gorman at the console, Apone on the front pair and a driver - 13 bodies.

Attachment:
APC_22052102.jpg
APC_22052102.jpg [ 387.29 KiB | Viewed 5929 times ]


I couldn't think how I could route the lighting wiring under the seats without raising either them or the flooring panel - room is pretty tight in there and I also have to work out where the safety bar wiring goes too.

Attachment:
APC_22052103.jpg
APC_22052103.jpg [ 361.54 KiB | Viewed 5929 times ]


I found a literal out of the box solution and I'll be adding little clips and a paint job to tidy up where the cabling goes around the wheel hub.

Attachment:
APC_22052104.jpg
APC_22052104.jpg [ 346.33 KiB | Viewed 5929 times ]


There was a similar routing issue for the headlight wiring which runs over the side door. I wanted to keep the roof section removeable so this is getting worked in around other elements.

Attachment:
APC_22052105.jpg
APC_22052105.jpg [ 302.63 KiB | Viewed 5929 times ]


The rear lights are wired in on the opposite side and you can see where they emerge behind the wheel (green/white wires). I'm keeping them as close to the hinge as I can to avoid unneccessary wear.

Attachment:
APC_22052106.jpg
APC_22052106.jpg [ 373.63 KiB | Viewed 5929 times ]


You can just see the wires at the bottom of the back wall but the seating will cover these up - and they'll be painted.

Attachment:
APC_22052107.jpg
APC_22052107.jpg [ 477.22 KiB | Viewed 5929 times ]


..and here's where we're currently at. I think I'll add mini magnets to all of the interior pieces to hold them in place.

Attachment:
APC_22052108.jpg
APC_22052108.jpg [ 432.71 KiB | Viewed 5929 times ]


Top
 Profile  
Reply with quote  
 Post subject:
PostPosted: Sat May 21, 2022 5:45 pm 
Harvester of Sorrow
User avatar

Location: Lancashire (Wirral born)
Service Number: A04/TQ1.0.32156E1
Country: United Kingdom
Looking so cool mate, you should be proud!

*Patiently waits for dropship build*

_________________
Image AKA: Simon


Top
 Profile  
Reply with quote  
 Post subject: Re: 1:18 scale M557 APC scratch-build
PostPosted: Sun Sep 25, 2022 12:05 pm 
Firstly I just had to do something about this awful bird's nest of wiring. If I'd planned it properly from the start (and with what I know now) I'd have used an all-purpose 'power rail' running through the interior and tapped off from that where I needed for the individual lights. I'd also have used thinner guage wiring from the start.

Image

Anyhow, I found a solution using GPIO headers from an electronics kit I bought to supplement my meagre knowledge in the subject.

Image

I've soldered all the short sides together and will use the long sides to clip wiring to for modules that need to be removable - like Gorman's console.

Image

Image

These donor connectors are used in testing on breadboards - I'm using just one end to connect to the GPIO headers.

Image

Image

In this next shot you can see the rough wiring plan I worked out.

Image

There was some heat shrink sleeving in the kit I got but it's too wide for these little wires.

Image

I also started working on the paint finish for the overhead details in the console area. They got a coat of chrome and will get a dry-brushed top coat of colour.

Image

The lights from the console (screens and desk) got twisted together, tinned then had the connector for positive and negative soldered on.

Image

Image

A quick test and all OK.

Image

On with the rest of the interior lighting - all bundled together into a single pair of + and - connectors.

Image

Tested and all good.

Image

The whole area got a much needed tidy-up and I reorganised the workspace prioritising the tools I currently use most.

Image

... and that's about it for now. I've wrestled for a long time with the wiring but it's getting done, which has given me enthusiasm to push ahead.

Thanks for looking and see you again hopefully soon. :)


Top
 Profile  
Reply with quote  
 Post subject:
PostPosted: Sun Sep 25, 2022 5:06 pm 
User avatar
Awesome work! Also doesn't make me feel so bad for taking so long building my Alien Warrior.. :)

_________________
still alive


Top
 Profile  
Reply with quote  
 Post subject:
PostPosted: Tue Sep 27, 2022 5:03 am 
Mad Cat
User avatar

Location: Active duty: USS Catalpa
Service Number: AO3/TQ6.0.79749E8
Country: United States
Man this is looking good!

_________________
"Awww, someone tell me that's a boot!

It's a boot!"

III drops


Top
 Profile  
Reply with quote  
 Post subject:
PostPosted: Fri Oct 21, 2022 2:28 pm 
Thanks metalalien, I'm taking comfort in the old adage: 'It's done when it's done'. :)

Hey Dropshipbob - thanks for sticking around!

I was scanning the shelves at me local model/hobby supplies shop and was overjoyed to see that they'd restocked their tubing - specifically styrene 2.4mm hollow which is exactly what I've used for the tube-light sections on the APC's seating restraints. I've been waiting for this stuff for a long time and couldn't find it anywhere else (unless I was prepared to spend hundreds on a full point-of-sale display).

Anyway, I can now finish the last of the seating elements that was just waiting for that last short piece of tube.

I dug out the 'kit' of parts I already had from storage. I'd made all of the other elements in one big batch. I know I've gone through this earlier in the thread but I needed to remind myself - so here's how it all goes together.

Here's the kit of parts - now complete with the hollow tube.

Image

1/ Two TINY LED's that drive light along the fibre optic strands.
2/ Two short lengths of fibre optic to go inside the tube.
3/ The hollow tube which will be drilled in the centre for the LEDs.
4/ Two tiny magnets that hold the whole thing in the 'up' position - one on the rail, one embedded in the back wall. (I couldn't get these any closer to each other without them snapping together). :)
5/ The small rail that supports the tummy cushions.
6/ The main vertical spar with pre-sawn bend points. The LED wiring will be fed down this to the tube.
7/ Two tummy cushion sets, each with inner and outer.
8/ Tummy cushion brackets.
9/ Hinge points for the rear wall.
10/ Central hinge tube to take the main vertical spar.

The plastic tweezers are essential for handling the magnets. The only thing missing from this image is a small length of 1mm brass rod for the hinge.

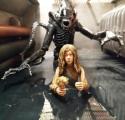
So, I'm aiming to go from this.

Image

..to this.

Image

Image

These little LEDs are pretty powerful.

Image

And the final effect once all of this is done will be..

Image

Image

Another small job I did was to add brass brackets to the practical wiring I hid in the wheel arches (paint's still damp here). With the wheels on very little of this is visible anyway.

Image

I hope to have some time this week to get this seating completed. It's afiddly job and needs concentration. Wish me luck.:)


Top
 Profile  
Reply with quote  
 Post subject:
PostPosted: Fri Oct 21, 2022 8:47 pm 
User avatar
the lights really bring it to life!

_________________
still alive


Top
 Profile  
Reply with quote  
 Post subject: Re: 1:18 scale M557 APC scratch-build
PostPosted: Sun Oct 23, 2022 8:25 pm 
Thanks Metalalien - it's the first time I've attempted any 'proper' lighting.

Okay here goes with the last of these seat restraints. No part of this job is easy - it's all really fiddly, especially with my old sausage fingers. :)

Image

Still, I've got some moral support playing on the tablet while I work.

Image

I managed to get the LEDs threaded through the brasswork, got that bent up properly and added the hinge sleeve and brass pin.

Image

Got the LEDs oriented back-to-back and installed in the light tube. That tested OK so I added the fibre optics and sealed the whole thing.

Image

Next up is adding the magnet in the rear panel. Plastic tweezers at the ready. :)

Image

..added the hinge plates, glued the unit into the frame and this is where I left off for today.

Still to do: add the tummy cushions and the secondary rail, paint and finish.

Image


Top
 Profile  
Reply with quote  
 Post subject:
PostPosted: Tue Oct 25, 2022 5:27 pm 

Location: Connecticut
Service Number: A09/TQ2.0.22951S1
Country: United States
Those tiny details make it, but always a PITA to pull off...

_________________
DON’T call me eighty-five.

Assistant Superintendent Leach,
Fiorina 161
"Serenity Through Confinement"


Top
 Profile  
Reply with quote  
 Post subject: Re: 1:18 scale M557 APC scratch-build
PostPosted: Wed Oct 26, 2022 12:00 am 
You got that right ID1OT. I spent a few hours today cleaning up / touching up some paint, re-soldering dodgy connections and figuring out the rest of the lighting rig (including the switches).

More pics soon. :)


Top
 Profile  
Reply with quote  
 Post subject: Re: 1:18 scale M557 APC scratch-build
PostPosted: Wed Oct 26, 2022 9:51 pm 
More work on the light bars now that I've got the last of them up and working.

Image

In this screenshot you can see (top right) that the light bar is 'capped' at either end and I noted elsehwre in the movie that it doesn't go all the way around too. I presume the Art Department built a tubular metal cage to house the flourescent tubes used for these lights.

I found some thick paint in an older pot - just right for light blocking - started in on the ends.

Image

I used an old sign-writer's trick to paint (hopefully) straight lines on the tubes.

Image

The painter's bridge is made from an old steel rule and a couple of Tamiya paint jars.

Image

Image

Well, it's as straight as it's going to get. :)

Image

Looks like I'll need another coat once this has dried.

Image

Here's a candid wide shot with flash - trying to look like an on-set continuity polaroid.

Image

..and a couple with lighting and without/with crew. The seat restraint here isn't yet rigged up to the battery box.

Image

Image


Top
 Profile  
Reply with quote  
 Post subject:
PostPosted: Wed Oct 26, 2022 10:16 pm 

Location: Connecticut
Service Number: A09/TQ2.0.22951S1
Country: United States
You need some India ink/panel line solution around the details to make them "pop", like that (thing) on the back of the seat on the left side of the photo.

I bought some stuff (decades ago) for the purpose- I bought black and brown- and I use them all the time to not only bring out the details, but also to hide the "less than perfect" paint lines where objects intersect.

_________________
DON’T call me eighty-five.

Assistant Superintendent Leach,
Fiorina 161
"Serenity Through Confinement"


Top
 Profile  
Reply with quote  
 Post subject:
PostPosted: Wed Oct 26, 2022 10:18 pm 
Site Admin
User avatar

Location: Wasteland Minnesota, USA
Service Number: A06/TQ2.0.65181E6
Country: United States
Amazing work on this project!

_________________
"A writer needs a pen, a painter a brush, and a filmmaker an army." - Orson Wells.

http://www.rookscastle.com
http://www.alchemyarms.com


Top
 Profile  
Reply with quote  
 Post subject:
PostPosted: Wed Oct 26, 2022 10:30 pm 
ID1OT - you're absolutely right, there's just a base coat on the model at the moment. Lots of finessing to do. I'll definitely be introducing pin-washes, as you suggested, as well as adding different shades and semi-gloss lacquers to areas that I want to have a bit of shine.

Russ Krook III - thanks!


Top
 Profile  
Reply with quote  
 Post subject:
PostPosted: Thu Oct 27, 2022 4:02 am 

Location: Connecticut
Service Number: A09/TQ2.0.22951S1
Country: United States
Perfect. It’s going to be awesome.

_________________
DON’T call me eighty-five.

Assistant Superintendent Leach,
Fiorina 161
"Serenity Through Confinement"


Top
 Profile  
Reply with quote  
 Post subject:
PostPosted: Thu Oct 27, 2022 6:53 pm 
User avatar

Location: East Tennessee
Country: United States
I love those last shots of the interior. Just awesome.


Top
 Profile  
Reply with quote  
 Post subject:
PostPosted: Sat Nov 05, 2022 12:17 am 
ID10T - I hope so.

Space Jockey, I couldn't have got where I am without your input mate, so thank you very much.

More to come soon, I promise. :)


Top
 Profile  
Reply with quote  
 Post subject: Re: 1:18 scale M557 APC scratch-build
PostPosted: Sun Nov 06, 2022 9:13 pm 
User avatar

Location: Wellywood.
Service Number: A10/TQ0.0.82146E1
Country: New Zealand
Skiffy wrote:
Anyhow, I found a solution using GPIO headers from an electronics kit I bought to supplement my meagre knowledge in the subject.
Image)


This is simple but no less genius; thank you for posting your process pics [esp these wiring ones ;) ].
I've been working on a wee project with an arduino nano, and have run out of gnd pins ... idea yoinked = problem sorted 8) 8) 8)

_________________
Cpl Aron "septic" Williams
A10/TQ0.0.82146E1


Top
 Profile  
Reply with quote  
 Post subject:
PostPosted: Sun Jan 29, 2023 8:43 pm 
I had some time and got the APC out and onto the bench today and..

Image

You can see Lt. Gorman's not happy. The rear roof has detatched from the back wall. Without the turret runners to keep those parts together, and with the inner rear wall not being glued yet it's no real surprise - but still disappointing.

Image

Oops. This didn't go smooth, or by the numbers.

Image

This inner wall goes a long way to secure that join but I was nervous about closing in that wiring.

Image

At the moment my APC has a rear hatch for speedy debussing of troops. :)

Image

I planned to add some strenthening brackets to the join between the rear roof and back wall panels. To allow me to align and glue them in place I put some sellotape over the side walls - I definitely didn't want those getting glued and sticking the roof closed.

Image

Here I've got the brackets on and the glue is drying.

Image

I glued the inner rear panel on too so this is all sealed and strong.

Image

Hopefully I won't get too much grief from Lt. Gorman - maybe a latrine cleaning detail. :)

I bought a selection of heat-shrink tubing this week too, something I've been meaning to get - to stabilise and strengthen the solder joints. More on that later.


Last edited by Skiffy on Sun Jan 07, 2024 11:31 pm, edited 1 time in total.

Top
 Profile  
Reply with quote  
 Post subject:
PostPosted: Mon Jan 30, 2023 2:36 pm 
Harvester of Sorrow
User avatar

Location: Lancashire (Wirral born)
Service Number: A04/TQ1.0.32156E1
Country: United Kingdom
I kinda like the idea of the rear ramp :)
Getting there buddy!

_________________
Image AKA: Simon


Top
 Profile  
Reply with quote  
 Post subject:
PostPosted: Mon Jan 30, 2023 3:58 pm 
User avatar
Awesome! Love it.

_________________
still alive


Top
 Profile  
Reply with quote  
 Post subject: Re: 1:18 scale M557 APC scratch-build
PostPosted: Sun Jan 07, 2024 2:52 pm 
I started in on soldering one of the new connectors I bought (thanks for the heads up Ant from Starship Modeler) which are the same ones Adam Savage and team use on their Starfield ship build.

Image

That worked great, although the cheap heat-shrink I have got toasted a little. I think better quality gear is needed there. :)

Image

Image

I'm also painting in some areas that are unseen until the model opens up - areas that wouldn't ever be seen normally, so I've chosen to black them out. I might even blank some of them off if I'm not using the space at all.

Image

Image

In the background you can see 2 test prints of the Martian ship from Quatermass which I'm building in 3d in the evenings sat in front of the fire watching TV. There's also some choice viewing on my tablet to keep me motivated. :)


Last edited by Skiffy on Sun Jan 07, 2024 11:28 pm, edited 1 time in total.

Top
 Profile  
Reply with quote  
Display posts from previous:  Sort by  
Post new topic Reply to topic  [ 339 posts ]  Go to page Previous  1 ... 10, 11, 12, 13, 14  Next


You cannot post new topics in this forum
You cannot reply to topics in this forum
You cannot edit your posts in this forum
You cannot delete your posts in this forum
You cannot post attachments in this forum

Search for:
Jump to: