The discussion of the Alien series of films and the props used in them is the aim, but if it's got Big Bugs and Big Guns, then they are welcome too!


Post new topic Reply to topic  [ 143 posts ]  Go to page Previous  1, 2, 3, 4, 5, 6  Next
Author Message
 Post subject: Re: Mini alien warrior build
PostPosted: Tue Aug 29, 2017 2:28 pm 

Location: ATX
Country: United States
Thanks, bigbisont!

_________________
"I'm working on it ... "


Top
 Profile  
Reply with quote  
 Post subject: Re: Mini alien warrior build
PostPosted: Thu Aug 31, 2017 4:25 am 

Location: ATX
Country: United States
Tubes!

So as much as I was avoiding buying this shop vac hose, I went ahead and did it cause I've had nooooo luck finding a junk one anywhere. I did find some other vacuum hoses at the ole Goodwill, but they weren't the right diameter for the large side tubes. Good thing I had a Home Depot gift card!

Image

I lengthened the back curve a bit last night, hard to tell in this pic, but here's what were messing with tonight.

Image

I estimated the length using a Hot Toys pic as a reference, and cut a section of hose. The big razor goes through this pretty easily. I then concluded that cutting that section in half was the way to go and would be the correct depth. (As opposed to keeping the tube intact and trying to set it into the head.) There are seam lines that mark the halves luckily enough so I just followed those with the razor. Again, easily slices through.

Plop. Done! (I used the heat gun to straighten it a tad since its got some memory from being packaged. The little curve I did leave I lined up with those seams.)

Image

Image

The taper cut.

Image

I then cut (hacked) a hole at the back of the head to insert the tube. I tapered the tube a bit and angled the foam to minimize distorting the hose. You basically just cut an entrance the width of the hose and then make some room inside the head for about 3/4" to sit in there. I over did it a tad, but once everything's painted black it'll be fine.

Image

Aah. Close enough.

Image

On the front end of the tube I again cut the corners to a taper and then used the heat gun to narrow it a bit. Looks good! Not sure how to fasten it down though ...

Image

Image

Image

Before and after "manipulation". Now I'll just do the same on the other side. Yaaaawwwwnn ... tomorrow.

Image


:) A little test earlier in the afternoon:

https://youtu.be/f6wPpctX758

_________________
"I'm working on it ... "


Top
 Profile  
Reply with quote  
 Post subject:
PostPosted: Sat Sep 02, 2017 1:26 pm 
Prop Churner Outer
User avatar

Location: Bath, Maine
Service Number: A03/TQ1.0.12143G1
Country: United States
Really looking great man!

_________________
:delta: My entry-level prop and costume tutorials: viewtopic.php?f=3&t=12751 :delta:


Top
 Profile  
Reply with quote  
 Post subject: Re: Mini alien warrior build
PostPosted: Sun Sep 03, 2017 4:13 am 

Location: ATX
Country: United States
Thanks, retro!

After working on those side tubes I went back to the lower jaw and did some re-working. Slimming it down a bit more. I made the front teeth smaller and am going to reposition the fangs a bit more to the sides. Chop chop choppity chop!

Image

Figured out a neat trick to suspend the repositioned teeth woth pin needles then squirted the foam underneath. Seems to work.

Image

Cheeeze.

Image

Whatchoo lookin' at?

Image

_________________
"I'm working on it ... "


Top
 Profile  
Reply with quote  
 Post subject: Re: Mini alien warrior build
PostPosted: Mon Sep 04, 2017 1:28 am 

Location: ATX
Country: United States
Facial reconstructive surgery!

The rare early evening post ...

Since I was repositioning the fangs to the sides, I couldn't rework the gums, so I cut 'em out!

Made as straight as possible block cut out, then matched the lines to a piece of scrap foam.

Image

Image

Test fit, size down, then hot glued in. If I was carving deeper into the foam, the spray foam would be better but since I'm doing shallow sculpting the hot glue is faster and just as secure.

Image

Image

Both sides done. Chipmunk.

Image

_________________
"I'm working on it ... "


Top
 Profile  
Reply with quote  
 Post subject: Re: Mini alien warrior build
PostPosted: Wed Sep 06, 2017 4:09 am 

Location: ATX
Country: United States
Still working on the jaw and teeth. Slowly.

Also busted out the spackle to start filling in the holes. I need to prep this for sealing so I can start gluing down the tubes and such.

Image

Image

_________________
"I'm working on it ... "


Top
 Profile  
Reply with quote  
 Post subject: Re: Mini alien warrior build
PostPosted: Sun Sep 10, 2017 1:38 am 

Location: ATX
Country: United States
After another run of spackling and sanding. The spackle is great for filling medium to small holes/gouges/scratches but this spackle is very soft so it sands faster than the surrounding foam. I'm hoping to smooth the rougher surfaces out with the white/wood glue.

Image

Image

After sanding I wiped it down with a damp paper towel. Gonna let it air dry for a little then go ahead and start using the gesso to give it a first seal.

_________________
"I'm working on it ... "


Top
 Profile  
Reply with quote  
 Post subject: Re: Mini alien warrior build
PostPosted: Sun Sep 10, 2017 3:28 am 

Location: ATX
Country: United States
Gesso'ed up. I'll do a second coat tomorrow morning.

Image

_________________
"I'm working on it ... "


Top
 Profile  
Reply with quote  
 Post subject:
PostPosted: Sun Sep 10, 2017 12:50 pm 
Prop Churner Outer
User avatar

Location: Bath, Maine
Service Number: A03/TQ1.0.12143G1
Country: United States
Fantastic!

_________________
:delta: My entry-level prop and costume tutorials: viewtopic.php?f=3&t=12751 :delta:


Top
 Profile  
Reply with quote  
 Post subject: Re: Mini alien warrior build
PostPosted: Tue Sep 12, 2017 3:27 am 

Location: ATX
Country: United States
Thanks, retro!

I filled in and smoothed out the ribs with more spackle, and put the first thin coat of PVA. Not sure how it will react with the spackle, so I went thin and only did a portion of the side. It should be fine. I'll check it in a sec and then add more coats slowly.

I'm hoping the PVA fills in the smaller pits and rougher spots. Good news is the surfaces don't have to be perfect. I'd like most of it to look smooth though.

Image

Image

I'm a tad behind in my schedule, but I always account for lags. I want to start his shoulders and chest this weekend.

_________________
"I'm working on it ... "


Top
 Profile  
Reply with quote  
 Post subject:
PostPosted: Tue Sep 12, 2017 3:32 pm 
Mad Cat
User avatar

Location: Active duty: USS Catalpa
Service Number: AO3/TQ6.0.79749E8
Country: United States
That's looking good!

_________________
"Awww, someone tell me that's a boot!

It's a boot!"

III drops


Top
 Profile  
Reply with quote  
 Post subject: Re: Mini alien warrior build
PostPosted: Wed Sep 13, 2017 6:32 am 

Location: ATX
Country: United States
Thanks, dropshipbob!

Tested one of the big tubes. Lesson learned tonight: Hot glue doesn't grab as well to the PVA coats, it does much better against the straight gesso since it's matte. I'll sand it down a bit in spots then reglue.

Image

Image

Can't wait to add the smaller tubes along the front and top.

_________________
"I'm working on it ... "


Top
 Profile  
Reply with quote  
 Post subject: Re: Mini alien warrior build
PostPosted: Thu Sep 14, 2017 4:01 am 

Location: ATX
Country: United States
Got the side tubes mounted. I think. :)

Started the smaller vein tubes!

I channeled around the head to give the hot glue a place to set. I didn't do it for the top or the sides*** cause it looks similar to the reference pics. The hot glue seems to work great except for where the PVA covered the spackle. The hot glue stuck to the PVA, but then pulled the PVA up from the spackle. This only happened in the temple hole for me. I ended up slicing a channel through to the foam and then set some glue in there, it's a little iffy in that spot so I'll probably need to reinforce it there.

Image

I pinned it down so it was easier to start gluing one end.

Image

Image

The good thing about hot glue is that it sets pretty quickly with just enough of a delay to adjust a little after placing the tube down.

PVA over spackle, everyone. The spackle has that powdery film that prevents the PVA from really adhering. I was hoping the spackle would soak some of the PVA in. Alas, I was mistaken.

Image

*** EDIT: Make channels. The veins I didn't make channels for came undone later. Lesson learned.

_________________
"I'm working on it ... "


Last edited by Red_2 on Sun Sep 17, 2017 3:50 am, edited 1 time in total.

Top
 Profile  
Reply with quote  
 Post subject: Re: Mini alien warrior build
PostPosted: Fri Sep 15, 2017 4:06 am 

Location: ATX
Country: United States
Got some more vein tubing done then sized up some foam to carve some of the side details.

Image

Image

Image

Image

_________________
"I'm working on it ... "


Top
 Profile  
Reply with quote  
 Post subject:
PostPosted: Fri Sep 15, 2017 8:56 pm 
Prop Churner Outer
User avatar

Location: Bath, Maine
Service Number: A03/TQ1.0.12143G1
Country: United States
That is looking really biomechanical and sweet.

_________________
:delta: My entry-level prop and costume tutorials: viewtopic.php?f=3&t=12751 :delta:


Top
 Profile  
Reply with quote  
 Post subject: Re: Mini alien warrior build
PostPosted: Sat Sep 16, 2017 4:17 am 

Location: ATX
Country: United States
It's coming along, retro! :) (We need to be able to like replies on here.)

Carved out a new detail for that smaller side tube and added a smaller vein tube to it.
For these I'm just estimating shape and carving down to fit. Lots of comparing back and forth with a front quarter view and the side view of a xeno head.

Image

Refined a bit.

Image

Image

Image

_________________
"I'm working on it ... "


Top
 Profile  
Reply with quote  
 Post subject: Re: Mini alien warrior build
PostPosted: Sat Sep 16, 2017 2:25 pm 

Location: ATX
Country: United States
Head test!

https://youtu.be/1ys1y44KCBc

How do you embed videos in this forum?

Also I woke up to some veins coming unglued. So I did have to go and cut in small channels, then reglue them down.

_________________
"I'm working on it ... "


Top
 Profile  
Reply with quote  
 Post subject: Re: Mini alien warrior build
PostPosted: Sun Sep 17, 2017 3:47 am 

Location: ATX
Country: United States
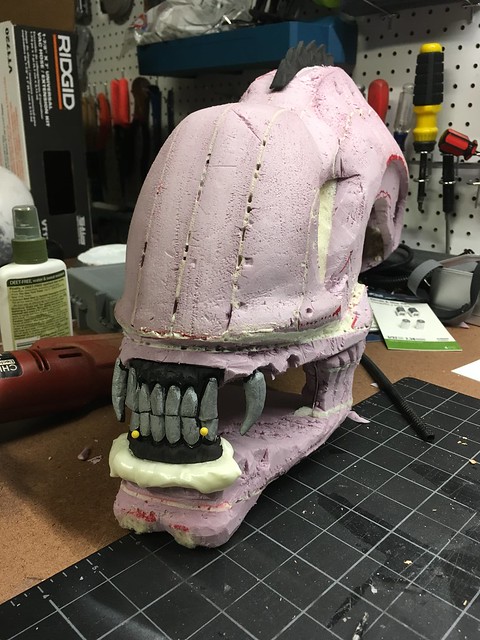
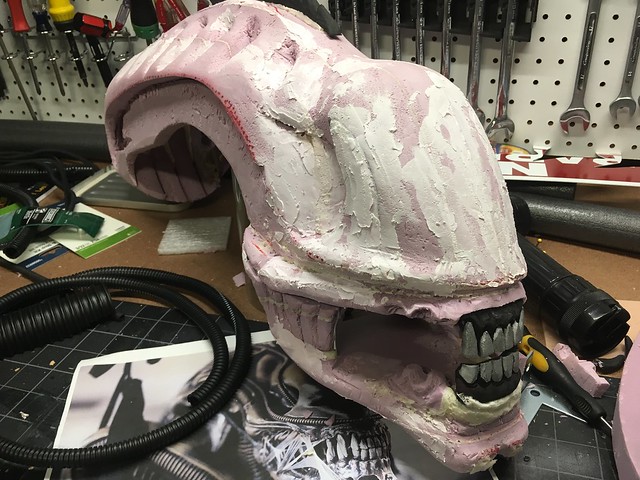
Worked on the head mostly today.

I did try to start the upper body. Even cut out the cardboard and did some fitting. But it looks like a cardboard vest may either need some more research OR I could just cut up that wet suit laying over there. Hmmmmmmm ...

Anyhoo.

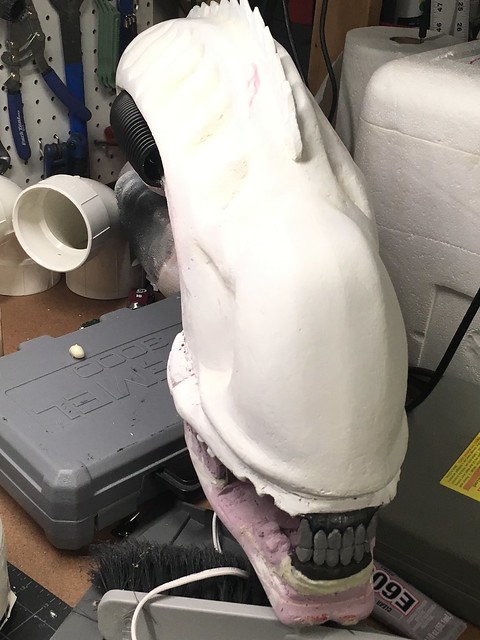
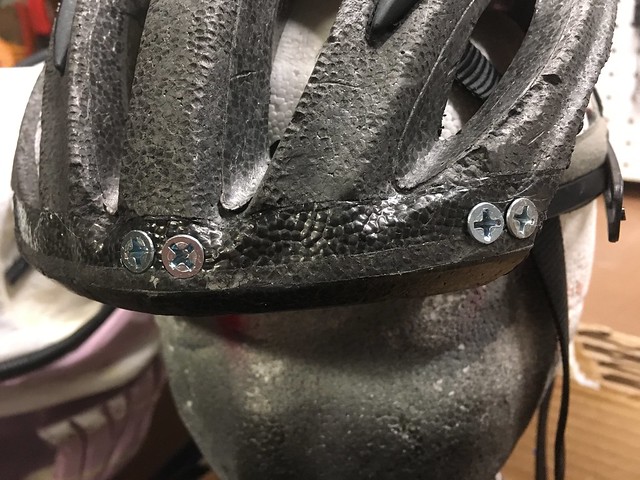
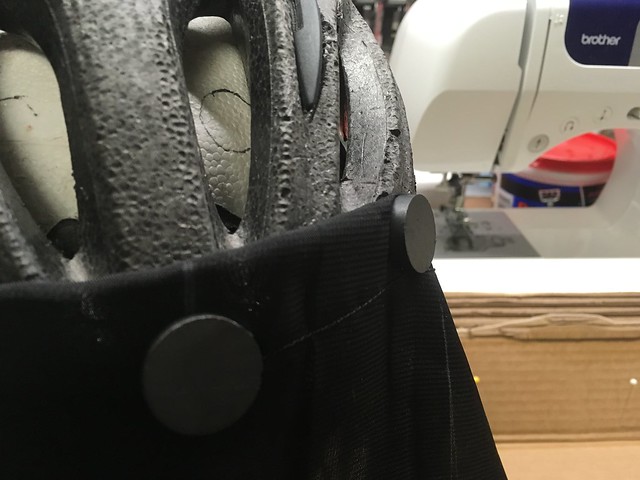
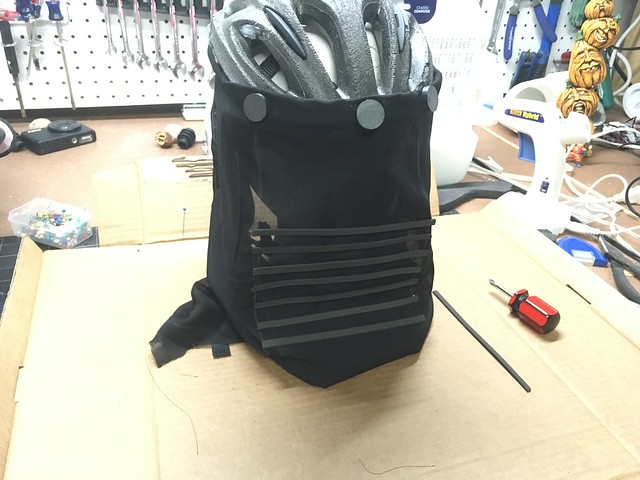
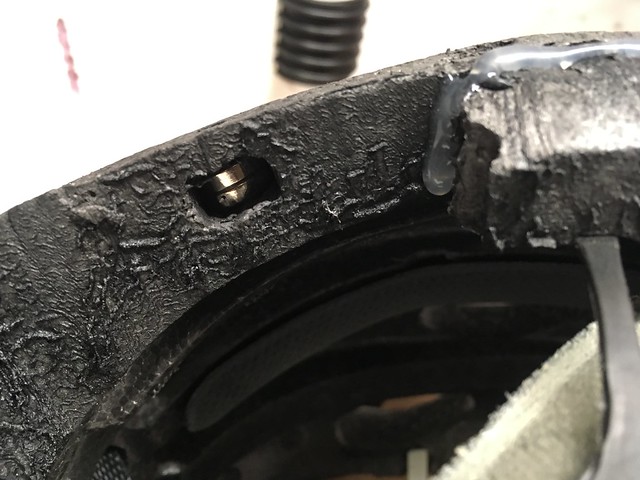
I tried to set up a quick release for the xeno head and the bike helmet so that fittings would be easier. I had some (a ton, actually) rare earth (neodymium) magnets left over from my TK build. I marked off the spots that joined on the xeno head and the helmet then embedded the magnets as close to the surface as possible. Then just hot glued them in, though I doubt they would have come undone. They hold strong enough for normal movement but if he slings his head really fast then it'll dislodge. I may be able to just tether it when done.

Meeting spot marked.

Image

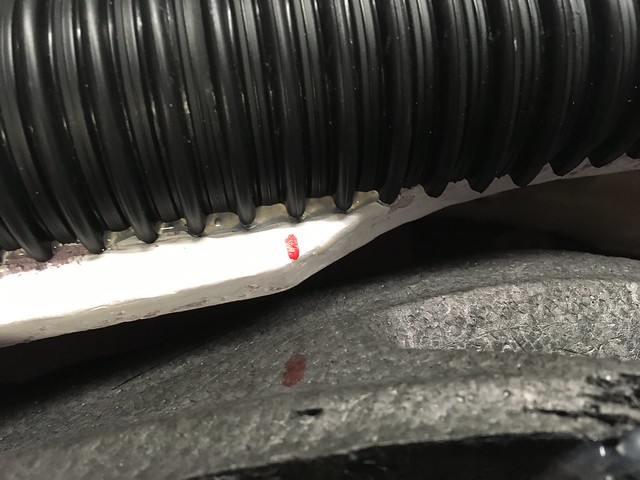
I used a drill to make a hole just big enough for the magnets to squeeeeze in there. I forgot how much of a pain in the ass working with multiple strong little magnets was. And they pinch. Masking tape is proof I built ABS armor at some point in time.

Image

Burrowed.

Image

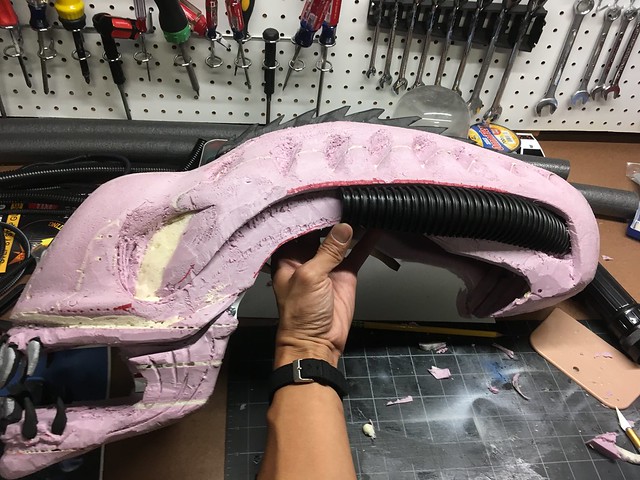
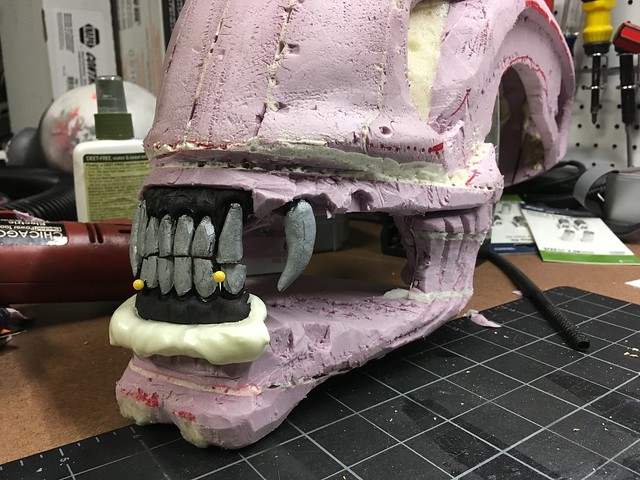
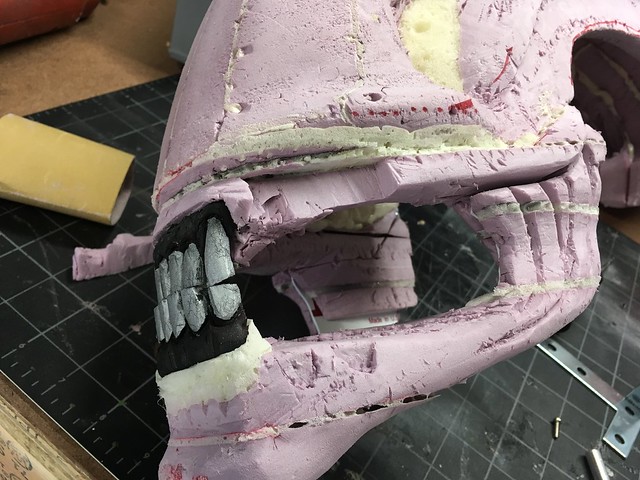
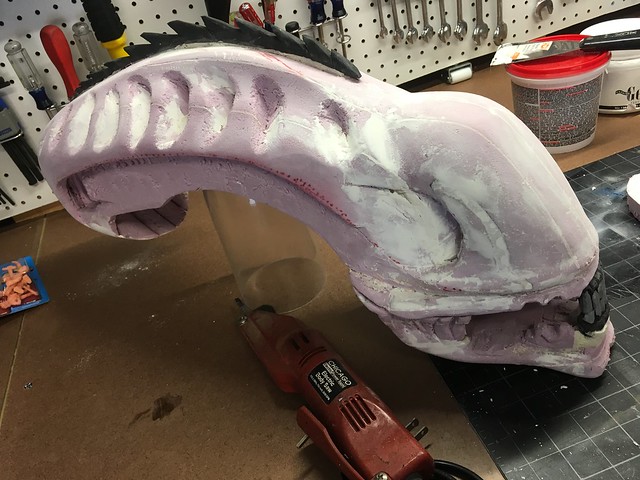
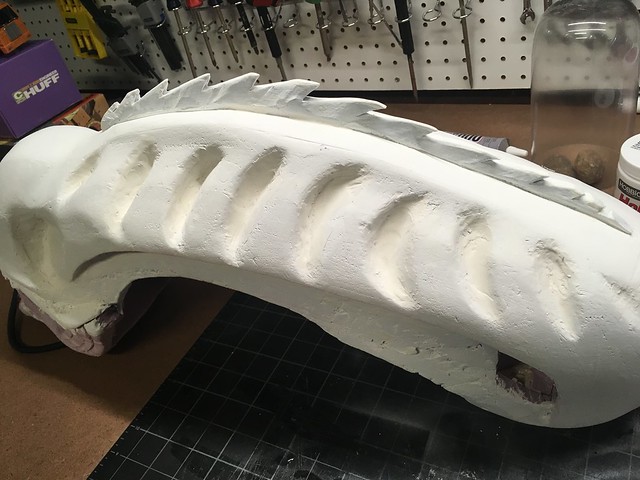
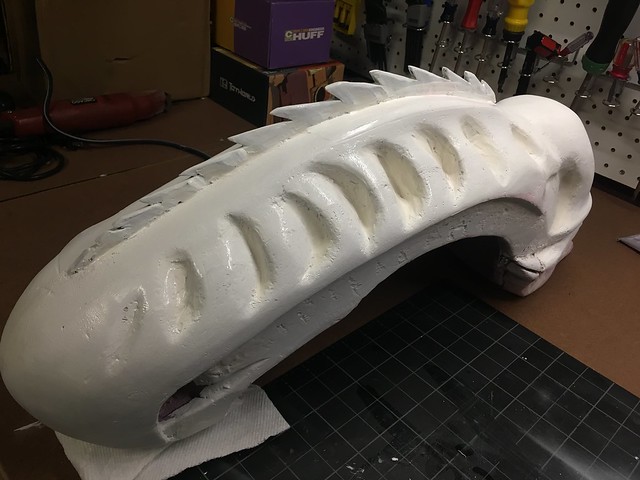
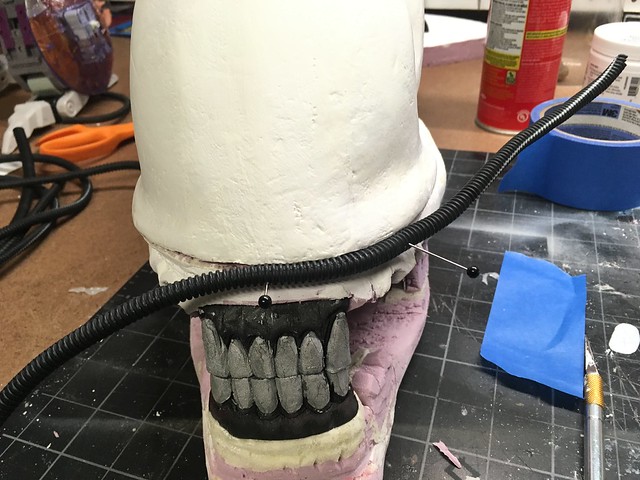
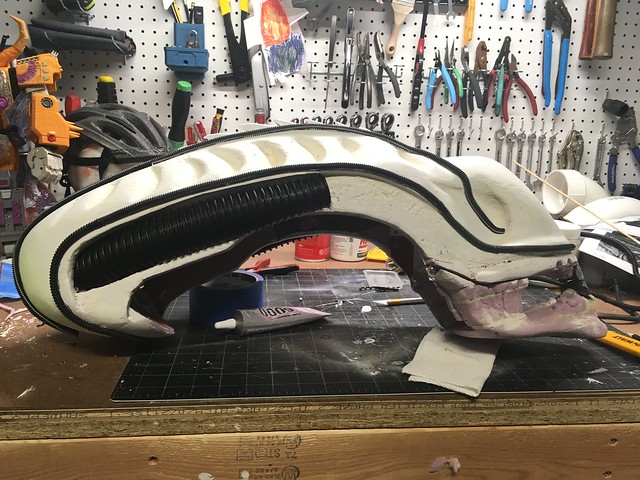
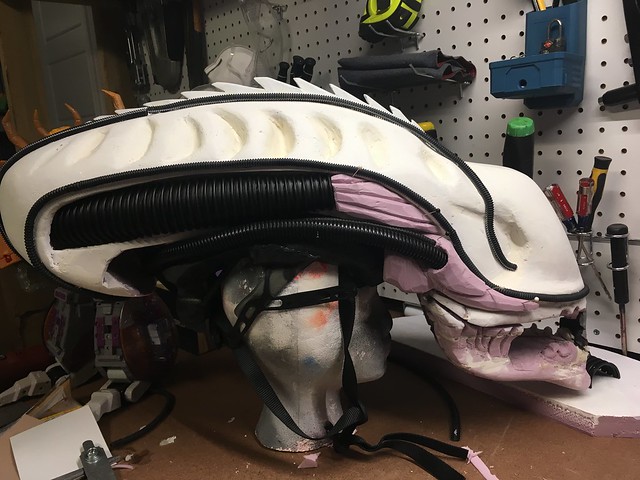
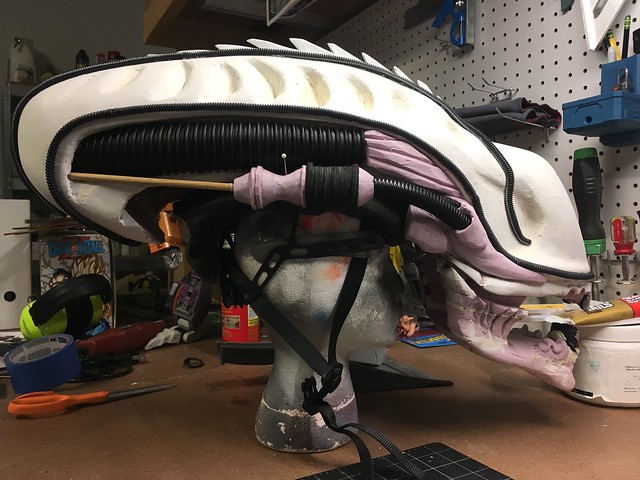
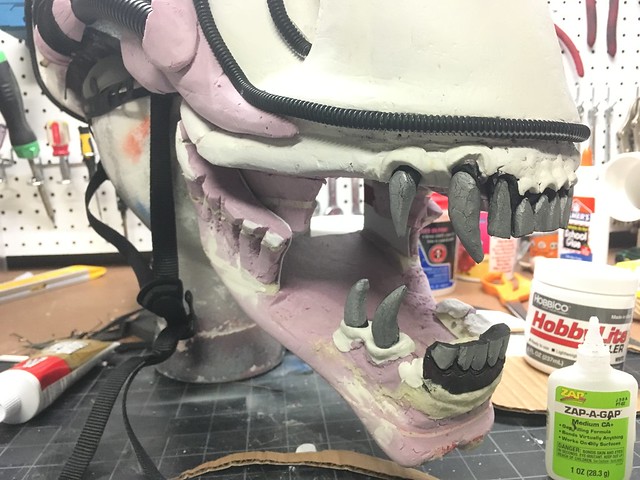
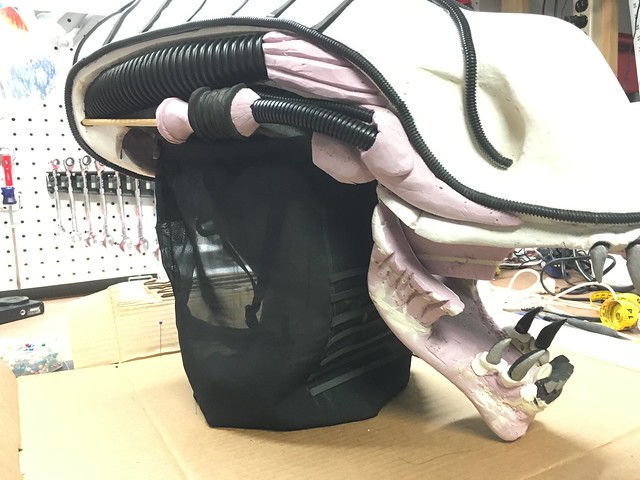
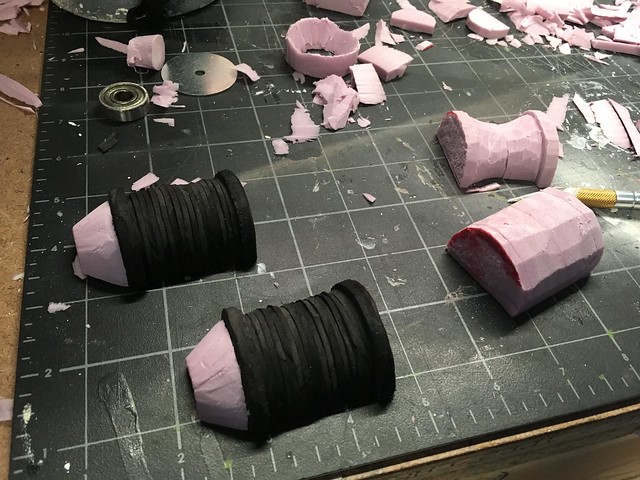
After my son tested it, I mounted it on a foam head and got to work carving the details out for the left side using the right side details as a template.

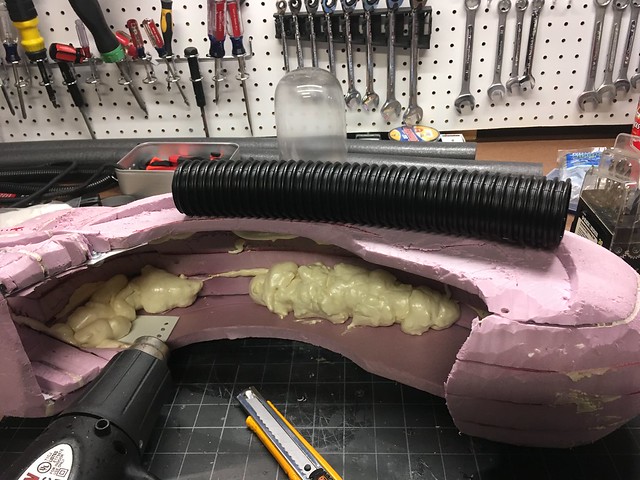
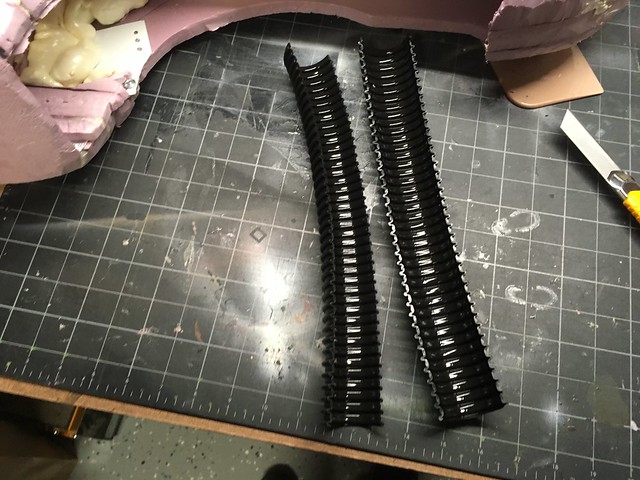
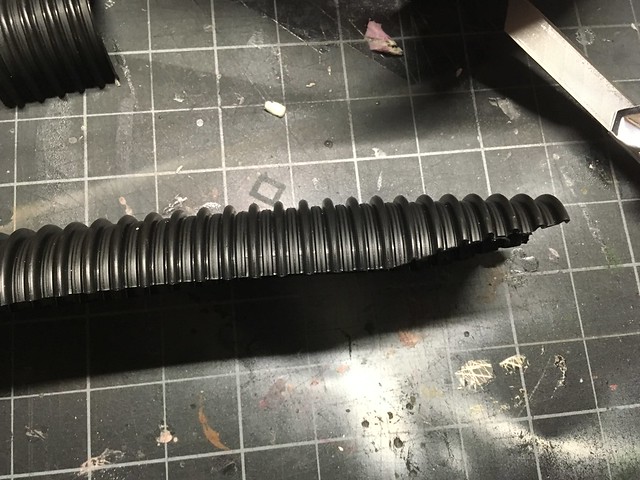
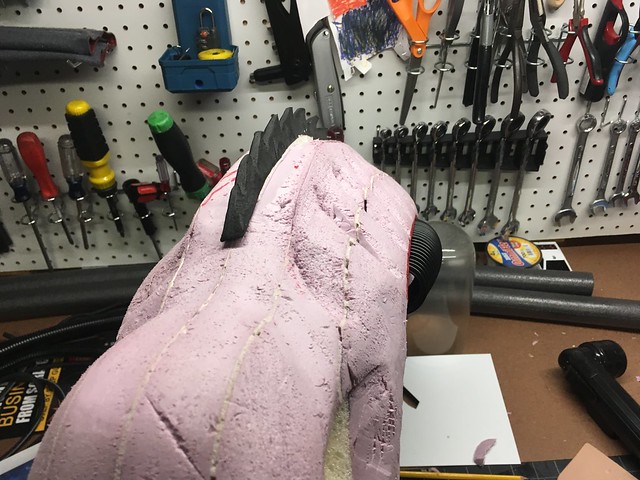
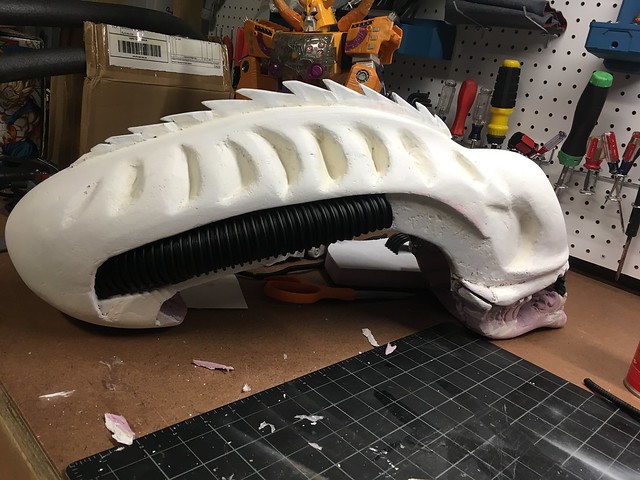
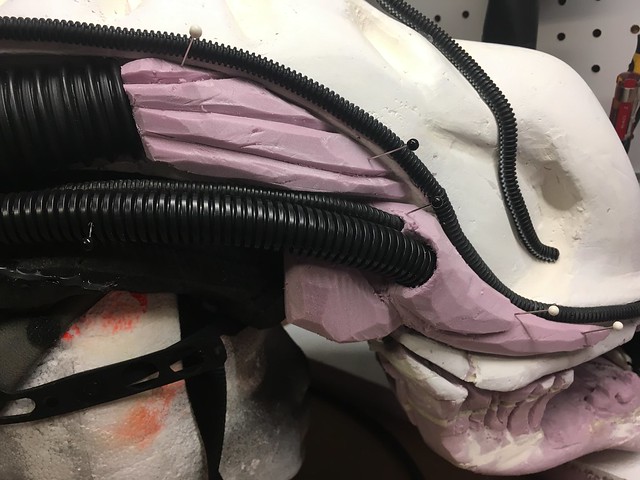
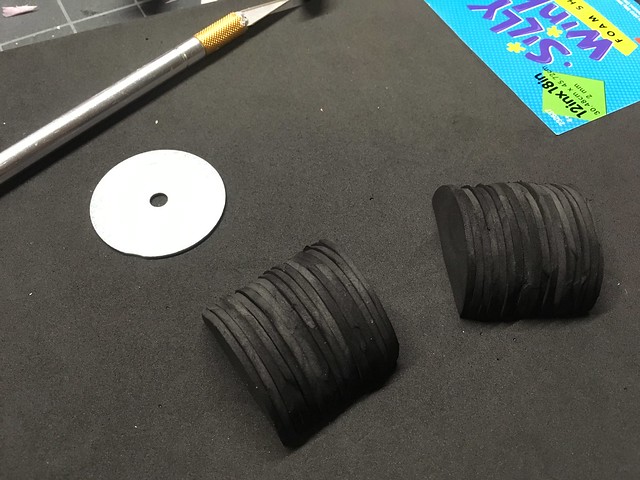
I then cut out about 12 discs from craft foam to make that small accordian looking tube.

Image

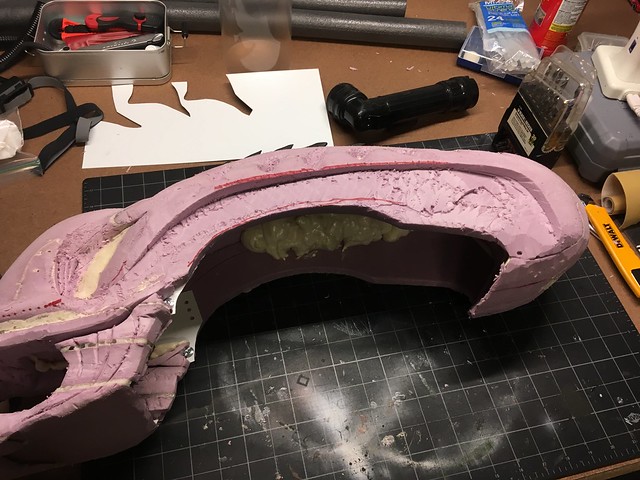
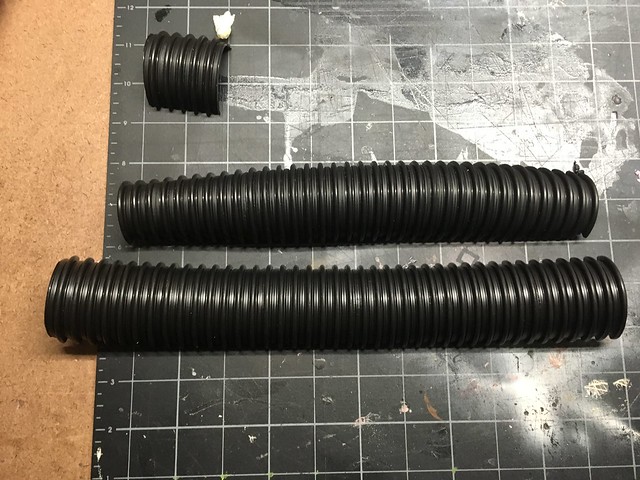
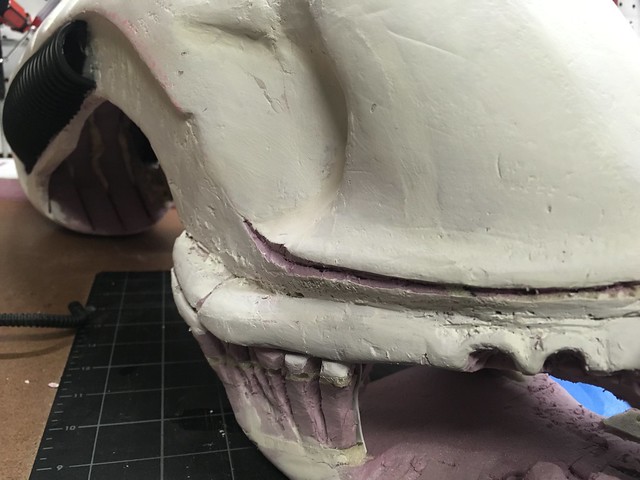
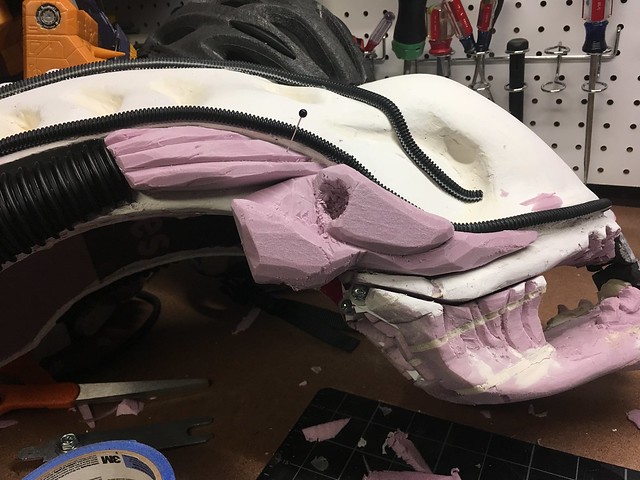
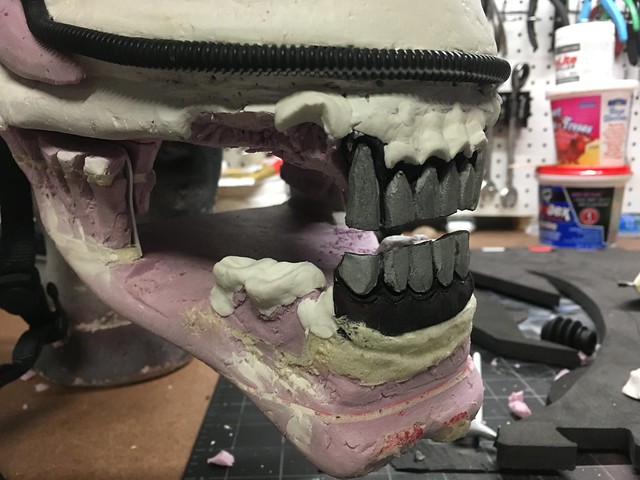
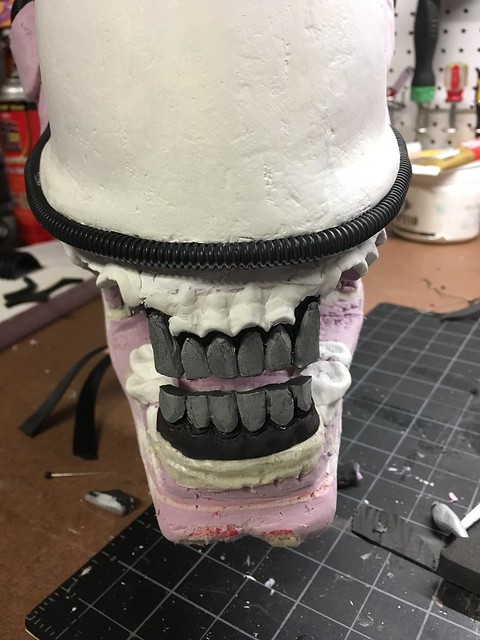
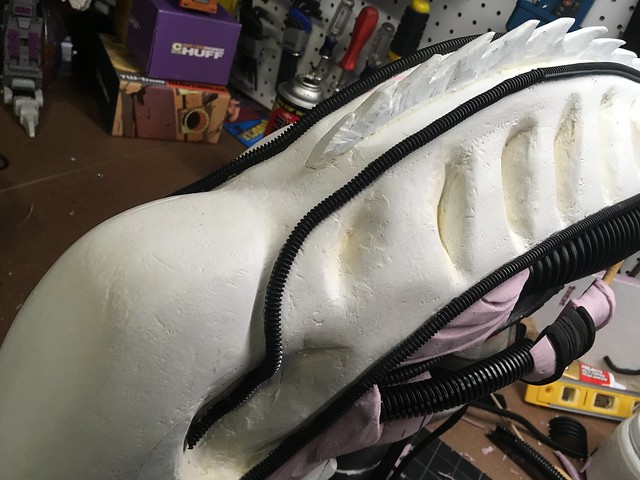
I then used pink foam to fill in details and make the trumpety looking parts that lead to that long stiff skinny tube. (Apologies if there are terms for these parts I am unaware of.)

Image

Image

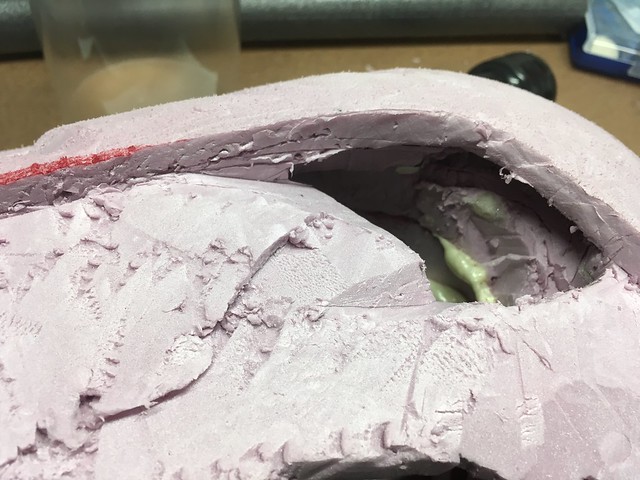
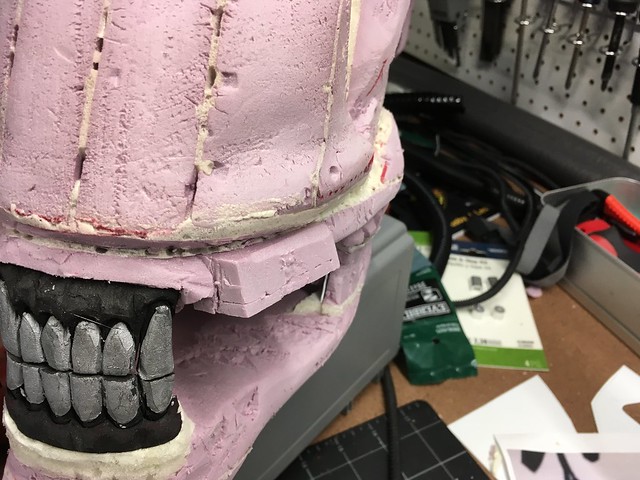
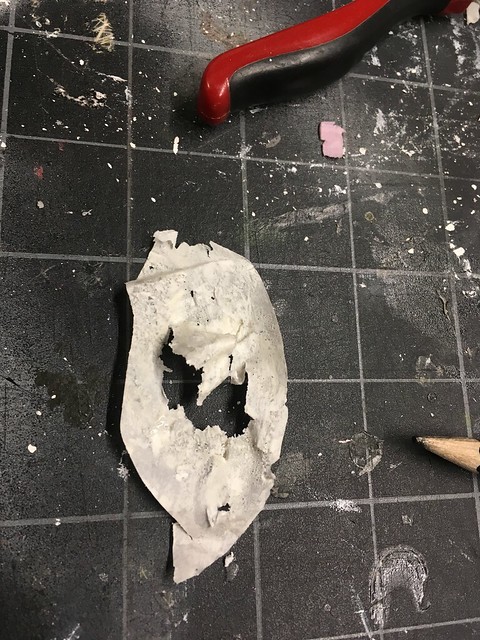
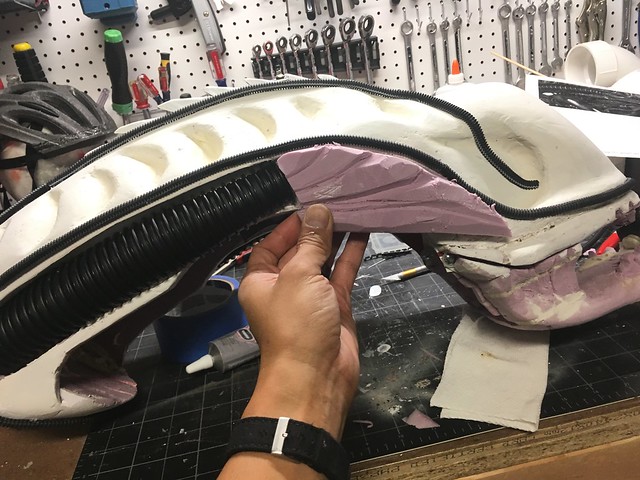
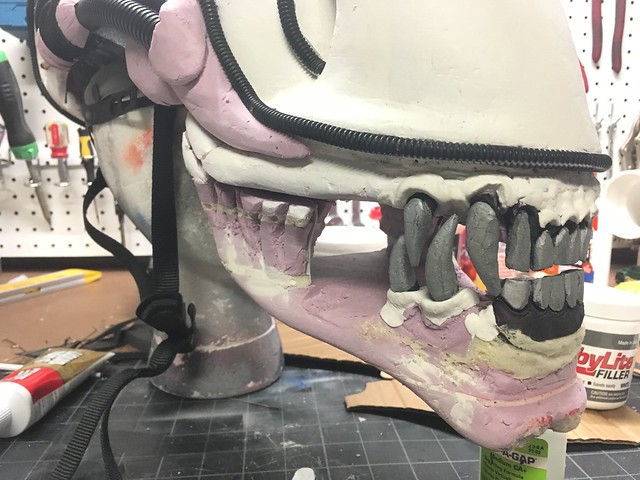
When installing these details came around this happened ...

F***.

Image

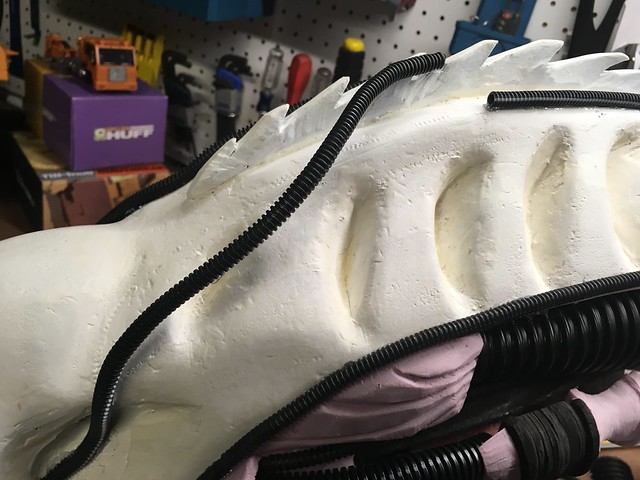
I'll go back and edit the thread and make sure to reiterate cutting out channels for the veins is necessary.
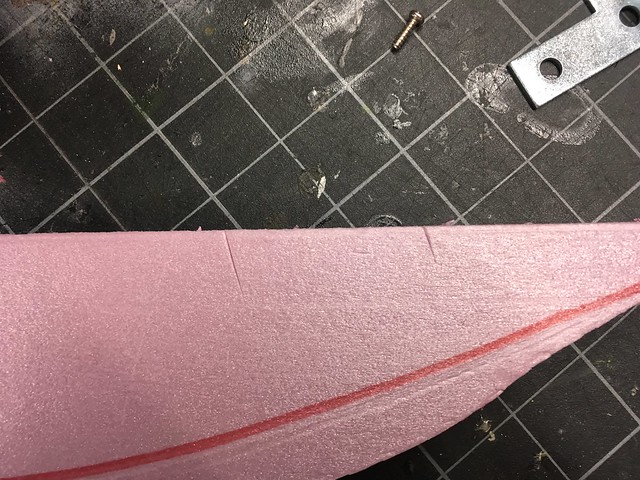
Channel cut.

Image

Reglued.

Image

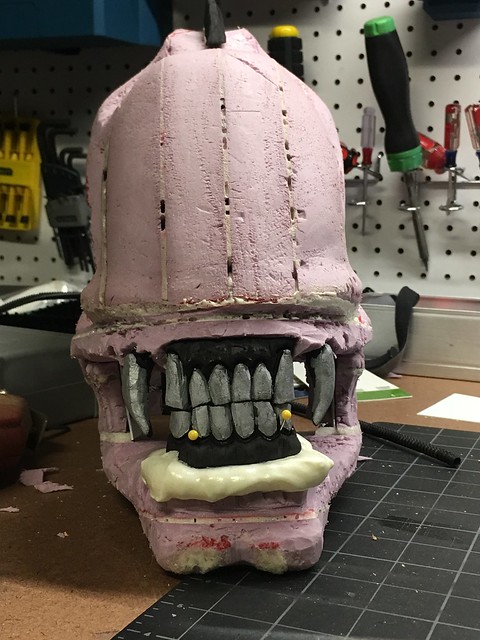
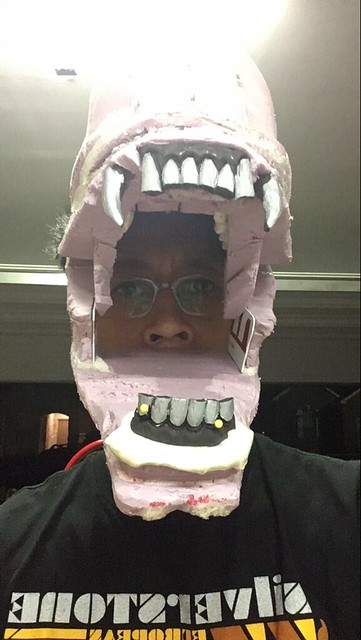
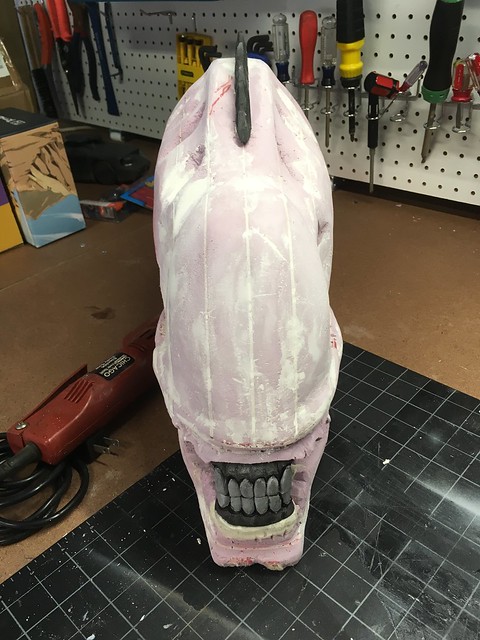
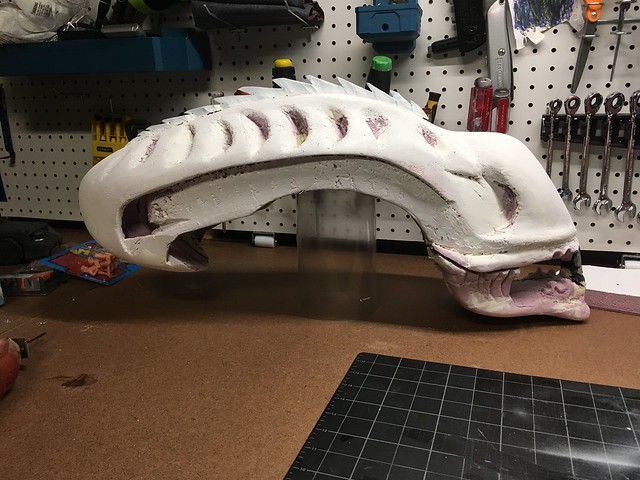
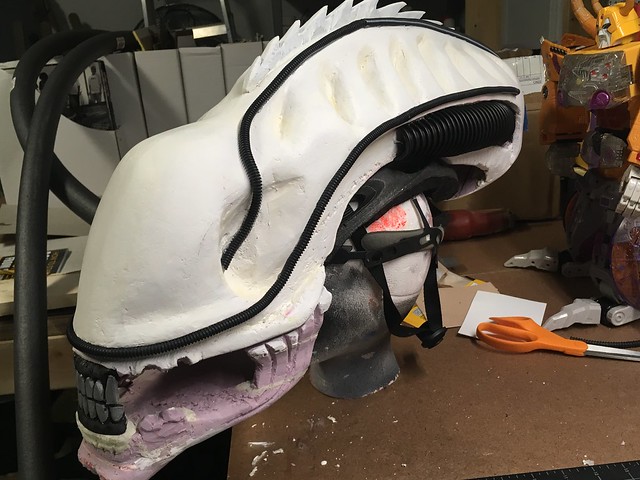
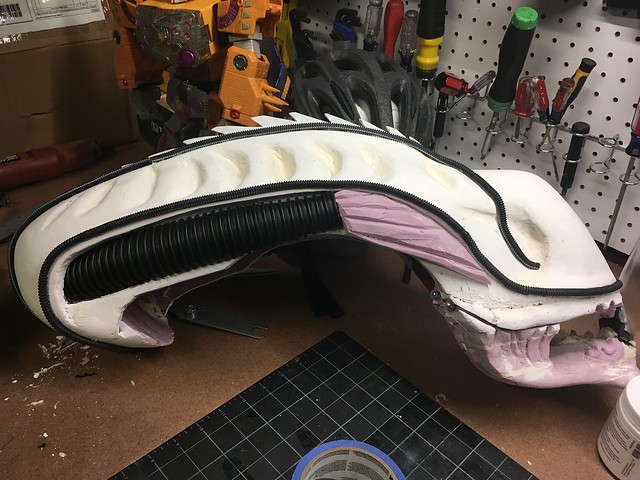
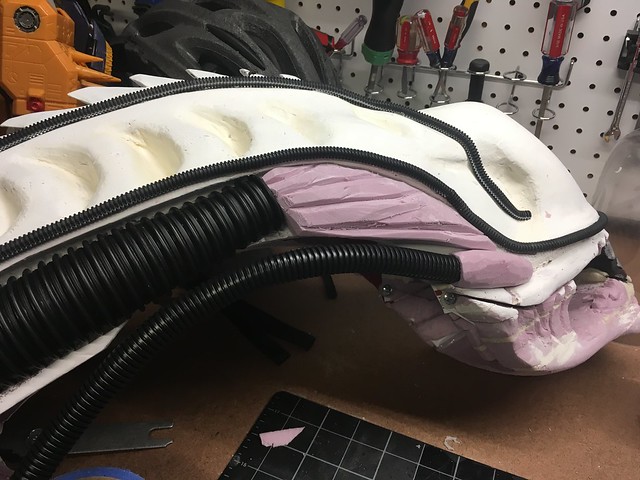
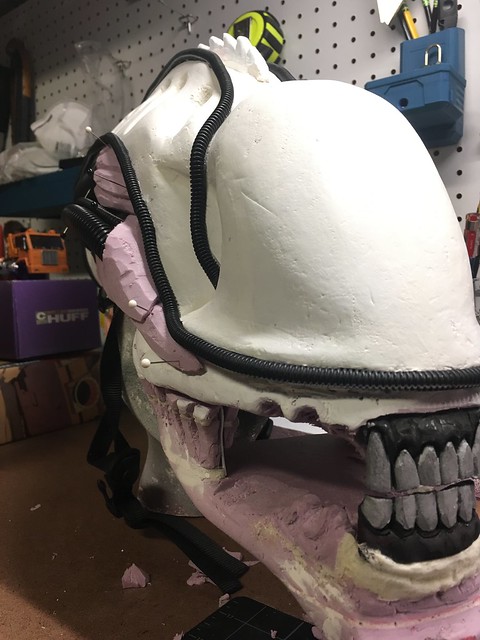
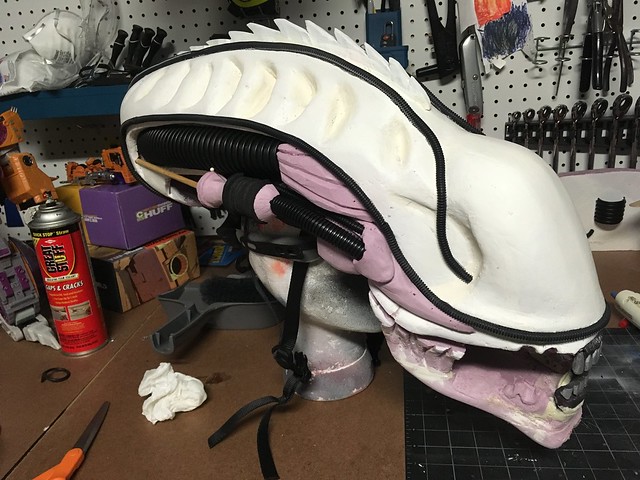
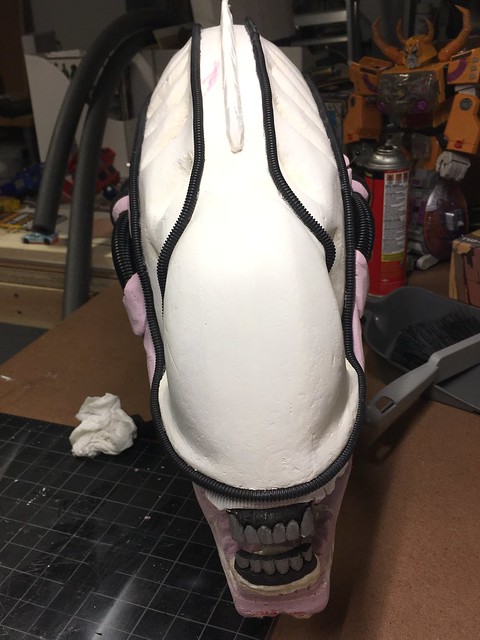
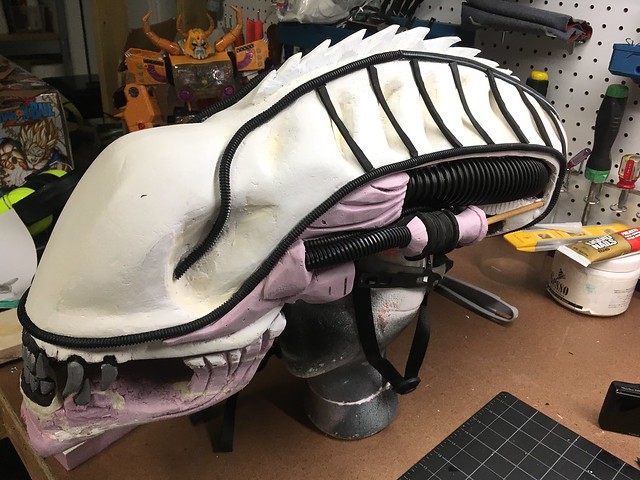
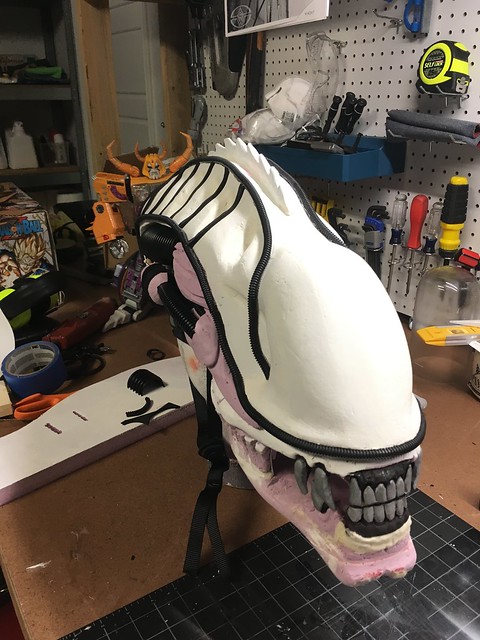
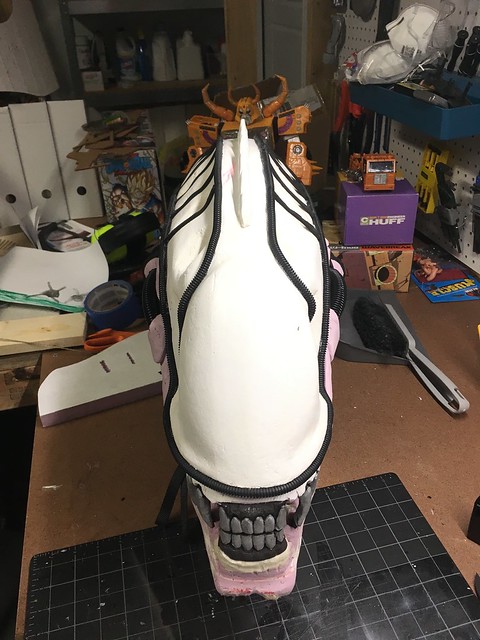
There it is, so far.

Image

Image

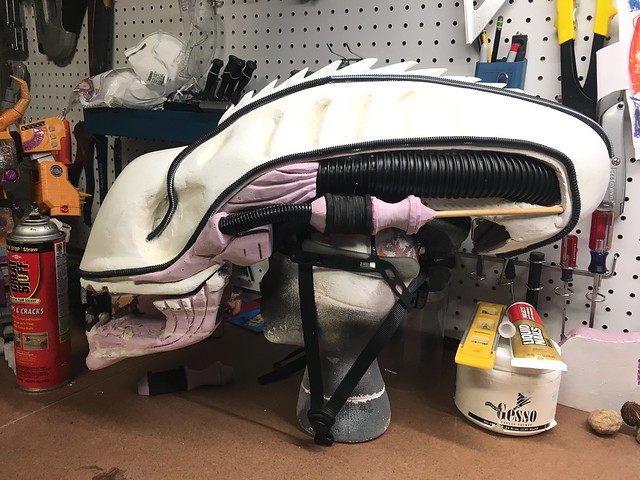
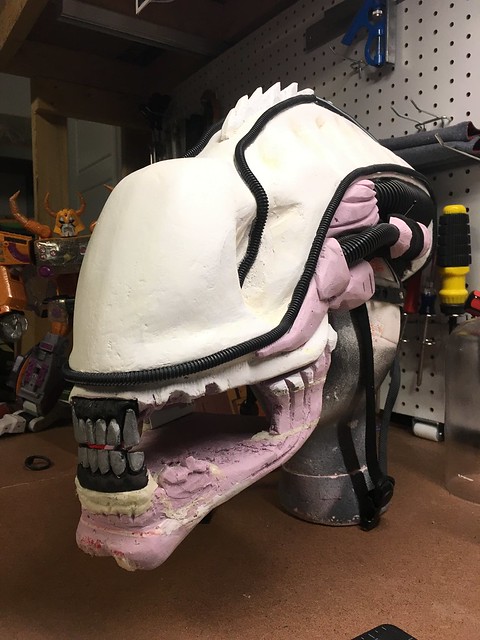
Looks like a shrunken xeno head (or maybe just shortened). I'll be honest and say I would've liked this to look more proportioned and the mouth and details should be smaller, but I still like how it's coming along. Plus it means I can do this all over ... for myself.

Oh and by the way, when carving pink foam your work area is going to look like this at some point.

Image

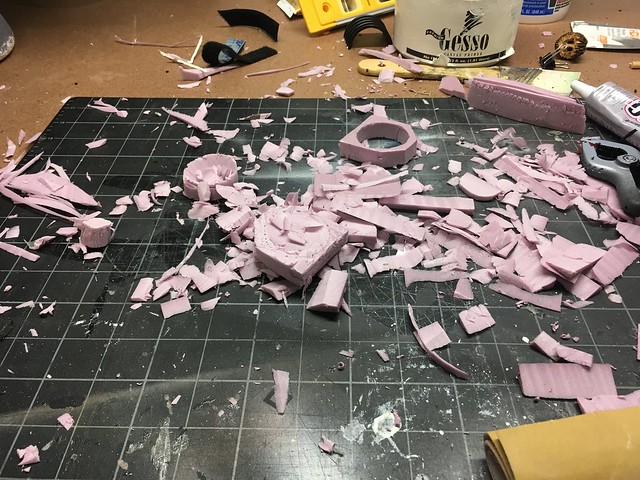
It's all over you, the floor, the bench, and pretty much everywhere else. I have a trash can nearby to sweep everything into, then every few days or so I vacuum as much as I can.

Hope everyone's having a great weekend!

_________________
"I'm working on it ... "


Top
 Profile  
Reply with quote  
 Post subject: Re: Mini alien warrior build
PostPosted: Sun Sep 17, 2017 4:55 am 

Location: ATX
Country: United States
Thought I was going to bed but ended up finishing up the other side.

Image

Image

I managed to get some decent symmetry, kinda sorta.

Image

Need to finish off the rib detailing along the top then figure out how to secure the jimmy hat jaw tendons and actuation.

_________________
"I'm working on it ... "


Top
 Profile  
Reply with quote  
 Post subject: Re: Mini alien warrior build
PostPosted: Mon Sep 18, 2017 4:36 am 

Location: ATX
Country: United States
Put the head ribs in. Just cut them out of the craft foam and glued down with crazy glue, I used the Zap-A-Gap type for foam.

Image

Image

Image

I put some of the fangs back in to check the gums. I may need to redo the gums again cause I don't like the fang placement.
I may try using some air dry clay to shape it. See how that works with the foam.

_________________
"I'm working on it ... "


Top
 Profile  
Reply with quote  
 Post subject: Re: Mini alien warrior build
PostPosted: Wed Sep 20, 2017 4:09 am 

Location: ATX
Country: United States
Tried that air dry polymer clay on the gums.

It seems to work well for smaller details although it's sticks to my fingers when it gets thin which made it a little annoying to shape with out a tool. I'll see how it hardens overnight and how it shapes tomorrow.

Image

Image

This is the clay I'm using. Had an unopened batch laying around. I used this for the strike plate on my marine helmets. It's a tad heavy though.

Image

As I was shaping those gums at the top front teeth I thought to myself that this is waaay too much detail for a 6 year old's costume. But I want to see what works. :)

_________________
"I'm working on it ... "


Top
 Profile  
Reply with quote  
 Post subject: Re: Mini alien warrior build
PostPosted: Fri Sep 22, 2017 1:23 am 

Location: ATX
Country: United States
Fangs installed temporarily. Looks alright!

Image

Image

_________________
"I'm working on it ... "


Top
 Profile  
Reply with quote  
 Post subject: Re: Mini alien warrior build
PostPosted: Sat Sep 23, 2017 9:11 pm 

Location: ATX
Country: United States
Here's my idea for the neck. My kid's got some sensory issues so I'm trying to balance between hiding his face and him having full vision without feeling like he's wearing a tight mask.

So I got some sheer fabric (seems like a polyester) at Wal-Mart for $3 (1 yard). Cut some ribbing out of craft EPA and glued it with E6000. If anyone knows of a better, less toxic way of gluing foam to fabric shout at me!

Image

Screwed some shorties into the helmet. Used plain 'ole magnets. I'll sew these in eventually, may use some small neodymium magnets eventually.

Image

Image

Image

I'll add more side ribs at a diagonal. Also going to use plastic conduit at the corners to give it some definition.

Image

Also cut out another chest out of cardboard ... hope to start gluing stuff down to that this weekend.

_________________
"I'm working on it ... "


Top
 Profile  
Reply with quote  
 Post subject:
PostPosted: Sat Sep 23, 2017 10:32 pm 
Prop Churner Outer
User avatar

Location: Bath, Maine
Service Number: A03/TQ1.0.12143G1
Country: United States
Awesome! My son has sensory issues too (Aspergers), so I was a bit worried about how long he'd last, but he LOVED it!

_________________
:delta: My entry-level prop and costume tutorials: viewtopic.php?f=3&t=12751 :delta:


Top
 Profile  
Reply with quote  
 Post subject:
PostPosted: Sat Sep 23, 2017 10:38 pm 

Location: ATX
Country: United States
That's funny, retro, cause earlier today when I was fitting his chest piece, I was worried that it was too tight and he said, "No, I like it tight." Of course, there's different rules for different body parts. :)

_________________
"I'm working on it ... "


Top
 Profile  
Reply with quote  
Display posts from previous:  Sort by  
Post new topic Reply to topic  [ 143 posts ]  Go to page Previous  1, 2, 3, 4, 5, 6  Next


You cannot post new topics in this forum
You cannot reply to topics in this forum
You cannot edit your posts in this forum
You cannot delete your posts in this forum
You cannot post attachments in this forum

Search for:
Jump to:  
cron