The discussion of the Alien series of films and the props used in them is the aim, but if it's got Big Bugs and Big Guns, then they are welcome too!


Post new topic Reply to topic  [ 143 posts ]  Go to page 1, 2, 3, 4, 5, 6  Next
Author Message
 Post subject: Mini alien warrior build
PostPosted: Sun Jul 30, 2017 11:31 pm 

Location: ATX
Country: United States
Started the build this weekend.

Here are the links I've referenced before and during the build at some point:

http://www.instructables.com/id/Alien-X ... Costume-1/

http://www.jamescamerononline.com/AlienWarrior.htm

https://www.youtube.com/watch?v=GOg1ygY1Yo0

https://www.youtube.com/watch?v=zPmP-ZSDYqg

Google image searches of "Hot Toys Alien Warrior", "Stan Winston's Alien Warrior" and "alien warrior head"

Didn't use this download link but just found it on Pilerud's thread in the RPF and figured it be useful for anyone starting a build: https://redirect.viglink.com/?format=go ... ild%20here


My son is almost 6 and 1/2 and asked to be an alien. I'm happily obliging. :)

He's just a few inches shy of 4 feet tall.

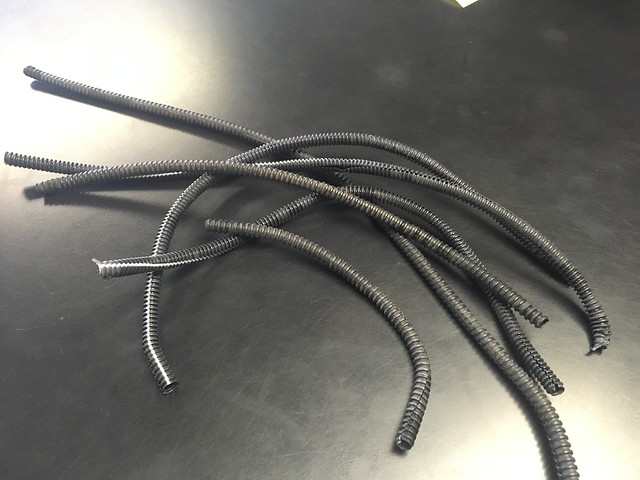
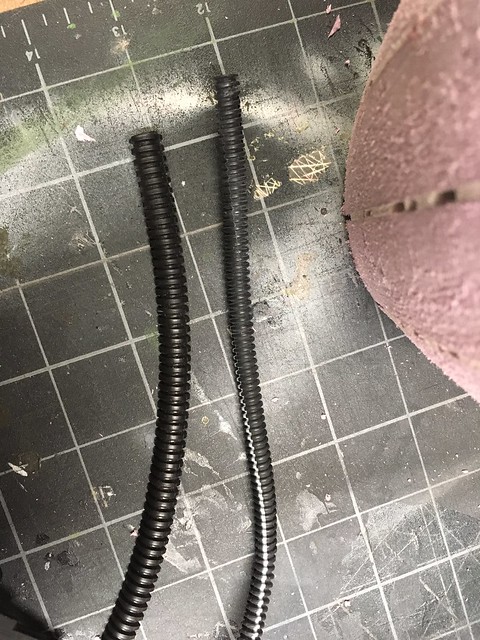
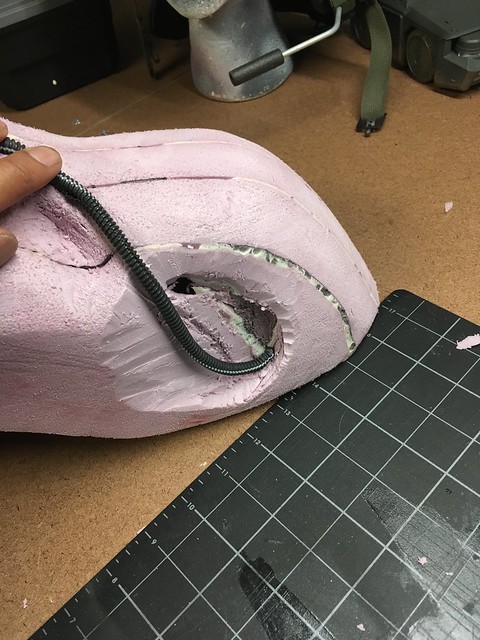
So plan is to make the head from insulation foam with tube details from various hoses, and plastic wire sheathing. The jaw will be cut and molded out of EVA, and I think the teeth also. Hoping to get the jaw to work. Still figuring that out.
The body will be similar details, plus soft foam, EVA foam, and whatever works. I'm trying to find a used kids wet suit to chop up and layer upon. We'll see if that ever surfaces.

Needs to be pretty forgiving durability wise since my son is not the most "careful" kid, but that's typical. (I once made him full Stormtrooper armor out of EVA and finished it as they were walking out of the house to trick or treat. First thing he does is take off running, then sits down on the curb. ACK!!! DON"T SIT DOWN!! :P) So the xeno suit should be ready for anything.

First purchase was the insulation foam, some expanding foam filler***, and a new retractable knife.

I had a Home Depot associate cut the foam panel in quarters for me. Barely fit in the wagon still.

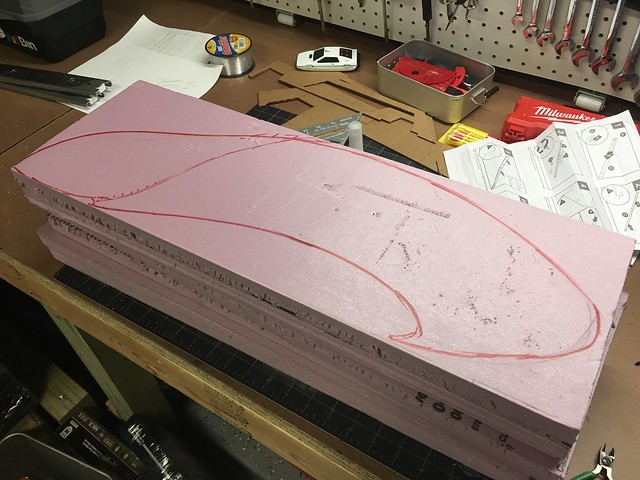
First I measured out 8" x 24" panels, and sliced away. (The head dimensions I approximated to 7" x 7" x 24".)
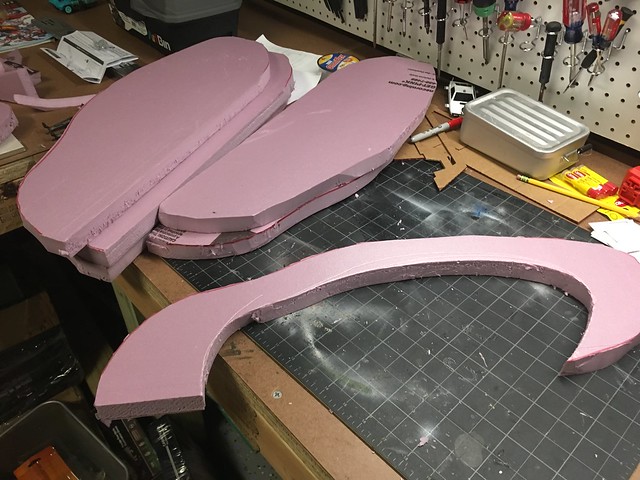
Then on one panel sketched out the head shape, and cut.
Image

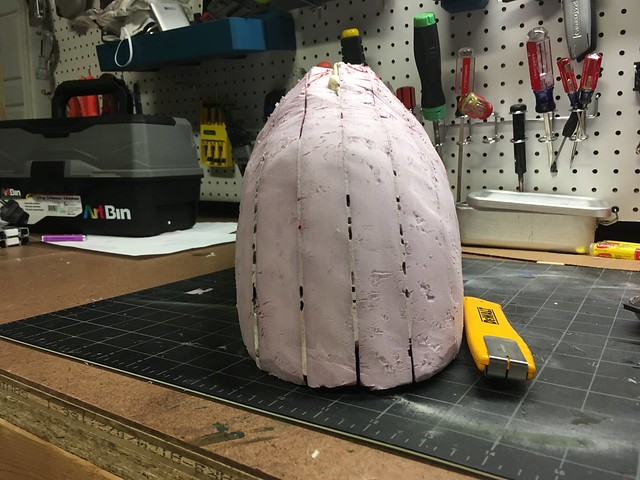
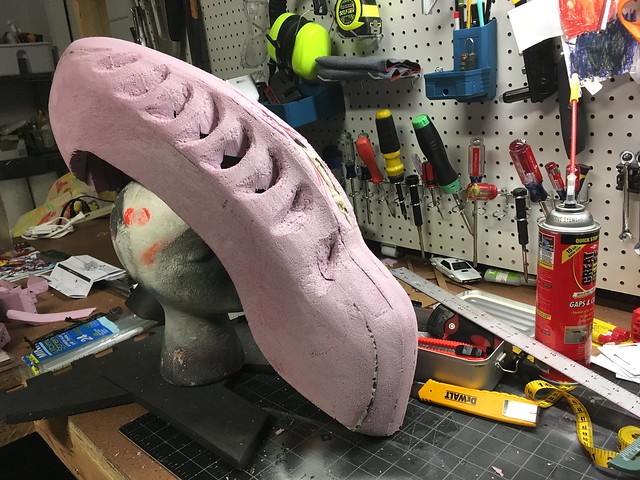
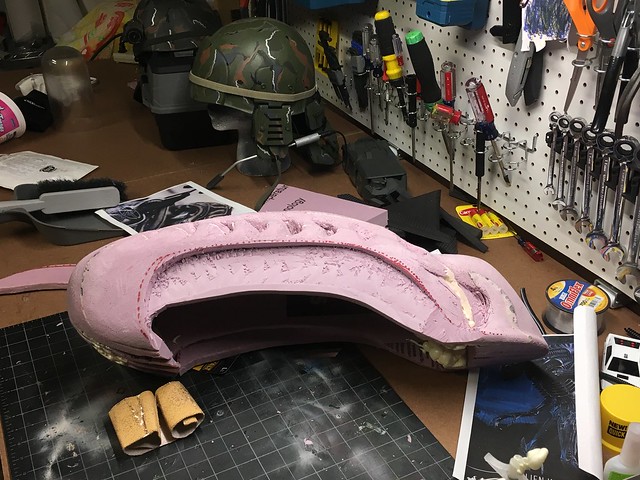
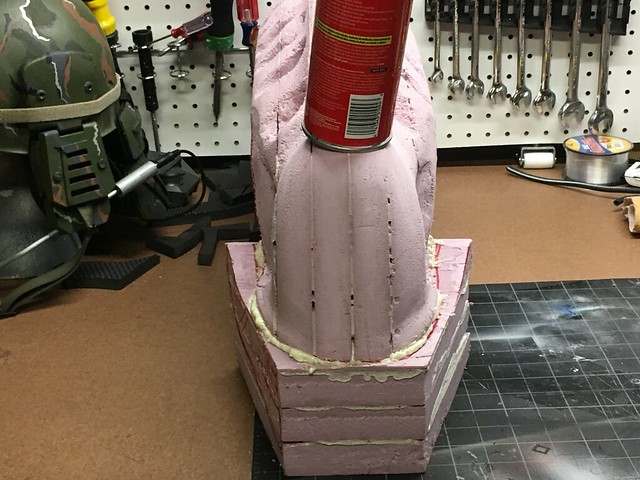
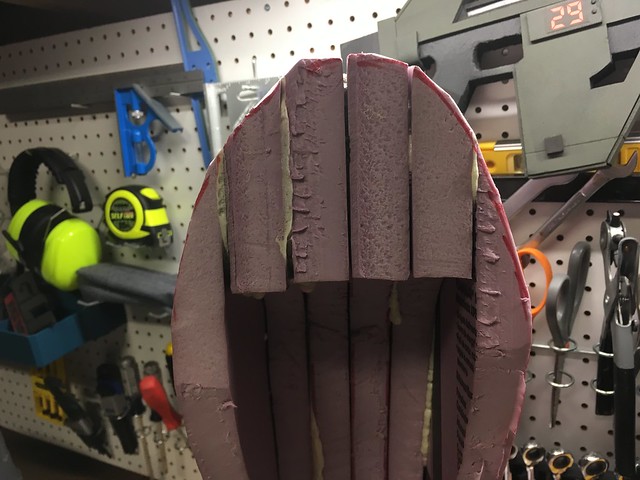
Did the same for the rest of the panels, then on the 4 inner panels I cut the shape to hollow out most of it. I plan on the top of my son's head fitting just inside and then most of his face hidden by the neck and jaw.

Image

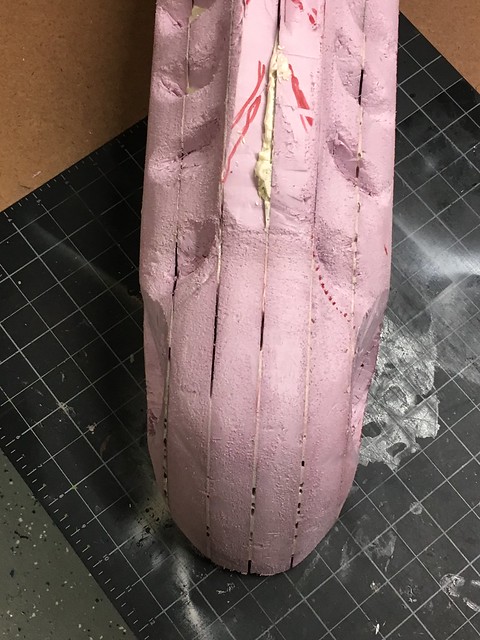
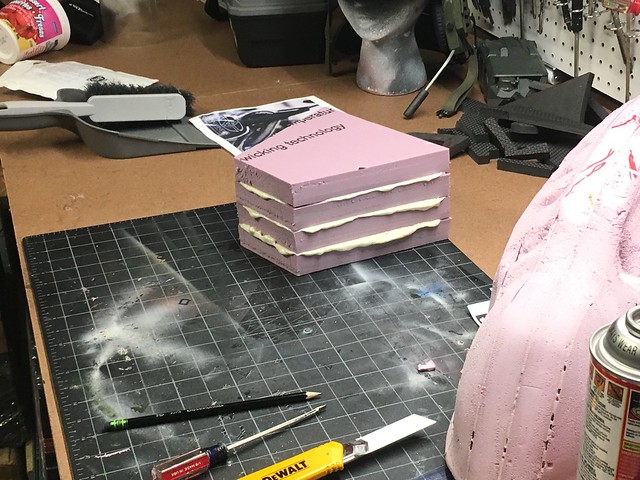
After the hollowing out, I stabbed some holes along the surface where the foam will be applied. Not sure if it helps but thought it wouldn't hurt. I then used a small amount of foam and layered the panels accordingly.

Image

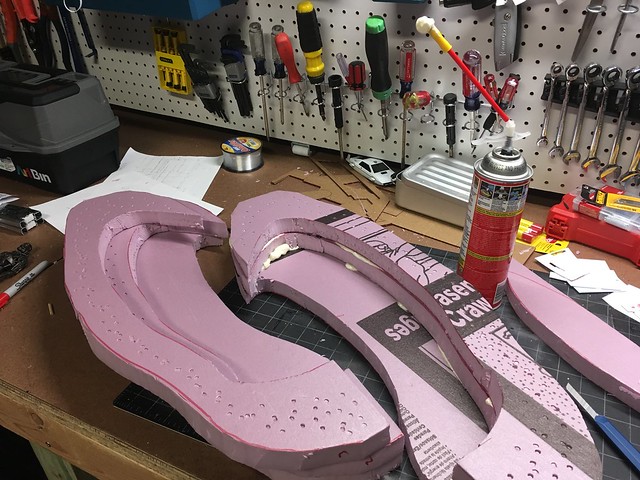
I probably under used the filler foam since there are some gaps in between the panels, but it's holding great. Also that stuff is super messy and wanted to avoid getting it all over my hands and the bench. Weighted it all down afterwards.

Image

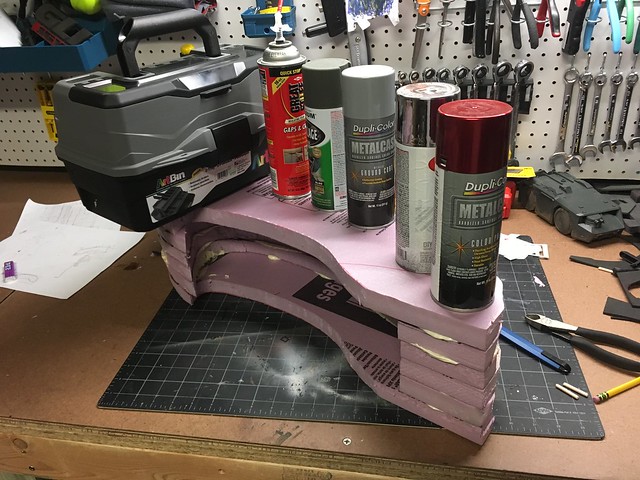
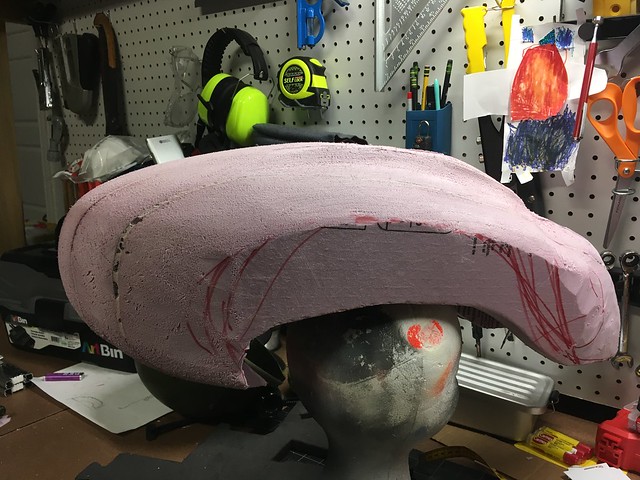
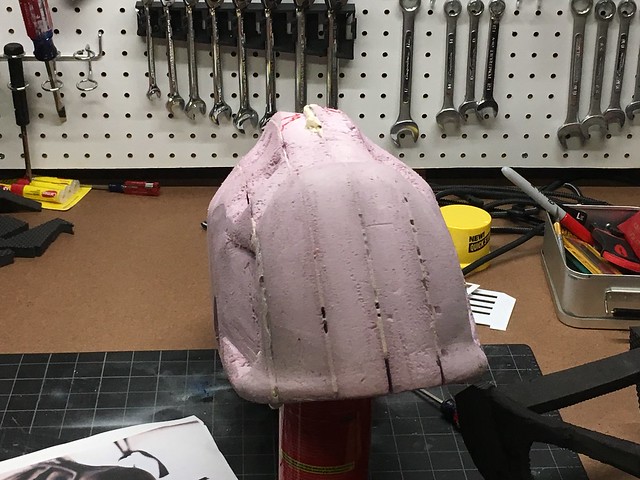
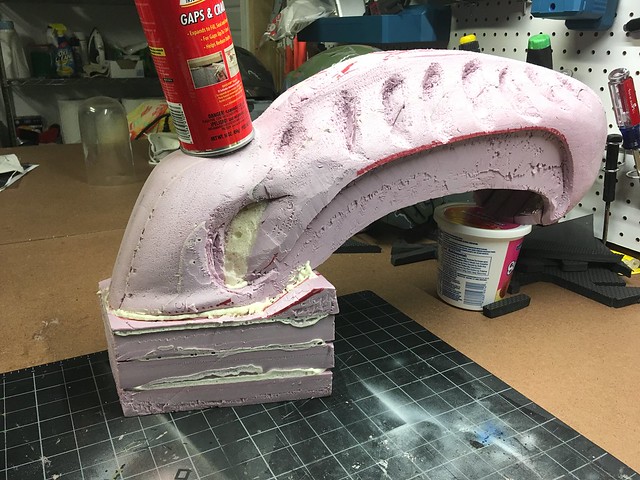
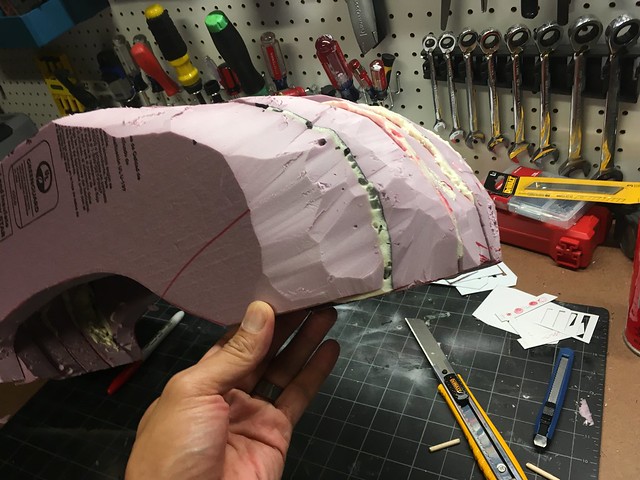
So this morning, I checked out the stack and the foam was solid. It was at this point that I realized I had never shaped insulation foam like this. I then reminded myself that the only time I've ever whittled something is to sharpen a pencil or a small branch into nothingness. I kinda looked around stunned. I figured if it was clay I'd have no problem pushing and pulling it into shape, so I'd just have to look at it from that perspective.

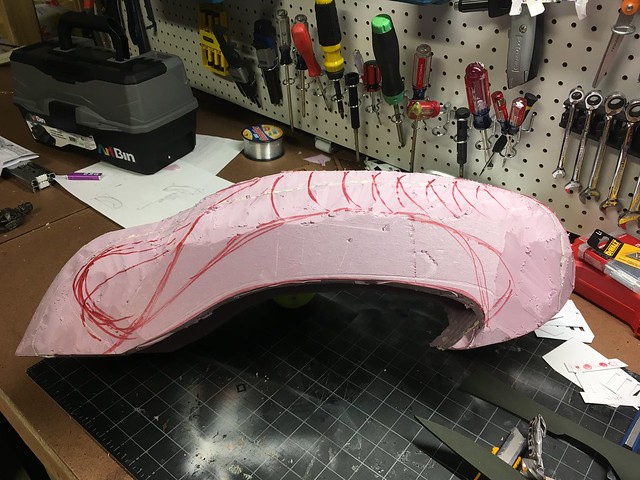
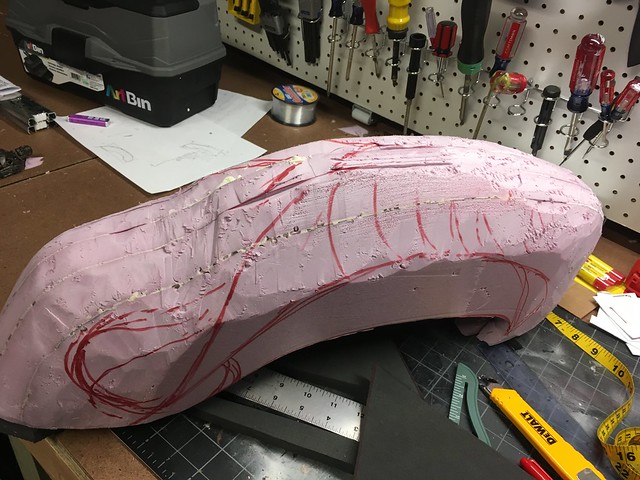
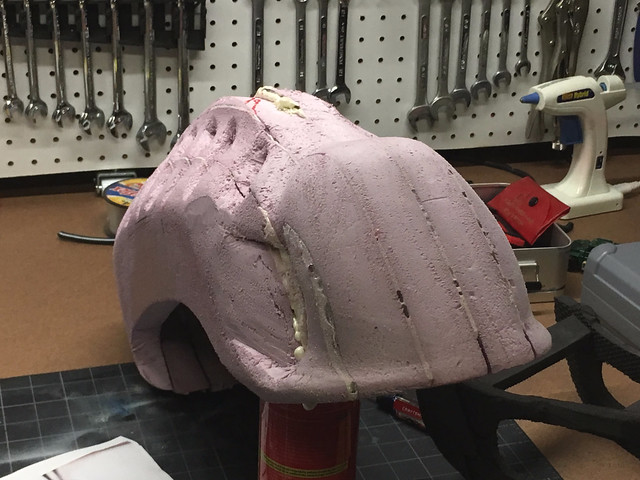
First thing I did was start to round the edges of the panels. Then I drew the shape of the head along the bottom to guide the blade.

Image

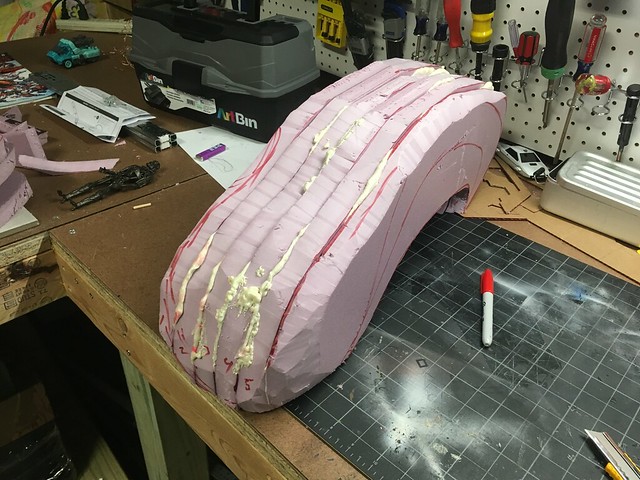
The whole time I was doing this, I was coming up with contigencies. Plastic soda bottles started looking real good. :D

Image

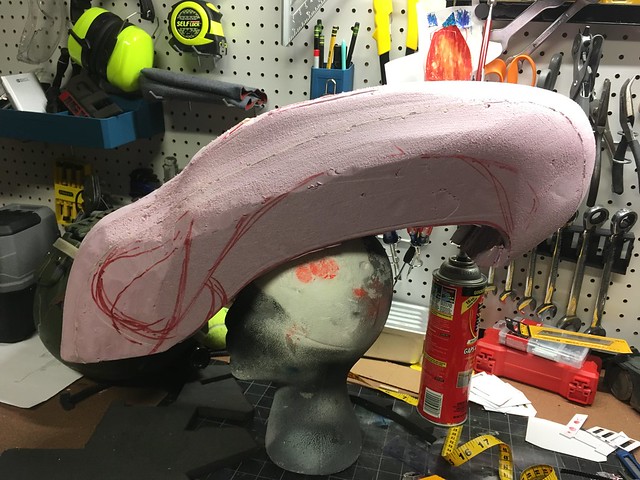
So this is where staring at an alien warrior and drawing them our whole life plays to our advantage. The more I shaped the easier it became and I started feeling waaay more comfortable with it. I can see why wood whittling is so popular.

Image

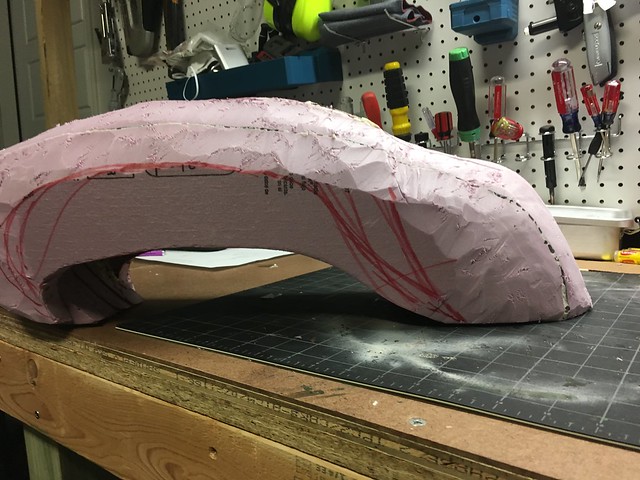
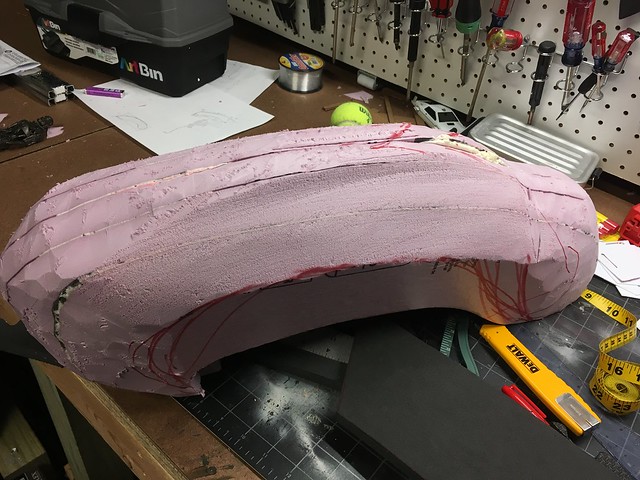
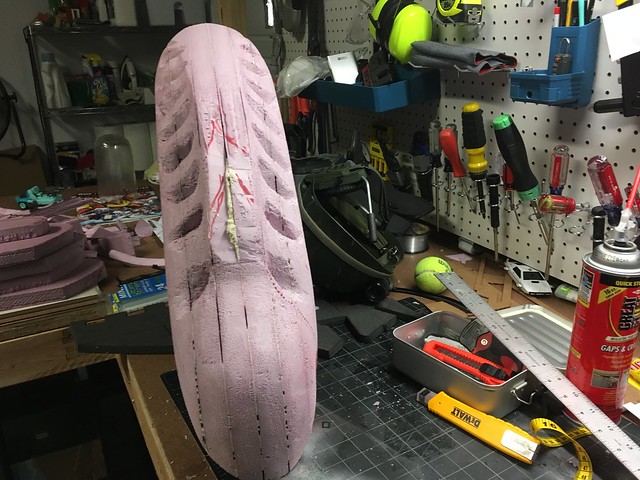
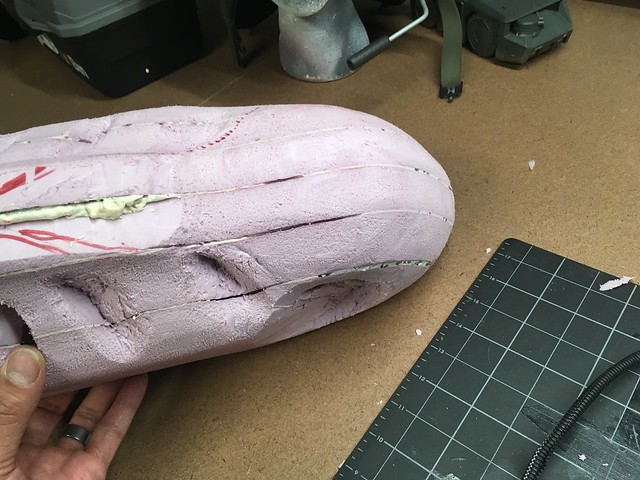
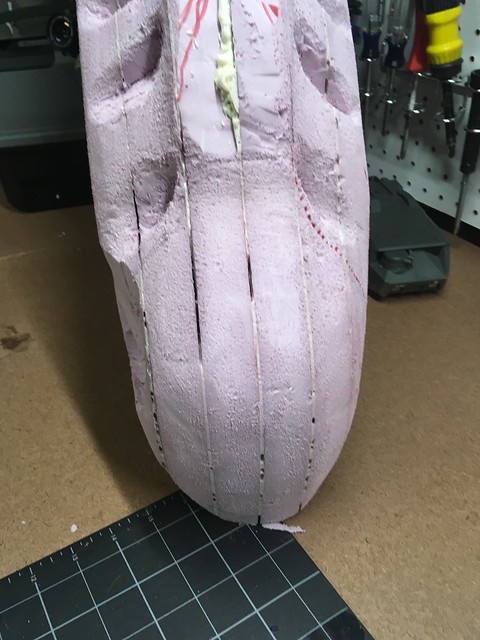
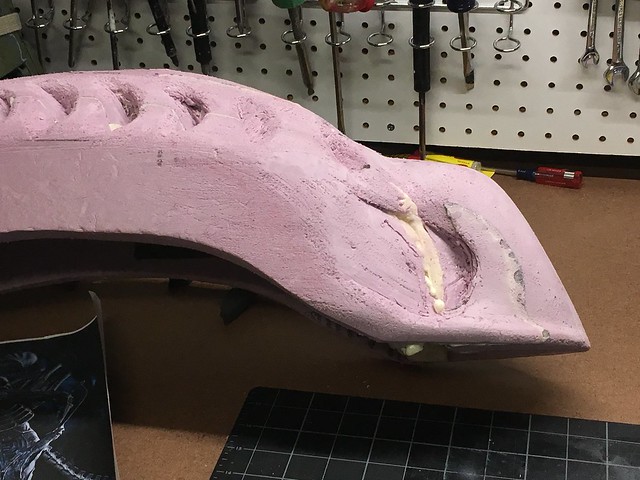
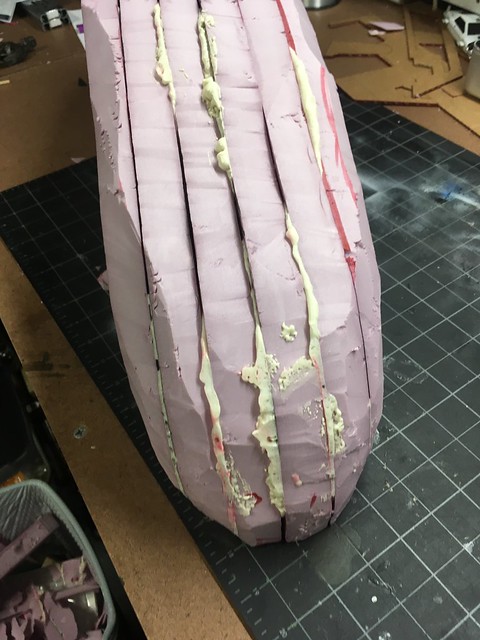
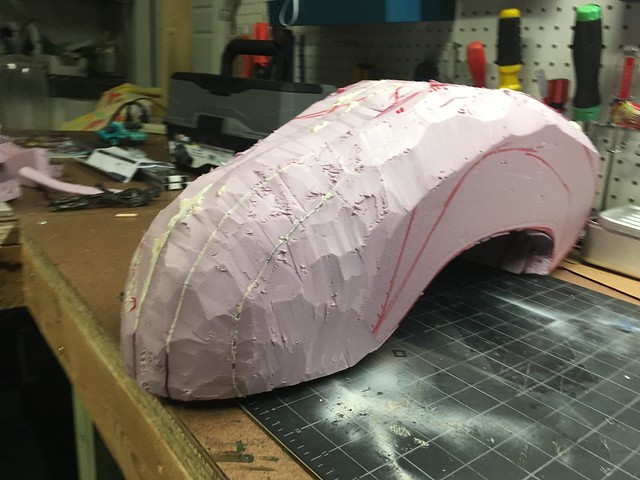
Here's the bottom of the head and you can see my guideline drawn in.

Image

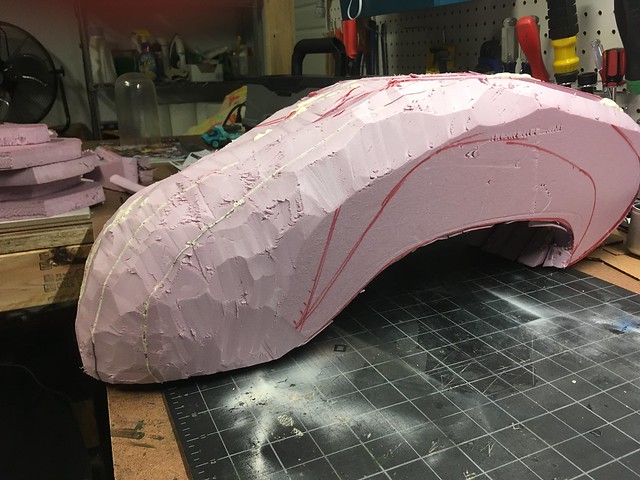
I'm using mostly pictures of NECA alien warriors as a reference. Just kept slicing away little by little. It goes surprisingly fast.

Image

Image

Image

Ignore the used up tube of E6000, can't use that for insulation foam. Eats it away.

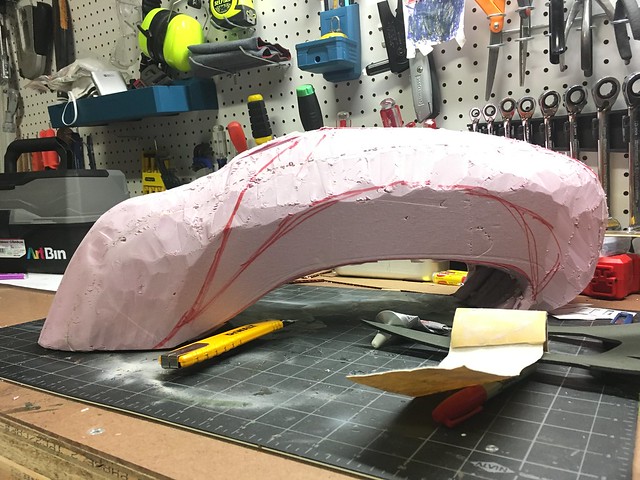
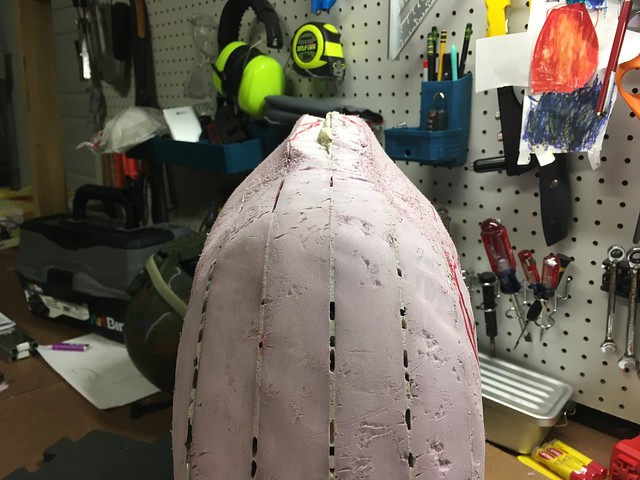
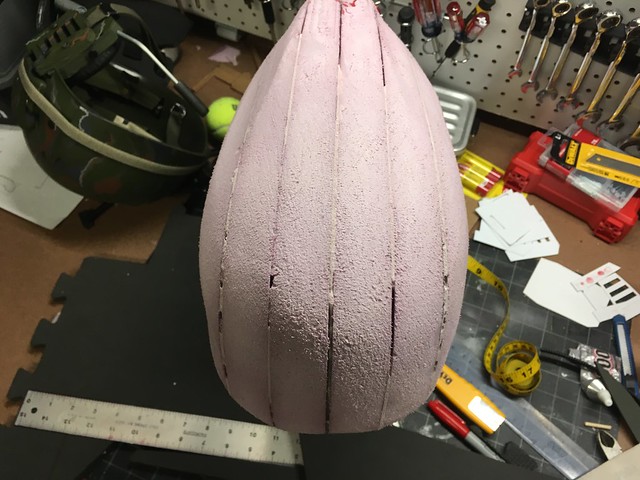
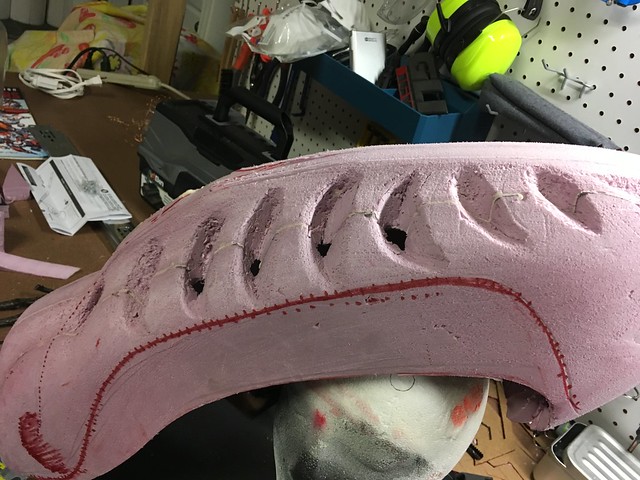
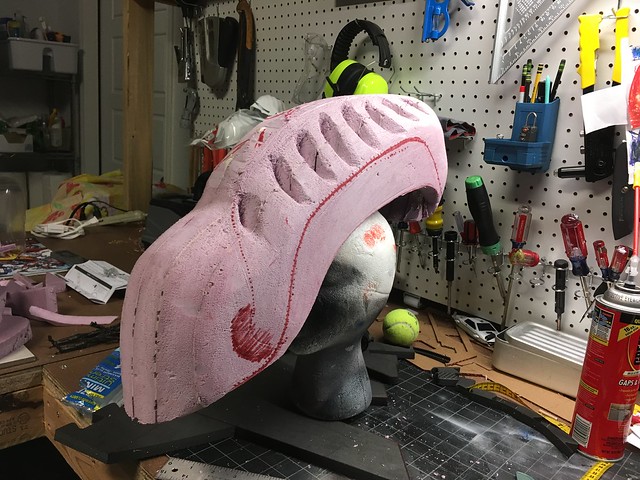
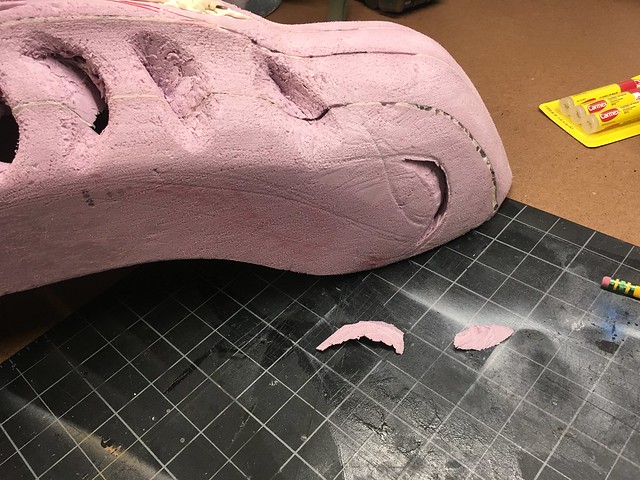
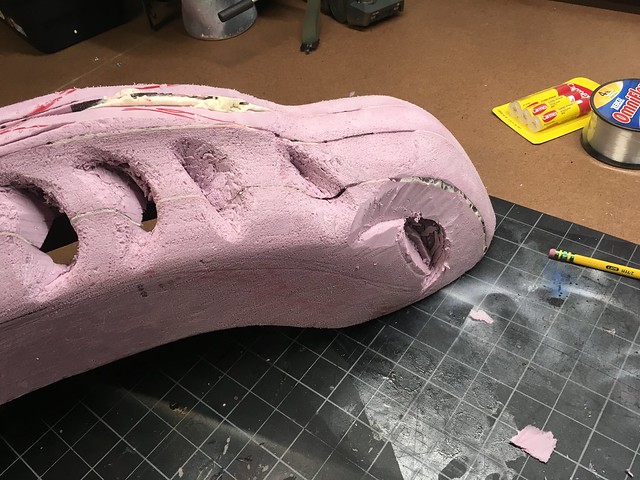
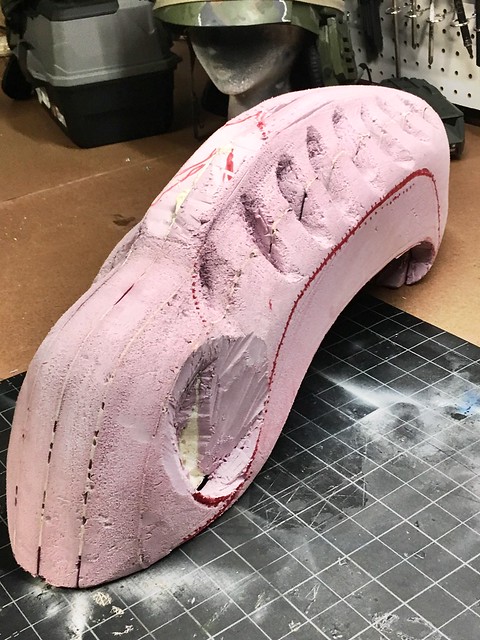
The forehead needs a little sizing down, then I'll sketch in the head "ribbing" and remove material there.

I would've gotten more done today but it's like a sauna in my insulated garage. Sweat and foam all over.

***LIQUID NAILS ended up being way easier and more efficient to join the XPS together!! Comes in small tubes and caulking tubes at HD, Lowe's, etc.

_________________
"I'm working on it ... "


Last edited by Red_2 on Tue Nov 07, 2017 7:21 pm, edited 4 times in total.

Top
 Profile  
Reply with quote  
 Post subject:
PostPosted: Mon Jul 31, 2017 1:13 am 
Prop Churner Outer
User avatar

Location: Bath, Maine
Service Number: A03/TQ1.0.12143G1
Country: United States
Oh man, this is looking great!

_________________
:delta: My entry-level prop and costume tutorials: viewtopic.php?f=3&t=12751 :delta:


Top
 Profile  
Reply with quote  
 Post subject:
PostPosted: Mon Jul 31, 2017 2:44 am 

Location: ATX
Country: United States
Thanks, retrogarde!

_________________
"I'm working on it ... "


Top
 Profile  
Reply with quote  
 Post subject: Re: Mini alien warrior build
PostPosted: Mon Jul 31, 2017 4:19 am 

Location: ATX
Country: United States
Snuck in a shaping session before calling it a day.

Using this Hot Toys pic as a reference for the angle of the forehead.

Image

Image

Image

Image

I also reshaped the back of the head at the top to get that arched shape closer. The bottom portion will need work.

Tested a 500 grit sandpaper to see how it smooths. Seems to work. I also like to shape with sandpaper also, so
once this rough shape is close I'll fine tune with that.

Image

_________________
"I'm working on it ... "


Top
 Profile  
Reply with quote  
 Post subject: Re: Mini alien warrior build
PostPosted: Mon Jul 31, 2017 11:43 am 

Service Number: A05/TQ2.0.32141E1
Country: United States
Great idea with the foam!

As far as sealing it for painting, seal with wood glue or the pros recommend mod podge.

_________________
The impossible takes a while longer and goes over budget too...


Top
 Profile  
Reply with quote  
 Post subject: Re: Mini alien warrior build
PostPosted: Mon Jul 31, 2017 4:48 pm 

Location: ATX
Country: United States
Got it! Thanks, Knoxville!

Last time I messed with this stuff I painted it with latex, but I didn't do any sanding last time.

_________________
"I'm working on it ... "


Top
 Profile  
Reply with quote  
 Post subject: Re: Mini alien warrior build
PostPosted: Tue Aug 01, 2017 12:43 am 

Service Number: A05/TQ2.0.32141E1
Country: United States
Red_2 wrote:
Got it! Thanks, Knoxville!

Last time I messed with this stuff I painted it with latex, but I didn't do any sanding last time.


I have been using an orbital sander myself. I have been using sealed foam from knoxville foam and fabric with great effects.

Do keep us posted on pics. I think that head on a 1" PVC pipe decorated would make a great combispear ornament...

_________________
The impossible takes a while longer and goes over budget too...


Top
 Profile  
Reply with quote  
 Post subject:
PostPosted: Tue Aug 01, 2017 1:31 am 

Location: ATX
Country: United States
Ha ha! I definitely would! And it's super light.

I'll get a little shaping in tonight. More pics to come.

_________________
"I'm working on it ... "


Top
 Profile  
Reply with quote  
 Post subject: Re: Mini alien warrior build
PostPosted: Tue Aug 01, 2017 4:44 am 

Location: ATX
Country: United States
Went to town with some coarse sandpaper tonight.

Before:

Image

After a few passes, It goes quickly:

Image

I leaned into the sides to start forming that spine along the top.

Image

Then I started rounding out the back. I also spent a lot of time (5 minutes?) at the last 1/5 of the rear to emphasize that back curve.

Image

Image

Was a quick 30 minute session. Looks like I'm still headed in the right direction.

Image

I tried to cut a quick jaw mock up with some floor mat EVA and it was too small. It almost looked right, but not quite.

_________________
"I'm working on it ... "


Top
 Profile  
Reply with quote  
 Post subject:
PostPosted: Tue Aug 01, 2017 8:33 pm 
Prop Churner Outer
User avatar

Location: Bath, Maine
Service Number: A03/TQ1.0.12143G1
Country: United States
That is shaping up really nicely. I'm a big fan of the Cameron ridged style heads, but the idea of sculpting one seemed daunting to me. Good luck man!

_________________
:delta: My entry-level prop and costume tutorials: viewtopic.php?f=3&t=12751 :delta:


Top
 Profile  
Reply with quote  
 Post subject: Re: Mini alien warrior build
PostPosted: Tue Aug 01, 2017 8:43 pm 

Location: ATX
Country: United States
Yeah, retro, I'm kinda figuring it out as I go. :)

It helps that I'm not going for super accuracy, but I like to emphasize the details that most of us recognize.

_________________
"I'm working on it ... "


Top
 Profile  
Reply with quote  
 Post subject:
PostPosted: Wed Aug 02, 2017 4:02 am 

Location: ATX
Country: United States
Did a little more shaping and then dove right into the "ribs" of the head. Their shape is deceiving cause I always think of the ribbed tubing veins as the main shape. But the indents have their own form and the veins follow a different path.

I cut deep enough to expose the hollow, but no biggie it'll be all black in there or I can patch it up with filler foam. My kid runs pretty hot so maybe I should think about vent holes.

Image

Image

I've got 1/4" diameter poly-loom that I was going to use for the veins, but I'm thinking it may be a tad too thick. Any ideas on another plentiful ribbed tubing I could use? Worst case it'll work but my brain is thinking "smaller head, smaller veins".

_________________
"I'm working on it ... "


Last edited by Red_2 on Wed Aug 02, 2017 5:45 pm, edited 1 time in total.

Top
 Profile  
Reply with quote  
 Post subject:
PostPosted: Wed Aug 02, 2017 4:11 pm 
Mad Cat
User avatar

Location: Active duty: USS Catalpa
Service Number: AO3/TQ6.0.79749E8
Country: United States
How about rope? I know the threading is more diagonal, but you should be able to find something that scales correctly.

_________________
"Awww, someone tell me that's a boot!

It's a boot!"

III drops


Top
 Profile  
Reply with quote  
 Post subject:
PostPosted: Wed Aug 02, 2017 5:44 pm 

Location: ATX
Country: United States
Hmmm, I'll look around for some. Thanks, Dropship!

It's funny when I'm making stuff, my brain automatically makes up that there's something that will fit exactly.
This is when I end up trolling all the hardware and craft stores for a thin rope/line/cable with some ribbing. :)

_________________
"I'm working on it ... "


Top
 Profile  
Reply with quote  
 Post subject: Re: Mini alien warrior build
PostPosted: Wed Aug 02, 2017 9:29 pm 

Location: ATX
Country: United States
AH HA!

Found some 3/16" (or maybe it's 7/32") poly-loom off some old factory engine harnesses. (I work in an auto shop.)
1/4" loom is a dime a dozen, looks like this size only comes from factory set ups. Wraps one wire instead of few or several.

This should be perfect. Just need to find some more.

Image

_________________
"I'm working on it ... "


Top
 Profile  
Reply with quote  
 Post subject: Re: Mini alien warrior build
PostPosted: Wed Aug 02, 2017 9:34 pm 

Service Number: A05/TQ2.0.32141E1
Country: United States
Red_2 wrote:
AH HA!

Found some 3/16" (or maybe it's 7/32") poly-loom off some old factory engine harnesses. (I work in an auto shop.)
1/4" loom is a dime a dozen, looks like this size only comes from factory set ups. Wraps one wire instead of few or several.

This should be perfect. Just need to find some more.

Image


This might work too:
https://www.123securityproducts.com/198 ... gIv9PD_BwE

Flexible conduit.

_________________
The impossible takes a while longer and goes over budget too...


Top
 Profile  
Reply with quote  
 Post subject:
PostPosted: Wed Aug 02, 2017 10:52 pm 

Location: ATX
Country: United States
AAAHH! $78 dollars!! You are a joker!

That actually looks better then the loom, but I'm hoping to keep this as cheap as possible. Doubt I'll find that steel flex line lying around. :)

_________________
"I'm working on it ... "


Top
 Profile  
Reply with quote  
 Post subject: Re: Mini alien warrior build
PostPosted: Thu Aug 03, 2017 4:30 am 

Location: ATX
Country: United States
30 minute session tonight.

Got the right side ribs in. Managed to cut even deeper this time so lots of patching to be done. Not worried though.

Image

Some decent symmetry there. I'll sand that second rib on the right (left in the pic) a bit to even it out more.

Image

Here's a comparison of the 1/4" and smaller loom. Not much of a difference but smaller is better. Also that 1/4" is cut in half.

Image

I'm anxious to get to the temple holes and rounding out the front. Gonna go slow cause it's pretty dynamic in the front.

Reference:
Image

_________________
"I'm working on it ... "


Top
 Profile  
Reply with quote  
 Post subject: Re: Mini alien warrior build
PostPosted: Fri Aug 04, 2017 5:10 am 

Location: ATX
Country: United States
Tried carving out the temple hole head cavity part. Wasn't sure how deep they go.

Tiny cuts ...

Image

More tiny cuts ...

Image

Giant hole!

Image

Started thinning out the top portion also to creat that flare from top to bottom.

Image

Image

After that I filled in the holes I made so far with the expanding foam.

Wish I could quit my job and just do this all the time.

_________________
"I'm working on it ... "


Top
 Profile  
Reply with quote  
 Post subject: Re: Mini alien warrior build
PostPosted: Sun Aug 06, 2017 4:31 am 

Location: ATX
Country: United States
Started the left side ...

Image

Image

Anyone have a large scale warrior figure, or a close reference pic of the temple hole? How deep does it go?

_________________
"I'm working on it ... "


Top
 Profile  
Reply with quote  
 Post subject: Re: Mini alien warrior build
PostPosted: Tue Aug 08, 2017 3:30 am 

Location: ATX
Country: United States
So I tried mocking up a mouth again with EVA and struggled mightily. The jaw is wider and a bit more substantial than the forehead and every mock up I made was huge and disproportionate. I realized that my forehead was too big. Especially since this is a sized down version.

I rechecked some reference pics and worked on sizing it down a bit.

Image

Image

Image

Another thing I need to consider is that the ridge along the bottom of the forehead will be the tubing/vein.

_________________
"I'm working on it ... "


Top
 Profile  
Reply with quote  
 Post subject: Re: Mini alien warrior build
PostPosted: Wed Aug 09, 2017 4:03 am 

Location: ATX
Country: United States
Cut out the sides where the tubes will go. Left a portion of the foam for mounting. It will sit on top my son's head right behind the jaw, so I'm guessing I'll trim a little indent there. Still need to figure out the mount set up.

Image

Image

Then I set up a foam block for the jaw which I mounted and left to dry overnight. Plan is to carve out the jaw then either cut it off to then articulate it or use it as a template for EVA version. We'll see ...

Image

Image

Image

Funny how builds go from "this looks great" to "what am I doing?"

_________________
"I'm working on it ... "


Top
 Profile  
Reply with quote  
 Post subject: Re: Mini alien warrior build
PostPosted: Wed Aug 09, 2017 11:27 am 

Service Number: A05/TQ2.0.32141E1
Country: United States
Looks awesome. You give us all ideas with what you do...

_________________
The impossible takes a while longer and goes over budget too...


Top
 Profile  
Reply with quote  
 Post subject:
PostPosted: Wed Aug 09, 2017 2:08 pm 
Prop Churner Outer
User avatar

Location: Bath, Maine
Service Number: A03/TQ1.0.12143G1
Country: United States
I love that APC by the way. Grabbed one at Toys R Us for less that $20 last year. So great!

You are absolutely nailing this thing, don't doubt yourself.

_________________
:delta: My entry-level prop and costume tutorials: viewtopic.php?f=3&t=12751 :delta:


Top
 Profile  
Reply with quote  
 Post subject: Re: Mini alien warrior build
PostPosted: Wed Aug 09, 2017 2:51 pm 

Location: ATX
Country: United States
Thanks, guys! Appreciate it!

As always, if anyone has suggestions, fire away.

Yeah, retro, that mini-APC is fun! The kids love it.

_________________
"I'm working on it ... "


Top
 Profile  
Reply with quote  
Display posts from previous:  Sort by  
Post new topic Reply to topic  [ 143 posts ]  Go to page 1, 2, 3, 4, 5, 6  Next


You cannot post new topics in this forum
You cannot reply to topics in this forum
You cannot edit your posts in this forum
You cannot delete your posts in this forum
You cannot post attachments in this forum

Search for:
Jump to: