The Aliens Legacy
http://forum.alienslegacy.com/

Putting together a new Marine helmet
http://forum.alienslegacy.com/viewtopic.php?f=3&t=14409
Page 1 of 3

Author:  retrogarde [ Thu May 22, 2014 5:40 pm ]
Post subject:  Putting together a new Marine helmet

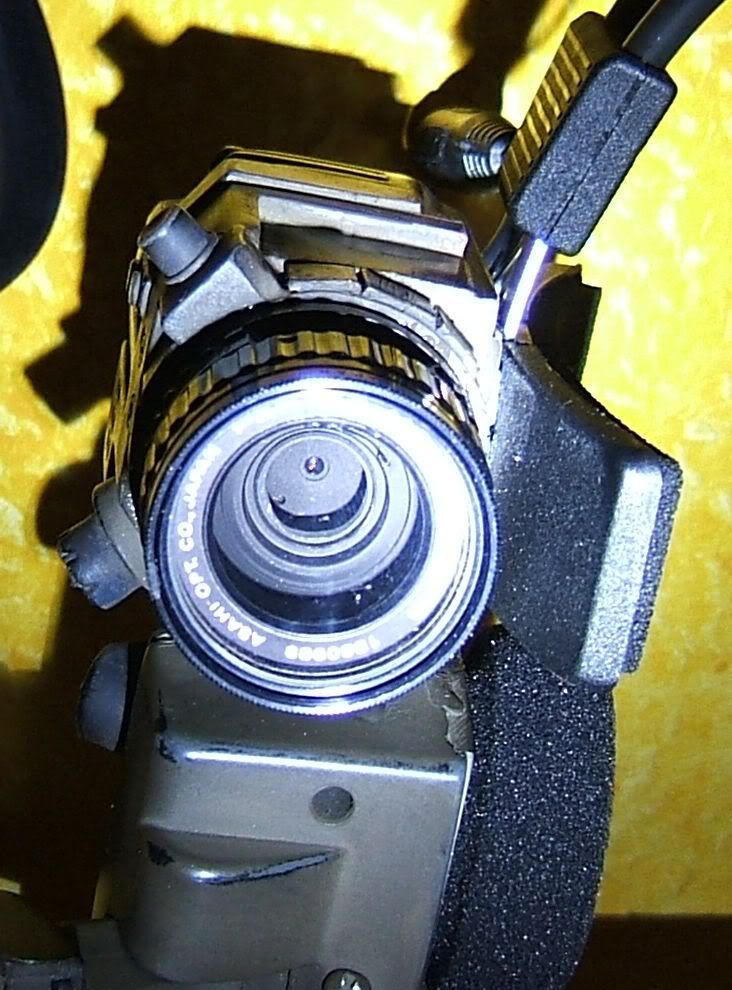
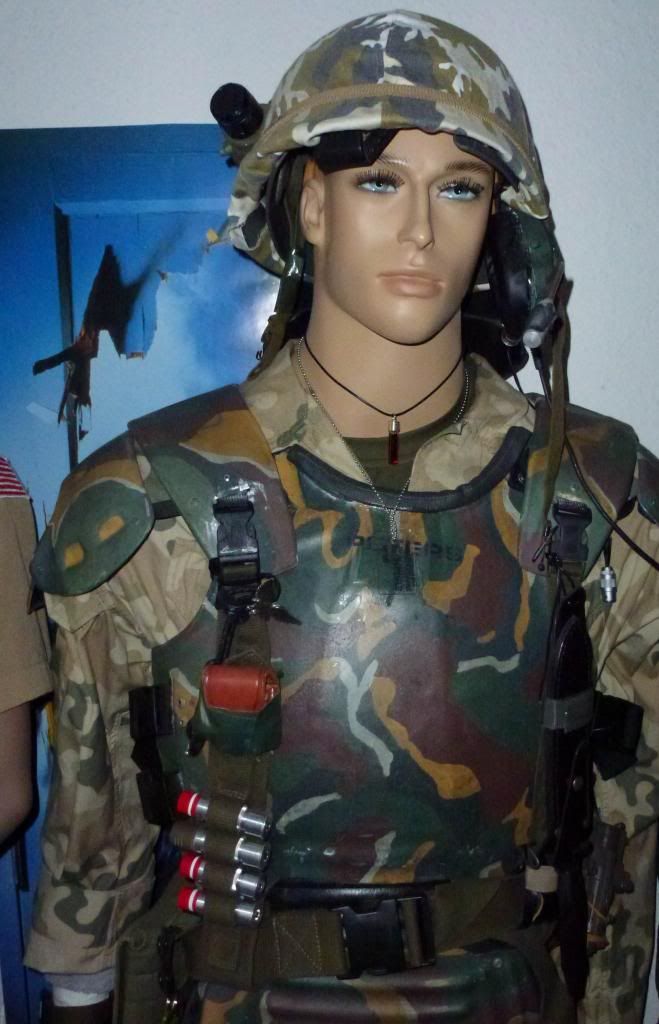
I bought a Spat helmet off DBoz as I need to outfit the Sarge in my miniseries. My own Marine helmet is a vintage pot with a HORPAT cloth cover, Spat camera, ear defender and lobster plates, and an improvized lobe plate. This one is a metal pot too, but it is fun to see how Spat attached all the various pieces. DBoz included an outstanding Mars Attacks Beyerdynamic clone, which I promptly snapped in two :x

Once I fixed the mic I put it in my own helmet and "traded up" the ancient Spat mic (in the picture below) for the nice one I bought from him last year for this new build.

Attachment:
helmetstart.jpg
helmetstart.jpg [ 111.76 KiB | Viewed 20148 times ]


I then set to work putting the top of the ear defender and the lobe plate back on, securing them from the inside with two-part epoxy. I considered trimming down the lobe plate as I do think the profile is too high, but damn if it doesn't fit the helmet perfectly as-is, so in the end I decided to go with it.

Next I gave it a base coat of OD, and started puttying up the seam on the lobe plate. The rivets bother me a bit on the lobe plate so I'm trying to decide if i'll leave them showing or try to hide them. I also began drawing out where the tan paint will go for the camo. Trigger-Happy's build was a great inspiration!

Attachment:
helmetputty.jpg
helmetputty.jpg [ 138.49 KiB | Viewed 20148 times ]


More to come!

Author:  577_ops [ Thu May 22, 2014 6:02 pm ]
Post subject:  Re: Putting together a new Marine helmet

YAGP (yet another great project) 8)
Any plans on puting in a real camera for your series?

Author:  retrogarde [ Thu May 22, 2014 6:05 pm ]
Post subject: 

I would absolutely love to. Have you done one Frank? That would really be epic (and useful!).

Author:  Archangel [ Fri May 23, 2014 3:45 am ]
Post subject: 

I have been looking at cameras that may fit. Just have to wait for spat to get done.

Author:  577_ops [ Fri May 23, 2014 8:54 am ]
Post subject:  Re: Putting together a new Marine helmet

In the past I used Pinhole Cameras. They fit nicely inside Spat's resin camera:
Image
Image

As Melissa and others pointed out there are nice small WLAN cameras.
Not to forget Aaron's action camera build and the video from the D*Con sweep 2013:
http://www.youtube.com/watch?v=vNmje-vObjk

Currently my choice for the next build is the "Mycrocam" as it offers both LIVE feed and in parallel recording of videos/pictures.

Author:  retrogarde [ Fri May 23, 2014 12:30 pm ]
Post subject: 

That's awesome Frank! Thank you for the info.

So here's a picture of Mars' Beyerdynamic clone as an upgrade to my first helmet. The break in the metal tube is actually hidden by the ear defender, so no one will ever see it. I am toying with the idea of wiring this as a working mic since it is hollow, but that's not high on my priority list as I have zero experience with that sort of thing.

Attachment:
marsmic.jpg
marsmic.jpg [ 129.81 KiB | Viewed 20081 times ]


And here's a quick shot comparing the Spat mics. I really like the newer one and so I'm glad I'll be putting it in this new helmet build. I think I'll save the old one though as I'm toying with making a SmartGunner rig for me six-year-old son.

Attachment:
spatevolution.jpg
spatevolution.jpg [ 122.61 KiB | Viewed 20081 times ]

Author:  SGT KITTEN [ Fri May 23, 2014 1:46 pm ]
Post subject: 

The Marsattacks one looks great in your helmet! If you don't mind, what's the lining on the lobster plates?

Charlie

Author:  retrogarde [ Fri May 23, 2014 1:52 pm ]
Post subject: 

Yeah, about that. The top plate has padding from the previous owner. I think it is pretty close to screen accurate. The bottom plate has yoga mat material that was the closest I could source. They don't match obviously, but I hate taking the less accurate piece off just to have them be uniform. I'm keeping my eyes peeled for the correct Dutch mat material, especially now that I have two sets of plates to pad.

Author:  88reaper88 [ Fri May 23, 2014 2:18 pm ]
Post subject: 

In terms of filming, a GoPro strapped to the helmet would work fine, unless the helmet is in shot somehow (mirrors, other characters etc).
You won't have to worry about any wireless receivers etc to get the shots from the camera too. :)

Author:  septic [ Mon May 26, 2014 12:07 am ]
Post subject: 

Edelweiss pin is a nice touch. :)

Author:  retrogarde [ Mon May 26, 2014 11:51 am ]
Post subject: 

Cheers Septic! It was my dad's and so it has sentimental value.

Author:  retrogarde [ Fri May 30, 2014 12:54 pm ]
Post subject: 

Started work painting the helmet. This was the first coat of tan, and of course I forgot to photograph the ear defender and lobster plates. I'm quite happy with how the helmet and lobe plate blend together on this side.

Attachment:
paintleftside.jpg
paintleftside.jpg [ 139.14 KiB | Viewed 19953 times ]


And the other side.
Not quite as happy with the blending on the bottom lip. I may have to go back and address that.

Attachment:
paintrightside.jpg
paintrightside.jpg [ 140.68 KiB | Viewed 19953 times ]


Stealing an idea from Charlie's build, I decided to do a pack of smokes to stick in the helmet band. I took the design for the fictional brand seen on the Nostromo and "updated" it to a standard size (after all, 57 years have passed so it's likely the look of the pack would have changed). I went with tan as it I didn't want it to stick out too much on the helmet, and the pack of cigarettes we see in Ripley's apartment was all tan.

Attachment:
newbalaji.jpg
newbalaji.jpg [ 139.33 KiB | Viewed 19953 times ]


I found a template for Red Apple cigarettes (from Pulp Fiction) online and used that as the basis of my design. I really did't like the way the folds were laid out (makes it way harder to assemble than it needs to be) but it was a shortcut to designing it from scratch so I shouldn't complain.

Author:  SGT KITTEN [ Fri May 30, 2014 4:05 pm ]
Post subject: 

Nice! I like the redesign of the Bajaji (and the homage to the Nostromo). Not to knock the lob plate, but does the right side (as worn) stick out a lot more than the left? It might be the light, but its casting a much larger shadow and seems to have a very clear edge that the left side doesn't.

Charlie

Author:  retrogarde [ Fri May 30, 2014 4:32 pm ]
Post subject: 

I'll have to check when I get home, but I'm pretty sure it's just a trick of the light. Notice that the doorframe is the same in both photos, with the light coming in from the right. When the left side of the helmet is showing, the light is illuminating the edge of the plate where it blends into the helmet. When the right side of the helmet is showing, the edge casts a shadow across the helmet.

But here's the real kicker for me: is the plate totally the wrong shape? Hicks's plate looks like the rind off a slice of an orange, while the Spat plate is more boxy. Thoughts?

Attachment:
lobecomp.jpg
lobecomp.jpg [ 52.01 KiB | Viewed 19931 times ]

Author:  Osmotic [ Fri May 30, 2014 5:16 pm ]
Post subject:  Re: Putting together a new Marine helmet

Retro any help ?


Attachment:
DSCF5011.JPG
DSCF5011.JPG [ 1.64 MiB | Viewed 19927 times ]


Attachment:
DSCF5023.JPG
DSCF5023.JPG [ 1.7 MiB | Viewed 19927 times ]

Author:  retrogarde [ Fri May 30, 2014 5:23 pm ]
Post subject: 

Yes indeed, that is EXACTLY what I need. Thanks man!

I'm glad I didn't get any further into painting this thing as I clearly need to do some modifications. No offense to Spat of course, but I really want this thing to be more screen accurate.

Author:  retrogarde [ Mon Jun 02, 2014 2:03 pm ]
Post subject: 

Using Osmotic's excellent reference photos, I made a line where I wanted to trim the lobe plate.

Attachment:
guideline.jpg
guideline.jpg [ 124.53 KiB | Viewed 19854 times ]


I then drilled some guide holes along the line (as it turns out I drilled far more holes than I needed, but they did help with the cutting).

Attachment:
guideholes.jpg
guideholes.jpg [ 156.04 KiB | Viewed 19854 times ]


Working slowly I cut through the plastic of the lobe plate with a hacksaw and worked my way around the front. I really didn't want to damage any of the other pieces on the helmet or scratch the existing paint too much.

Attachment:
hacksaw.jpg
hacksaw.jpg [ 91.04 KiB | Viewed 19854 times ]


Once it was cut off the excess popped off pretty well.

Attachment:
fronttrimmed.jpg
fronttrimmed.jpg [ 109.15 KiB | Viewed 19854 times ]


The rivets holding it to the helmet were not spaced evenly, so I had to remove the one nearest to the camera. I'm thinking of actually incorporating the hole (made into a circular dent with putty) as a bit of battle damage like Hicks had on his shoulder bell. I'm leaning towards putting the Kanji for "good fortune" next to it.

Attachment:
sidetrimmed.jpg
sidetrimmed.jpg [ 144.97 KiB | Viewed 19854 times ]


The remaining epoxy leftovers came off cleanly with a little help from a chisel and sand paper. I'll clean it up and then re-epoxy to smooth out the new top of the lobe plate, and then give that section a fresh coat of OD.

I am much happier with this new profile!

Author:  retrogarde [ Mon Jun 02, 2014 2:52 pm ]
Post subject: 

I also snagged a correct Pentax lens at last, and for under $20 shipped! Here's a breakdown of my lenses: I started with a resin Spat (like the one on the bottom in this photo), and added a piece of an actual camera lens that I scavenged (upper left). That will go in the current helmet build, while the real Pentax (upper right) will go in my Hero Helmet. The remaining resin lens will be saved for my son's armour.

Attachment:
lenscomp.jpg
lenscomp.jpg [ 223.88 KiB | Viewed 19851 times ]


And here is a much better comparison shot between the 2122 style Balaji Imperial pack (screen accurate), and my new 2179 theoretical pack.

Attachment:
balajicomp2.jpg
balajicomp2.jpg [ 254.31 KiB | Viewed 19851 times ]

Author:  bigbisont [ Mon Jun 02, 2014 5:36 pm ]
Post subject:  Re: Putting together a new Marine helmet

Great upgrades!
I'm really feeling the lobe plate reduction. I think one of my first ever posts on this forum (maybe even the very first) was on that topic.

Reducing the plate over the ear defender may not be a bad idea either, but then you would almost certainly have to find a way to fill in the relatively large cutout below it a bit. Could be more work than its worth.

Looking forward to seeing it all finished!

And also looking forward to seeing that metal breastplate. Where is that thing already?!?!?

Author:  retrogarde [ Mon Jun 02, 2014 6:47 pm ]
Post subject: 

Crap, now you've got me eyeing that other plate... on my first helmet I used the lid off an old tin of Altoids (before they made the lids be embossed). It was a lot closer to the correct side. I may have to look into doing that again.

The aluminum breast plate was something my single, out-of-work brother started as a birthday present for me. He then (selfishly) got a job and girlfriend, so it's on the back burner until I can get him to devote a bit more time to it. Soon though, I promise!

Author:  SGT KITTEN [ Mon Jun 02, 2014 9:27 pm ]
Post subject:  Re:

That looks a lot better! It's amazing how much just a little change can affect the profile of the helmet. Since you have to redo the top, I would suggest maybe smoothing out the side bond line as well. It might be the light, but it looks almost wavy. Since you have to do some repainting anyway, it might be worth the effort.

retrogarde wrote:
The rivets holding it to the helmet were not spaced evenly, so I had to remove the one nearest to the camera. I'm thinking of actually incorporating the hole (made into a circular dent with putty) as a bit of battle damage like Hicks had on his shoulder bell. I'm leaning towards putting the Kanji for "good fortune" next to it.


Wait...you mean....you're making A Dented Helmet?? :)

Charlie

Author:  retrogarde [ Mon Jun 02, 2014 10:24 pm ]
Post subject: 

Charlie: which side do you mean looks wavy? The camera completely hides that side so I'm not worried about it. But did you mean the ear defender side?

Author:  SGT KITTEN [ Mon Jun 02, 2014 11:17 pm ]
Post subject:  Re:

retrogarde wrote:
Charlie: which side do you mean looks wavy? The camera completely hides that side so I'm not worried about it. But did you mean the ear defender side?


Ah, I understand now. I meant the camera side, not the ear defender. If its covered by the camera I understand why you left it the way you did.

Charlie

Author:  nick-a-tron [ Tue Jun 03, 2014 10:19 am ]
Post subject: 

This is looking great! IMO getting the shape of the strike plate correct really makes the difference between a good build and a great build so its worth getting right :)

Author:  retrogarde [ Tue Jun 03, 2014 12:22 pm ]
Post subject: 

Thanks Nick! You've been a huge inspiration to me so that means a lot.

Here's a comparison of the before and after with Osmotic's original as a reference:

Attachment:
profilecomp.jpg
profilecomp.jpg [ 246.22 KiB | Viewed 19774 times ]


So it is clearly much closer to screen accurate, but I can spot at least three big differences, the width and angle of the cut for the ear defender being the most obvious. I'm just going to have to let that one go though as I can't see rebuilding the edge of the steel pot. I can always claim the Sarge did a little field modification on his gear.

Charlie: it took me a minute to get your reference, but then I remembered you did Mandalorian armour! So yes, I have indeed made a dentel helmet:

Attachment:
dentedhelmet.jpg
dentedhelmet.jpg [ 118.66 KiB | Viewed 19774 times ]


The paint job will make or break this particular detail, but hopefully it will look cool.

Next up is a fresh coat of OD on the areas I've rebuilt.

Page 1 of 3 All times are UTC [ DST ]
Powered by phpBB © 2000, 2002, 2005, 2007 phpBB Group
http://www.phpbb.com/