The Aliens Legacy
http://forum.alienslegacy.com/

Rookie build _ colonial marine helmet
http://forum.alienslegacy.com/viewtopic.php?f=3&t=12731
Page 1 of 8

Author:  8Ball [ Fri Mar 08, 2013 1:10 pm ]
Post subject:  Rookie build _ colonial marine helmet

Hi everyone


I've taken the first steps in making a marine helmet, and as this is my first one I may need some tips n hints along the way.

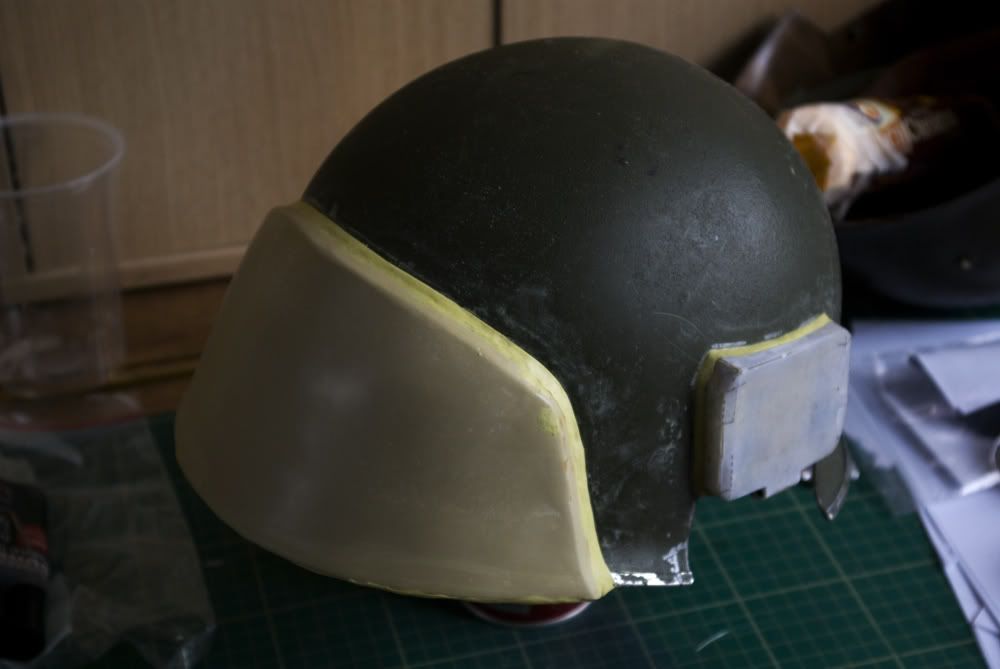
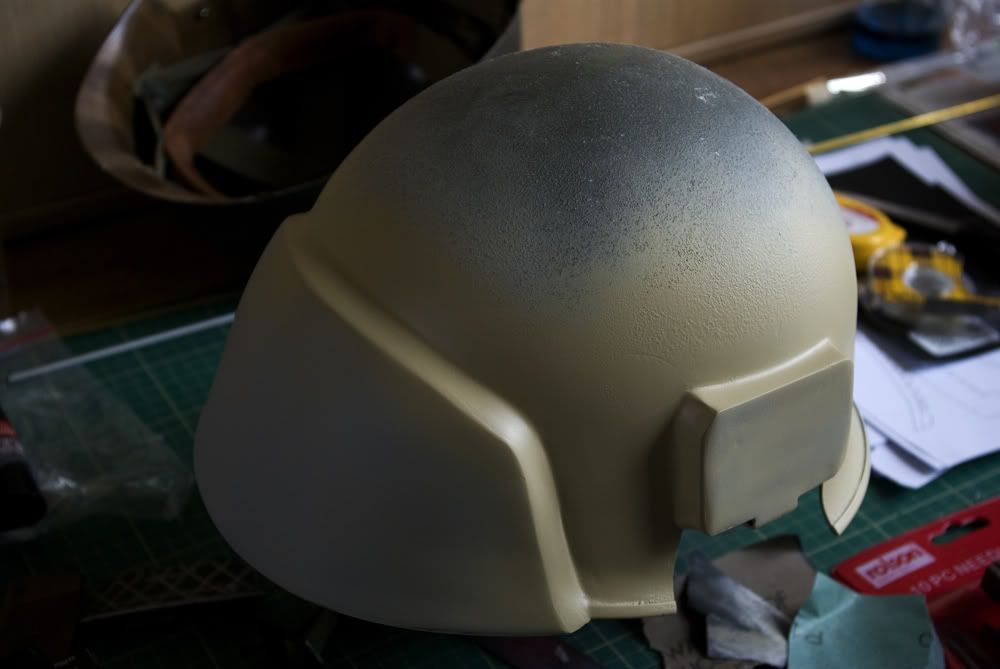
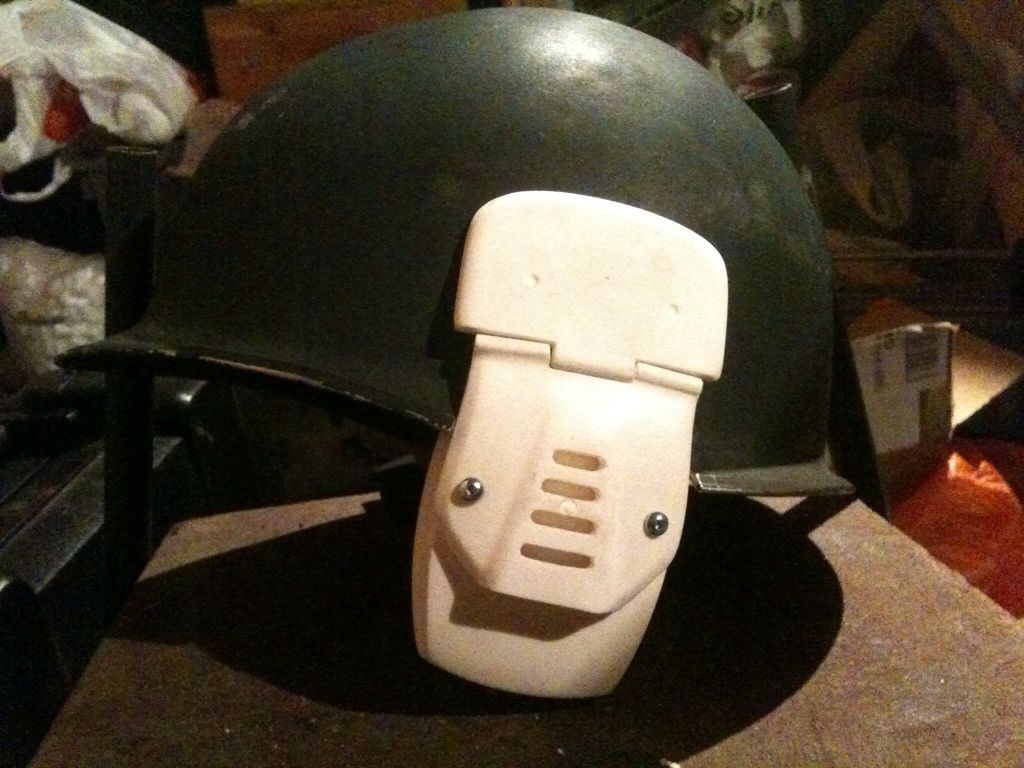
The parts were purchased from Mooncrest (bar kneck flaps, still waiting on availability), and still need assembling (good quality work I have to say, very few holes to fill, and no skewed casts where the two mould halves haven't aligned properly).


Quick noob question:

What screws/bolts do you guys use to join the earpieces together, is there a difinitive type, or will anything that looks the part be ok?


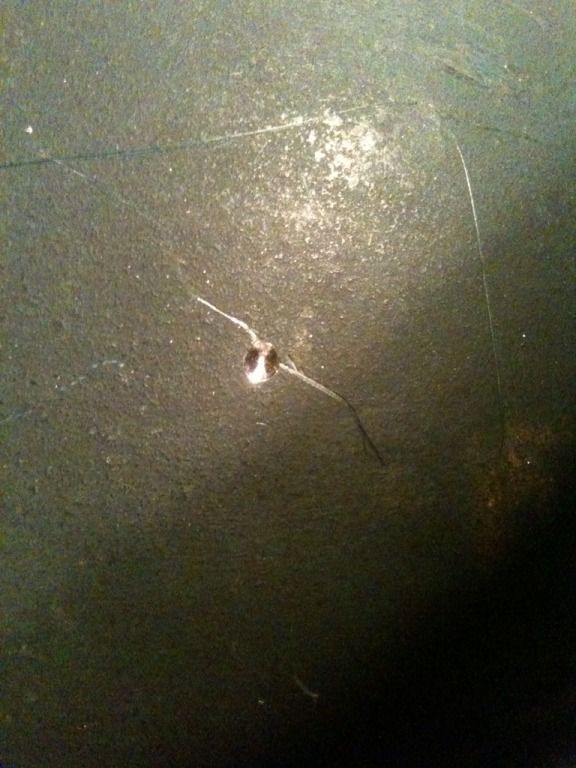
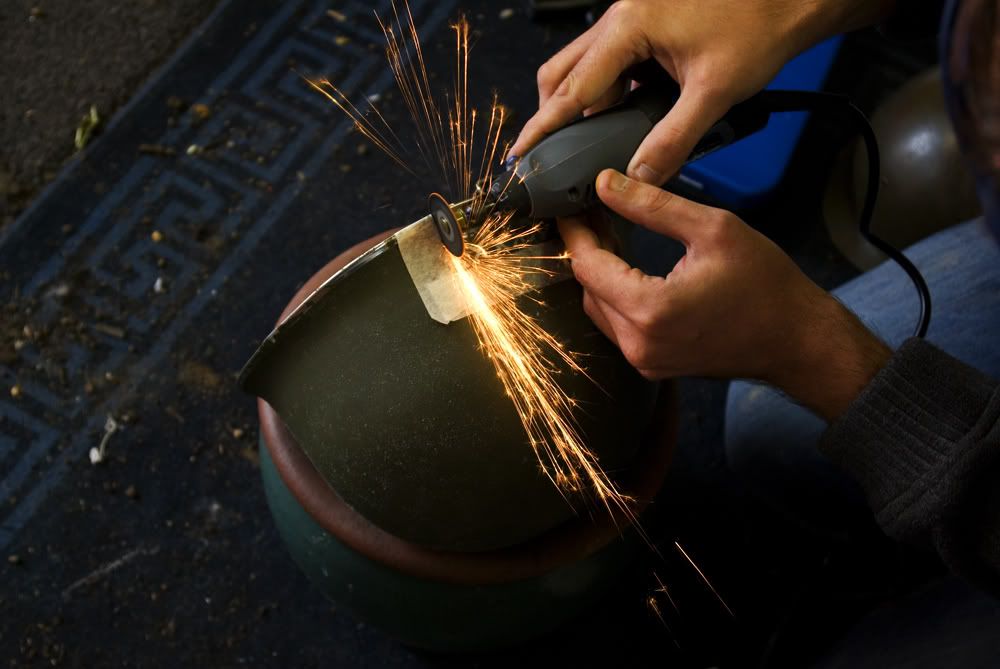
I've marked roughly where the helm cam should go, and cut the section out for the ear piece:

Image


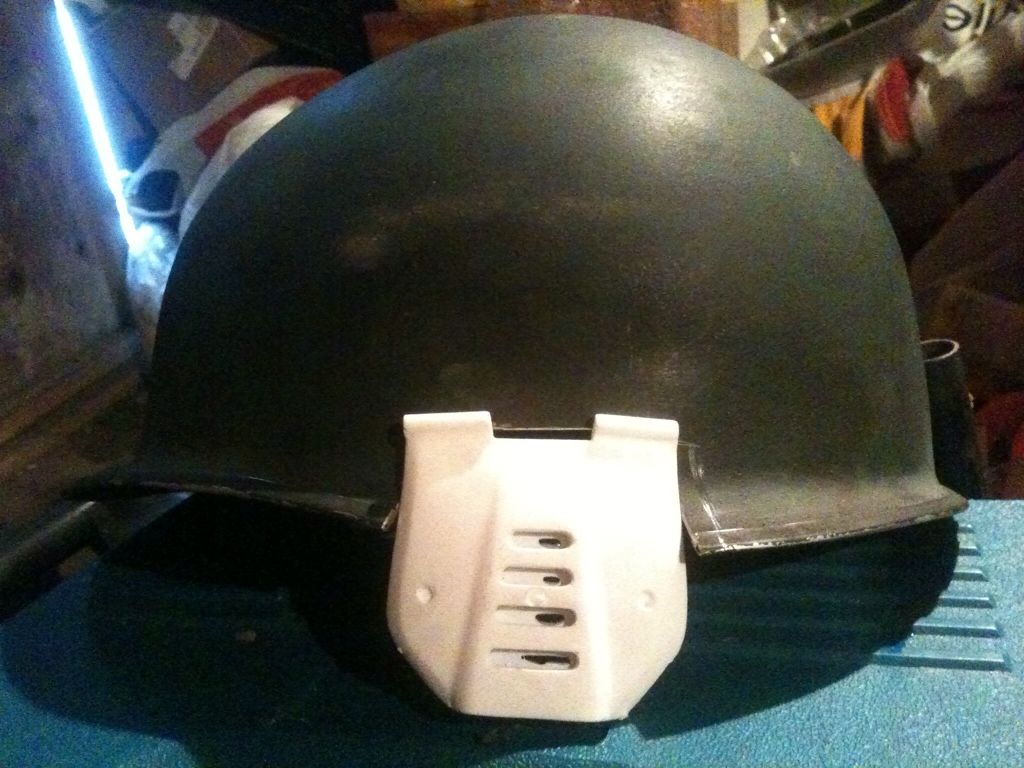
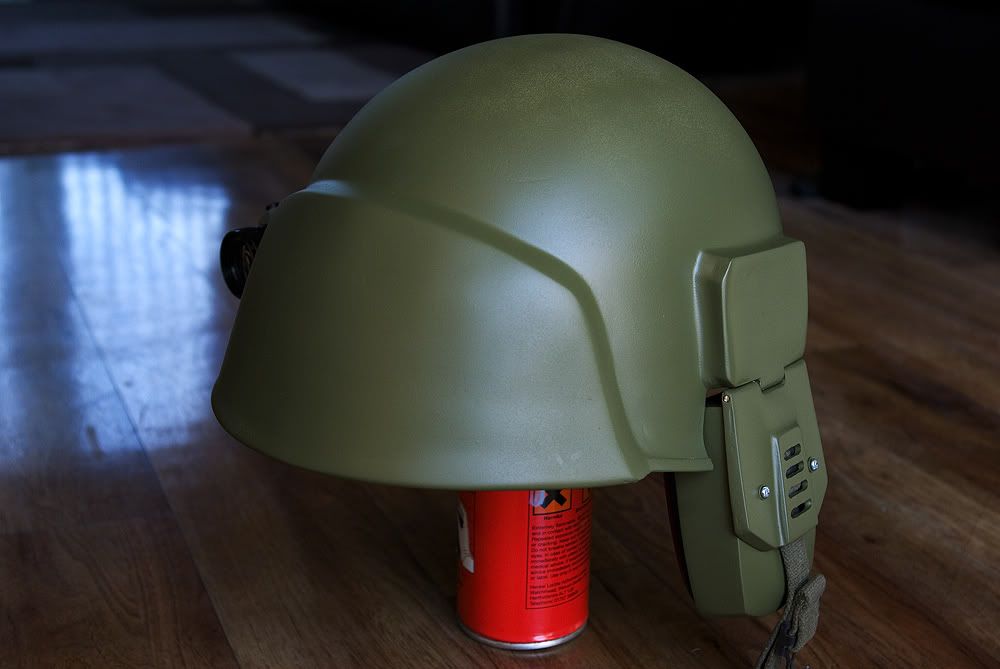
I've been usings Spats helmet build tutorial on his website for the most part, but could do with a few more build referance pics if anyone is willing to share. Everyone has different ways of approaching the same subject matter so will be very helpfull as pointers to find a way that suits me best.


On that note, I've decided to get a proper drill bit for the job and rivet everything on. I realise there's more elbow grease involved, but didn't want to have to fill in long cut marks if I use the dremel.


Well that's it so far, I'll update as I progress, and hopefully I'll have made something respectable at the end of it.


8ball

Author:  Magnus [ Fri Mar 08, 2013 3:19 pm ]
Post subject: 

There are a few here:

viewtopic.php?f=3&t=12729

Author:  Spatman [ Fri Mar 08, 2013 4:01 pm ]
Post subject: 

Hey! You can't use my tutorials if you're not using my parts!!!!

:)

Just take your time, and be careful and wear eye protection!!!

Author:  8Ball [ Fri Mar 08, 2013 5:02 pm ]
Post subject: 

Thanks Magnus :)


Sorry Spat, no offence meant, and thanks for the concern of my welfare, I have respirator and protective eyewear and use them every time they are needed.

Author:  cosmo_kraemer [ Fri Mar 08, 2013 5:10 pm ]
Post subject: 

yes never can be to safe when cutting metal or anything Eye Pro is a must. but cant wait to see how you build urs.always luv watching scratch built items

Author:  8Ball [ Fri Mar 08, 2013 7:21 pm ]
Post subject: 

The protective eyeware and respirator are by far the best investments I have made to date, can't count the times I've thought "OMG, that could have been my eyes" etc etc. For £30 ish pounds for both, it's an easy one to absorb too, health is too important to skimp on.


While I wait for the drill bits to turn up, I'll mostly be concentrating on the earpiece, there's a tiny but of cleaning up needed on the parts, and the cutout need a little fine tuning for everything to fit nicely. If it goes well, and the bits still haven't arrived by next week, I'll be moving on to the lobe plate.

Author:  punkmarine [ Sat Mar 09, 2013 12:31 am ]
Post subject: 

What drill bits are you getting?

Only asking because I think, from my experience, you will need something special to drill through the helmet.
So if you get some that work well it will be of interest.

I tried expensive tungsten drills, it broke all the small ones and the bigger ones hardly touched it.
I eventually used small grinding tools on my dremmel, took a while but did the job.

Martin

Author:  8Ball [ Sat Mar 09, 2013 1:12 am ]
Post subject: 

I ordered two types of forged jobber drill bits, one for most hard metals, the other for carbonised steel. The blurb says something about a shallow cutting angle, it's supposed to make them better, but ill have to see.

If they don't work, I'd like to try your grinding technique. Did you use deburring bits?

Author:  Spatman [ Sat Mar 09, 2013 3:32 am ]
Post subject: 

I would be curious, too. In almost 15 tears of cutting these helmets I've never found a drill bit that works!

Author:  8Ball [ Sat Mar 09, 2013 12:05 pm ]
Post subject: 

Well, they might turn out to be a red herring, but I have to give them a try, all part of the learning curve ;)

Author:  8Ball [ Sat Mar 09, 2013 12:38 pm ]
Post subject: 

Hey guys, get this! I just did a bit of googling on drill bits n helmets, and found this :)

http://www.practicalmachinist.com/vb/ge ... eel-79818/

Author:  88reaper88 [ Sat Mar 09, 2013 5:52 pm ]
Post subject: 

I just a bog-standard ceramic cutting wheel on my dremel, worked a treat.

Author:  8Ball [ Sun Mar 10, 2013 12:08 am ]
Post subject: 

I can confirm that masonry bits seem the way to go :)

Image

It's not very deep, but it did a heck of a lot better than the metal bits did before going blunt. I've ordered a bit grinder and some cutting oil, once they arrive I'm hoping it will go a little quicker.

Author:  who45 [ Sun Mar 10, 2013 2:27 am ]
Post subject: 

I just hit mine with a diamond tip dremel type part from an engineering company for the strap slits and simply dremeled it across until the slit was made, then i hit the ear cutouts wiith the snap clip dremel grinding discs.

When i bonded the front plate and ear section i used milliput to stick it on then smoothed out the join with a wet finger, after some sanding i got a seamless join. When it went hard it bonded and it isnt comming off....... That was my way around the drill and rivett option

I gave up with a drill bit 30 seconds after trying, after all there designed to try and protect from bullets and shrapnel in wars so my drillbit didnt even tickle a scratch on it lol.

Image
Image
Image

Ofcourse this was by far my fav part on mine
Image

Author:  8Ball [ Sun Mar 10, 2013 10:17 am ]
Post subject: 

Very cool pics who45, I have been considering milliput, good to know it has some bonding power to the helmet.

That's also a mighty fine lobe plate by the way. I like the thicker versions myself but I'm undecided in how to do mine. I have several options as I have some mould making materials, fibreglass, foam (make shape infuse with resin, sand to a nice finish etc etc).

The one thing that slightly bothers me is the peak on the helmet I have is quite pronounced, I'm not sure it's an acurate M1 replica (as it was described) or if it matters too much. I'm hoping the lobe plate will hide it some so should look ok once it's on.

Author:  nick-a-tron [ Sun Mar 10, 2013 10:28 am ]
Post subject: 

Outstanding!

Author:  Spatman [ Sun Mar 10, 2013 5:53 pm ]
Post subject: 

I did that on my first helmet as well. Then someone knocked it off the table and when it hit the ground, all the plates popped off. :(

Author:  who45 [ Sun Mar 10, 2013 8:06 pm ]
Post subject: 

Its all pepakura on my steel helmet, back lobsters, front plate and ear parts

Author:  8Ball [ Sun Mar 10, 2013 9:03 pm ]
Post subject: 

That's some impressive skills you got there, they came out great!

I don't suppose you'd be willing to share the lobe plate file? I've been looking for a decent one for ages.

Author:  sbonse [ Mon Mar 11, 2013 11:27 pm ]
Post subject:  Re: Rookie build _ colonial marine helmet

The build is looking good so far. Where did you get the metal helmet from

Author:  8Ball [ Tue Mar 12, 2013 12:11 am ]
Post subject: 

I got it on eBay for £16, my only criticism about it is the peak is a bit pronounced, but I'll be trying to hide it a bit with the lobe plate hopefully.

Author:  8Ball [ Tue Mar 12, 2013 1:52 pm ]
Post subject: 

Well, the drill bits have arrived, so I'll be giving them the work out later on. I've also been thinking about adding some helm graffiti, don't know why, but it the idea of having "take me to your leader" on the lobe plate kind of tickles me. I'd like to carry on the theme and get a stack of xeno decals with X's over the top to put on the PR as confirmed kill markers.


8Ball

Author:  8Ball [ Tue Mar 12, 2013 9:17 pm ]
Post subject: 

The drill bit sharpener, and a diamond grinding bit arrived today :)

The grinding bit went a long way in only 7 mins, and even made a slight indentation on the inside before the very tip wore out and it stopped going through. I think I applied too much pressure to it, and the helmet metal started to grind back once the cutting layer was gone as it now sport a point on the end instead of being flat :p

The rest of it is fine, so I can still use it for other things, but its definately the fastest so far and it wasn't expensive so is an option, but the other bits should arrive in the next day or two so we'll see how they work out.

Author:  8Ball [ Tue Mar 12, 2013 10:17 pm ]
Post subject: 

It's not quite so cold tonight, so managed to get a bit more done before I go to bed :)

Image


Still some smartening up to do, and I need to sort out a drill press for the workshop which I will use for boring the hole for the mic arm, and hinge pin holes.


I've noticed on some helmets, the earpiece attachment plate is quite thick, on some it's thin like mine. Is this to do with comfort/better fit, or screen accuracy?

Author:  88reaper88 [ Wed Mar 13, 2013 12:43 am ]
Post subject: 

Mine sticks out allot due to me ballsing it up :)

Page 1 of 8 All times are UTC [ DST ]
Powered by phpBB © 2000, 2002, 2005, 2007 phpBB Group
http://www.phpbb.com/