The discussion of the Alien series of films and the props used in them is the aim, but if it's got Big Bugs and Big Guns, then they are welcome too!


Forum locked This topic is locked, you cannot edit posts or make further replies.  [ 188 posts ]  Go to page Previous  1, 2, 3, 4, 5, 6, 7, 8  Next
Author Message
 Post subject:
PostPosted: Sat May 11, 2013 3:06 am 
Excellent work. Helmet is really coming along.


Top
  
Reply with quote  
 Post subject:
PostPosted: Sat May 11, 2013 8:06 am 
User avatar

Country: United Kingdom
SGT KITTEN wrote:
Wow. I never realized there was a cutout in the lob plate for the camera. I went back and checked my references pics and there are! Thanks for for teaching me something!

Charlie


I guess it just takes a fresh pair of eyes sometimes :p

I noticed I forgot to fill two holes in the helmet, gonna plug em up and see if I can get some primer on it today.


Top
 Profile  
Reply with quote  
 Post subject: Re:
PostPosted: Sat May 11, 2013 9:18 am 
User avatar

Country: United Kingdom
Magnus wrote:
Excellent work. Helmet is really coming along.


Thanks Magnus :)


Top
 Profile  
Reply with quote  
 Post subject:
PostPosted: Sat May 11, 2013 1:30 pm 
User avatar

Country: United Kingdom
So, was about to spray it, and saw two holes that needed filling first:

Image

This putty cures very quickly, so I'll be able to carry on in about 30 mins, once I've removed the excess.


Top
 Profile  
Reply with quote  
 Post subject:
PostPosted: Sun May 12, 2013 4:13 pm 
User avatar

Country: United Kingdom
Well, I cleaned up the excess before bed with the intention of spraying it the next day, but the weather has other plans it seems, and it's now generally wet and miserable again.

Waiting for a decent dry spell so I can carry on.


Top
 Profile  
Reply with quote  
 Post subject:
PostPosted: Tue May 14, 2013 12:06 pm 
User avatar

Country: United Kingdom
Finally, had a short sunny spell that was long enough to get a few coats of primer on :)

Image

Need to clean up the hinge a little, looks like I spilled a bit of resin on it :/

Also, though not pictured, it looks like the putty filler I used didn't bond properly round the back, a hairline crack in the primer is the dead giveaway.

Think I'll just fill it with superglue and sand it back. It's riveted to the helmet, so I'm not worried about it falling off.


Top
 Profile  
Reply with quote  
 Post subject:
PostPosted: Fri May 17, 2013 12:32 pm 
User avatar

Country: United Kingdom
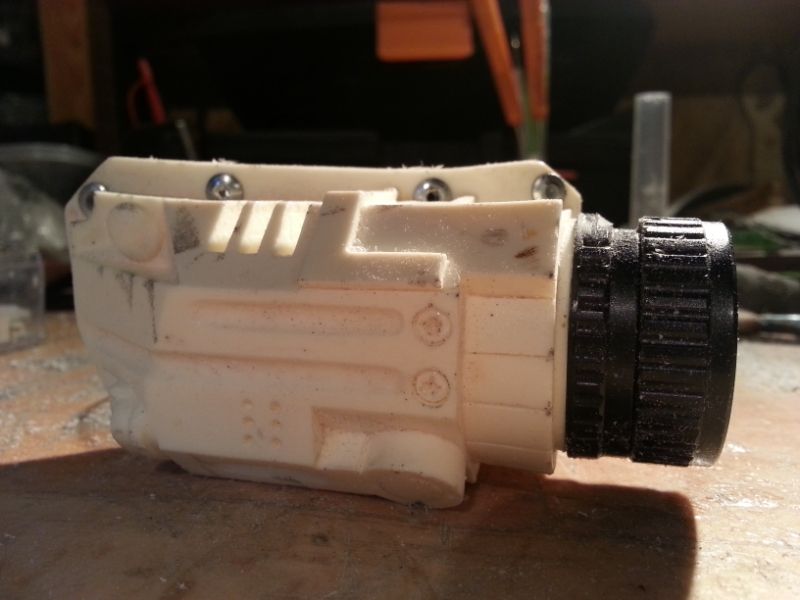
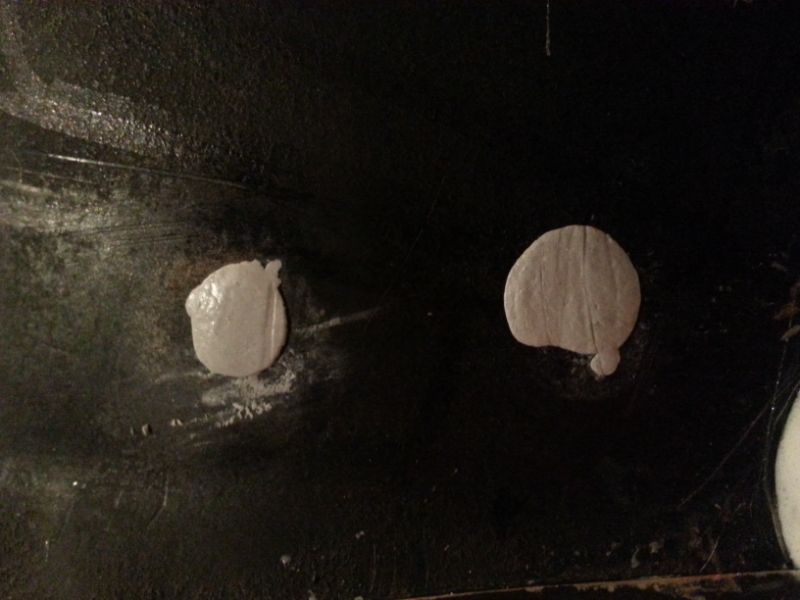
Still pretty damp out, and the final layer of primer is taking it's time to dry properly, so while I wait for that, I started work on installing the micro cam into the helm cam.

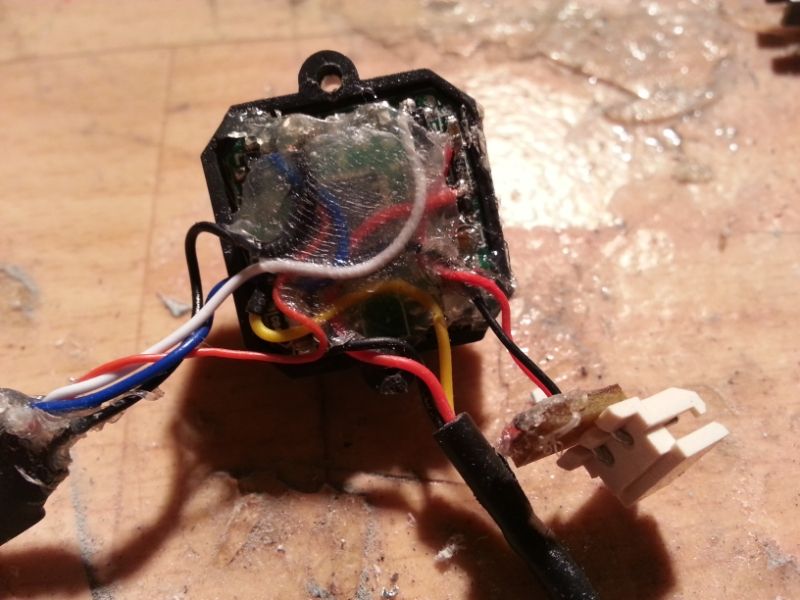
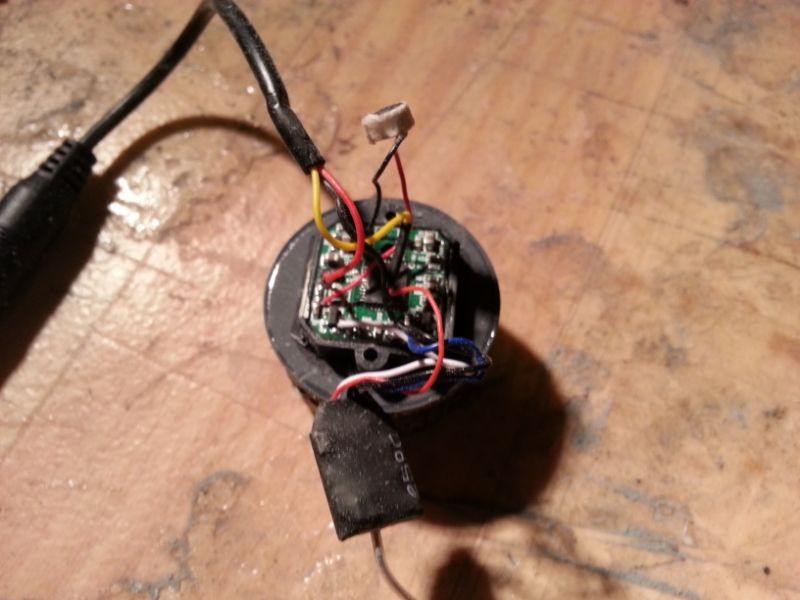
The first thing I did was open it up to check what kind of mic setup it had, and it couldnt be better :)
Image

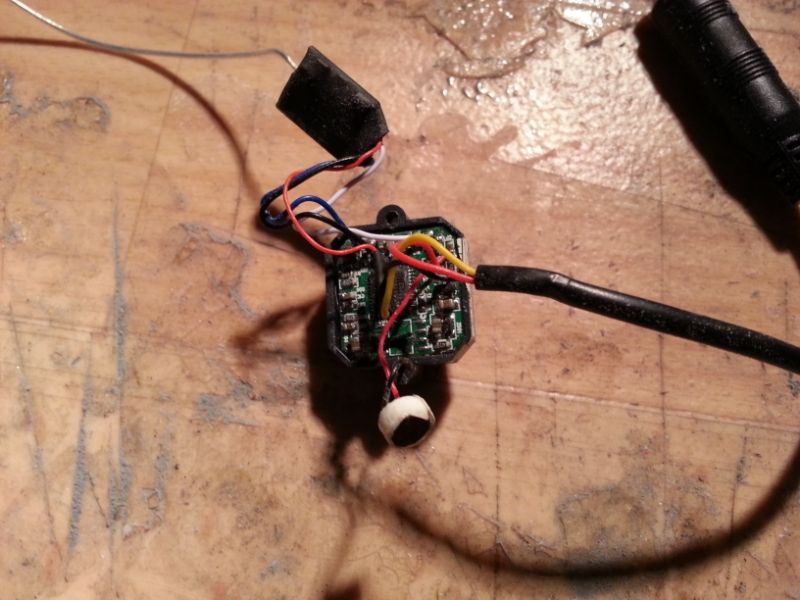
I can desolder the mic, make room in the resin mic, solder on new wires and trail them to the cam to connect up with the exisisting ones.

Experiance has taught me to leave such small PCB connections alone at home, splicing wires is much simpler, though care must be taken with such small guaged wire as this one has.

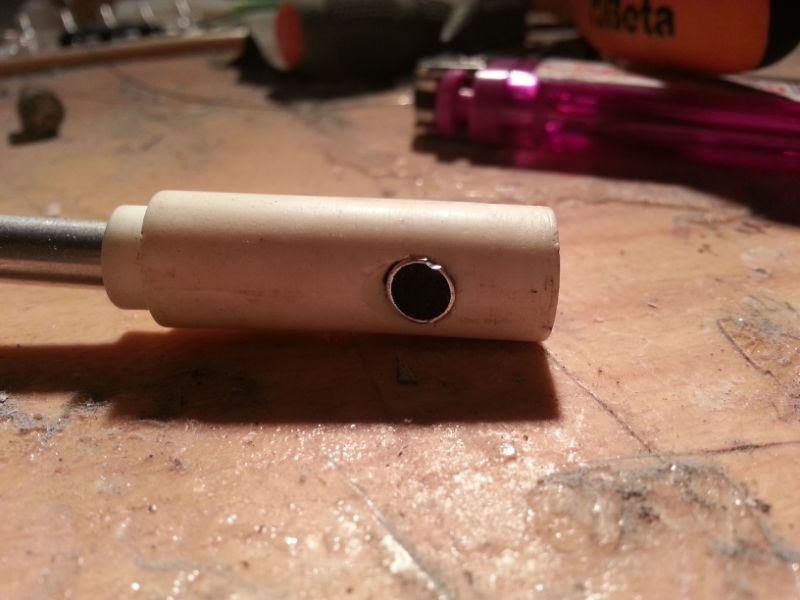
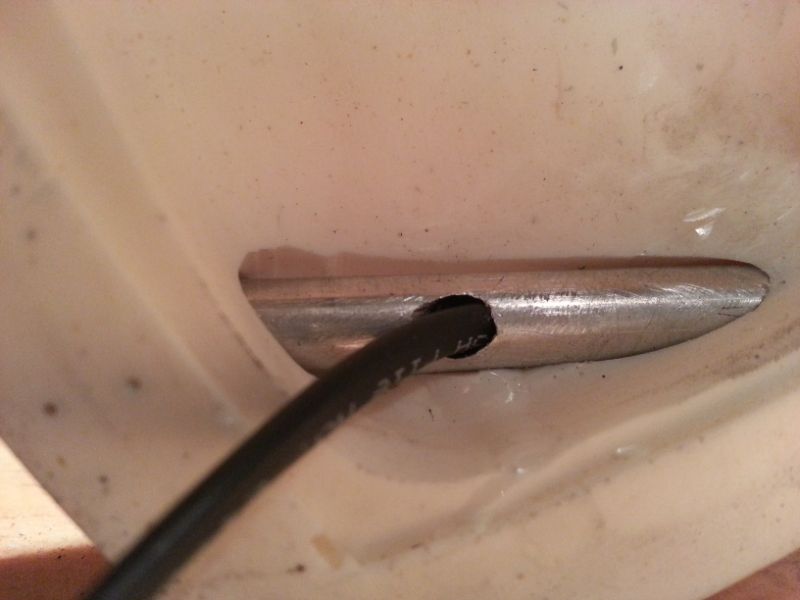
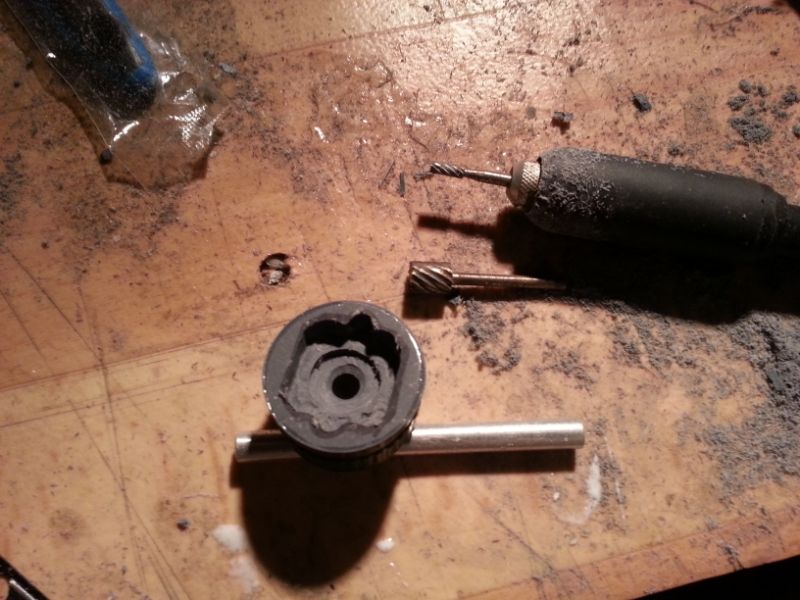
So, with the mic situation given a green light, I got creative with my drill and dremel. I first used the biggest bit in my collection (which was a few mm too small anyway) and made a hole from the back but stopped just short by about 1mm from going all the way through.

I then used the dremel to widen the hole so the micro lens would fit and line up, drew around the body of the micro cam and using two different size shaping bits, removed the excess from inside the line:
Image

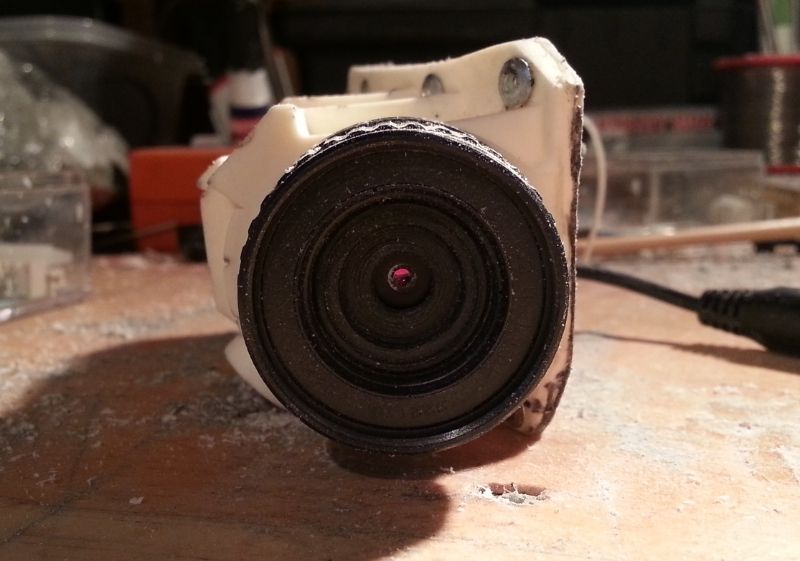
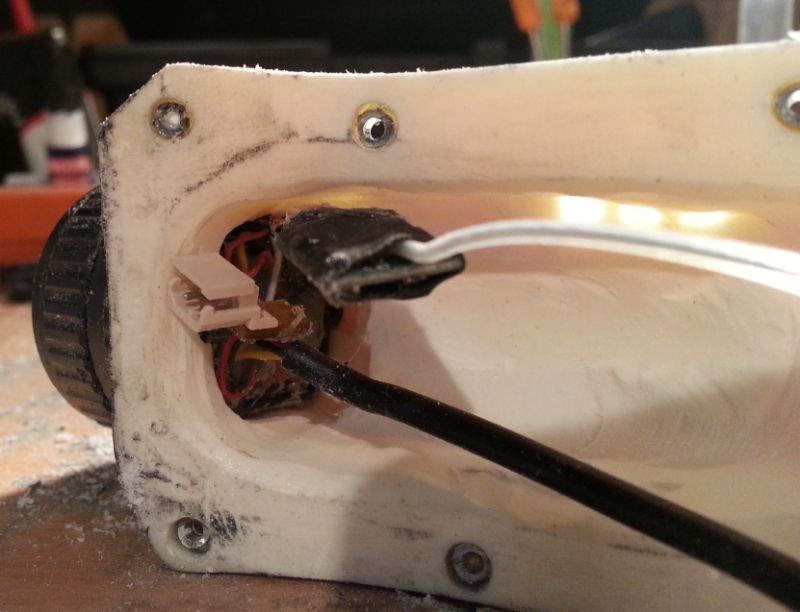
Cleaned and squared up the lines, and the micro cam fits very snugly......
Image

.....and is almost, almost central from the front, but that's doing things by hand for you :p
Image

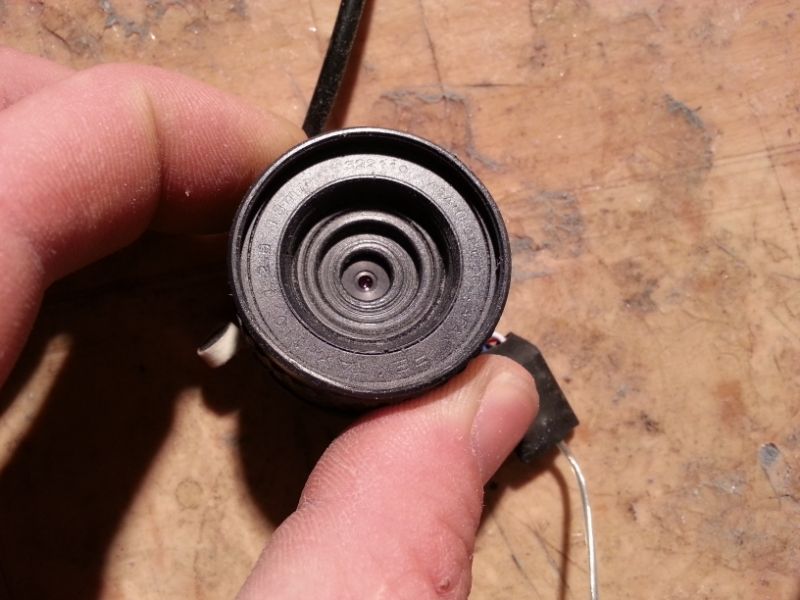
Once the lens cap is on, I don't think it'll be noticeable so I think I'll leave it as is.

tomorrow I'll be making room in the helm cam body so the lens can butt up flush to the main body for gluing, and modding the resin mic to install the real one.

See ya then ;)


Top
 Profile  
Reply with quote  
 Post subject:
PostPosted: Fri May 17, 2013 12:58 pm 
Prop Churner Outer
User avatar

Location: Bath, Maine
Service Number: A03/TQ1.0.12143G1
Country: United States
That's just awesome!

This past week I was helping on a film shoot and they were using a GoPro Hero3 with an iPad app that allowed for real-time viewing. It gave me a vision of a row of iPads, each synched to a different Marine's cam, set up at a convention just like Gorman had in the APC. Seeing even just three or four live feeds would be pretty awesome. There must be a way to do the mission time and name/serial number overlay too...

Attachment:
a2script265.jpg
a2script265.jpg [ 97.11 KiB | Viewed 5844 times ]

_________________
:delta: My entry-level prop and costume tutorials: viewtopic.php?f=3&t=12751 :delta:


Top
 Profile  
Reply with quote  
 Post subject:
PostPosted: Fri May 17, 2013 1:02 pm 
Harvester of Sorrow
User avatar

Location: Lancashire (Wirral born)
Service Number: A04/TQ1.0.32156E1
Country: United Kingdom
Excellent work!

I bought a webcam to install into mine but the video quality was horrendous (cheapo cam), couldn't afford a mini cam. Well done fir living my dream ;)

_________________
Image AKA: Simon


Top
 Profile  
Reply with quote  
 Post subject:
PostPosted: Fri May 17, 2013 1:19 pm 
Prop Churner Outer
User avatar

Location: Bath, Maine
Service Number: A03/TQ1.0.12143G1
Country: United States
Poor quality video is what we see in the film though! I think HD would kinda ruin the effect, but no doubt there's a filter that could be applied to add video grain or ghosting...

_________________
:delta: My entry-level prop and costume tutorials: viewtopic.php?f=3&t=12751 :delta:


Top
 Profile  
Reply with quote  
 Post subject:
PostPosted: Fri May 17, 2013 1:27 pm 
Harvester of Sorrow
User avatar

Location: Lancashire (Wirral born)
Service Number: A04/TQ1.0.32156E1
Country: United Kingdom
There's poor quality video and then there's calculator quality video... ;)

_________________
Image AKA: Simon


Top
 Profile  
Reply with quote  
 Post subject: Re:
PostPosted: Fri May 17, 2013 3:56 pm 
User avatar

Country: United Kingdom
retrogarde wrote:
That's just awesome!

This past week I was helping on a film shoot and they were using a GoPro Hero3 with an iPad app that allowed for real-time viewing. It gave me a vision of a row of iPads, each synched to a different Marine's cam, set up at a convention just like Gorman had in the APC. Seeing even just three or four live feeds would be pretty awesome. There must be a way to do the mission time and name/serial number overlay too...

Attachment:
a2script265.jpg


Thanks guys :)

As far as I know, the receiver that came with the micro cam can host up to four units. As to the quality of the image, dont know, got carried away installing it and forgot to test it out :p


Top
 Profile  
Reply with quote  
 Post subject:
PostPosted: Fri May 17, 2013 5:18 pm 
MODEL 120-A2
User avatar

Service Number: A04/TQ0.0.72178E5
Country: United States
Forgive my ignorance, but what is a microcam? (Other than a really small camera). Is it some kind of wireless video feed or something?

Charlie

_________________
"There is a clause in the contract which specifically states any systematized transmission indicating a possible intelligent origin must be investigated. On penalty of total forfeiture of shares. No money."


Image


Top
 Profile  
Reply with quote  
 Post subject: Re:
PostPosted: Fri May 17, 2013 6:22 pm 
User avatar

Country: United Kingdom
Thats exactly right ;) The cam itself runs on a 9v battery.

SGT KITTEN wrote:
Forgive my ignorance, but what is a microcam? (Other than a really small camera). Is it some kind of wireless video feed or something?

Charlie


Top
 Profile  
Reply with quote  
 Post subject:
PostPosted: Fri May 17, 2013 6:31 pm 
Harvester of Sorrow
User avatar

Location: Lancashire (Wirral born)
Service Number: A04/TQ1.0.32156E1
Country: United Kingdom
Yeh they normally come with the actual camera and a wireless reciever you hook up to a computer or TV etc.
Very cool bits of kit. Relatively cheap too. :)

_________________
Image AKA: Simon


Top
 Profile  
Reply with quote  
 Post subject:
PostPosted: Fri May 17, 2013 6:52 pm 
MODEL 120-A2
User avatar

Service Number: A04/TQ0.0.72178E5
Country: United States
I see....this just got very intriguing then. What model did you use?

Charlie

_________________
"There is a clause in the contract which specifically states any systematized transmission indicating a possible intelligent origin must be investigated. On penalty of total forfeiture of shares. No money."


Image


Top
 Profile  
Reply with quote  
 Post subject:
PostPosted: Fri May 17, 2013 11:24 pm 
User avatar

Country: United Kingdom
I think its by Recievers, here's the front of the box....
Image

....and the back (if your thinking of getting one, make sure its the type circled in red as the other cams are too big to install)
Image

The actual reciever itself is only as big as my hand.
Image


Top
 Profile  
Reply with quote  
 Post subject:
PostPosted: Sat May 18, 2013 1:34 am 
User avatar

Country: United Kingdom
Ok, almost finished the mic relocation. I did the majority tonight as I forgot my wife is working this w/e so I'm on daddy duty (I feel a nerf battle looming, my littlest usually goes for the powder monkey roll and fetches ammo for the boys :lol:)

Anyway, back on topic.....

I seperated the mic from the wires, then soldered on my own and sleeved them with heat shrink. I then sized the drill bits I'd need and made holes.

I opted to have the mic point slightly toward the mouth, technically it should make the signal a little hotter.
Image

I chose a fairly midway point to make the hole in the boom arm, I figured tha it would allow me some play room when adjusting it.
Image

The ensemble
Image

Aaand then disaster struck. I found a wire dangling about with nothing to do (black ground wire). It must of snapped when handling it at some point :(

First thing I did was check for telltale signs of wires on any of the solder points, not easy on such a tiny PCB as this one :/ I then remembered my high res pic I took of it when I opened it up (ding!), and we have a winner :)

Soldering it back on was just the nightmare I knew it would be, I just hope I didn't make a short circuit (crossed connections that stop it from working to the layman). I can take it into work on monday as they have a digital microscope and a reflow station I can use to fix it.

To prevent any other mishaps in the meantime, I opted to hot glue it. The possibly bad area is accessible without too much fuss, I just didnt want to end up having to solder each wire back on as they came off while fitting it.

Another slight mod was to add a quick connect and tiny PCB of my own to the mic wires. Once the cam is in place, I can glue the quick connector to the helmet so I'm not stressing the ultra thin wires and likely snap them.
Image


Top
 Profile  
Reply with quote  
 Post subject:
PostPosted: Sat May 18, 2013 1:49 am 
Bacon Rapscallion
User avatar

Location: Logan, Utah
Service Number: A12/TQ1.0.72136E1
Country: United States
Awesome build! The camera and mic are coming along nicely.


Top
 Profile  
Reply with quote  
 Post subject:
PostPosted: Sat May 18, 2013 7:49 pm 
Prop Churner Outer
User avatar

Location: Bath, Maine
Service Number: A03/TQ1.0.12143G1
Country: United States
Too damn cool.

_________________
:delta: My entry-level prop and costume tutorials: viewtopic.php?f=3&t=12751 :delta:


Top
 Profile  
Reply with quote  
 Post subject: Re: Rookie build _ colonial marine helmet
PostPosted: Sun May 19, 2013 12:05 am 
THAT guy
User avatar

Location: Virginia
Service Number: A03/TQ2.0.02146E1
Country: United States
man that is just crazy. I love it. I made a half hearted effort to run a wired mic/headset from my cell phone through my ear flap and got pissed off and quit. To do what your doing is just too wild. Very very cool though.


Top
 Profile  
Reply with quote  
 Post subject:
PostPosted: Sun May 19, 2013 11:07 am 
User avatar

Country: United Kingdom
Thanks bigbisont :)

Wait till you see what I have planned for my MT build in the near future. I'm just deciding if ultrasonics, or infra red is the better option ;)


Top
 Profile  
Reply with quote  
 Post subject:
PostPosted: Sun May 19, 2013 12:41 pm 
User avatar

Country: United Kingdom
Ok, so a bit more progress last night.

Dug out some storage room in the resin cam, then marked and cut out a hole for the micro cam. I didn'take it an exact hole in case I marked it off the horizontal due to it being done by hand. It's still a snug fit, but I can turn it round in either direction so I can line it up correctly before gluing.
Image
Image
Image

I need to test it it out before I mount it permanently in case I've soldered a short circuit while trying fix it. Results in a bit.


Last edited by 8Ball on Sun May 19, 2013 4:27 pm, edited 1 time in total.

Top
 Profile  
Reply with quote  
 Post subject:
PostPosted: Sun May 19, 2013 1:44 pm 
MODEL 120-A2
User avatar

Service Number: A04/TQ0.0.72178E5
Country: United States
Too cool. Thanks for posting the box cover. I'll be very interested to see how this works out with the video feed. It's definitely got me thinking about doing something similar.

Charlie

_________________
"There is a clause in the contract which specifically states any systematized transmission indicating a possible intelligent origin must be investigated. On penalty of total forfeiture of shares. No money."


Image


Top
 Profile  
Reply with quote  
 Post subject:
PostPosted: Sun May 19, 2013 4:48 pm 
User avatar

Country: United Kingdom
Thanks sarge, should work if I haven't screwd up the electronics :p


Top
 Profile  
Reply with quote  
Display posts from previous:  Sort by  
Forum locked This topic is locked, you cannot edit posts or make further replies.  [ 188 posts ]  Go to page Previous  1, 2, 3, 4, 5, 6, 7, 8  Next


You cannot post new topics in this forum
You cannot reply to topics in this forum
You cannot edit your posts in this forum
You cannot delete your posts in this forum
You cannot post attachments in this forum

Search for:
Jump to: