The discussion of the Alien series of films and the props used in them is the aim, but if it's got Big Bugs and Big Guns, then they are welcome too!


Post new topic Reply to topic  [ 340 posts ]  Go to page Previous  1, 2, 3, 4, 5 ... 14  Next
Author Message
 Post subject:
PostPosted: Sat Mar 02, 2013 5:32 pm 

Location: rutland ,england
Country: United Kingdom
hi charlie , I did pretty much what your planning on doing with the exception of bending the ends of the d rings over didn't think the cast parts would stand up to it so I very carefully used dabs of weld on the ends being very careful not to let the welder earth through the cast parts only the steel rings as it will blow a big chunk out of the casting ! . dont thing there would be room in the triangle for the bend backs I had to remove most of the plastic on the ring side of the light gate just to accomodate the tiny spots of weld

_________________
rockin in the free world !


Top
 Profile  
Reply with quote  
 Post subject:
PostPosted: Sun Mar 03, 2013 12:49 am 
MODEL 120-A2
User avatar

Service Number: A04/TQ0.0.72178E5
Country: United States
Well, my ACUs are ordered. Woot woot. Should be here Tuesday. I went out searching for paint today; no go on Krylon Camo paints, especially the Olive anywhere in town. On a lark, I grabbed a can of Rustoleum Camo Deep Forest Green. It's a VERY close match to the green that the PR is made of. I think that, maybe with a faint overspray of brown would capture the look very well. I'm going to practice mixing the colours on a few test pieces, but worst case scenario looks like I will just use the flat Forest Green.

I am off work tonight so I will be out in the shop for a while starting disassembly. Hopefully I will have some good pictures and very few screw ups at the end of the night. I've got a lot of test fititng to do before I start to drill on anything for the D-rings. I think at this point I will go with the 3/4" for the depth to make sure the sling will fit (I don't have Noble's sling yet, so I don't have a good feel on getting the clips right). Using the 3/4" is going to mean some additional mods, both to the PR and the D-rings, but I have cutters, welders, and vises (oh my!) so I should be able to work something out. Right now, pending actual test fit, my plan is going to be to slightly compress the D-ring to close the diameter up a bit, and lengthen it enough to fit through the rear stock. Once I figure out if I can do that I'll start setting up the drill points and see how things go from there.

Once the ACUs get here, I will have switch up and work on them some since I can do that without having to go to the shop for the tools. I have some sketches of the mods I want. I don't have the skill or patience to do the work on modifying the collar, but ripping out seams and removing pockets I can do. :)

Right now I think I am going to head off to the craft store and get some masking fluid. I'll need that once the aluminum layers on the PR.

Charlie

_________________
"There is a clause in the contract which specifically states any systematized transmission indicating a possible intelligent origin must be investigated. On penalty of total forfeiture of shares. No money."


Image


Top
 Profile  
Reply with quote  
 Post subject:
PostPosted: Sun Mar 03, 2013 5:16 am 
MODEL 120-A2
User avatar

Service Number: A04/TQ0.0.72178E5
Country: United States
Well, I took it apart. Not as bad as I thought in some parts, a bit worse in others. Oh well. Live and learn. Here's how I started:

Image

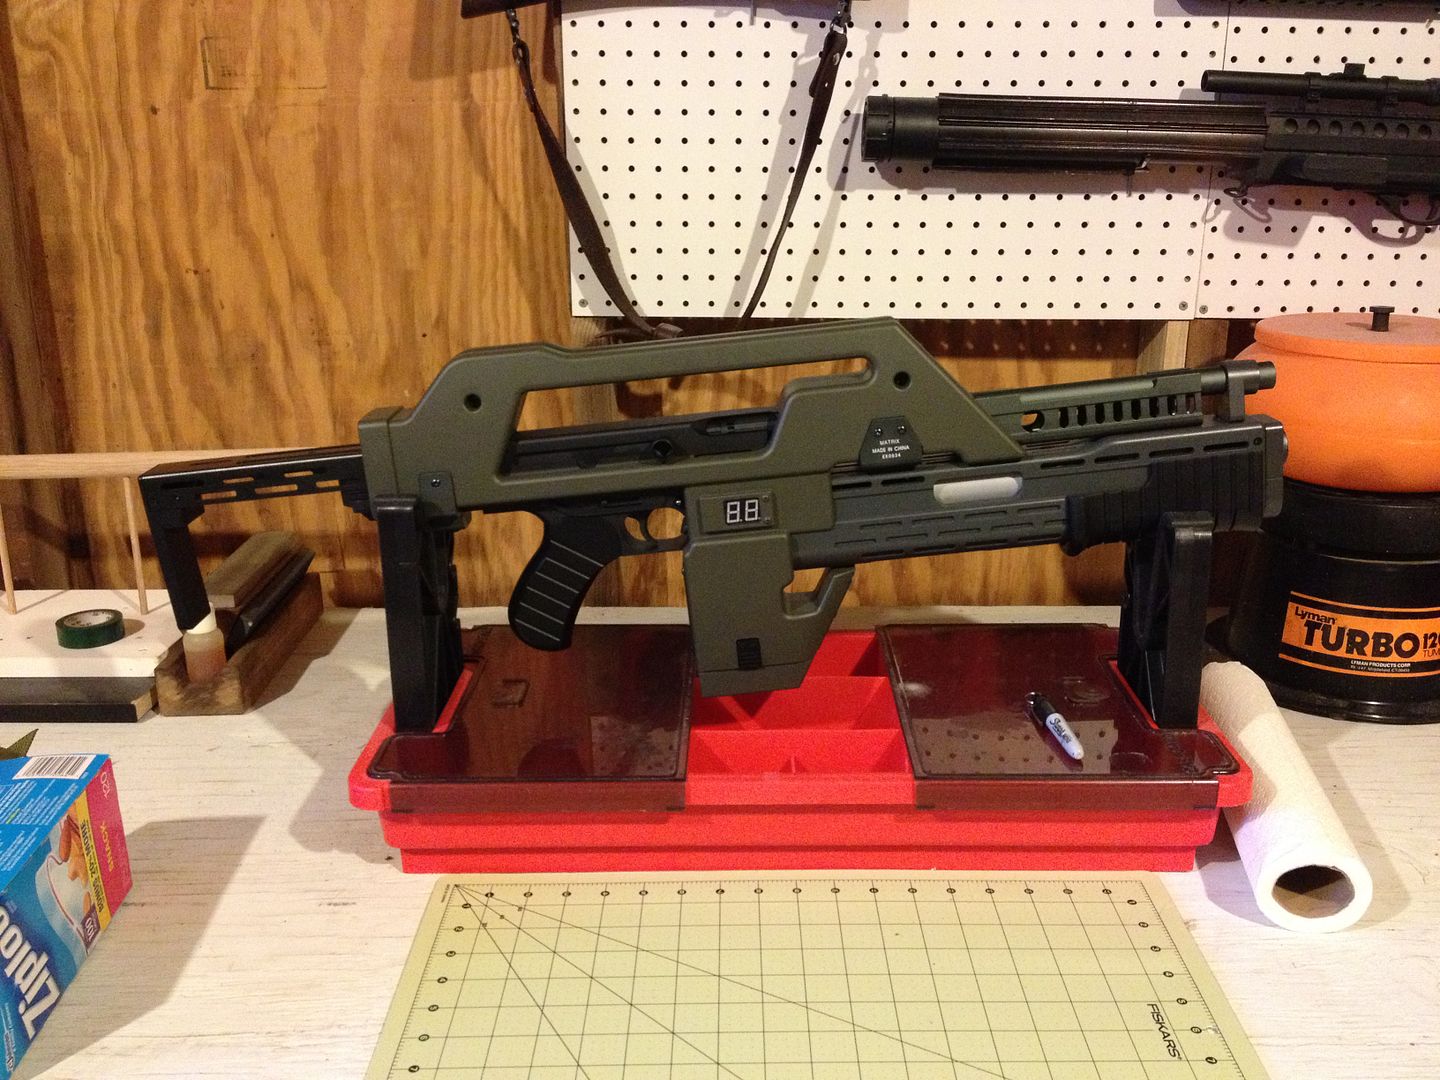
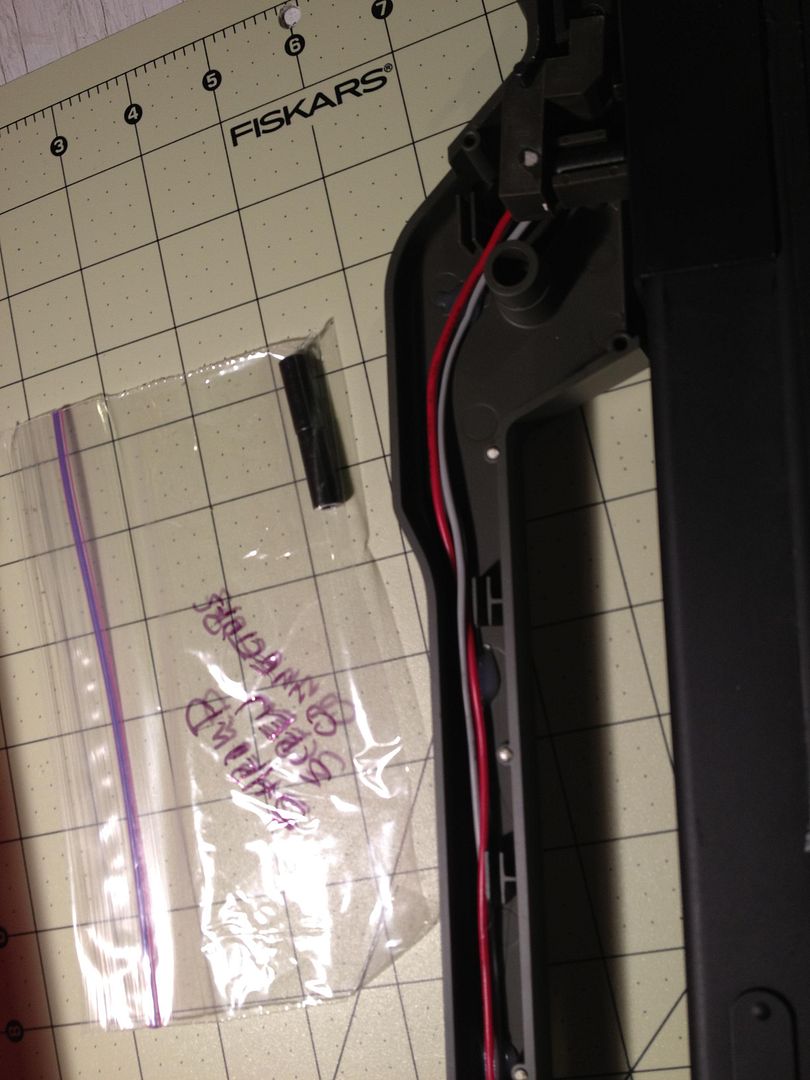
I basically went backwards through the evike manual. One tip: I always bag the parts, with a label, and try to take a photo to represent where things went:

Image

Getting the base parts off wasn't hard (plates, the GL pump, etc). I did accidentally drop the lock mechanism for the stock when I flipped the gun over. Be careful of that!

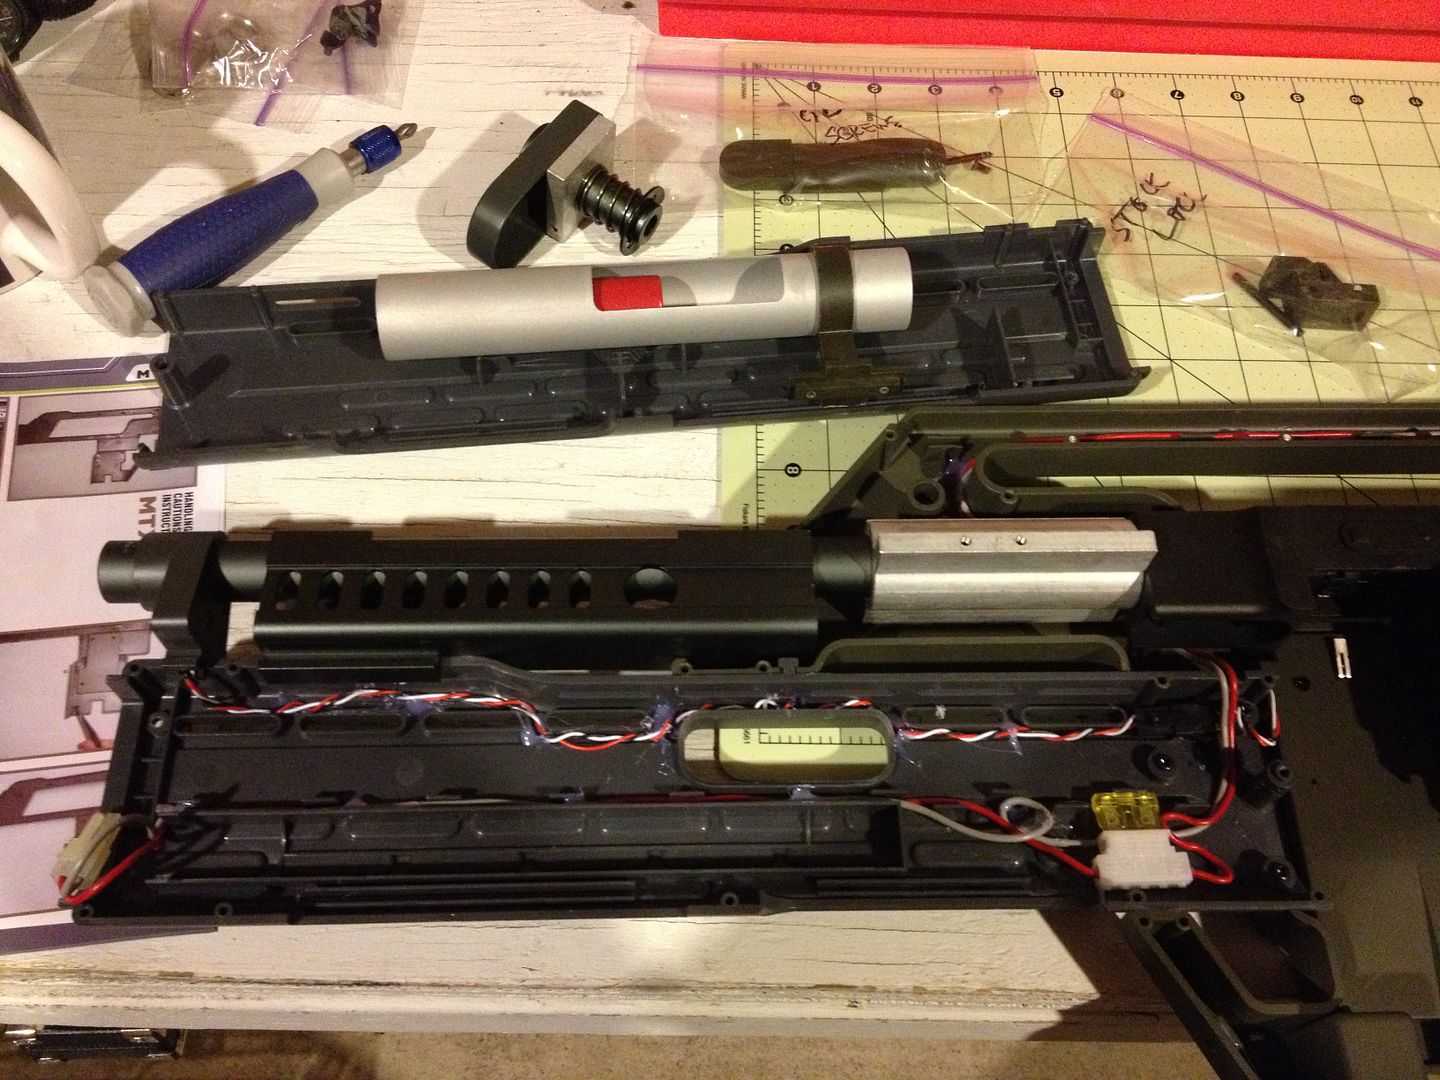
The shroud was the worst part; the pins are solid and they use metal and plastic pins to hold it in place. The metal pins came through the ordeal pin. Some of the inner plastic pins, especially at the sight rail area, didn't come out so great. I used wooden tools (esp dowel rods) so there are very little marks on the exterior of the shroud. I'm happy about that part. On reassembly, I don't think it will be a big deal with the snapped pins, but I have a contingency plan to secure it. Severely secure it. I know it would be solid. I'm not so sure I could ever get it apart again. Anyway, the internals!

Image

Image

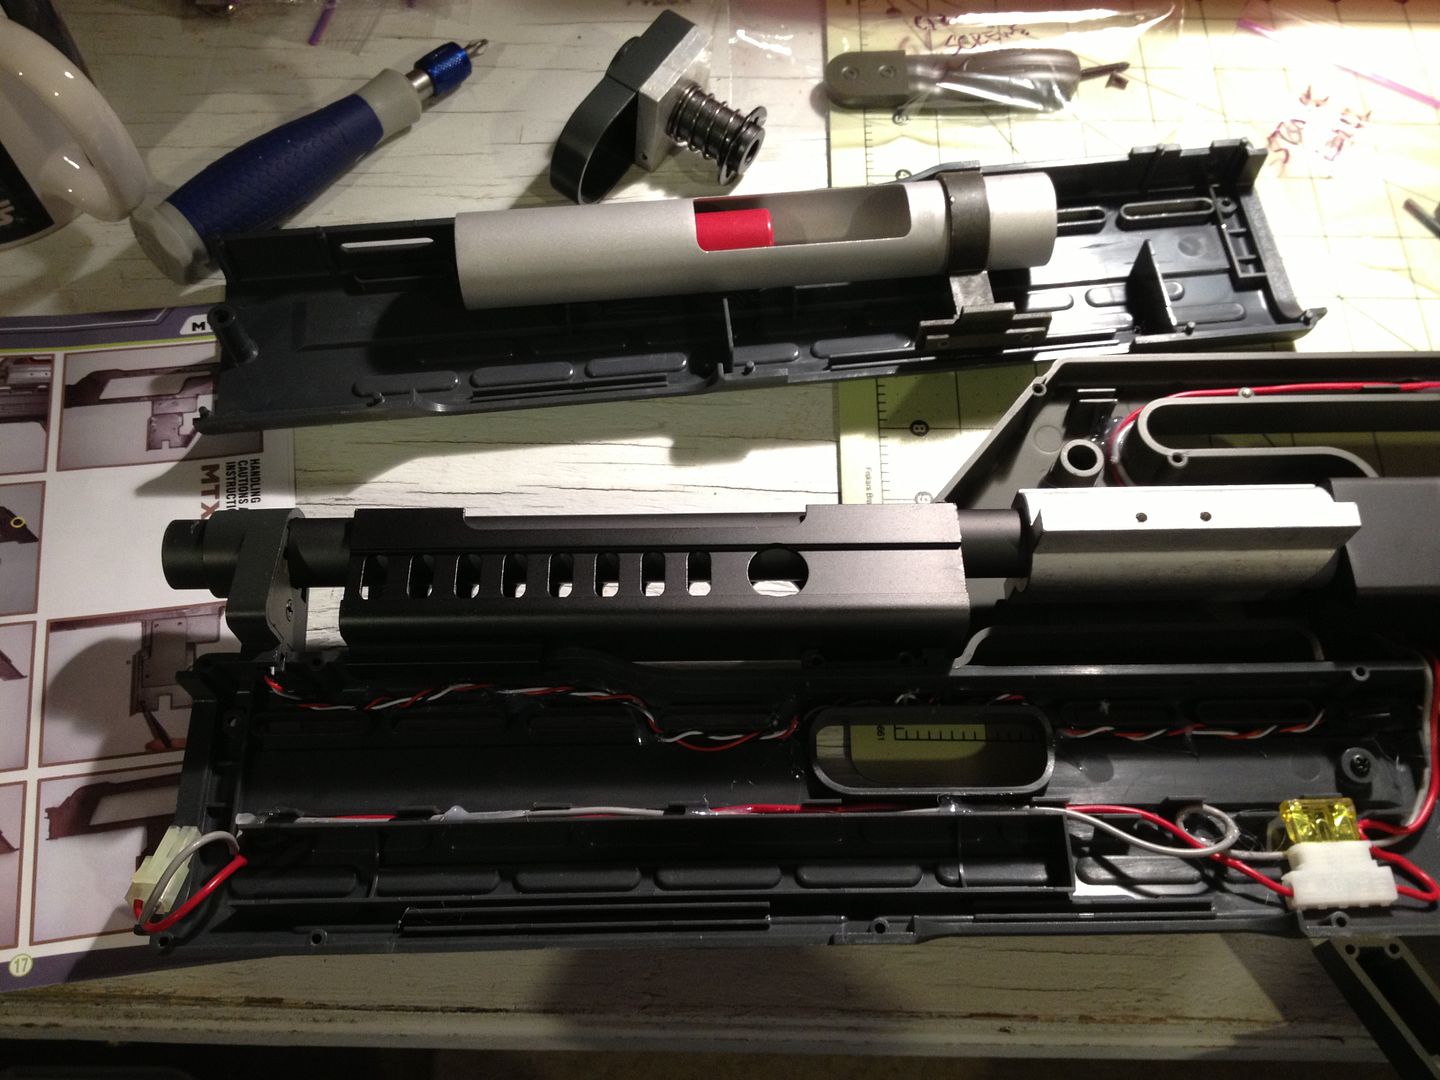
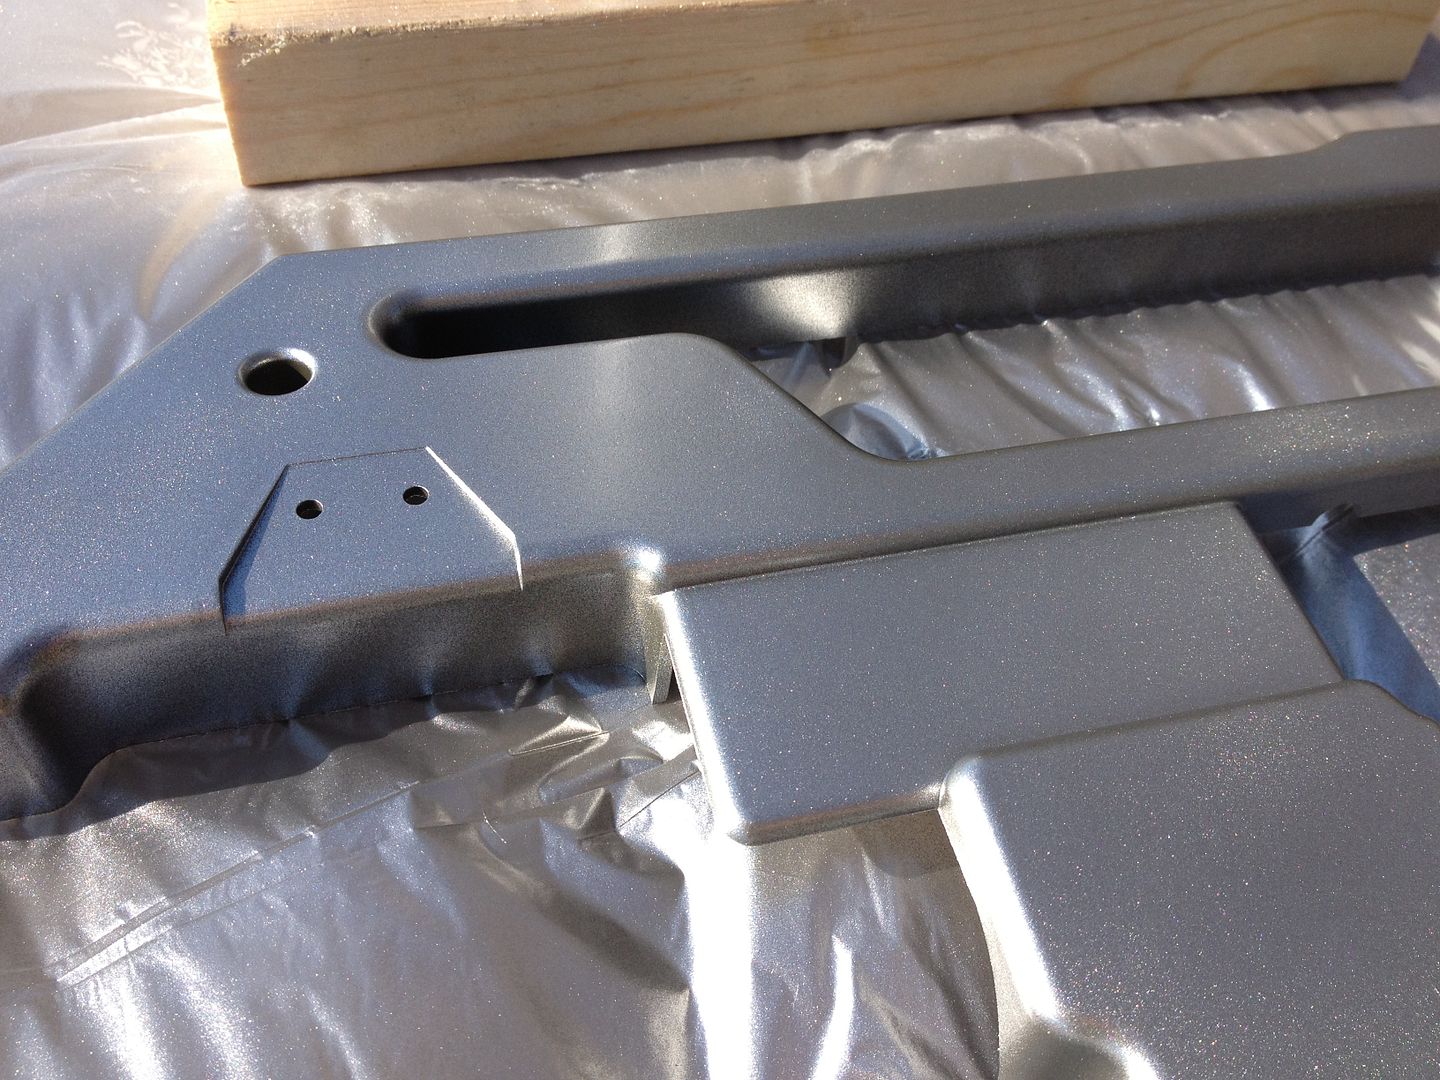
Now for this paint job, I removed most the wiring. It was hotglued in, but it was cheap brittle hot glue and easily snapped free. I'm still considering how to put it back. I can easily just reglue in place (glad I took pictures of the wiring routes) but I am having an internal debate about whether I want to leave the gun functional or not. This will be mainly used as a static prop and carried at cons. I really want to get secure sling mounts, and the light sensor is in the way. If I remove that, it won't count down. If it can't count down, I really don't care it fires or not. (I don't play airsoft). I'm not going to disassemble to the point of removing the motor or anything either. Right now it's an option. Chances are I will put it back fully functional.

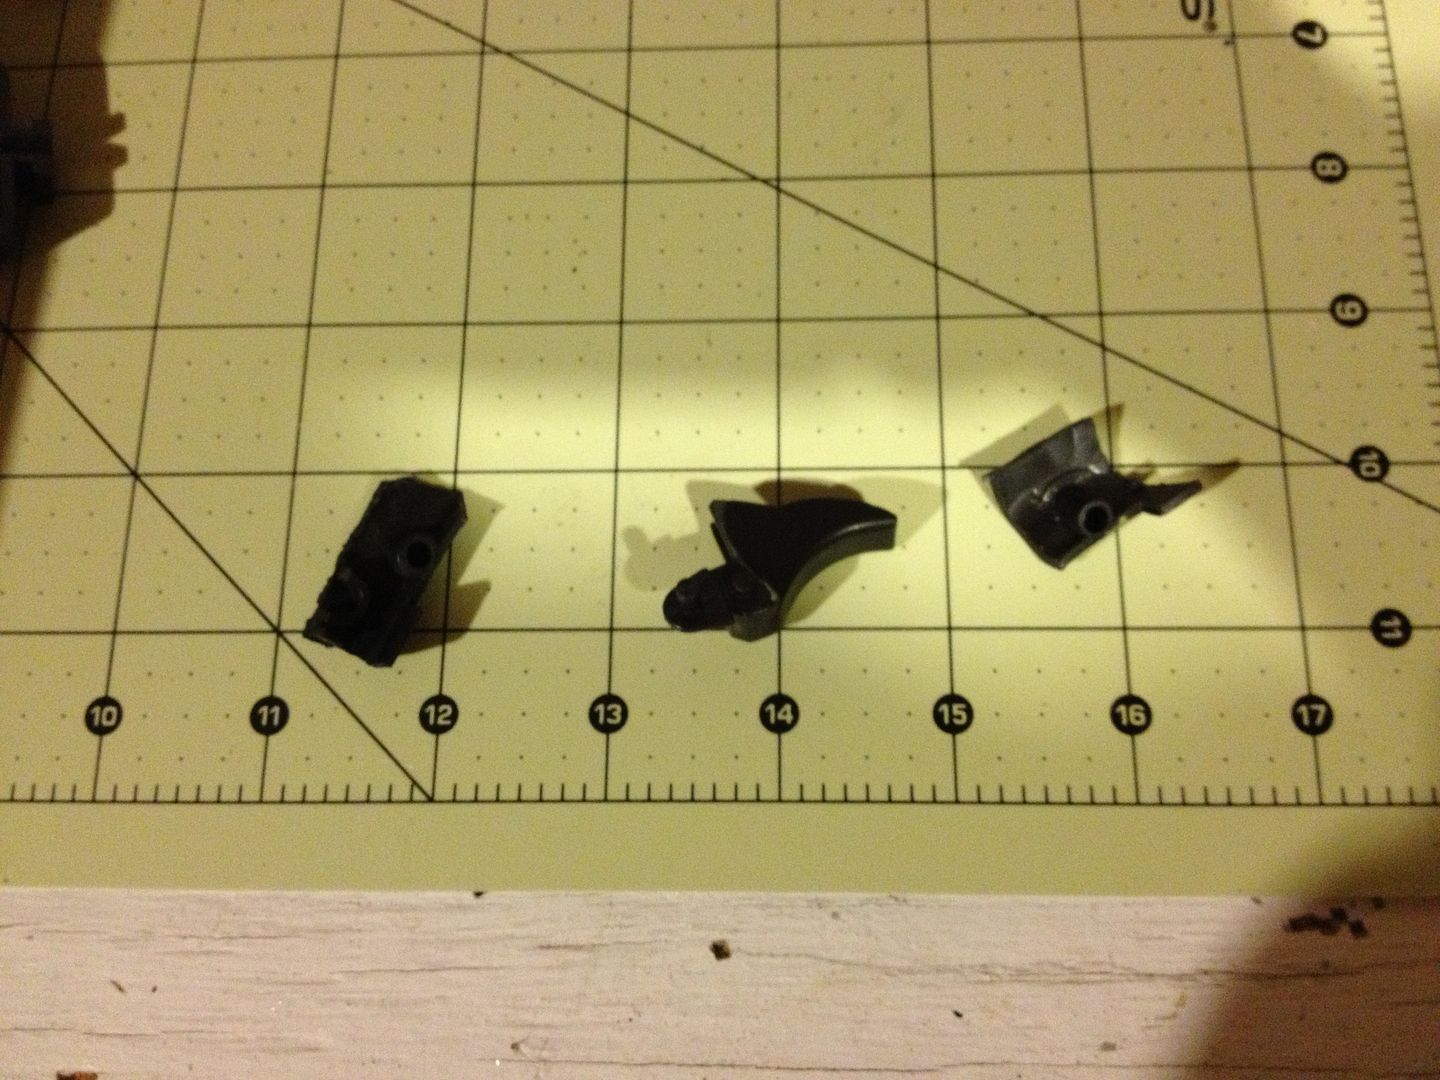
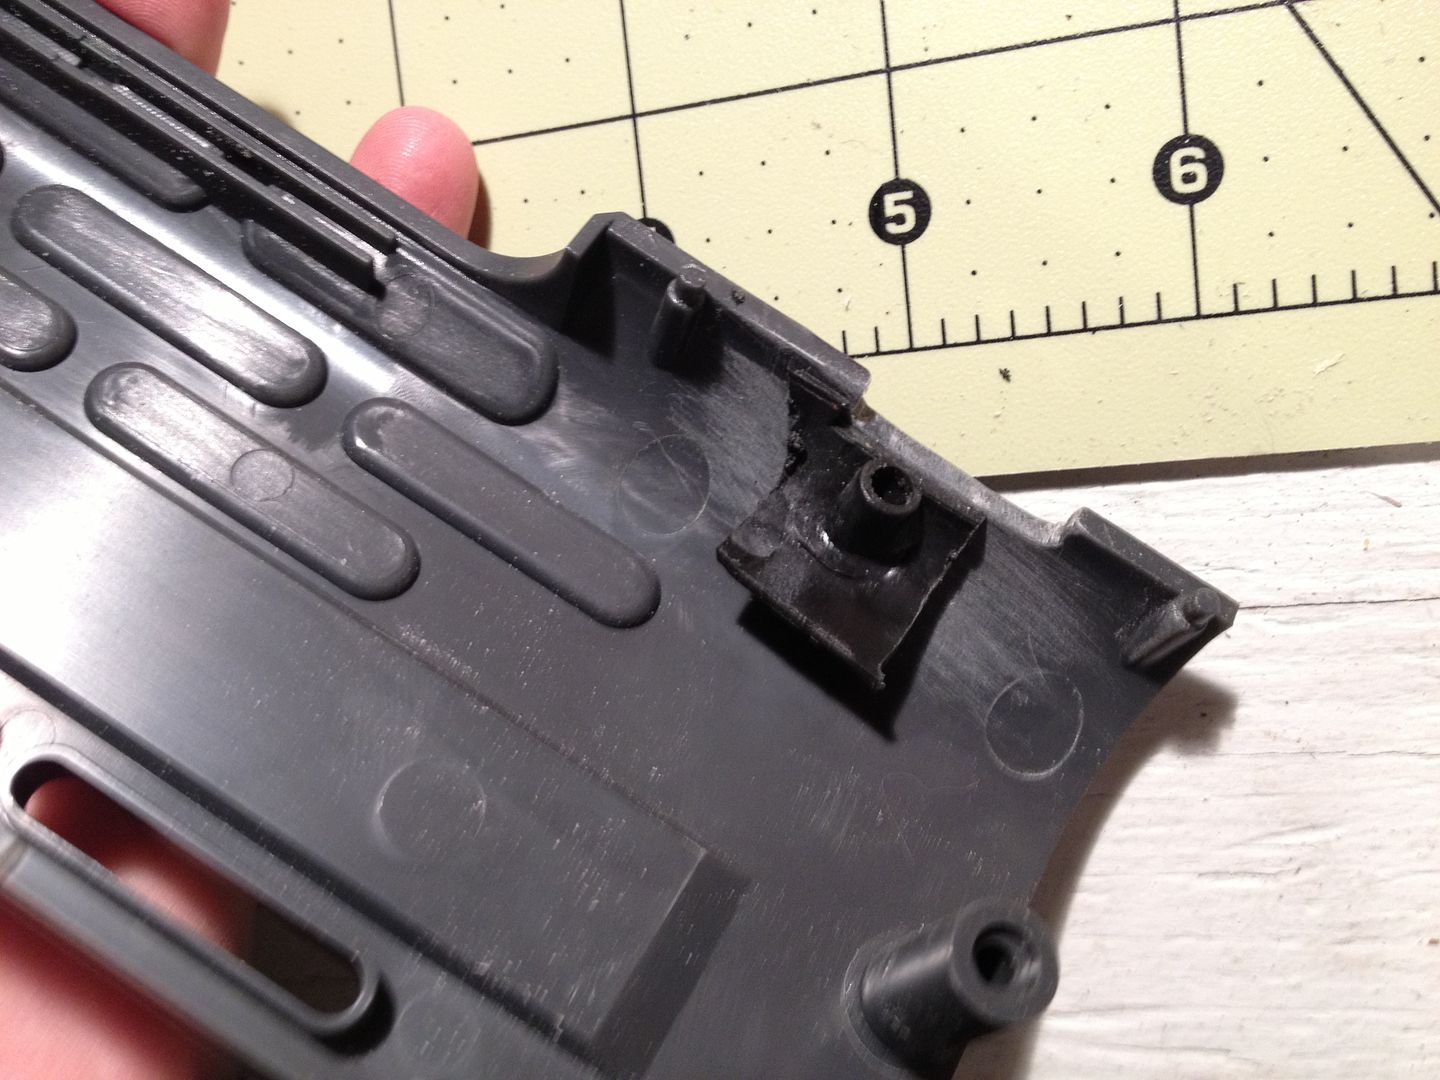
Here's a closeup of the pin damage:

Image

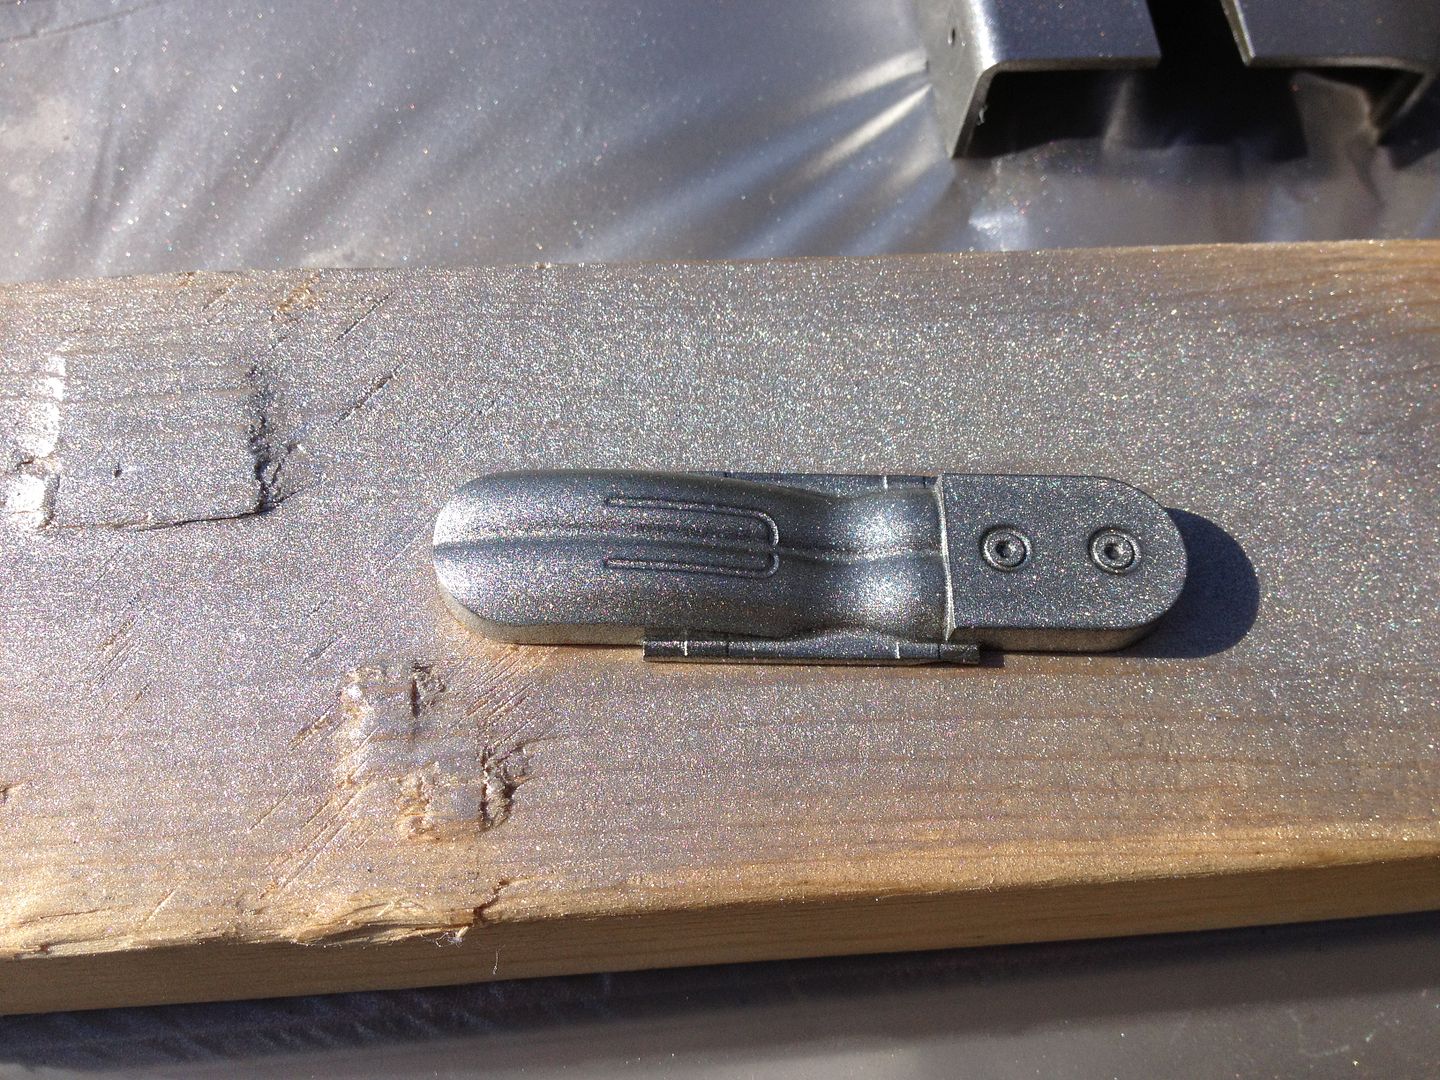
Here's a closeup of the grenade launcher parts:

Image

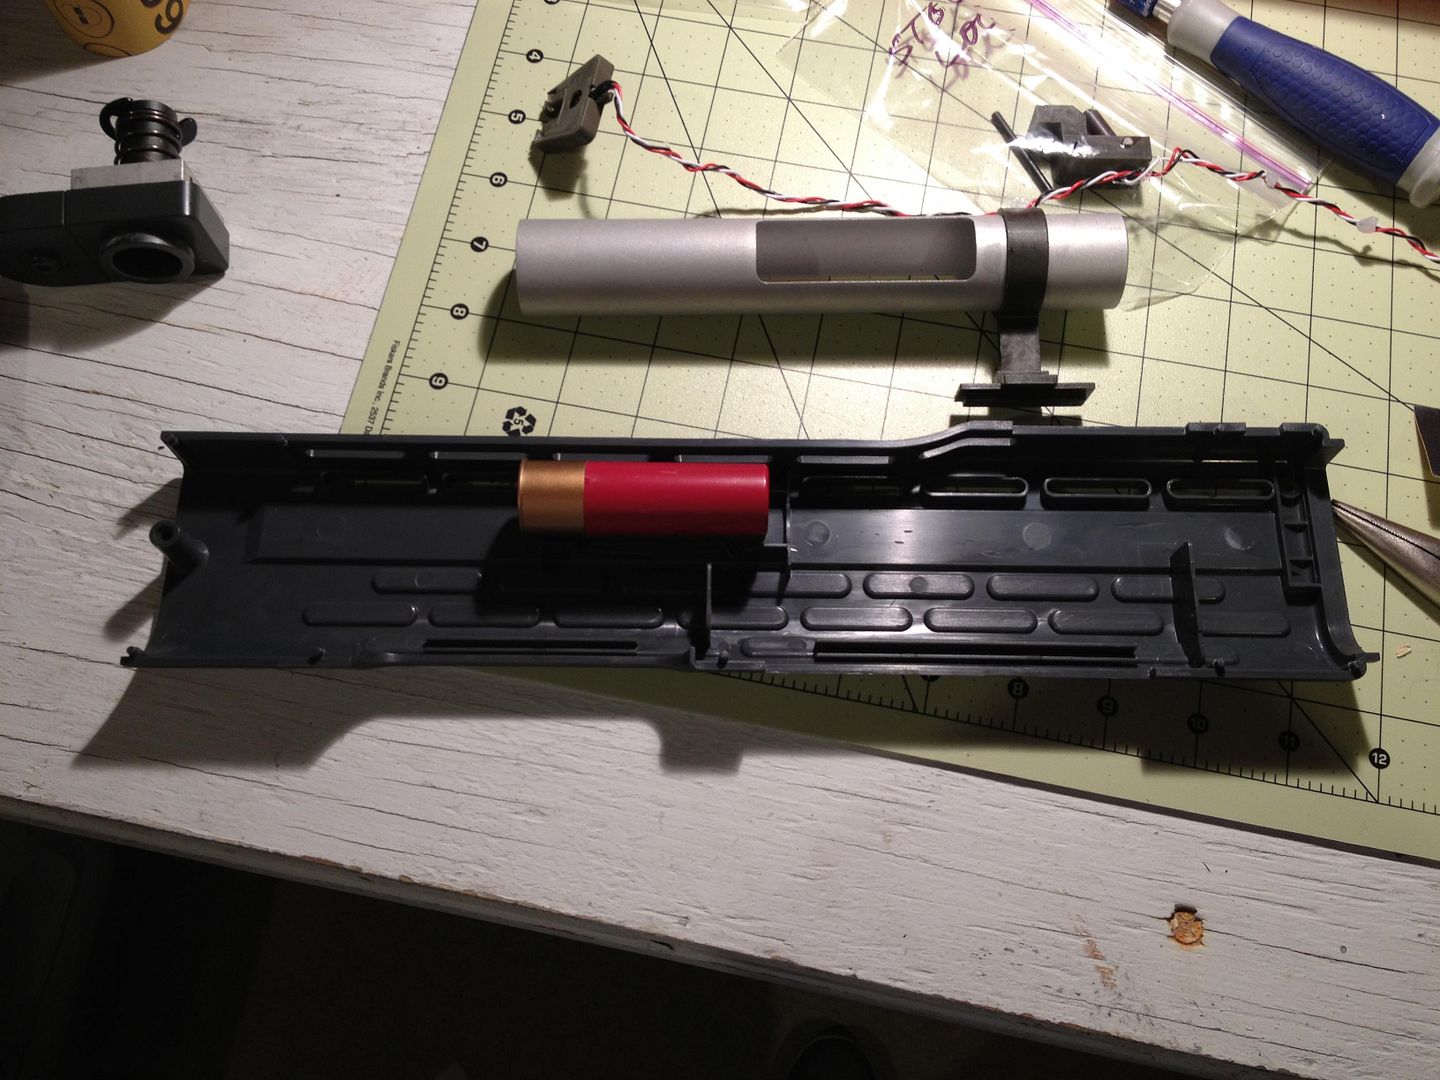
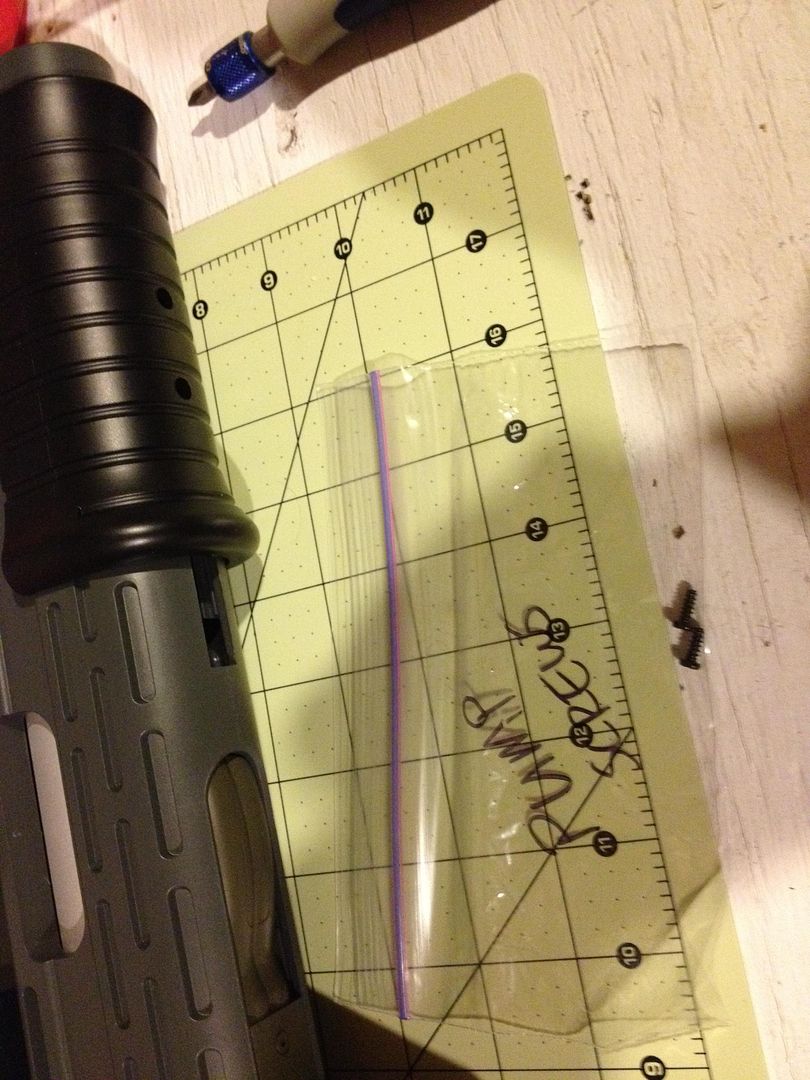
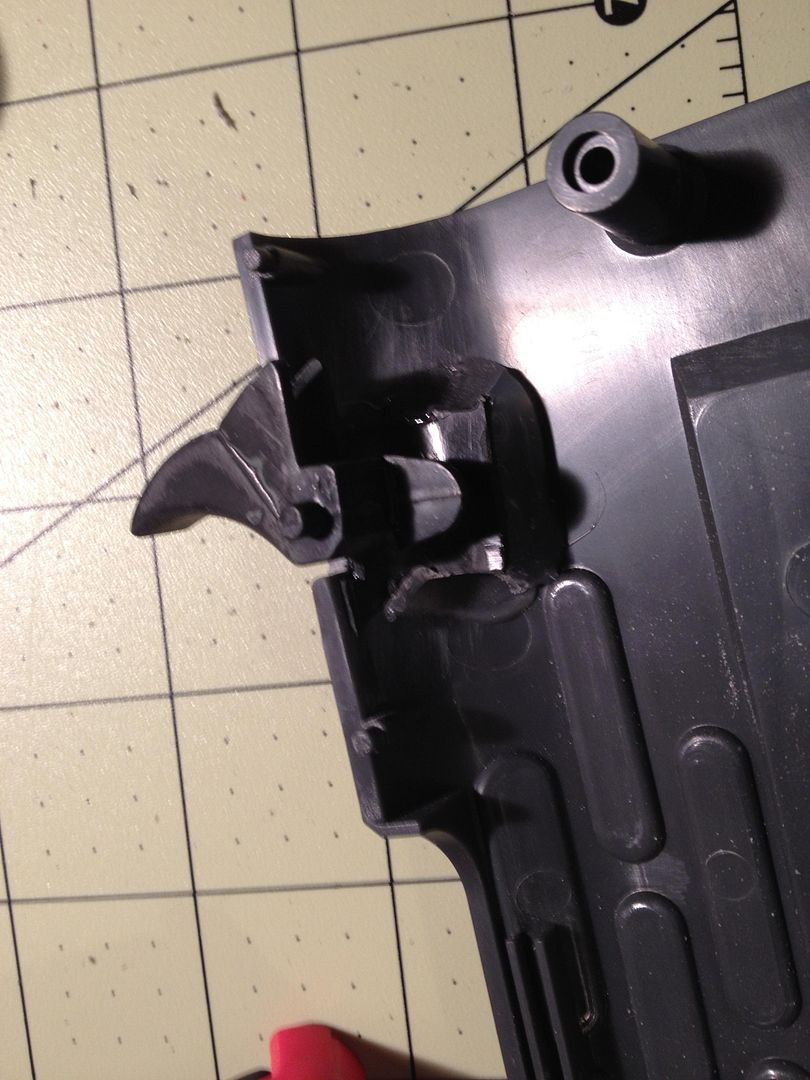
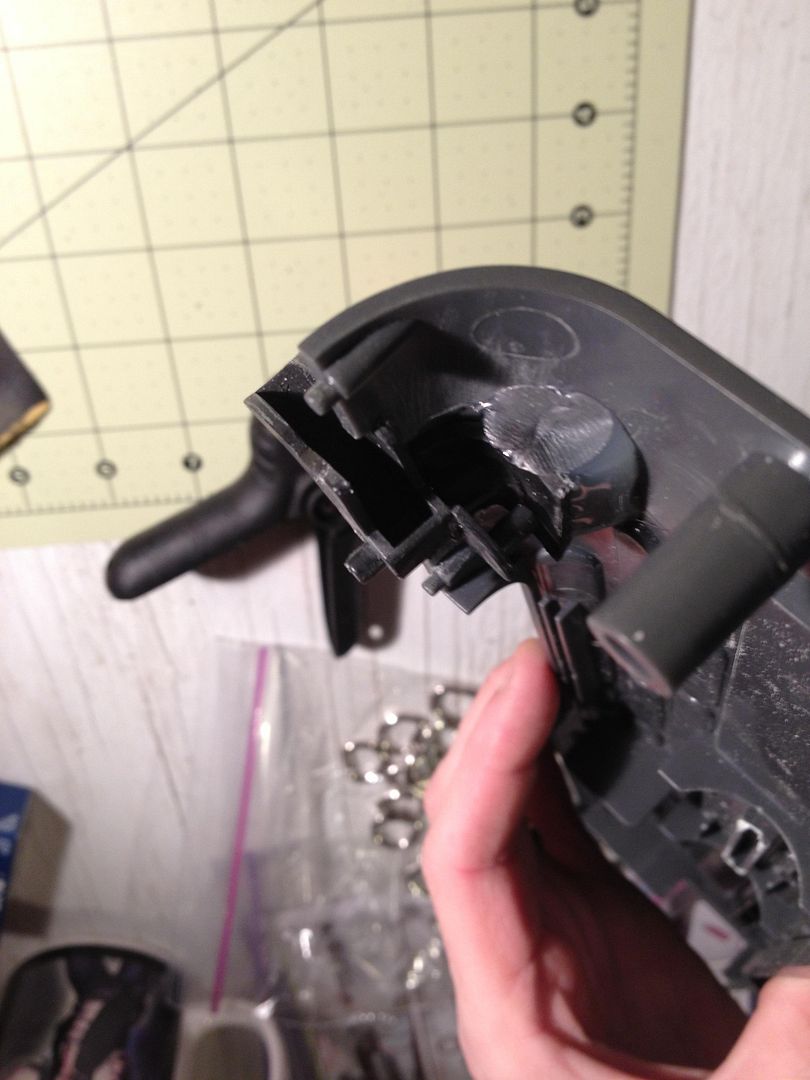
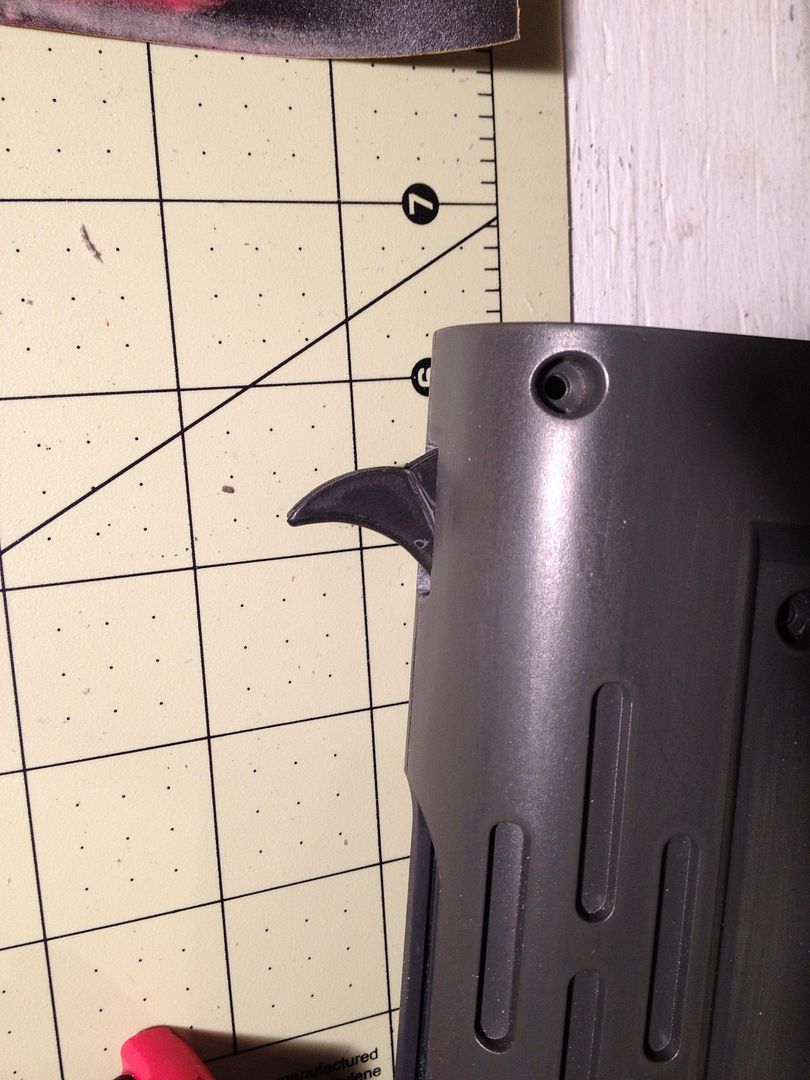
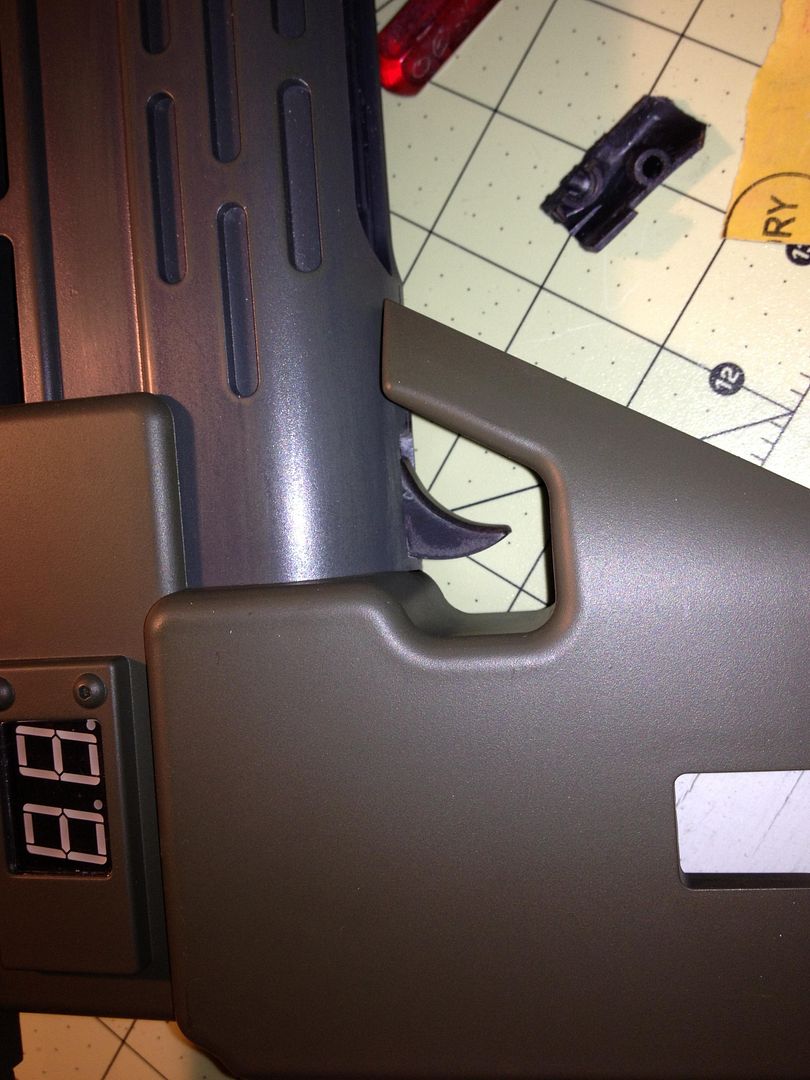
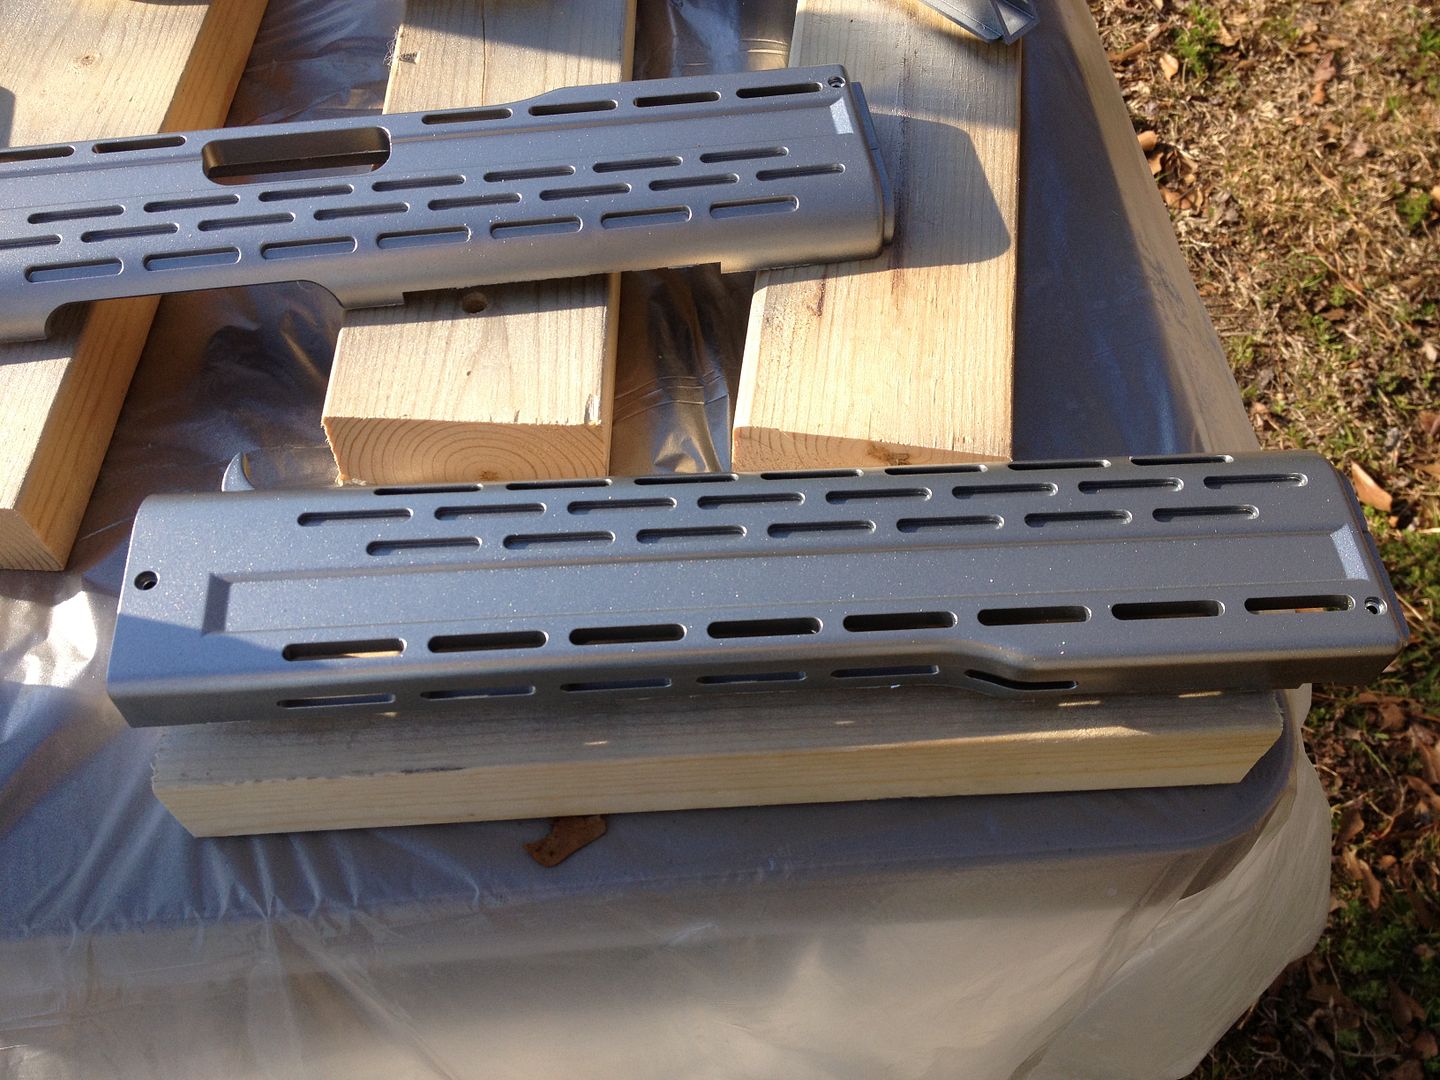
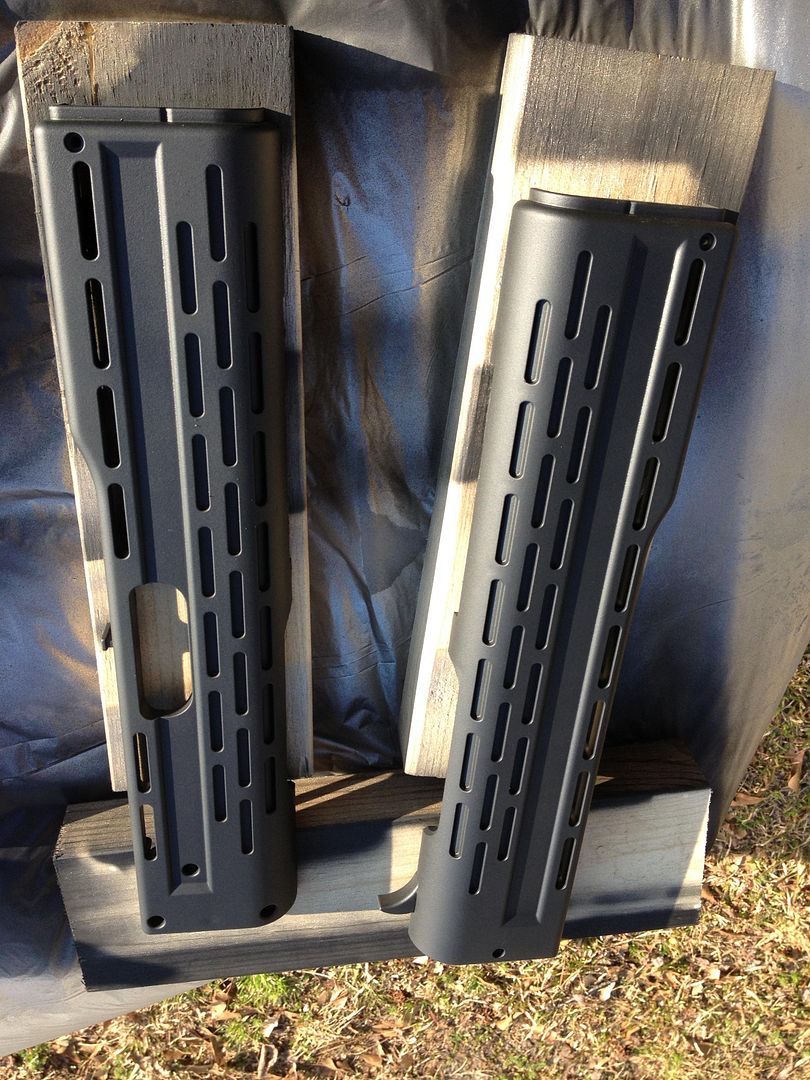
Right now I am NOT drilling out the cage holes. One, I think it might have a negative effect on the sturdiness of the plastic. Two, if I go full functional, it won't hide the wires or the battery. Three, in the movie, there is a shotgun inside, so it looks filled. Right now, with the right paintjob, it will look almost the same, except for side angled shots, and frankly, that's not worth it to me to weaken the forend. I do want to try shifting around the pump mechanism so that it goes fully to rear (doubtful without a LOT of mods but I will try) and installing a trigger for the grenade launcher. As for the trigger, I took an old $5 airsoft glock and chopped it (literally) into pieces.

Image

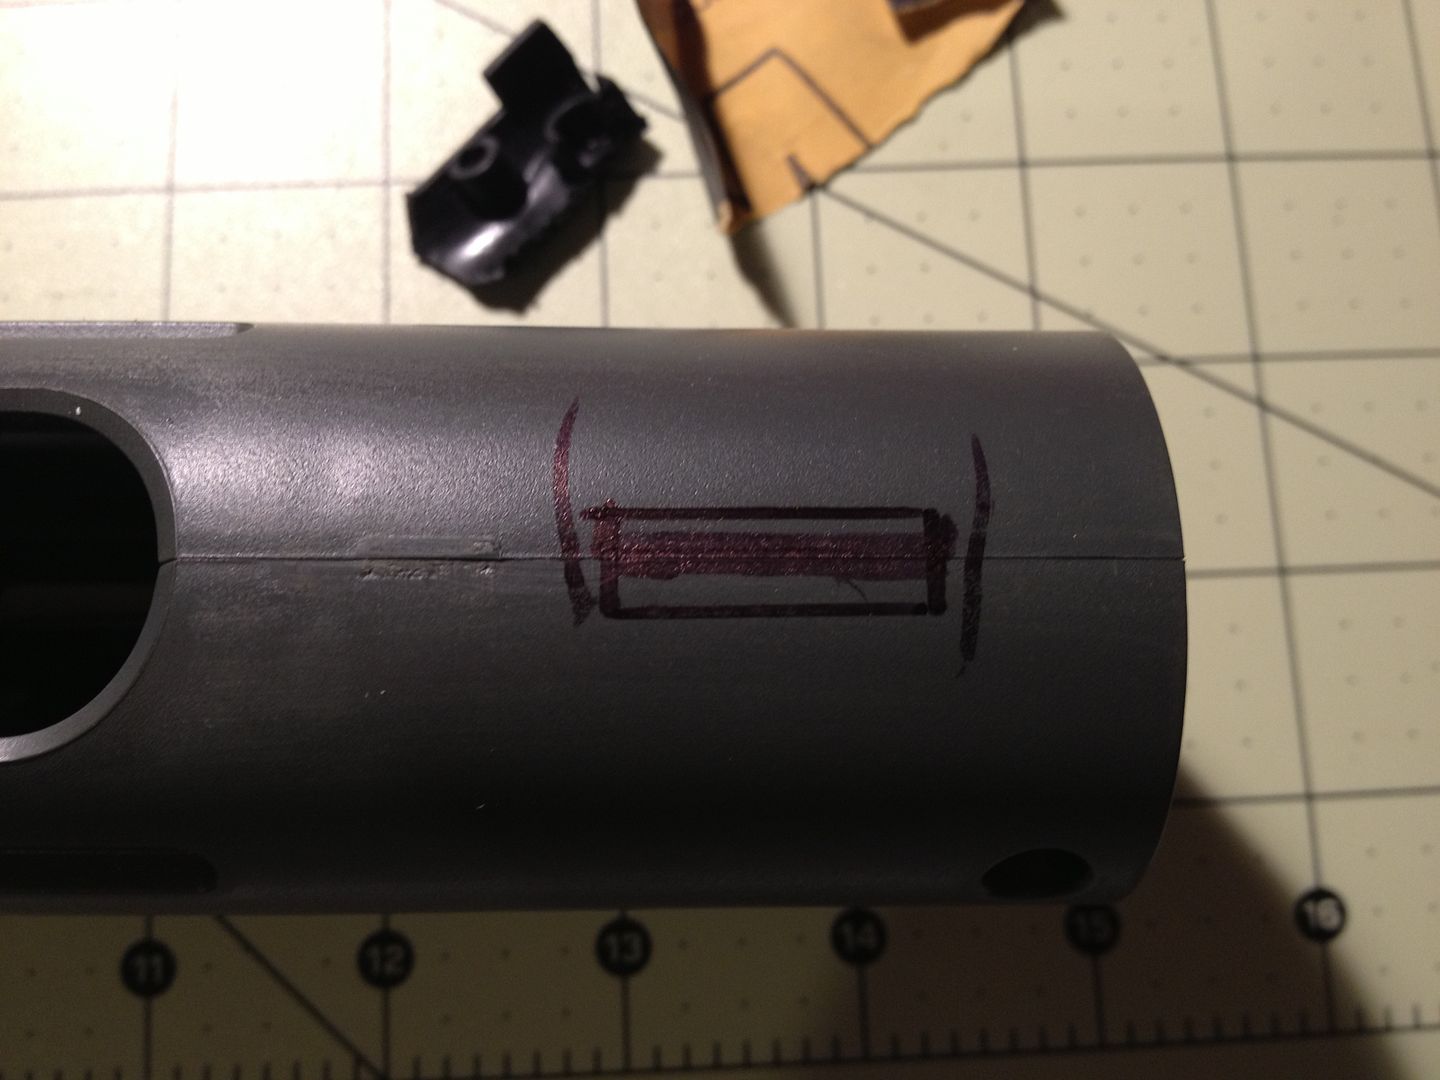
I am measuring the hole for the GL now; the two side pieces are parts of the old Glock. They actually match the side curve of the GL pretty well. I plan on bonding (read: glue) the two pieces to each half of the GL. The trigger will then fit in just like it did on the Glock. Shouldn't be too hard of a cut either (although I may have screwed myself by saying that).

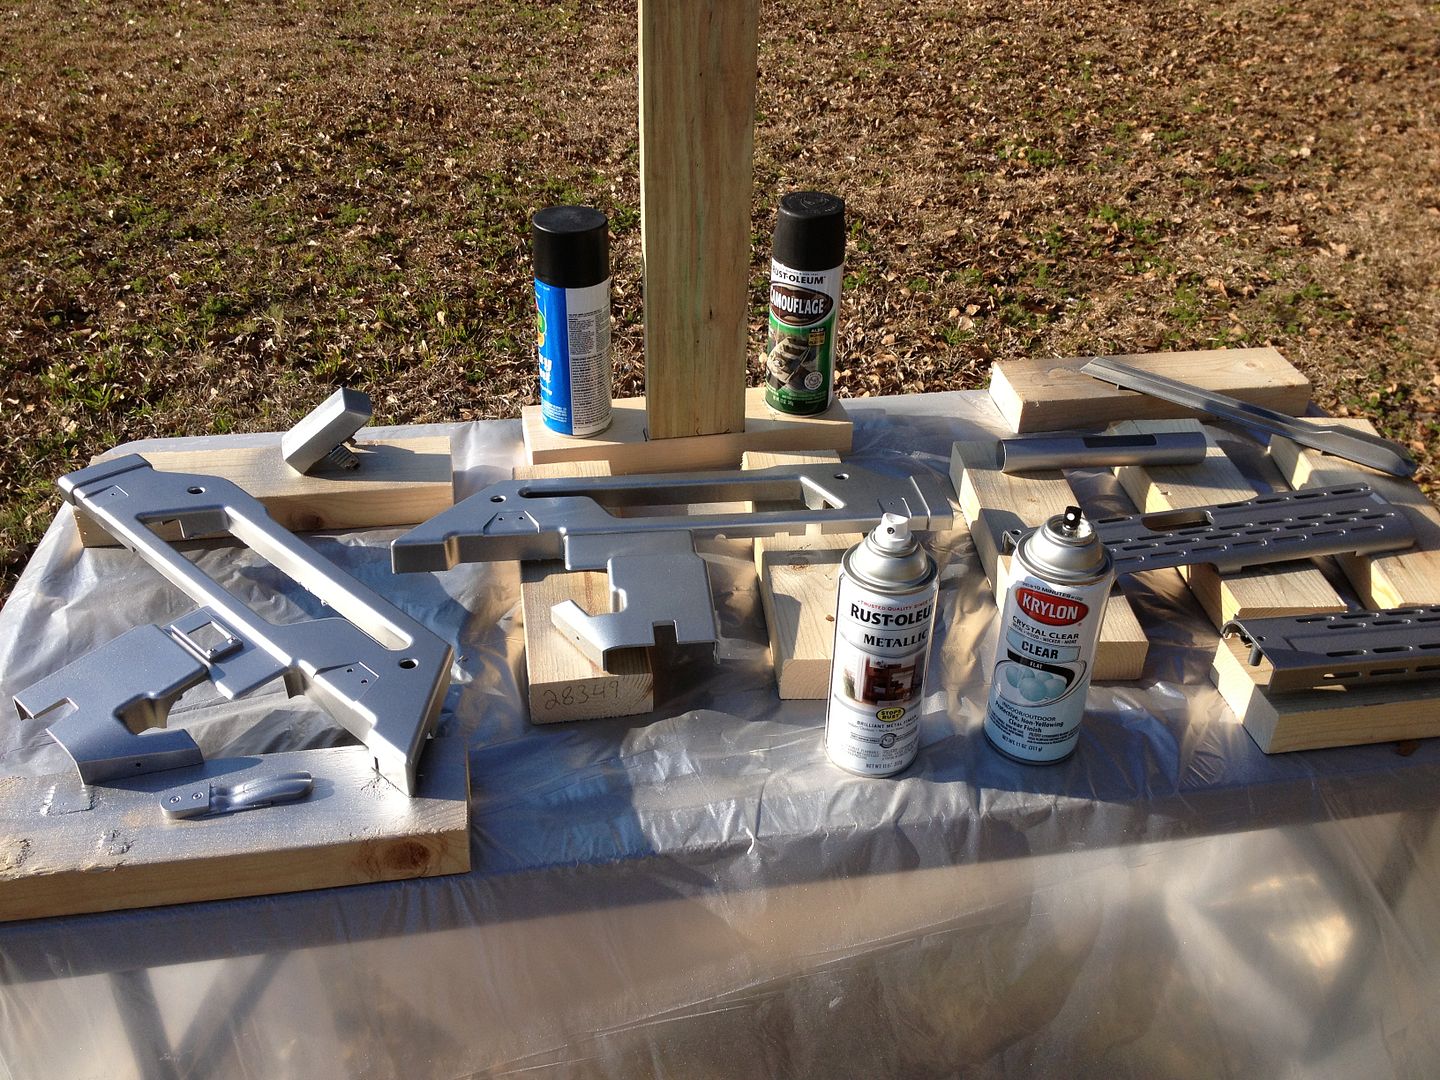
More updates as I do more work; right now it is cold, so I can't really paint. I am toying with the idea of trying in the heated shed, but it's still pretty cold in there too. If I can't get it about 60-65F then I'm not painting.

Charlie

_________________
"There is a clause in the contract which specifically states any systematized transmission indicating a possible intelligent origin must be investigated. On penalty of total forfeiture of shares. No money."


Image


Top
 Profile  
Reply with quote  
 Post subject: Re: Charlie's Colonial Marine Build
PostPosted: Sun Mar 03, 2013 8:35 am 
Duke Bronson
User avatar

Country: Canada
Here's a few fun pics of the mods done on mine... just for laughs, of course.

http://www.pbase.com/sharpuscm/m41a


Top
 Profile  
Reply with quote  
 Post subject: Re: Charlie's Colonial Marine Build
PostPosted: Sun Mar 03, 2013 9:03 am 
MODEL 120-A2
User avatar

Service Number: A04/TQ0.0.72178E5
Country: United States
SFC Baldwin wrote:
Here's a few fun pics of the mods done on mine... just for laughs, of course.

http://www.pbase.com/sharpuscm/m41a


Your shop is much nicer than mine. :) But speaking of mods...I did get the rifle broken down to complete parade rest, so I was able to prep all of the pieces to get primered. It's too cold right now for me to do anything, so it will probably be a few weeks before I get all the painting done. However, I did manage to get the grenade launcher trigger installed.

Image

I measured this and then dremeled. I took it slow, and had to redo it a few times, but I didn't want to cut too much.

I did a bunch of measuring and test fitting and then superglued the pivot in position.

Image

Once the superglue was tight, I used some high temp hot glue to fill in the gaps between the sides and strengthen the pivot.

Image

Image

Enough testing and fitting and I bonded the trigger to pivot point. It won't actually move, but I'm ok with that. It's a tight fit, so I didn't need to install the second pivot on the opposite side.

Image

Test fit with the shroud.

Image

Now to find a better grenade to go in.

Charlie

_________________
"There is a clause in the contract which specifically states any systematized transmission indicating a possible intelligent origin must be investigated. On penalty of total forfeiture of shares. No money."


Image


Top
 Profile  
Reply with quote  
 Post subject:
PostPosted: Sun Mar 03, 2013 11:37 am 

Location: rutland ,england
Country: United Kingdom
looking good , wish I'd put a moving launcher trigger in mine

_________________
rockin in the free world !


Top
 Profile  
Reply with quote  
 Post subject: Re:
PostPosted: Tue Mar 05, 2013 2:13 pm 
MODEL 120-A2
User avatar

Service Number: A04/TQ0.0.72178E5
Country: United States
COL R wrote:
looking good , wish I'd put a moving launcher trigger in mine


My trigger doesn't actually move. I made it static cause it was simpler and I won't actually be firing anything.

On another note:

Details to the rifle. It's still too cold to paint right now (infuriating but what can you do?). I am working on the stencils for the gun. One bit I wanted to add was my service number. I know a lot of guys in the military added that to their gear to keep track of it (heck, in the Navy they made us stencil the last four of our social to pretty much everything they issued). I have two thoughts on it: one, I just make a stencil and paint in black on the rifle. The other is actually etch the number into the shroud by hand. I have a hand engraver; I was going to use a stencil just to keep the letters/numbers halfway straight but add that bit of hand-done detail.

Thoughts?

Charlie

_________________
"There is a clause in the contract which specifically states any systematized transmission indicating a possible intelligent origin must be investigated. On penalty of total forfeiture of shares. No money."


Image


Top
 Profile  
Reply with quote  
 Post subject:
PostPosted: Tue Mar 05, 2013 8:42 pm 

Location: rutland ,england
Country: United Kingdom
Like the service number idea, I think having it just stenciled would be cool. Bit more inkeeping with the way the marines graffiti their armour . keep us posted on how its going !!!

_________________
rockin in the free world !


Top
 Profile  
Reply with quote  
 Post subject: Re: Charlie's Colonial Marine Build
PostPosted: Wed Mar 06, 2013 4:28 pm 

Location: rutland ,england
Country: United Kingdom
My pulsey
Attachment:
Untitled.jpg
Untitled.jpg [ 108.91 KiB | Viewed 9776 times ]

_________________
rockin in the free world !


Top
 Profile  
Reply with quote  
 Post subject:
PostPosted: Wed Mar 06, 2013 6:32 pm 

Location: rutland ,england
Country: United Kingdom
managed to post a picture woohoo , don't know how though as I can't get the sling mount ones to upload! It's not as brown in real life as it looks on the photo !

_________________
rockin in the free world !


Top
 Profile  
Reply with quote  
 Post subject:
PostPosted: Fri Mar 08, 2013 3:03 am 
MODEL 120-A2
User avatar

Service Number: A04/TQ0.0.72178E5
Country: United States
Well, the weather warmed up enough I could paint for about an hour and a half today. Here is my work so far:

Image

Image

As you can see, I used a Rustoelum paint for the base coat. I took each of the pieces and sanded gently with a 600 grit sandpaper. I alternated between coats of the aluminum and a matte clear coat. The Rustoelum metallic has been one of the few (and the only readily available) metallic paints that you can clear coat over and it doesn't turn flat grey. I use the combo of the two to provide extra protection when sanding down for weathering.

Here are some closeups:

Image

Image

Image

Image

It maintains a nice metallic shine. It's not as good as true metal, of course, but it does the job and unless there is some metal for comparison it's hard to tell the difference. Once its top coated and weathered it will look better.

Speaking of top coat, I did get the SPAS shroud done:

Image

Image

I took the extra step to paint the insides just to make sure the ports were covered. I used a flat Krylon camo (which had a slight interaction with the clearcoat I think) and cheapo Walmart brand flat black (which is actually a pretty decent paint, believe it or not). Tonight I should get some time in the shop to test fit and weather the SPAS part, and also get the liquid mask down for the chips on the bulk of the shroud. More details on that to follow.

Also, I am now working on (yet another) method of sling mounts. I decided to forgo the D-rings attached directly. I can't get the metal to work right without snapping or losing shape. So....I'm going to steal an idea from real world firearms. Swivel sling mounts with a D-ring in the swivel. These are machined 10-32 studs about 7/8" long (more than enough for what I need). I'll get the studs, drill, and size with nuts for a proper fit on the fore and rear. Then it's thread them through, add a washer and lock-tite blue, and it will be done. Based on playing around with the stock and forend, it will be sufficient not to overpower the sling.

I have also taken about the counter mechanism. Basic electronics was 13 years ago for me, so I have forgotten a lot, but I've got the circuitry worked out (mostly). It's a 5V (standard digitial signal) going to the light gate. The current motor in the Thompson has direct wiring to the trigger switch, basically when you pull the trigger it gives you a short, when you release it gives you an open. This means I can just use the motor battery wire and connect to the counter circuit. Not quite as easy as it sounds, since I have to route the 5V logic signal through both lines and I'm not sure if that will be affected by the motor. Since it won't have a battery and will basically be a dead weight, it shouldn't be a problem but I have a bit more testing to do. I am certain that I can reroute the counter to actuate off the trigger instead of the light gate. This means I can make it con safe. I don't think I will be able to make the counter tick down automatically, but semi-auto. I could probably design and fab a timing circuit to do that, but frankly I don't care that much about it. Single trigger pulls are ok for me. More details and a write up as I get more work down.

For the BDUs, most of my patches are here.Waiting on custom name tapes and the white bordered flag, but the ACUs did arrive. I've started on them with a seam ripper and contacted my normal seamstress. Once all the patches are in and my sketches done, I'll take the shirt down to her for the mods. Hopefully uploads of those sketches will get done tonight after I am done screwing around with counter circuit.

Charlie

_________________
"There is a clause in the contract which specifically states any systematized transmission indicating a possible intelligent origin must be investigated. On penalty of total forfeiture of shares. No money."


Image


Top
 Profile  
Reply with quote  
 Post subject:
PostPosted: Fri Mar 08, 2013 8:59 am 
MODEL 120-A2
User avatar

Service Number: A04/TQ0.0.72178E5
Country: United States
SUCCESS!!!!!!!!!!!!!!

The counter circuit has been rewired to the trigger. Pulling the trigger now causes the counter to lower. The main battery doesn't have to be in it, and the motor never even turns on!

Basically I opened the gun up. Way up. Full parade rest breakdown, including removing the gearbox. I discovered the motor wires (2 flat connectors, black red) were just dupes from the trigger switch going to the battery connector. So, I unplugged those, cut the lines, and resoldered the whole thing into one connector.

My earlier efforts discovered that the "BB sensor" was an infrared emitter/sensor rig. No problem. I found out which one was the emitter and which was the sensor. The sensor was a normal open (no voltage) closed short (when it was tripped it put 5V on its line). For anyone interested, the red and white lines are the sensor. Power goes on and off. The black and white (uses the same power line, the white) is for the emitter and is always at 5V. I cut that line too, covered the black lead, and tapped the connector portion to the main battery line. It plugs in just like it did before to the digital circuitry.

It was actually a fairly simple mod; it did worry for a bit just making sure the solders were right (at one point, the main line feed connector separated internally, so I just took out all the connectors and hard soldered the wires. I was also pretty sure I wouldn't blow any of the circuitry but I feel relieved when it actually worked. Getting the Thompson section put back together was also tricky. It's normally not easy, but the way I soldered the connectors made it worse. The main housing connectors got cut out too. The wire itself was pretty small and made getting the gun back together easier.

Now, the down side is that the gun won't fire BBs anymore. It's not a downside to me, cause I don't play airsoft. I wanted a cool display/prop. I don't want to run the risk of actually firing at a con or anyone. Plus, it frees up the forward rail where the sensor was for a D-ring sling mount, which is even better.

Charlie

_________________
"There is a clause in the contract which specifically states any systematized transmission indicating a possible intelligent origin must be investigated. On penalty of total forfeiture of shares. No money."


Image


Top
 Profile  
Reply with quote  
 Post subject:
PostPosted: Fri Mar 08, 2013 9:29 am 
MODEL 120-A2
User avatar

Service Number: A04/TQ0.0.72178E5
Country: United States
I added a youtube video to show the function.

http://www.youtube.com/watch?v=lwu45vol ... e=youtu.be

If anyone is interested, I have a few tutorials on weathering/battle damage on armor there as well.

Charlie

_________________
"There is a clause in the contract which specifically states any systematized transmission indicating a possible intelligent origin must be investigated. On penalty of total forfeiture of shares. No money."


Image


Top
 Profile  
Reply with quote  
 Post subject:
PostPosted: Fri Mar 08, 2013 3:21 pm 
That's really cool Charlie. How did you learn to do all the electronics stuff? That's one skill I wish I even had novice ability in!


Top
  
Reply with quote  
 Post subject:
PostPosted: Fri Mar 08, 2013 5:57 pm 
Prop Churner Outer
User avatar

Location: Bath, Maine
Service Number: A03/TQ1.0.12143G1
Country: United States
Great idea Charlie. While shooting a few BB's sounds like fun, I can't help but get the refrain from "A Christmas Story" stuck in my head. And for Con use this is ideal.

_________________
:delta: My entry-level prop and costume tutorials: viewtopic.php?f=3&t=12751 :delta:


Top
 Profile  
Reply with quote  
 Post subject:
PostPosted: Fri Mar 08, 2013 6:19 pm 
User avatar

Location: Southampton, UK
Country: United Kingdom
Very impressed! might have one of my more electronics-savvy mates have a fiddle with it and try and get the same thing going :D Cheers for the writeup.


Top
 Profile  
Reply with quote  
 Post subject: Re: Re:
PostPosted: Sat Mar 09, 2013 12:12 am 
BANNED USER
User avatar

Location: California, USA
Service Number: BANNED-USER-2024
Country: United States
Harry Harris wrote:
SFC Baldwin wrote:
Harry Harris wrote:
It's a common mistake that happens everywhere - even in Aliens: Colonial Marines sadly.
That never happens! What're you talking about?!?


:lol:

Harry


When I told the SEGA guys this, they assured me that it was blue... That they even had access to all of the FOX archives and saw it in person.

_________________
BANNED USER


Top
 Profile  
Reply with quote  
 Post subject: Re:
PostPosted: Sat Mar 09, 2013 12:42 am 
MODEL 120-A2
User avatar

Service Number: A04/TQ0.0.72178E5
Country: United States
Magnus wrote:
That's really cool Charlie. How did you learn to do all the electronics stuff? That's one skill I wish I even had novice ability in!


I was an electronics tech in the US Navy. I really should know a lot more than I do :) but I had further specialization.

I had no chance to paint today; I'm on nights and wound up sleeping all day. I might be able to get the latex fluid down on the metal shroud tonight, depending on the temp. If not, I'll get my sketches done.

CHarlie

_________________
"There is a clause in the contract which specifically states any systematized transmission indicating a possible intelligent origin must be investigated. On penalty of total forfeiture of shares. No money."


Image


Top
 Profile  
Reply with quote  
 Post subject: Re: Charlie's Colonial Marine Build
PostPosted: Sat Mar 09, 2013 1:20 am 

Service Number: A06/TQ1.0.72129E1
Country: United States
Amazing thread! The silver under paint is a great idea. I am about to start taking mine apart. This has been a HUGE inspiration and help!


Top
 Profile  
Reply with quote  
 Post subject: Re: Charlie's Colonial Marine Build
PostPosted: Sat Mar 09, 2013 5:28 am 
MODEL 120-A2
User avatar

Service Number: A04/TQ0.0.72178E5
Country: United States
provadan wrote:
Amazing thread! The silver under paint is a great idea. I am about to start taking mine apart. This has been a HUGE inspiration and help!


Glad to be able to help. I recommend using a layer of clear coat over the silver; that way when you sand you run less chance of accidentally sanding through the silver coat.

I wish I had taken more pictures during the rewire, but I was so concentrating on soldering that I forgot. I do recommend using a multimeter (or at least ohmeter) to verify resistances. It will help verify which lines are which, ensure the solder joints are good, and provide some troubleshooting if it doesn't work. I actually had about 3 times during the build where it stopped working. Turns out it was the connectors getting jiggled by the meter leads. Go figure, but that's the reason I took out all of the connectors except the three wire.

Charlie

_________________
"There is a clause in the contract which specifically states any systematized transmission indicating a possible intelligent origin must be investigated. On penalty of total forfeiture of shares. No money."


Image


Top
 Profile  
Reply with quote  
 Post subject:
PostPosted: Sat Mar 09, 2013 8:03 am 
MODEL 120-A2
User avatar

Service Number: A04/TQ0.0.72178E5
Country: United States
While I am waiting for temps to equalize and the latex to warm up, I finished my sketches for the front armor. Still deciding on what colours to use, so I figured I would ask for some opinions.

FLAT GREEN:
Image

WOODLAND CAMO:

Image

Image

I'm not sure about using the light green or the light tan. So, I included both variants.

I think if I do the woodland I will add the small grey stripes that you can see on the screen used armor. Also, either way the claw marks will have bits of undercoat silver on them, implying they are going through the armor. I'm too lazy to photoshop that much detail in :)

Here is a blank reference if anyone would like it:
Image

Charlie

_________________
"There is a clause in the contract which specifically states any systematized transmission indicating a possible intelligent origin must be investigated. On penalty of total forfeiture of shares. No money."


Image


Top
 Profile  
Reply with quote  
 Post subject:
PostPosted: Sat Mar 09, 2013 5:49 pm 
Harvester of Sorrow
User avatar

Location: Lancashire (Wirral born)
Service Number: A04/TQ1.0.32156E1
Country: United Kingdom
Cheers for that blank pic, I can waste a bit of time messing around with that. :)

_________________
Image AKA: Simon


Top
 Profile  
Reply with quote  
 Post subject:
PostPosted: Sat Mar 09, 2013 6:22 pm 
Dirty Bird
User avatar

Location: San Diego CA
Service Number: A07/TQ0.0.82154E1
Country: United States
thank you very much now we need the back lol. But very kool idea i was looking for something like this to play with my custom art for my armor.

_________________
SGT Chris Kraemer "BIRD"
S/N: A07/TQ0.0.82154G1 Sgt Kraemer

Image


Top
 Profile  
Reply with quote  
 Post subject:
PostPosted: Sat Mar 09, 2013 7:26 pm 
Victim
User avatar

Location: BIRMINGHAM/LICHFIELD UK
Service Number: A86/TQ3.4.49421E3
Country: United Kingdom
Hi Charlie

Can I ask why you aren't thinking about using a SA camo paint job on your armour?

Just a thought, but you may want to go more fully SA in the future (as many do, with the correct BDU's etc) and will then have to repaint the armour.

The SA armour camo will still look fine with your multi-cams IMHO.

Martin

_________________
Martin 'Victim' Victory
A86/TQ3.4.49421E3
UKCM 13th Regt. 1st Batt. Freebooters


you can't take the PUNK outa Spunkmeyer


Top
 Profile  
Reply with quote  
 Post subject:
PostPosted: Sat Mar 09, 2013 10:05 pm 
I agree with Martin...I'd go with SA camo. It'll work great with your grafitti and your choice of bdu's, regardless if you are using multi cam or SA stuff.


Top
  
Reply with quote  
Display posts from previous:  Sort by  
Post new topic Reply to topic  [ 340 posts ]  Go to page Previous  1, 2, 3, 4, 5 ... 14  Next


You cannot post new topics in this forum
You cannot reply to topics in this forum
You cannot edit your posts in this forum
You cannot delete your posts in this forum
You cannot post attachments in this forum

Search for:
Jump to: