The discussion of the Alien series of films and the props used in them is the aim, but if it's got Big Bugs and Big Guns, then they are welcome too!


Post new topic Reply to topic  [ 340 posts ]  Go to page Previous  1 ... 7, 8, 9, 10, 11, 12, 13, 14  Next
Author Message
 Post subject:
PostPosted: Sat Apr 27, 2013 4:50 am 
Nice Charlie. Glad you got it sorted.


Top
  
Reply with quote  
 Post subject:
PostPosted: Sat Apr 27, 2013 6:23 am 
User avatar

Location: USA
Service Number: A7/TQ2.0.22139E1
Country: United States
I was not brave enough to drill into that front triangle for my Matrix, so all I did was attached the clip of one end of the sling I had directly through the front hole of the heat shield. I did drill a small hole in the back of the stake, but only because where I had it originally, the stack did not go all the way in. What I did, though not “screen accurate”, works pretty dandy for me.

_________________
"Tyranny will know our name, for we will carve it into his forehead."

No ground to give...not 1 inch... Major T. Gunn


Top
 Profile  
Reply with quote  
 Post subject: Re: Charlie's Colonial Marine Build
PostPosted: Sat Apr 27, 2013 1:48 pm 
MODEL 120-A2
User avatar

Service Number: A04/TQ0.0.72178E5
Country: United States
I added the pinstripe to the grenade inside the launcher. It was a bit tricky, but I used a toothpick to even it out and an exacto to cut it to length. Only took about 3 min.

Image

My BDU belt showed up yesterday, It's a repo WWII tan/khaki uniform belt I got from sportsmansguide.com

Image

Image

It will fit the uniform much better than the Propper BDU belt I was using.

Here is my M69 flak jacket:

Image

I'm still trying to figure out how to add the patches. I'm thinking of radical solutions at this point; maybe hot glue them in place? or I could put adhesive velcro on the jacket. Possibly even hand sewing with a curved needle. Right now I want to avoid having to remove the lining if at all possible. I've put up another thread asking the community how they added their patches.

I'm also debating if I want to put my name and USCM on the little cotton straps running horizontal on the vest. I believe that is how Drake had his setup. If that is the case, I will probably freehand it in pencil and sharpie. I was thinking of printing out properly sized, correct font examples to make sure I get it close.

Charlie

_________________
"There is a clause in the contract which specifically states any systematized transmission indicating a possible intelligent origin must be investigated. On penalty of total forfeiture of shares. No money."


Image


Top
 Profile  
Reply with quote  
 Post subject: Re: Charlie's Colonial Marine Build
PostPosted: Sat Apr 27, 2013 4:24 pm 
User avatar

Location: Kentucky USA
Service Number: A03/TQ1.0.12132E1
Country: United States
You could use fuseable web tape. It's made for hemming pant legs. It's a roll of tape that gets sticky by heat. Cut a strip off and lay it between the patch and the jacket and then iron it. The heat melts the tape and when it cools it is permanently attached. You can find it in the sewing department at stores like Wal-Mart and Meijer's.

web tape.jpg
web tape.jpg [ 10.91 KiB | Viewed 6249 times ]


_________________
viewtopic.php?f=4&t=12784
viewtopic.php?f=4&t=12917
Top
 Profile  
Reply with quote  
 Post subject:
PostPosted: Sat Apr 27, 2013 4:49 pm 
MODEL 120-A2
User avatar

Service Number: A04/TQ0.0.72178E5
Country: United States
The problem with ironing is the chance of damaging the nylon outer. Anything hot enough to secure the patches will damage the nylon. I have thought about using sticky back Velcro though.

Charlie

_________________
"There is a clause in the contract which specifically states any systematized transmission indicating a possible intelligent origin must be investigated. On penalty of total forfeiture of shares. No money."


Image


Top
 Profile  
Reply with quote  
 Post subject:
PostPosted: Sat Apr 27, 2013 4:58 pm 
Do you want the patches on permanently? if not, what about double sided tape? If you do, I think a curved needle would work ut may be slow going.


Top
  
Reply with quote  
 Post subject:
PostPosted: Sat Apr 27, 2013 5:25 pm 
MODEL 120-A2
User avatar

Service Number: A04/TQ0.0.72178E5
Country: United States
Yes I would prefer to make them permanently mounted. Talking with everyone I might take carmac's route, bite the bullet, and remove the inner liner. I could still try the Velcro route but I do like the idea of making the vest lighter to wear. I am goin to go by the craft store later this afternoon and see what kind of foam they have I could use to make a replacement.

Charlie

_________________
"There is a clause in the contract which specifically states any systematized transmission indicating a possible intelligent origin must be investigated. On penalty of total forfeiture of shares. No money."


Image


Top
 Profile  
Reply with quote  
 Post subject:
PostPosted: Sun Apr 28, 2013 2:36 am 
MODEL 120-A2
User avatar

Service Number: A04/TQ0.0.72178E5
Country: United States
Inspired by retrogard's thread

viewtopic.php?f=3&t=12360&hilit=racal

I got bored and decided to make a racal headset. I figured since I was making a flak jacket, I needed something to go with it. This is not screen accurate. Not even close. But I promised myself that I was not going to spend any more money, so I wanted to see if I could make it with stuff I had lying around the house. I had an old xbox live headset, so I figured, why not?

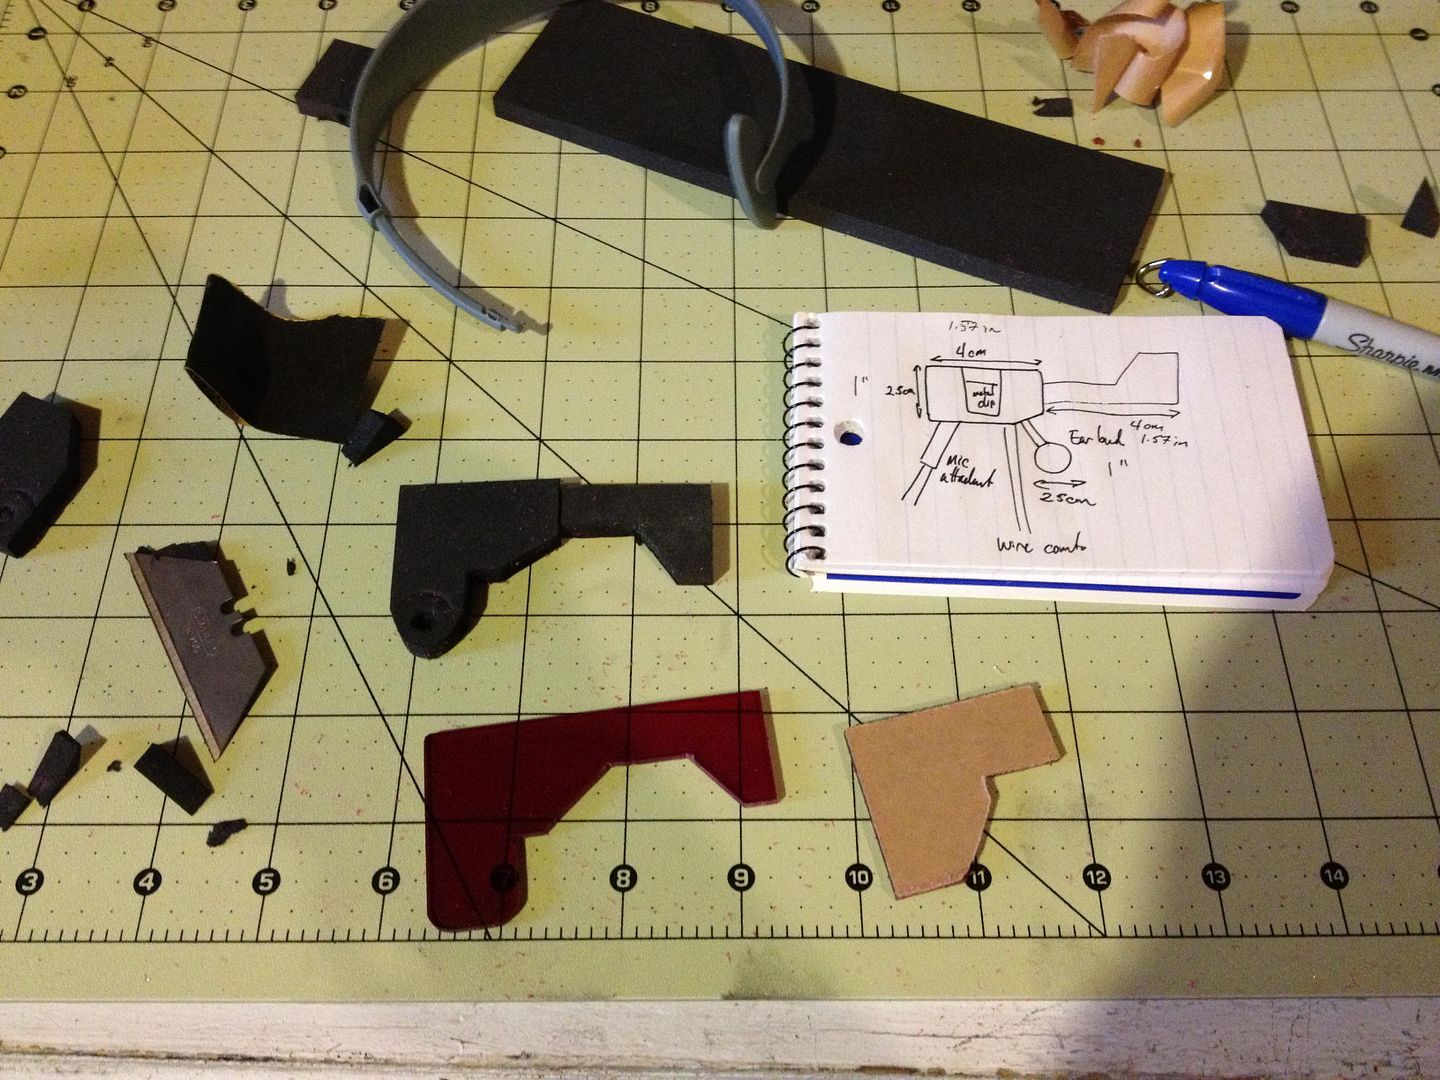
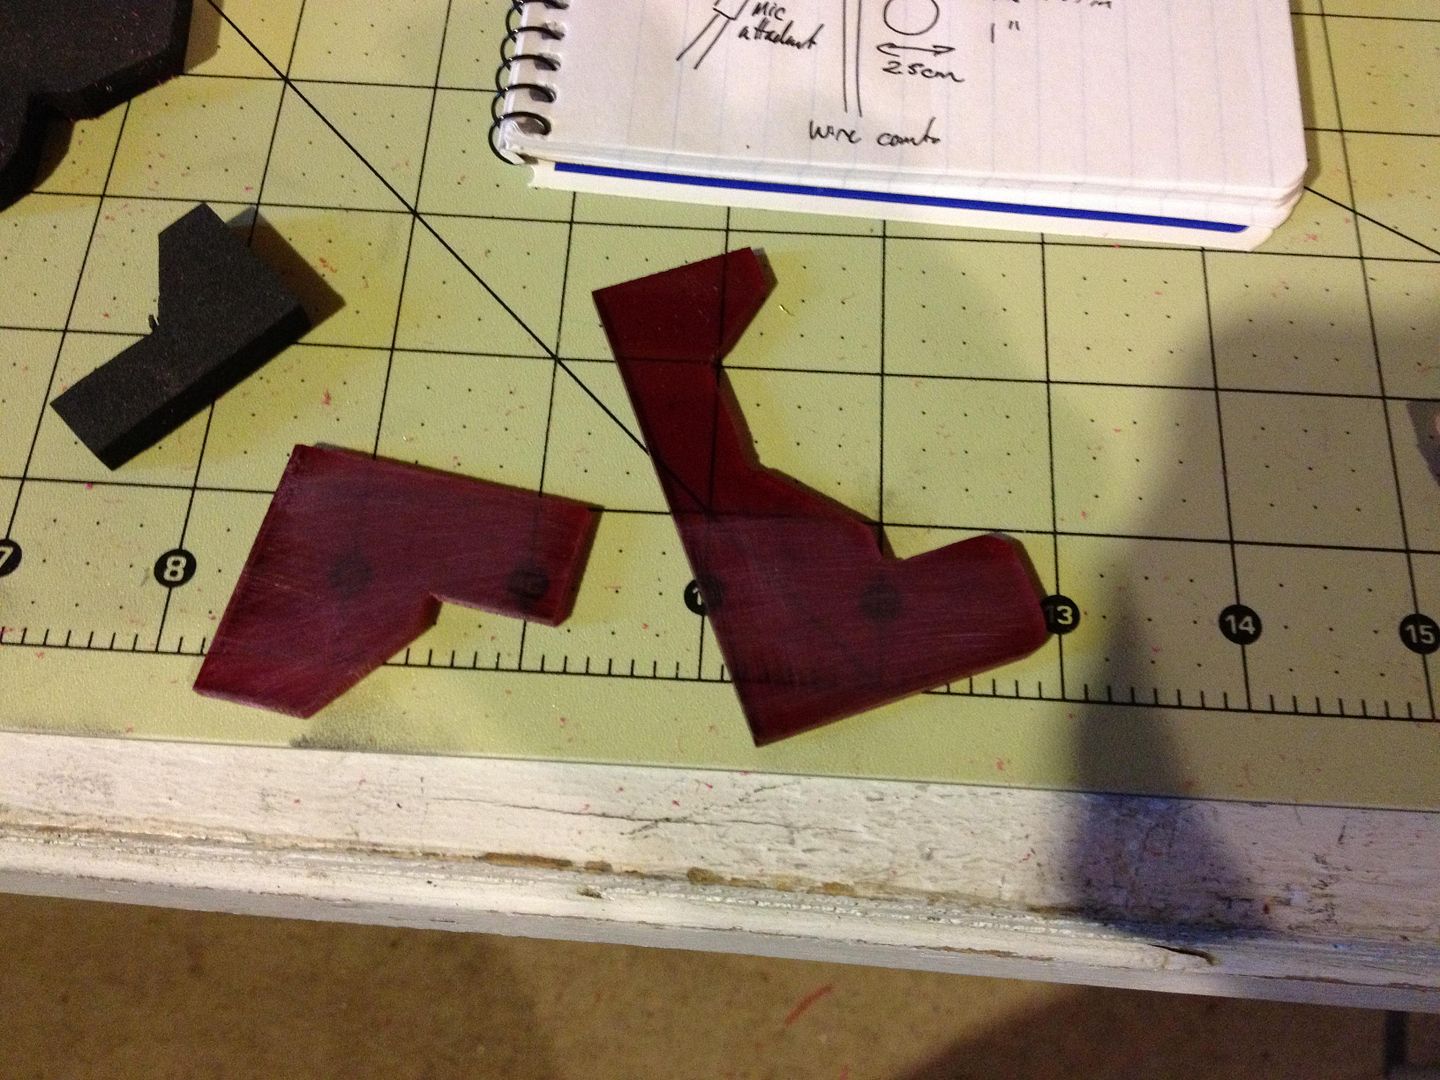
First off, I looked at some of the threads on the board and got some rough measurements for the racal set. The main body is about 1.5" x 1"; the clip part is about the same. I did a quick sketch; disassembled the xbox headset, and of course, did a sketch or two. Once that was done, I made a mock-up in 6mm craft foam. Once I had tried that on my head for a rough fit, I used it as template to cut the shape out of plexiglass.

Image

I had to take some liberties because of the mic assembly from the xbox headset. That is why there is a little bit sticking out the bottom of the main body. Also, for stability, I joined the clip and the body as one part. I figured since accuracy was gone, I may as well go for an easier build.

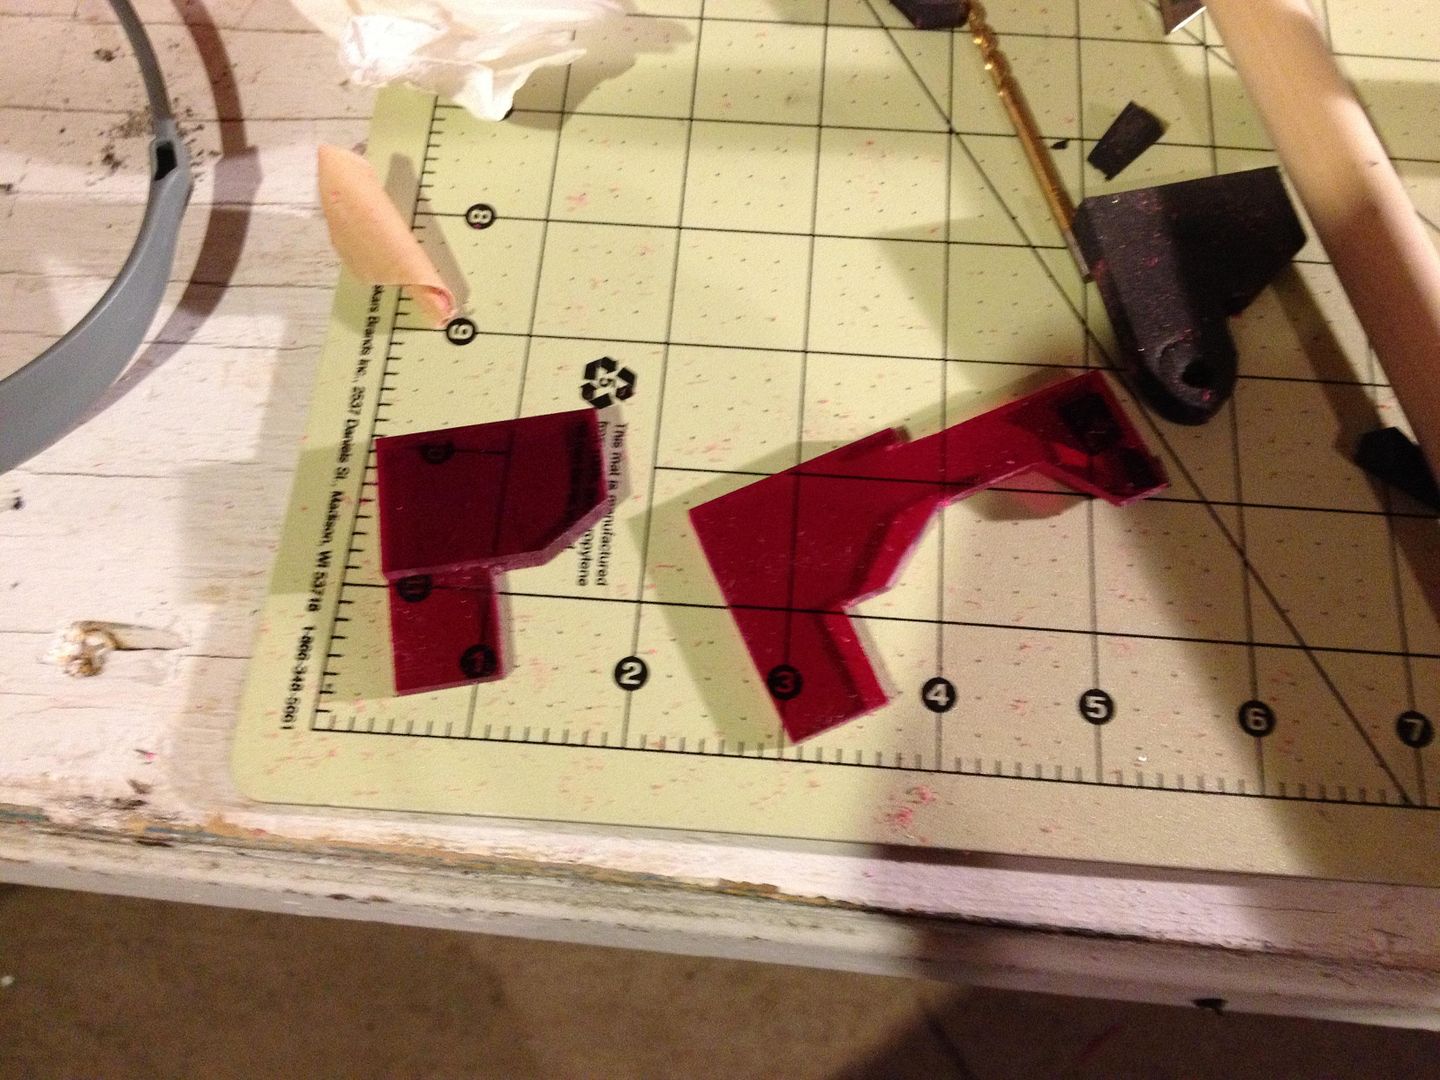
I cut out three pieces, each incrementally smaller. The first piece was the main body with mic extension and clip, the second the main body with mic extension, and the third just the main body. The mic actually has a screw piece, so i could only have the extension two piece of plexiglass thick. I roughed the pieces with sandpaper and then superglued them together.

Image

Image

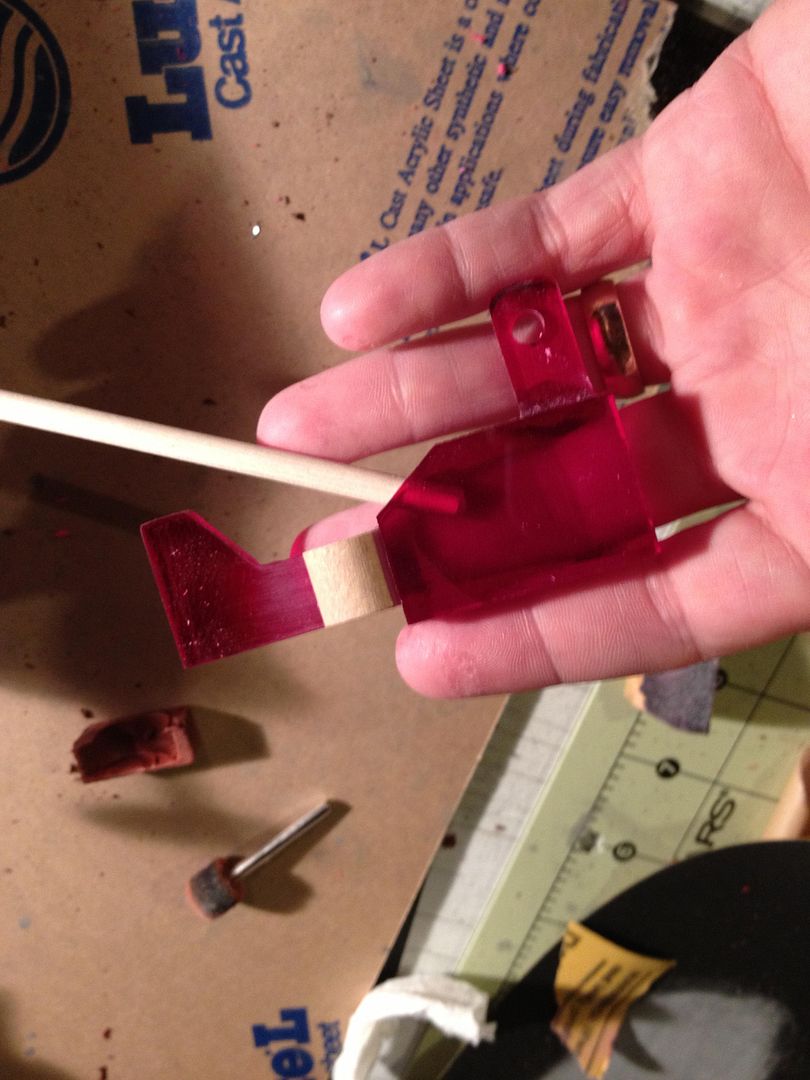
I cut a round wooden dowel in third to use as the base for mounting the headset. I drilled a 3/16" hole in it for the headset (I'm talking the actual part that goes over the top of your head) and superglued that to the plexiglass. Next I drilled a 3/16" hole in the center of the angled edge to place the earpiece connection in.

The earpiece connection is a 3/16" dowel rod. The earbud itself is the cap from a small bottle of testor's paint.

Image

I messed up the angle on the first shot, but I had enough play to redrill with no issues.

Image

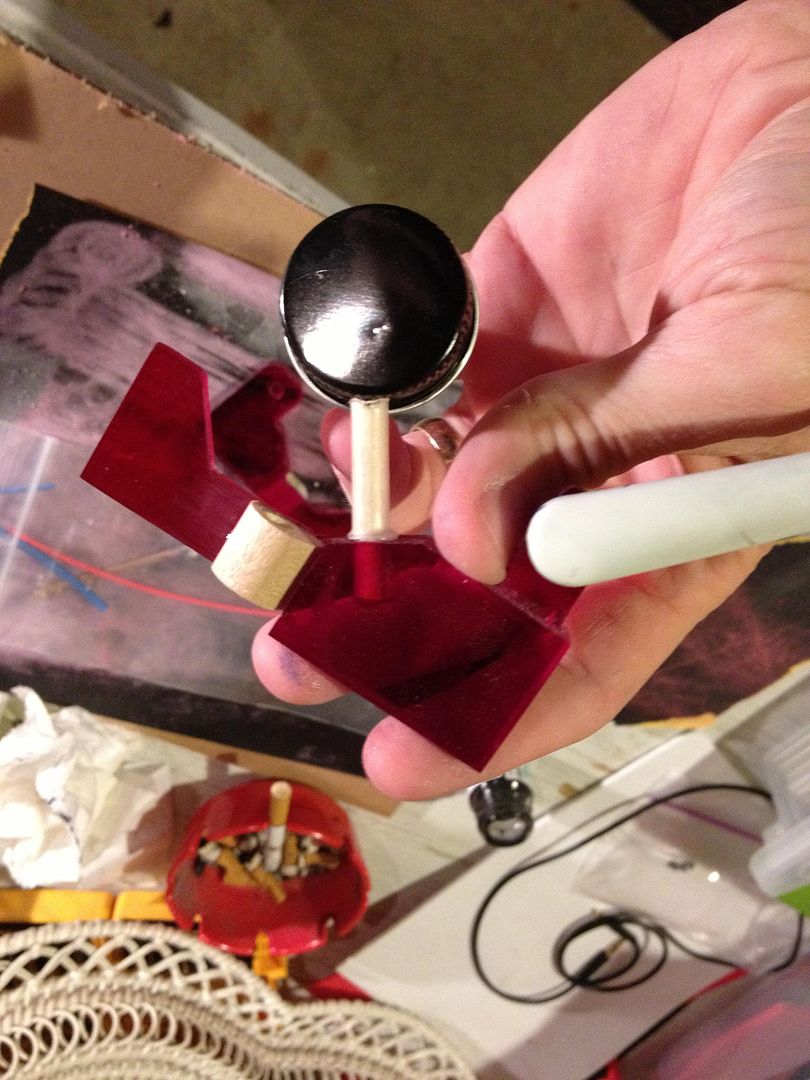
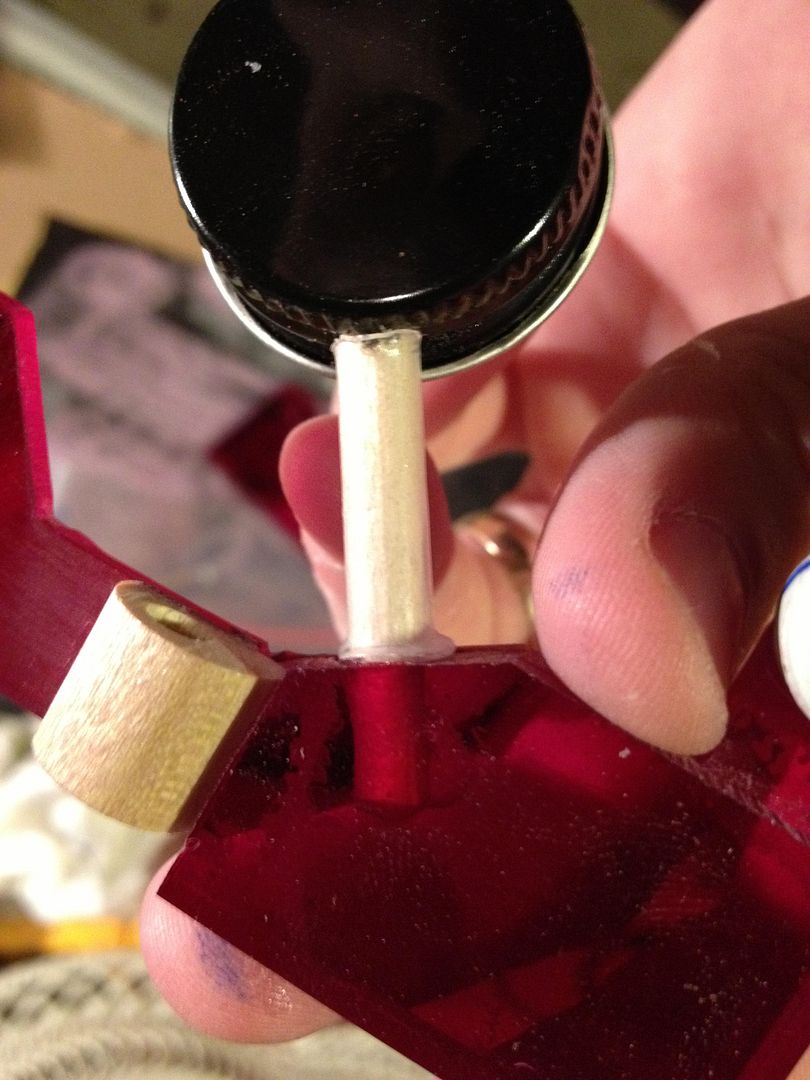
I had to basically trim the dowel in small increments, trying on the whole headset, to get the right length. Once that was done, I put a piece of clear heat shrink tubing over the dowel and shrank it down. This will hide the woodgrain and any gaps in the connection.

Image

Then I put another hole, 9/64" this time, in the horizontal section for the cord connection. I had an old 3mm to 3mm 3' cable lying around; it should work fine.

Finally I drilled 3 small holes and used the leftover screws from my mag insert work to add to the exterior. No real reason, just looks cool. I hit the headset and the "racal" with my beloved deep forest green paint.

Image

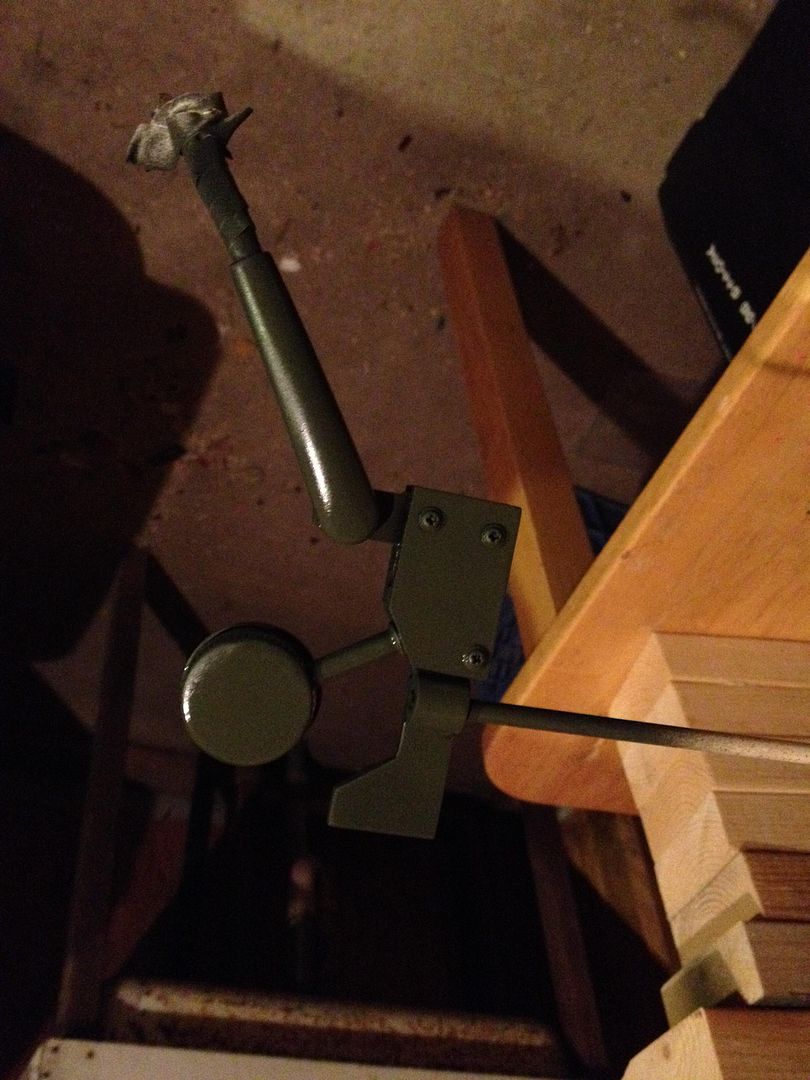
I'm going to let it dry overnight; we'll see how it looks tomorrow.

Charlie

_________________
"There is a clause in the contract which specifically states any systematized transmission indicating a possible intelligent origin must be investigated. On penalty of total forfeiture of shares. No money."


Image


Top
 Profile  
Reply with quote  
 Post subject: Re: Charlie's Colonial Marine Build
PostPosted: Sun Apr 28, 2013 2:47 am 
THAT guy
User avatar

Location: Virginia
Service Number: A03/TQ2.0.02146E1
Country: United States
This and Retro's build make this pretty
attainable. its most def on my list of things to do...


Top
 Profile  
Reply with quote  
 Post subject:
PostPosted: Sun Apr 28, 2013 4:42 pm 
MODEL 120-A2
User avatar

Service Number: A04/TQ0.0.72178E5
Country: United States
Here it is on my Nostromo dummy:

Image

Image

It's not bad, but I don't know if I like the way it swings out so much because of how the microphone is set up. I do have another mic that I think might be more appropriate; since I have a bunch of excess plexiglass lying around, mocking another one or two won't be a problem. I will see if I can make something work better with the other mic.

Charlie

_________________
"There is a clause in the contract which specifically states any systematized transmission indicating a possible intelligent origin must be investigated. On penalty of total forfeiture of shares. No money."


Image


Top
 Profile  
Reply with quote  
 Post subject:
PostPosted: Sun Apr 28, 2013 7:36 pm 
MODEL 120-A2
User avatar

Service Number: A04/TQ0.0.72178E5
Country: United States
So....I totally redid the Racal. LOL. I started with a screen cap of Hicks and Vasquez to try to get a little more accurate. I also used a different mic, instead of 360 one. I still used the 360 head band.

First, I cut a much longer clip, and decided to mount it to the outside.

Image

I glued 3 pieces of plexiglas together to make 2 of the plexiglas main bodies; it allowed to make all the side cuts even, instead of having to try to line up and glue down later.

Image

i cut that piece in two and then angled them. I made a rudimentary angle using the 6mm craft foam to keep the angle straight and even on each piece.

Image

Once that was done I started drilling holes in the main body for the attachments. The mic was tricky; I was scared to cut too much and there would be no going back. I took my time with the dremel and razor knife to get the angle just right to fit inside the housing. Note: this is a real project; it's never real until bleed. :)

Image

I attached the clip to the body; it's superglued on and then I added a cut up binder clip to simulate the real racal attachment point.

Image

I mounted everything together and did some test fits. I think it looks much better than my first version.

Image

I reused the bottle top from v1 as well as some of the screws.

I put a base coat of flat black and then the forest green.

Image

Once it dries I will see how it looks on the mannequin.

Charlie

_________________
"There is a clause in the contract which specifically states any systematized transmission indicating a possible intelligent origin must be investigated. On penalty of total forfeiture of shares. No money."


Image


Top
 Profile  
Reply with quote  
 Post subject:
PostPosted: Sun Apr 28, 2013 9:00 pm 
MODEL 120-A2
User avatar

Service Number: A04/TQ0.0.72178E5
Country: United States
Once the paint dried, I added a small section of 2mm craft foam to the interior of the ear bud. This covered the wooden dowel and the 6mm I used as filler.

Image

Here's a closeup of the exterior with the mounted cord:

Image

Last (and probably least) I took some photos of myself wearing it to give you an idea of how it sits:

Image

Image

On the plus side, I can wear it with my hat as well:

Image

Image

Looks like this project is a wrap.

Charlie

_________________
"There is a clause in the contract which specifically states any systematized transmission indicating a possible intelligent origin must be investigated. On penalty of total forfeiture of shares. No money."


Image


Top
 Profile  
Reply with quote  
 Post subject:
PostPosted: Sun Apr 28, 2013 9:15 pm 
User avatar

Location: Sunny Cornwall
Country: United Kingdom
pretty nifty there bud.

nice detailing.

_________________
You don't have to be pitilessly sadistic to work here.... But it helps.
http://www.chefs-creations.co.uk/shop/index.php/colonial-marine

http://www.kgbairsoft.com/wordpress


Top
 Profile  
Reply with quote  
 Post subject:
PostPosted: Sun Apr 28, 2013 9:28 pm 
Mobile Mayhem
User avatar

Location: Rapid View, Saskatchewan
Service Number: A10/TQ1.O.32157E1
Country: Canada
Thats fantastic! I really like following along with you on your builds haha, a lot of great ideas :)

_________________
Lt. Melissa L. Klassen, ALG
AL Colonial Admin. - Executive Officer (XO) -- 2021-2022
RCCM | Royal Canadian Colonial Marines - Commanding Officer (CO) -- 2021-2022

Read the AL Charter Rules & Regulations: https://docs.google.com/document/d/1i3gd9QUyIqI_6rfk8kpxspbKU-JT4MBAjLPxfCkvGJ8


Top
 Profile  
Reply with quote  
 Post subject:
PostPosted: Sun Apr 28, 2013 9:46 pm 
Yep...Charlie should win a decoration for his creativity :)


Top
  
Reply with quote  
 Post subject: Re:
PostPosted: Sun Apr 28, 2013 10:38 pm 
MODEL 120-A2
User avatar

Service Number: A04/TQ0.0.72178E5
Country: United States
Magnus wrote:
Yep...Charlie should win a decoration for his creativity :)


LOL. Thanks for the compliment, but if anyone deserves a decoration it's Retrogard.

Charlie

_________________
"There is a clause in the contract which specifically states any systematized transmission indicating a possible intelligent origin must be investigated. On penalty of total forfeiture of shares. No money."


Image


Top
 Profile  
Reply with quote  
 Post subject:
PostPosted: Mon Apr 29, 2013 11:27 am 
Prop Churner Outer
User avatar

Location: Bath, Maine
Service Number: A03/TQ1.0.12143G1
Country: United States
I was hoping someone else would give it a try and dude, yours looks so much more sturdy than mine! Great job on this. :delta:

_________________
:delta: My entry-level prop and costume tutorials: viewtopic.php?f=3&t=12751 :delta:


Top
 Profile  
Reply with quote  
 Post subject:
PostPosted: Mon Apr 29, 2013 12:31 pm 
User avatar

Location: South-West UK
Country: United Kingdom
Have you got an angry birds plaster on your finger ? :)


Top
 Profile  
Reply with quote  
 Post subject:
PostPosted: Mon Apr 29, 2013 1:54 pm 
Prop Churner Outer
User avatar

Location: Bath, Maine
Service Number: A03/TQ1.0.12143G1
Country: United States
I have those same bandaids! I was wearing one just the other day thanks to a blade slip while trimming the Dropship helmet. We bleed for our craft.

_________________
:delta: My entry-level prop and costume tutorials: viewtopic.php?f=3&t=12751 :delta:


Top
 Profile  
Reply with quote  
 Post subject:
PostPosted: Mon Apr 29, 2013 2:38 pm 
MODEL 120-A2
User avatar

Service Number: A04/TQ0.0.72178E5
Country: United States
Yes it is angry birds. I have a 12 year old daughter and the razor slipped when I was trimming the edge of the mic connector. I initially used a paper towel with duct tape around (rawr! Manly!) but once I left the shop and came back into the house I grabbed the first band-aid available.

Charlie

_________________
"There is a clause in the contract which specifically states any systematized transmission indicating a possible intelligent origin must be investigated. On penalty of total forfeiture of shares. No money."


Image


Top
 Profile  
Reply with quote  
 Post subject:
PostPosted: Tue Apr 30, 2013 1:33 am 
MODEL 120-A2
User avatar

Service Number: A04/TQ0.0.72178E5
Country: United States
Looking at the back of the flak jacket....that is a big open area screaming for some graffiti on it. I was thinking of maybe putting the "Kittens Have CLAWS" graffiti, same as I have designed for the front of my armor. I can print up a fairly large stencil and I already have the artwork designed. Since I won't wear the flak jacket and the armor at the same time it won't be the same exactly. Or I could try to come up with something different. Maybe the chestburster "Dont Tread on Me". Thoughts on that?

Charlie

_________________
"There is a clause in the contract which specifically states any systematized transmission indicating a possible intelligent origin must be investigated. On penalty of total forfeiture of shares. No money."


Image


Top
 Profile  
Reply with quote  
 Post subject:
PostPosted: Tue Apr 30, 2013 3:55 am 
I dunno. I couldn't even decide on a chest graffiti for my armour, so I'm not much help. They are both cool...depends if you want to go with the same theme on both of your armours, or do something different for each.


Top
  
Reply with quote  
 Post subject:
PostPosted: Tue Apr 30, 2013 11:48 am 
Prop Churner Outer
User avatar

Location: Bath, Maine
Service Number: A03/TQ1.0.12143G1
Country: United States
An argument against the Chestburster graffiti: my personal preference (and that's all it is) is for no references to the Aliens on CM armour. I like where the trilogy of films leave things, with the Aliens out there as a threat, but one that remains almost totally unknown. Some of the Marines in the Dark Horse comics had anti-Aliens graffiti and it just felt like it diminished the threat of them. It would be like wearing a "Hello Cthulhu" t-shirt while reading the Necronomicon.

An argument in favor of the Chestburster graffiti: I love your avatar, and there are certainly some great examples of other Aliens references in armour graffiti on the AL. It certainly would help with "costume recognition" at Con's: if someone gives you the "I have no idea what you're supposed to be" stare you can just point to your graffiti and they'll get it.

_________________
:delta: My entry-level prop and costume tutorials: viewtopic.php?f=3&t=12751 :delta:


Top
 Profile  
Reply with quote  
 Post subject:
PostPosted: Tue Apr 30, 2013 9:47 pm 
The Hugger of Destruction TechnoSasquatch
User avatar

Location: Middlesbrough- Anglo Saxon land
Service Number: A06/TQ1.0.22140E1
Country: United Kingdom
Great Job with the kit and always amazes me the ingenuity people can come up with the achieve their goal.

_________________
What ya gonna do when I TECKNO HUG Youuuuu!!

Image

Pvt.
STEAD,J "TECKNO VIKING"
A06/TQ1.0.22140E1

Skype: ulthur1


Top
 Profile  
Reply with quote  
 Post subject:
PostPosted: Wed May 01, 2013 2:24 am 
MODEL 120-A2
User avatar

Service Number: A04/TQ0.0.72178E5
Country: United States
Thanks for the compliments and the info. Retro, I tend to agree with you about the use of the chestburster. I don't like overt references to the aliens themselves (although I am going to write "REMEMBER THE NOSTROMO" on my armor. I love Alien too much to ignore it). Plus, another thought I have would be the chestburster would be on my back. Totally opposite of my chest. Kinda ruins the effect. :) I think I will just duplicate what I was going to do on the armor for the flak jacket. Make it matching set. If I do take the route of removing the inner liner, then it will definitely be a nice switch away from the armor for lighter wear. I think the most distinctive part of the marine costume is the PR. While the armor is definitely unique and distinctive (especially with the head cam and shoulder lamp) all you really need is the pulse rifle and people will know what movie it's from. If they can't recognize from the gun, they're not going to get the reference anyway.

On a different note....the extra set of plexiglas I had cut for the racal. Well, I started thinking, I drilled the holes by hand. I thought, wouldn't it fit better if I used the vice and the drill press? So I went out to shop after work, just on a lark. It worked pretty well. While I was moving some boxes around, I remembered I had a few old headsets in my Resident Evil box. I found one that I thought looked pretty good and had a much smaller mic tip than the old TB I used. But it was too short. So, I took a 3/16" dowel rod (I tend to use those a lot I noticed) and drilled a 1/8" hole in it. Wow that was tricky, but it worked. I put a bit of heat shrink on the dowel. I don't know if I like it better than the v2, but I'm kicking around the idea. The main reason is that I put clip/headband permanently attached on v2. So, that makes it harder to store and transport since it's not really going to fit into a box. If I made it closer to the original design, then it would be two pieces (the main racal body and mic, and then the headband). Much easier to lay flat in a small box.

This is what I have right now:

Image

And a quick comparison to v2:

Image

So what do you guys think? Worth it to continue on and make a v3? I think the plus side of two pieces (and maybe I can find a more accurate headband). Downside is that the mic is shorter than v2 mic. But I have no idea how big the real racal mic is. I have some good screenshots, but nothing where I can get a definitive measurement.

Charlie

_________________
"There is a clause in the contract which specifically states any systematized transmission indicating a possible intelligent origin must be investigated. On penalty of total forfeiture of shares. No money."


Image


Top
 Profile  
Reply with quote  
Display posts from previous:  Sort by  
Post new topic Reply to topic  [ 340 posts ]  Go to page Previous  1 ... 7, 8, 9, 10, 11, 12, 13, 14  Next


You cannot post new topics in this forum
You cannot reply to topics in this forum
You cannot edit your posts in this forum
You cannot delete your posts in this forum
You cannot post attachments in this forum

Search for:
Jump to: