The discussion of the Alien series of films and the props used in them is the aim, but if it's got Big Bugs and Big Guns, then they are welcome too!


Forum locked This topic is locked, you cannot edit posts or make further replies.  [ 188 posts ]  Go to page Previous  1 ... 4, 5, 6, 7, 8
Author Message
 Post subject:
PostPosted: Mon Jun 17, 2013 12:11 pm 
Prop Churner Outer
User avatar

Location: Bath, Maine
Service Number: A03/TQ1.0.12143G1
Country: United States
It looks absolutely awesome!

My one comment would be that you've worn the edges on all the bits you've added to the helmet, but not the edge of the original helmet itself. One or two chips (say around the cut out for the ear piece) would probably be worth adding. Not a ton of wear, but a little to make it look more unified.

It has been really fun watching this thing come together, thanks so much for sharing!

_________________
:delta: My entry-level prop and costume tutorials: viewtopic.php?f=3&t=12751 :delta:


Top
 Profile  
Reply with quote  
 Post subject:
PostPosted: Mon Jun 17, 2013 12:14 pm 
User avatar

Location: long island , NY
Country: United States
looks great !

_________________
Cpl Matthew Rendar. M56 smart gun operator. 2nd bat 7th colonial marines "Rendars Raiders "
Image


Top
 Profile  
Reply with quote  
 Post subject:
PostPosted: Mon Jun 17, 2013 12:17 pm 
User avatar

Country: United Kingdom
Thanks retrogard, I knew something was niggling at me about it.

Cheers mattrender, its been fun.


Top
 Profile  
Reply with quote  
 Post subject:
PostPosted: Mon Jun 17, 2013 5:20 pm 
User avatar

Country: United Kingdom
Hi guys

As per retrogarde's suggestion, I have added some wear to the actual helmet
Image

Finishing up a few tiny details I left out, and then it's on to full assembly. I am tempted to mod the IR sensor so it has the little flip down lever thing thats on the helmet in my ref pics (direct link: http://i1225.photobucket.com/albums/ee3 ... 170904.jpg ), but I only have till thursday so I'll have to see :p


Top
 Profile  
Reply with quote  
 Post subject:
PostPosted: Tue Jun 18, 2013 12:12 pm 
User avatar

Country: United Kingdom
Hi guys

Looks like I have time to mod the IR sensor after all as I thought we were further into the month than we are, and there's me racing to get it finished for this Friday :p


Top
 Profile  
Reply with quote  
 Post subject:
PostPosted: Tue Jun 18, 2013 1:07 pm 
Prop Churner Outer
User avatar

Location: Bath, Maine
Service Number: A03/TQ1.0.12143G1
Country: United States
IS the lever how they flipped the sensor down? I've never seen that before!

_________________
:delta: My entry-level prop and costume tutorials: viewtopic.php?f=3&t=12751 :delta:


Top
 Profile  
Reply with quote  
 Post subject:
PostPosted: Tue Jun 18, 2013 6:22 pm 
User avatar

Country: United Kingdom
As far as I can see, it looks like it.


Top
 Profile  
Reply with quote  
 Post subject:
PostPosted: Tue Jun 18, 2013 8:50 pm 
User avatar

Country: United Kingdom
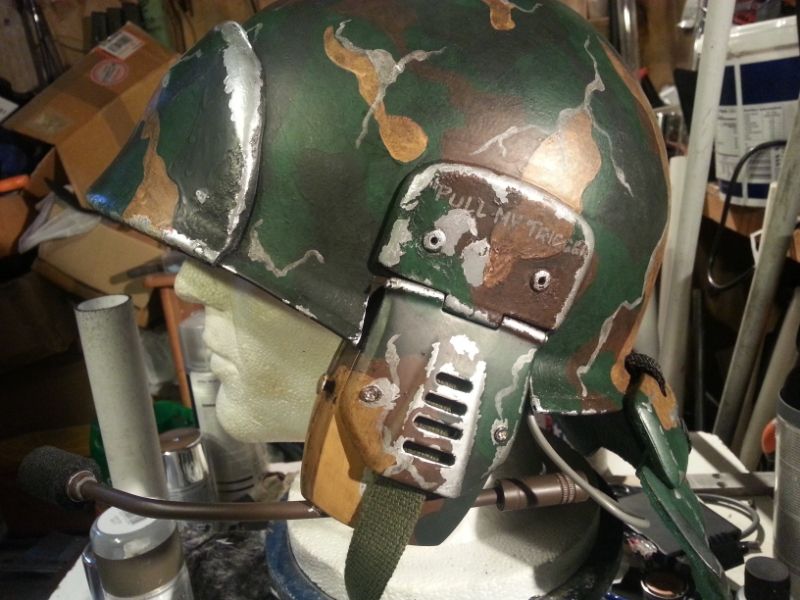
Very nearly almost there folks, but it looks like I won't be modding the IR for this helmet after all.

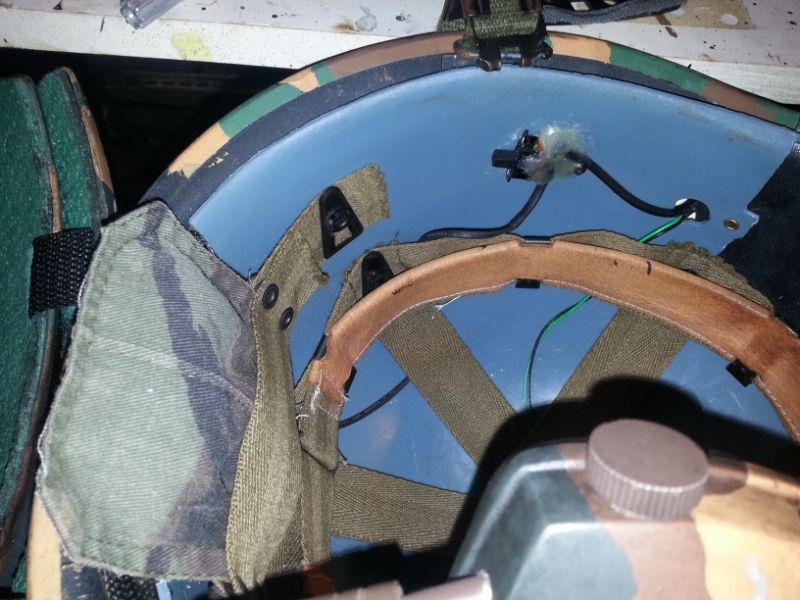
A little closer inspection of the referance pic brought out a detail I missed. It seems that the parts that were used to guide the IR body were just screwe into the helmet liner, and since I've already made room for one with a casing in mine, there's nothing to screw into for one without a caseing. Still, it means that once its glued in place, this build is finished. I'll post up the finished pics tomorrow...

...until then, here's todays progress:

Here's the finished helm cam wiring, and the little pouch I made for the 9v battery to sit in
Image

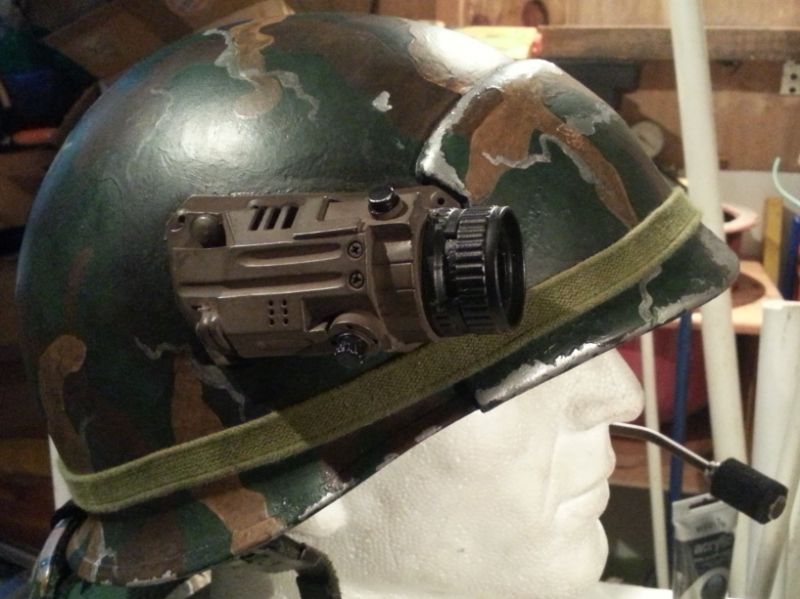
Once that was done, it was time to line up and fix on the lens/cam. It was at this point I gave myself a scare when all I could see from the live feed was a mostly black screen. Turns out I forgot to remove the protective tape on the real lens (WHEW!!!), never been so relieved, a proper facepalm moment :lol:
Image


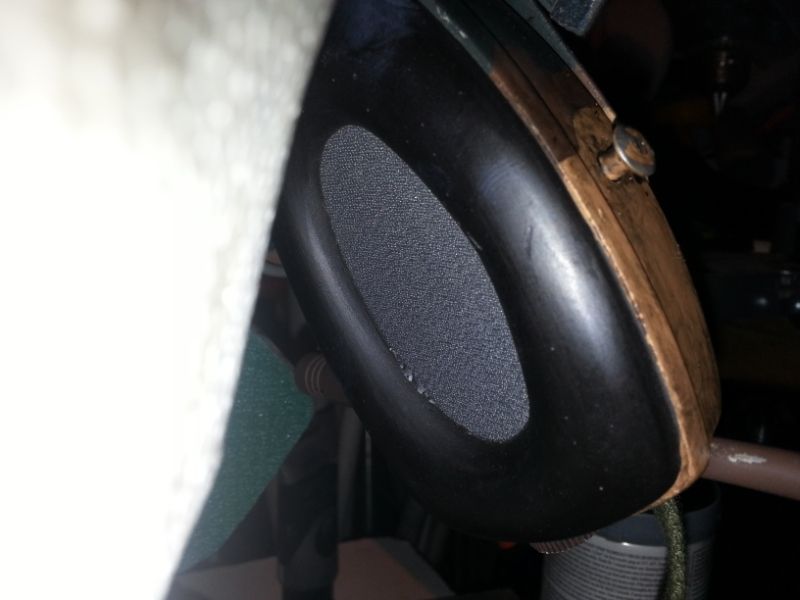
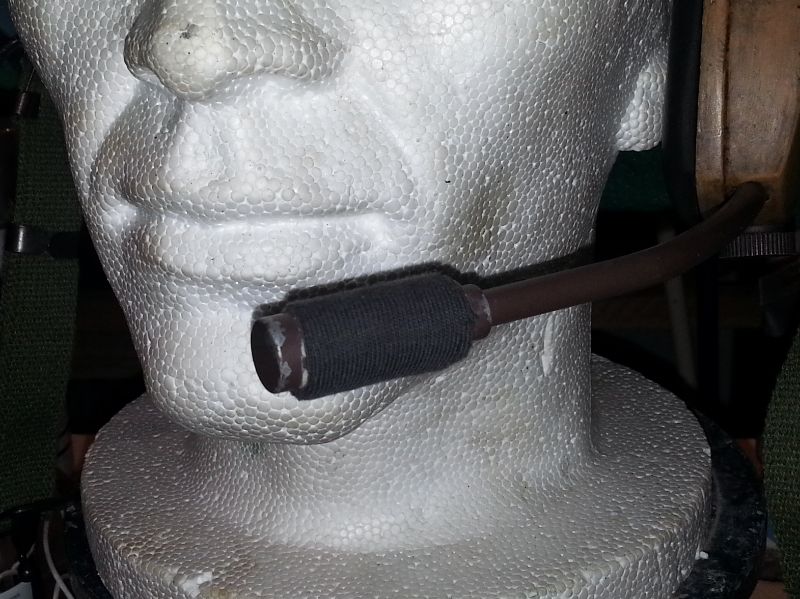
Waste not, want not as they say. My little PC speakers gave up the other day, and handily enough, they have removable speaker covers :) 
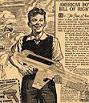
I took one off and dropped the moulded rubber section of the earpiece on it for sizing, and it only needs it to be about 5mm wider than the inside hole. Other than the fact its grey, it was perfect.
Image


Top
 Profile  
Reply with quote  
 Post subject:
PostPosted: Tue Jun 18, 2013 10:18 pm 
User avatar

Location: Kent, UK
Looks great! One small suggestion though, remove the foam on the mic tip, its a little too thick. I find black t-shirt material superglued over the tip gives a very screen used look.


Top
 Profile  
Reply with quote  
 Post subject: Re:
PostPosted: Tue Jun 18, 2013 10:27 pm 
User avatar

Country: United Kingdom
nick-a-tron wrote:
Looks great! One small suggestion though, remove the foam on the mic tip, its a little too thick. I find black t-shirt material superglued over the tip gives a very screen used look.


Yeh it is too thick, I've been on the hunt for some thinner stuff for a while. Thanks for the tip bud, I think I might have a doner t somewhere, I'll give it a shot :)


Top
 Profile  
Reply with quote  
 Post subject:
PostPosted: Wed Jun 19, 2013 8:52 pm 
User avatar

Country: United Kingdom
I gave the black (well nearly) T-shirt trick a go, though its not glued on in the pic.
Image

It's better, but still not quite right as the weave can be seen, I did however, find this 2mm sticky backed foam light seal used for cameras on ebay
Image

It comes in 8x4" pieces which means I could get a few covers out of just one piece, and I can put loads of pin holes in the area covering the actual mic head to let the sound get through the sticky layer better. The only downside is the cost as apparently no one in the UK will buy the special machine that can cut foam that thin so its all imported.

The other option I found for sourcing foam that thin are foam headphone liners, though the total surface area is much smaller for the same price as the light seal foam, but has the advantage of no sticky layer which I would prefer as I can glue it on so as to avoid the mic area.


Top
 Profile  
Reply with quote  
 Post subject:
PostPosted: Thu Jun 20, 2013 10:51 pm 
User avatar

Country: United Kingdom
Hi guys

Got creative today and cut my own foam cover from a small block I had left over from a different project. It's probably still 1mm too thick, but cutting it that thin evenly was impossible, I can see why a special machine is needed to do it :p

I distresed it a little with a sanding pad, and pulled some bits off here and there, and it now looks much closer to the one in the reference pics I have, so I'm happy with it as is I think
Image

Its been one heck of an adventure, and I thank all those from the bottom of my heart who contributed their good/bad criticisms, encouragements and donations to me and this project, you guys rock :D


Top
 Profile  
Reply with quote  
 Post subject:
PostPosted: Thu Jun 20, 2013 11:22 pm 
Harvester of Sorrow
User avatar

Location: Lancashire (Wirral born)
Service Number: A04/TQ1.0.32156E1
Country: United Kingdom
Still sucks...

;)

_________________
Image AKA: Simon


Top
 Profile  
Reply with quote  
Display posts from previous:  Sort by  
Forum locked This topic is locked, you cannot edit posts or make further replies.  [ 188 posts ]  Go to page Previous  1 ... 4, 5, 6, 7, 8


You cannot post new topics in this forum
You cannot reply to topics in this forum
You cannot edit your posts in this forum
You cannot delete your posts in this forum
You cannot post attachments in this forum

Search for:
Jump to: